That’s the car but I’m sorry I do not know the builder. I assume the car came across the pond at some point. Though I believe the car was from Long Island NY this is what I found and maybe this company has the information needed, cheers!
Significant Cars
626 N Park Ave
Indianapolis, IN46204
Showroom
2225 E 54th St
Indianapolis, IN 46220
317-636-9900
@AluminumJag If you ever get a chance to go to CT you will find kindred spirits here. Mark and Steve will share all they know to keep the skills alive.
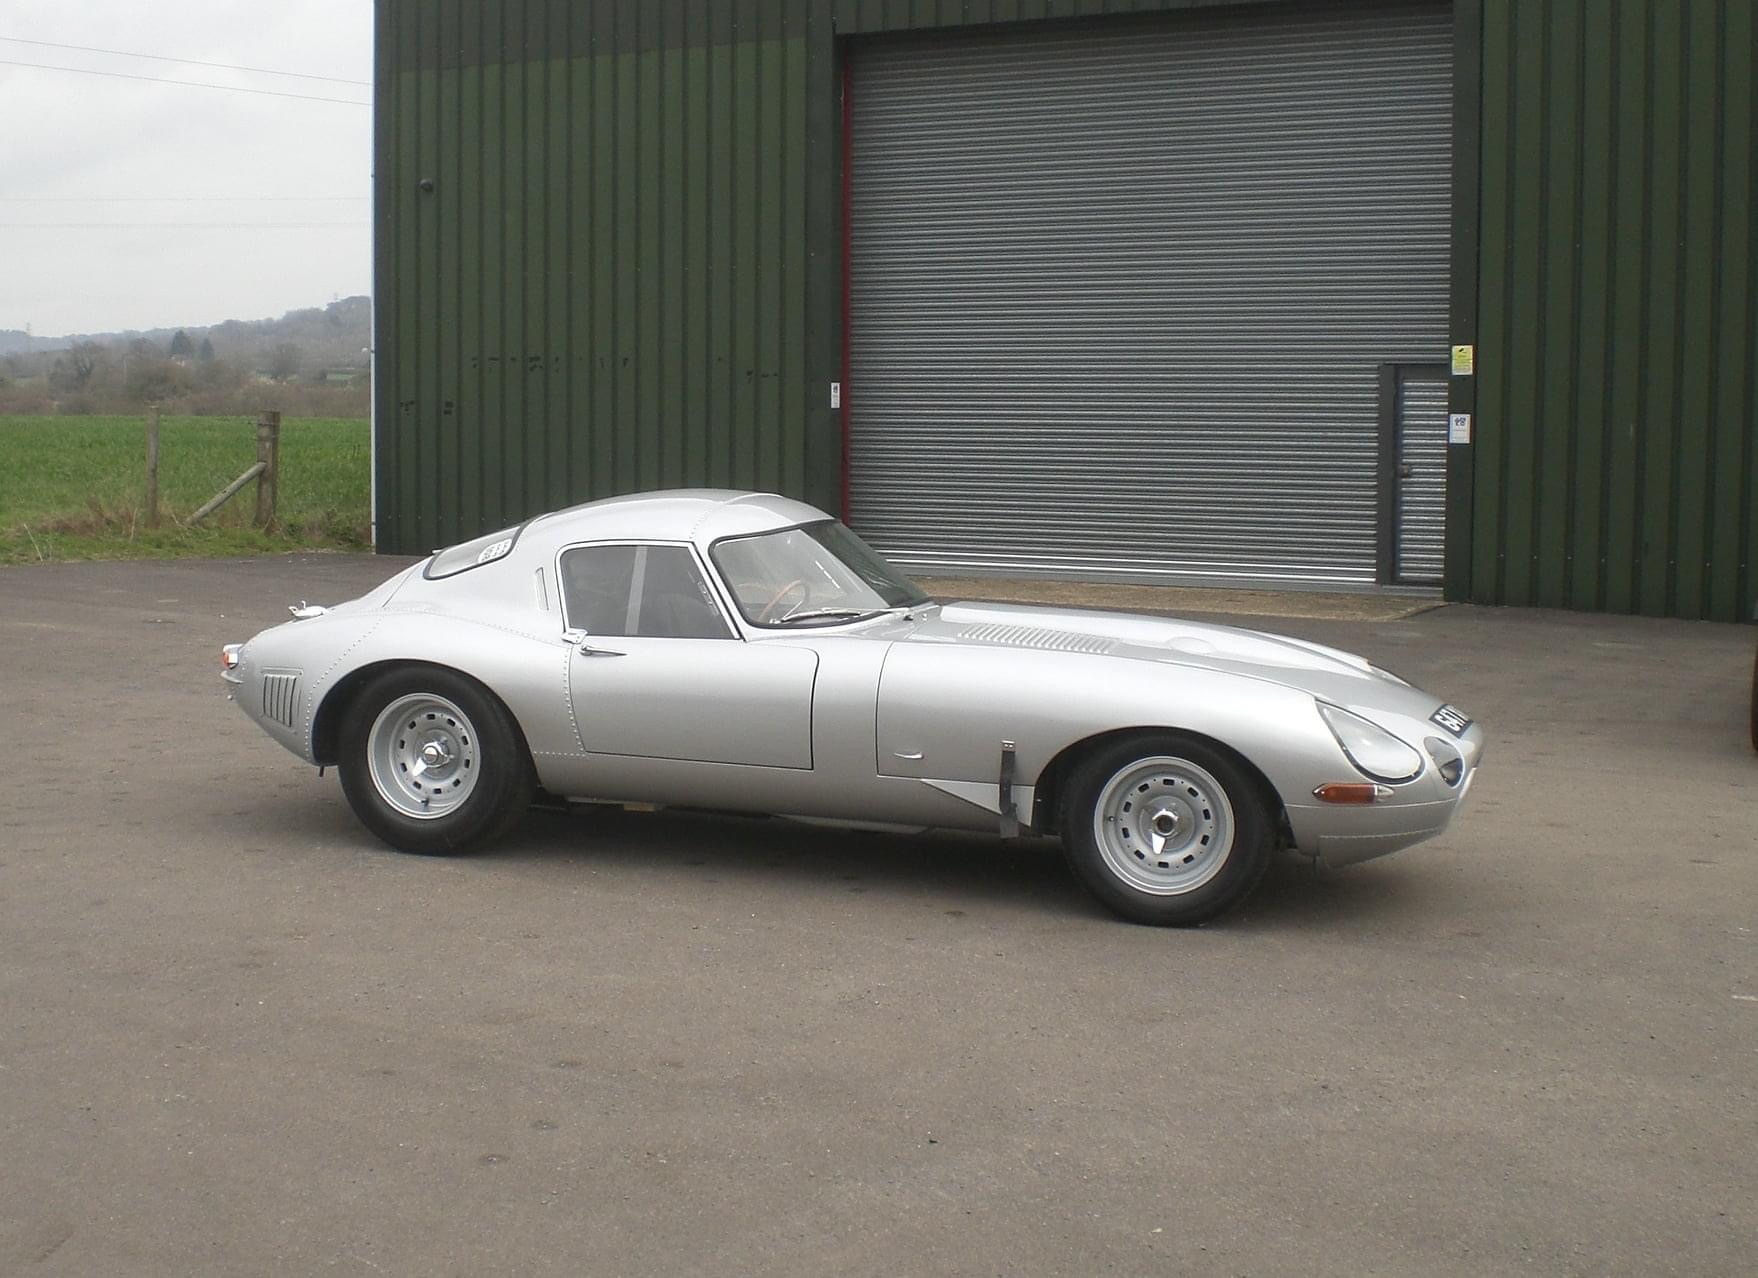
@Geoff Thank you for the advise on the roof line. Below I complied side profiles of the original you sent and a few replicas I found. Upon close inspection you can see quite a bit of different in roof lines, back windows, windshield rake, and trunk lid angles.
I should not be getting credit for the original pic. I believe that was sent by David. Not sure why the replicas vary so much. At least one looks like the a pillar shape was chosen because it is close to the standard e type pillar. I am sure there are valid reasons and they all look good.
This all reminds me of the extensive and exhaustive research work @V12_Racer went through, to accurately reproduce the original XJ13.
Check out his magnificent creation and the wonderful work done, on the series of YouTube videos called “Building The Legend”
I may be in the minority here, but I’ve always found the lines of the low drag coupe to not be as pretty as the street version. It just goes to prove that often times, an aerodynamic shape is not necessarily the prettiest.
You might also want to check out RS Panels as you can simply buy complete aluminium bodyshells for this car now. It means you can probably get a few sub-assemblies in aluminium at a reasonable price.
As I undersand from several people, these cars are very nice except when it rains. There is no useful weatherstrip sealing on the doors, which are extremely light and flimsy with their perspex windows. The single tiny windscreen wiper leaves you without too much forward vision.
Fantastic eye candy, but take a towel with you if the forecast is for rain.
Here it is in Peter Wilson’s book before the crash. If you can find a reasonably priced copy it is a very enjoyable book and has some details about it and all the competition E’s.
Excellent project, but I might be biased, if you wish please pm me and I can alert you to some of the pitfalls you are likely to encounter, plus tips to make it a bit more user friendly. I elected for the raw racer car the original had, you may wish to reconsider this if you want to use it on the street.an example being if you wish to retain the large door plexi’s then you must have sliders as the door frame is larger than the base so glass or Perspex can’t go down, also as has been pointed out there are no drip channels so when stationary in the rain you will get a wet shoulder, I found the engine at normal height nearly fouls the bonnet, bearing in mind it should be dry sumped and lower, so I had to lower the wet sump engine and trans in my car. I could go on. Let me know if you need anything. Best of luck
Hello, I found a page with some of your build. The craftsmanship looks amazing. I’m really interested in your perspective having built one and will send my contact information via pm.
I will be the first to admit that I am not that familiar with jaguars having grown up working mostly on ford’s. I’ve always loved the body styles and decided if I ever had the opportunity to build one, I would try. My original plan was to buy a 2+2 and convert it. When that didn’t work out I stumbled across the roadster and bought it. I then spent the better part of a month learning how to Tig weld on practice pieces. I’m in no rush, I just enjoy the challenge and learning new things.
I bought the shell for my LN Low Drag, but there was still plenty to do once I got the shell home. Think now about your handbrake fixing, if you are going to create a true replica then it should have a LeMans tunnel, this is longer, wider and taller than a standard tunnel. You can mount the brake inside the tunnel having the lever pop out the top or mount it external to the tunnel but this will reduce seat area for the lh seat. The wiper motor sits in front of the lh dash section as the mechanical injection takes the space of where a standard wiper motor would normally be. If you are going to make your Low Drag lh drive then you may have problems with space for mounting bracket and wiper motor. The bonnet is double skinned under the chin and above the intake aperture, none of which are apparent from period photos. If going aluminium, then note the windscreen aperture is steel and the rear chassis legs are clad in steel. These parts are the only bits of the shell that are steel. Doors are different to FHC and ots. The front screen is made by Pilkington and is a one off. The dash top is a different shape to OTS, FHC and 2+2. There are lots of other bits to bear in mind depending on how accurate to the original you wish to be.
It has been a little while since I posted so I figured it was time for an update.
I began work on the hood louvers. Progress was slow and it took me 5 different prototypes to finally get something I liked. I ended up making custom dies out of normal metal stock and a grinder.
The first two versions had issues creating a good shear line so I added half inch dowel pins. Then I ran into issues with tearing so I adjust and rebuilt the dies. After solving the tearing I noticed the original jaguar louvers had a nice dome and mine were more flat looking so I made a negative bed in my bottom die. Lastly, I had to adjust the indexing so it perfectly matched the original.
Overall, it was really a lot of fun learning how to makes these. The main challenge was how long these louvers were. This caused all kinds of problems getting a proper shear and correct shape. Below are some pictures to show the results throughout my testing. I started with a wood buck and eventually settled on steel dies and using a 12 ton shop press which did the trick.
I’m limited to 5 photos so more pictures will be in next post.
Overall I’m really pleased with how they came out. I have a little filing and bending of the edges and will start on the center section of the hood next.