First day of 2019… Trying to move the project forward. WILL NOT DRIFT thru 2019…
I have received one quote for replacing rusted body panels and tinning (currently including LT inner/outer sill, closing plates, gussets, floor pans, minor weld repairs, I’m expecting RT inner/outer sills to be added to the list). You’ve seen my project… $15,000
I need two more vendor quotes to verify this price before I take action. The first gentleman lives in Austin and seems reputable, but he has given me this quote without looking at the car. He has worked on E-types for 30+ years, so may be working on past assumptions.
If somebody has had their body worked on by a knowledgeable and reputable vendor they were happy with (preferably within 200 miles of DFW) please contact me directly thru message or email me at steve.armstrong@cebridge.net
I’m guessing this is Lawrence. He’s a great guy and super talented. You saw my car. He spent quite a while aligning and adjusting my bonnet prior to it being painted. He also did a bang up job on Drew’s car. Does that quote include both sills? I’d bet you could find someone to do it a bit cheaper but you likely won’t find someone to do it cheaper with the same quality, or trust that it will be delivered on time. It might be worth it to throw it on a trailer and bring it down for an in person quote.
Eric is up your way though, maybe he knows someone.
Steve, If that quote is a contract, I’d accept it. I had Pa shop quote of $17500 (no contract) just for rear wheel arch implants, both sides; and shop tried talking me into new rear belly, panels, and new sills instead (as well as full body dip.
I ended up just letting them renew both footwells, driver side closing panel (X-Panel), and new driver side lower inner sill 4 bolt piece for $4800.
The JCNA Series 2 Judging Guide lists the changeover point from reflector to lighted lamps. For the LHD OTS 1R11052, FHC 1R27051, 2+2 1R42850 (RHD numbers also there, but I’m too lazy to copy…). The guide also states that early Series 2 cars did’t have a hole in the bonnet for wires, so either these lampless cars but with a hole for wires are transitional cars (not reflected in the Judging Guide), or later bonnet replacements.
Aug 7, 1969 build, same holes, no lights, just reflectors. I swear I bang my knee on the front reflectors every time I walk around the car. I would do the same as Geo and fill the holes if I repainted the car.
Based on the feed back so far, the transition to lamped must not have coincided with the stock of “transitioning” front wings. Thus they were using fenders ready for lamped assemblies until the “reflector” inventory was depleted. Pretty common in manufacturing
Still muddy, I have 1R9743, and it has lights. Perhaps someone changed it over. I will admit I just cleaned up the wiring on the marker lights, it was a mess.
Q1. When I am removing items from the car in preparation for blasting, do I remove EVERY item that is bolted/riveted to the car? For example, the popout window rubber seal trim retainer strip?
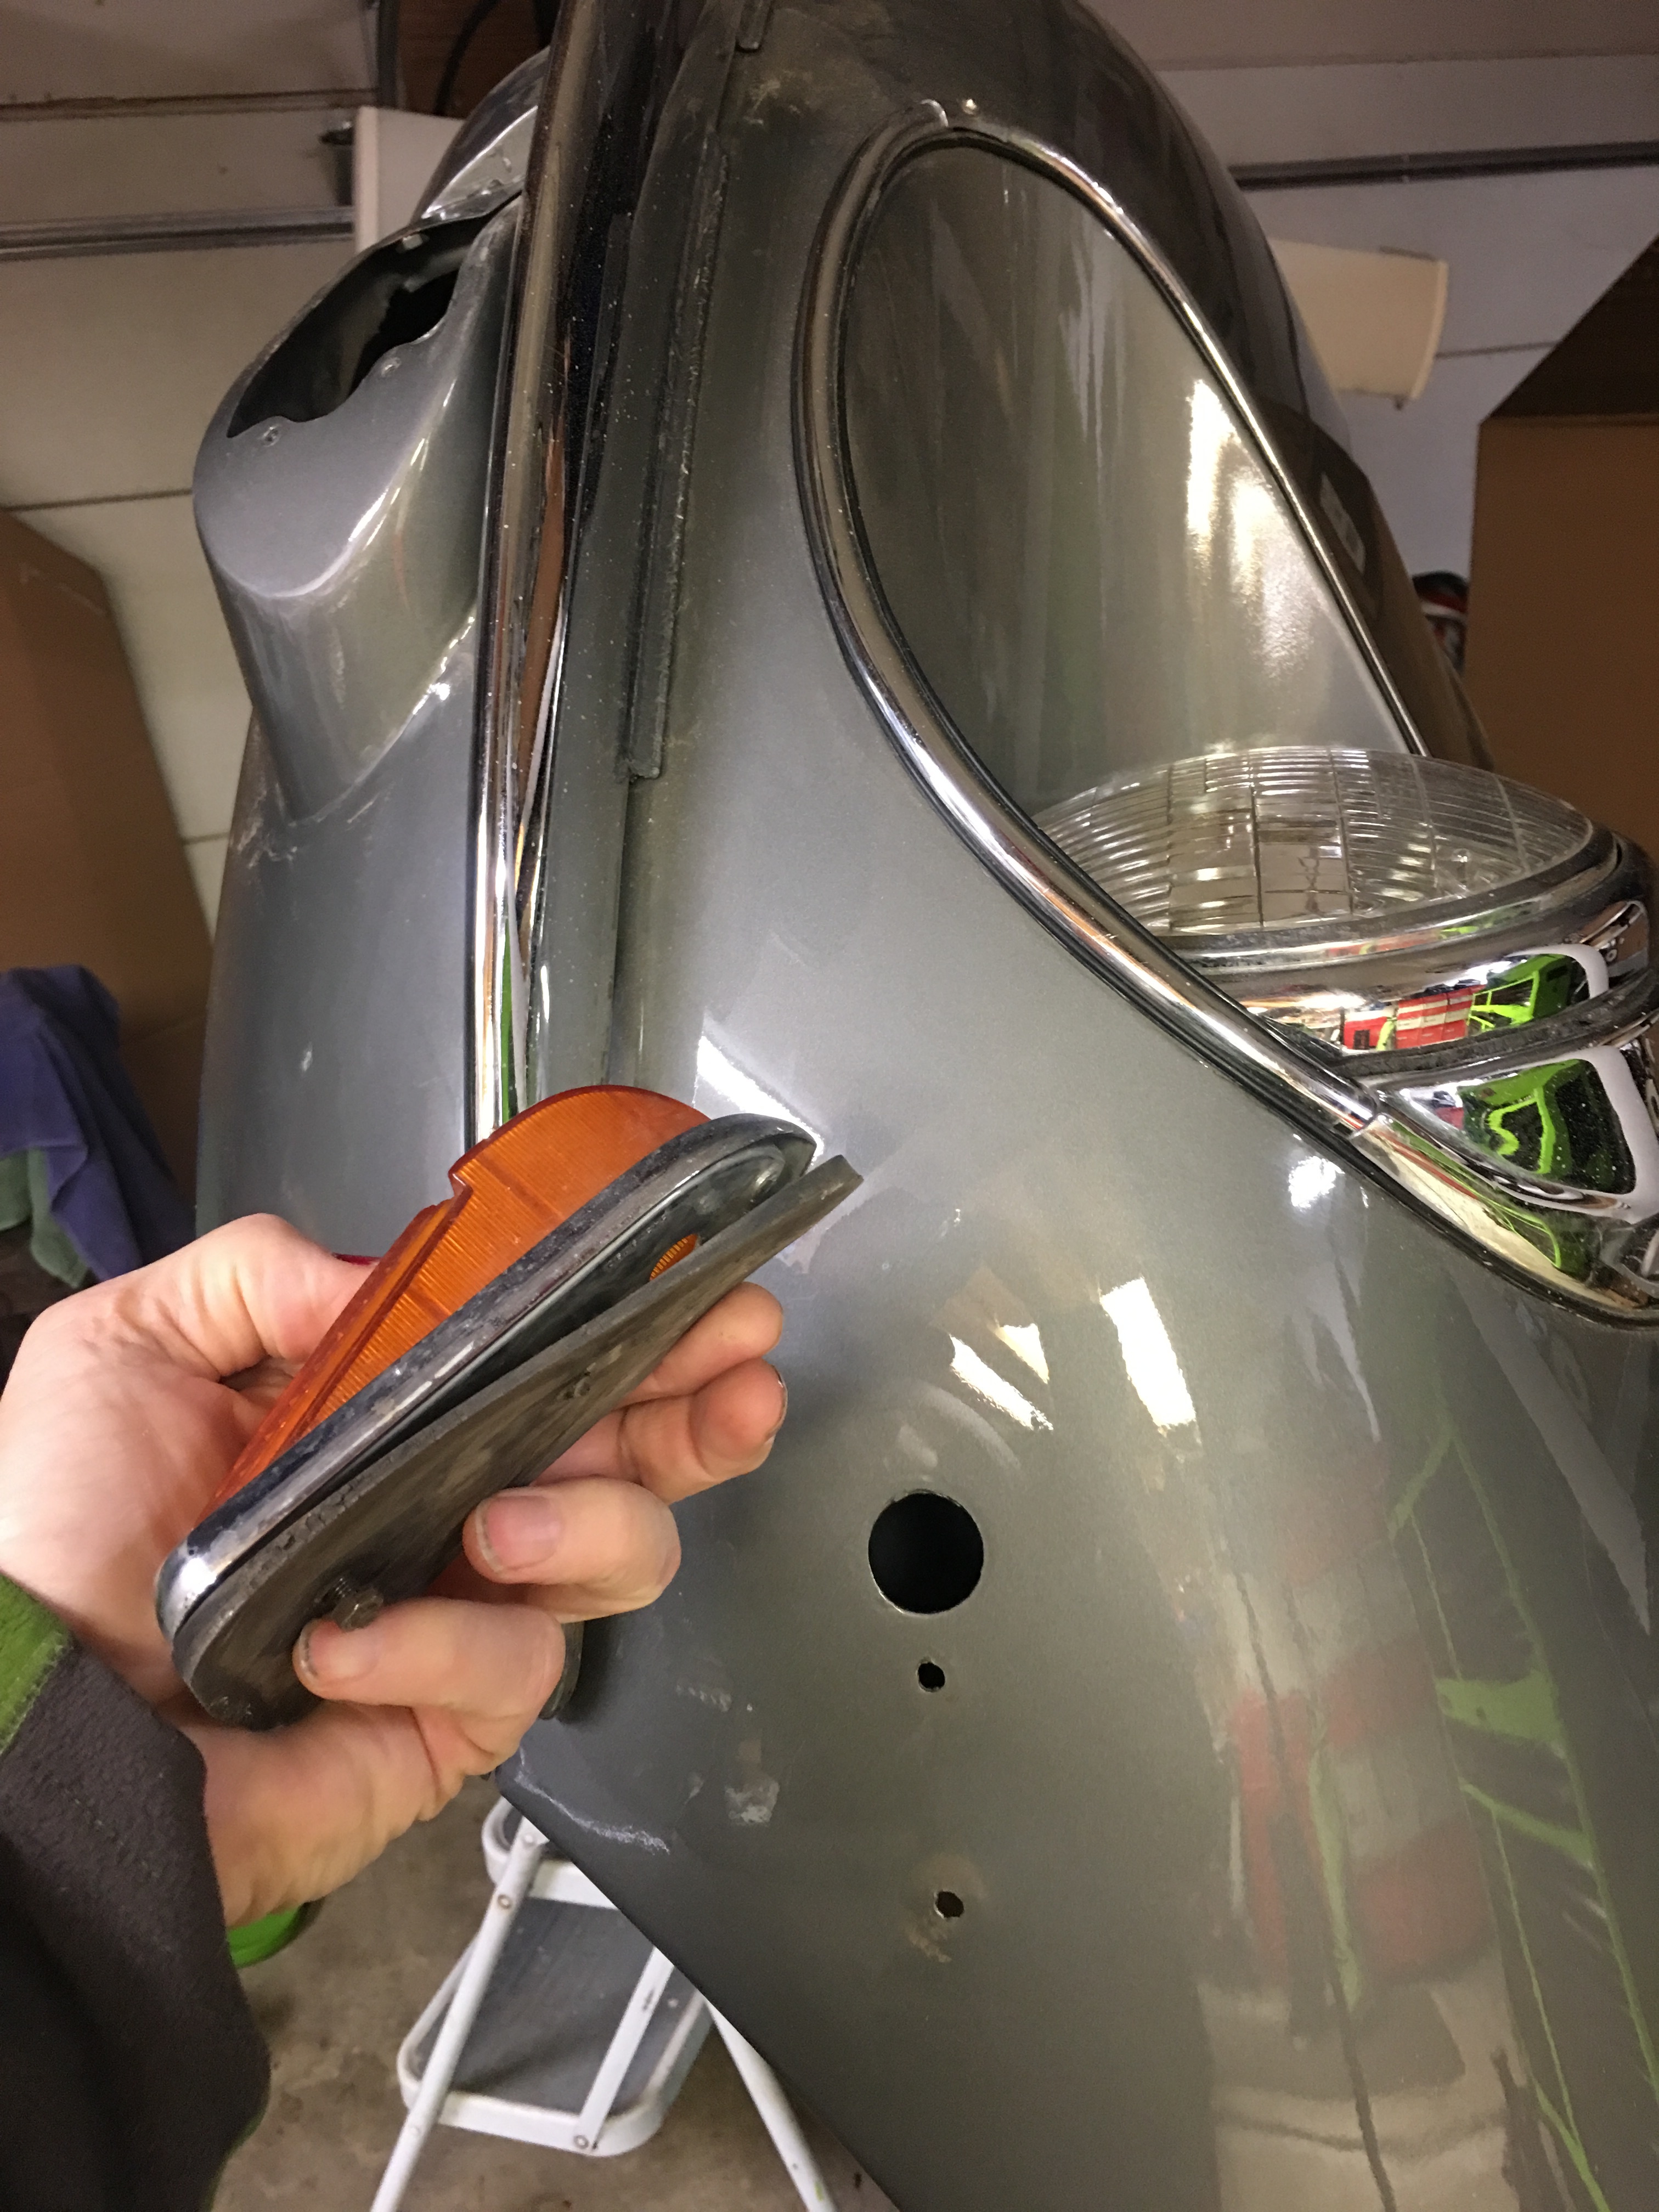
Q2. I’m breaking down the bonnet and and am unclear on the best way to remove the chrome strips. Do I have to loosen wing bolts? The chrome headlight assembly “snaps” on? The backside of the headlight assy has so much undercoating I can’t see any bolts/screws. Are there some under all that crude?
I take everything that is bolted, and drill out pop rivets.
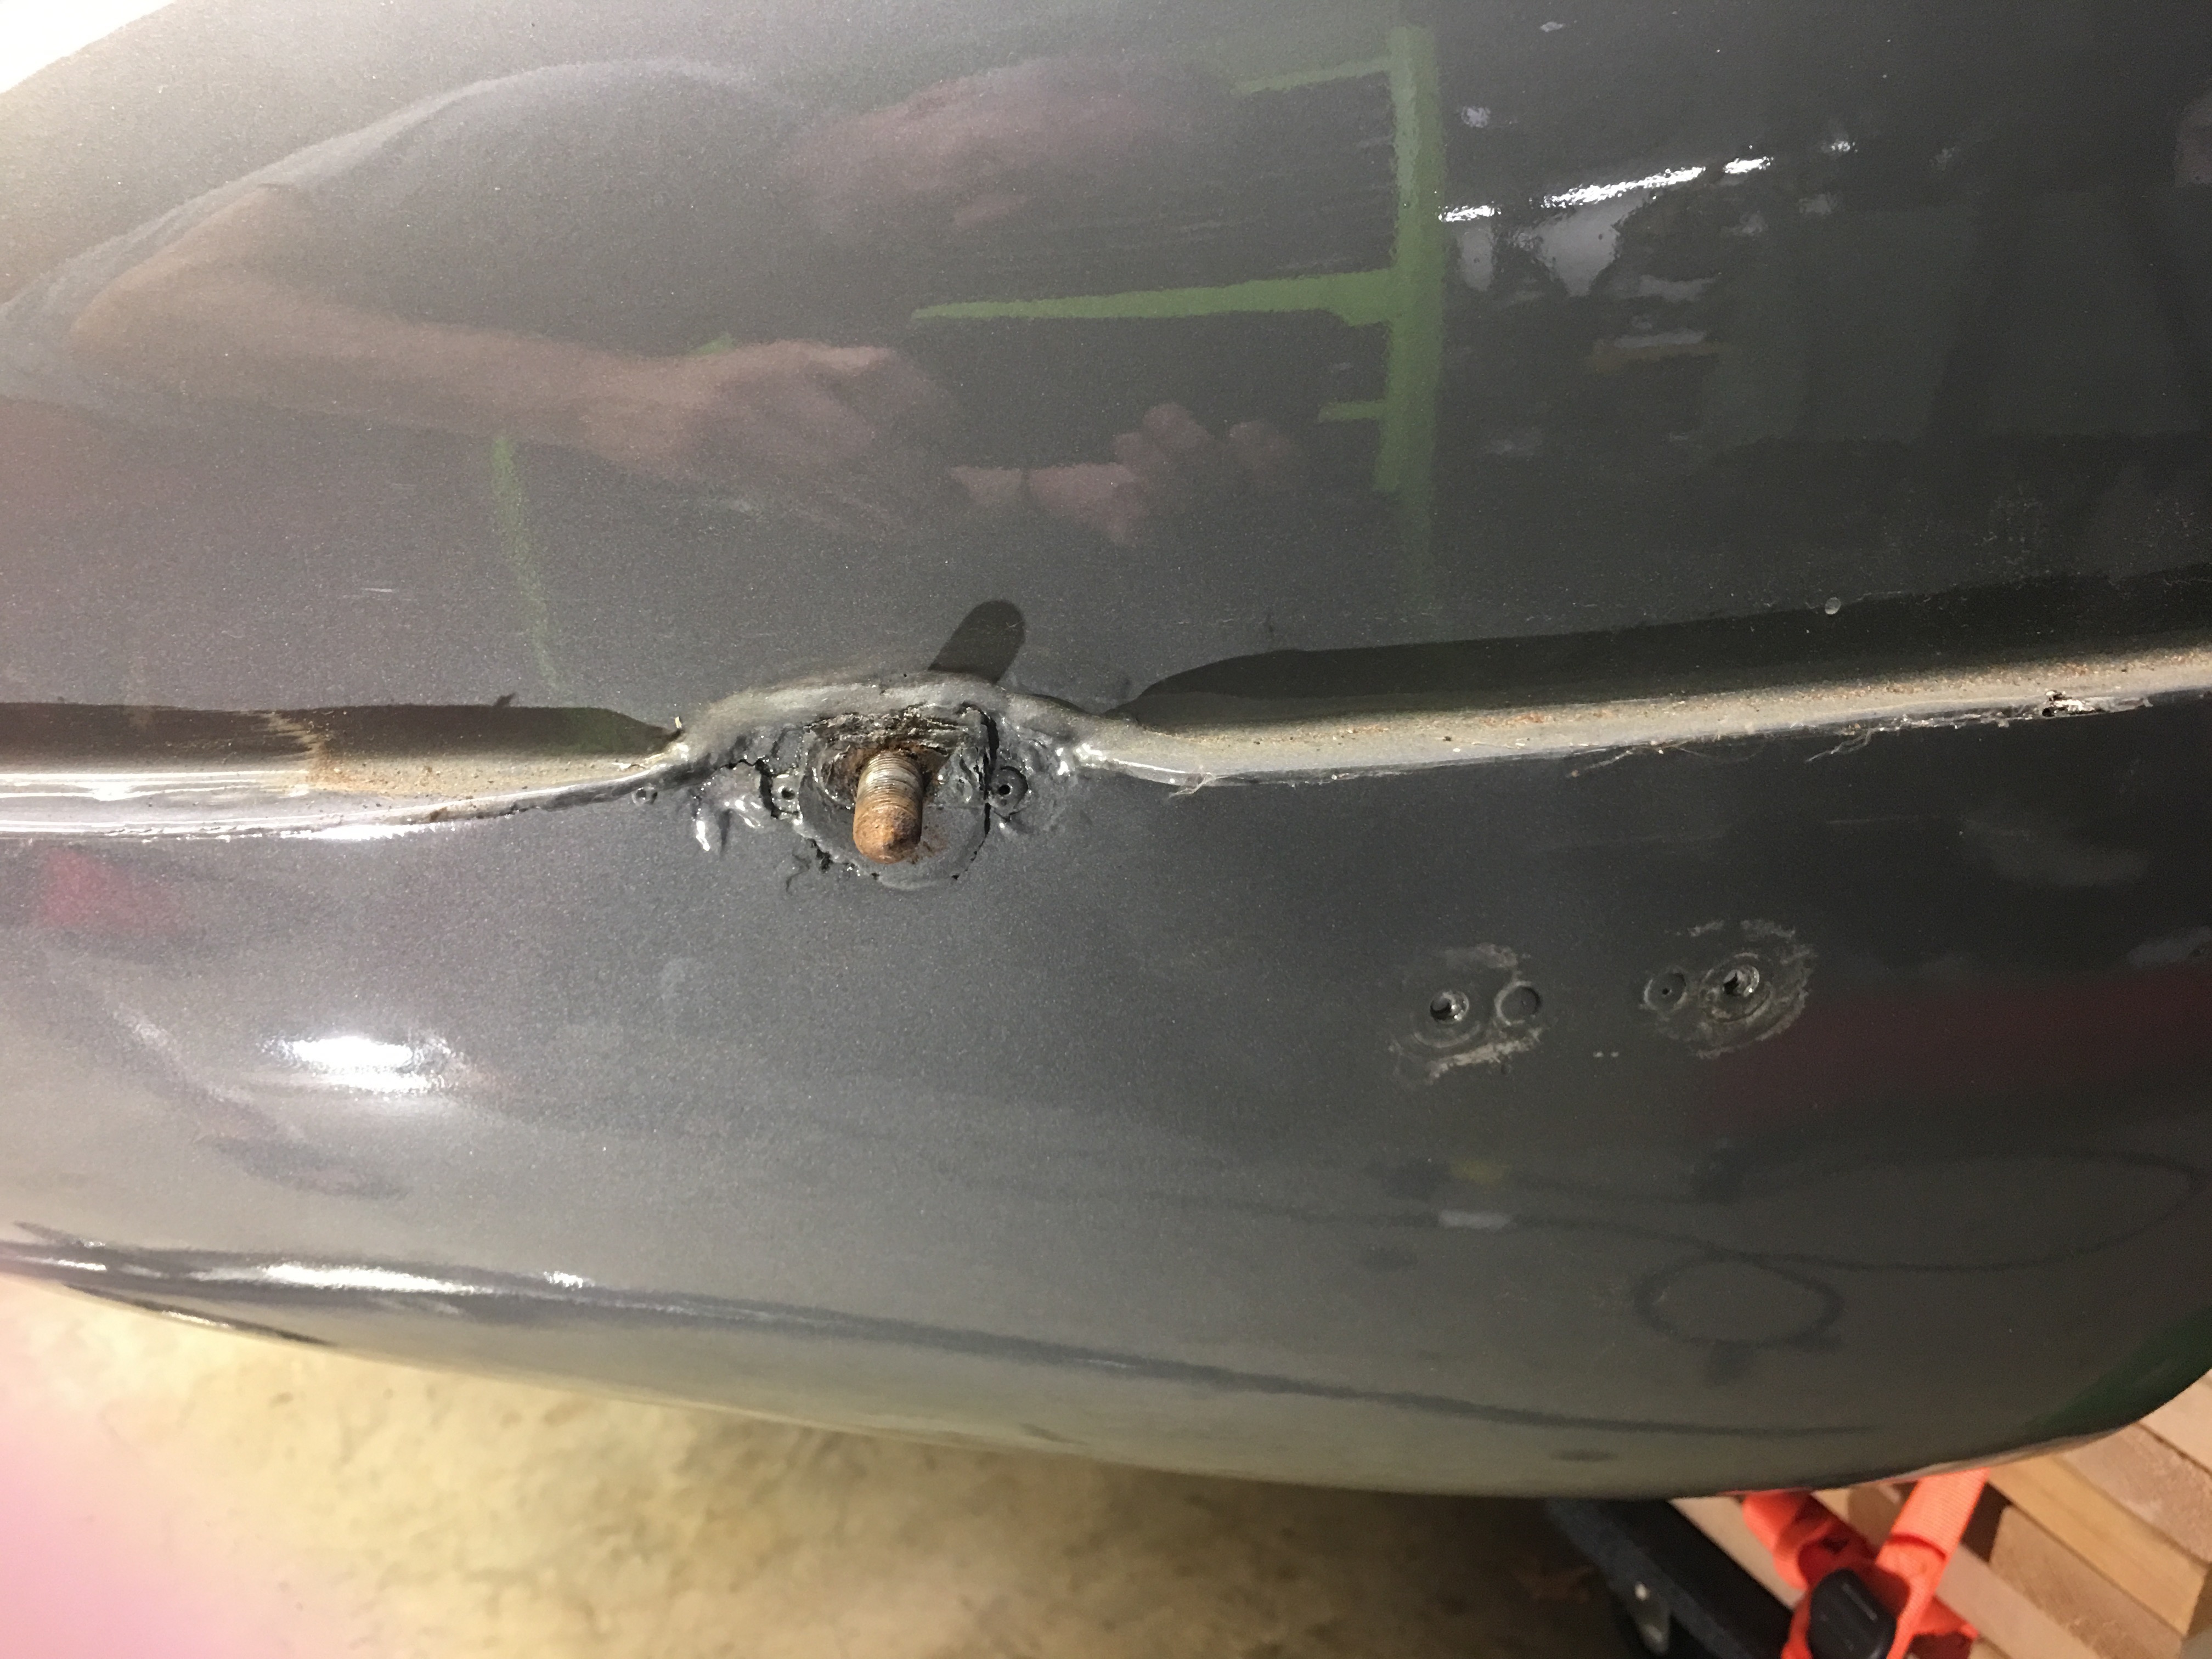
Put some sacrificial bolts into the captive fastener plates - this will stop them falling down and hiding the threaded holes while in paint, and also means that you won’t have paint inside the threads.
iI would recommend that before blasting you remove all that “crud” from all over the car. Undercoatings and sealants do not blast well. At worst, if you are using sand the blaster may lean into in too hard attempting to remove the soft stuff and warp your panels. If you are using soda or some less aggressive media it will take forever to get the stuff off. Timeis money. A few days spent with a heat gun/solvents etc removing sealers, fillers etc will improve your final result. It is a dirty job but someone has to do it.
Very important: if you choose to go the sand route make absolutely sure that the operator is VERY experieced. A rookie will likely ruin your bodyshell.