Looking at picture 3 - the view down the bottom sill - looks like there is rust almost around the entire circumference of this structural element. If so, what is keeping the car from folding? Am I missing welded-in support elements? Or the roof is enough?
I feel that way about my car occasionally too!
Cheers,
LLynn
1 Like
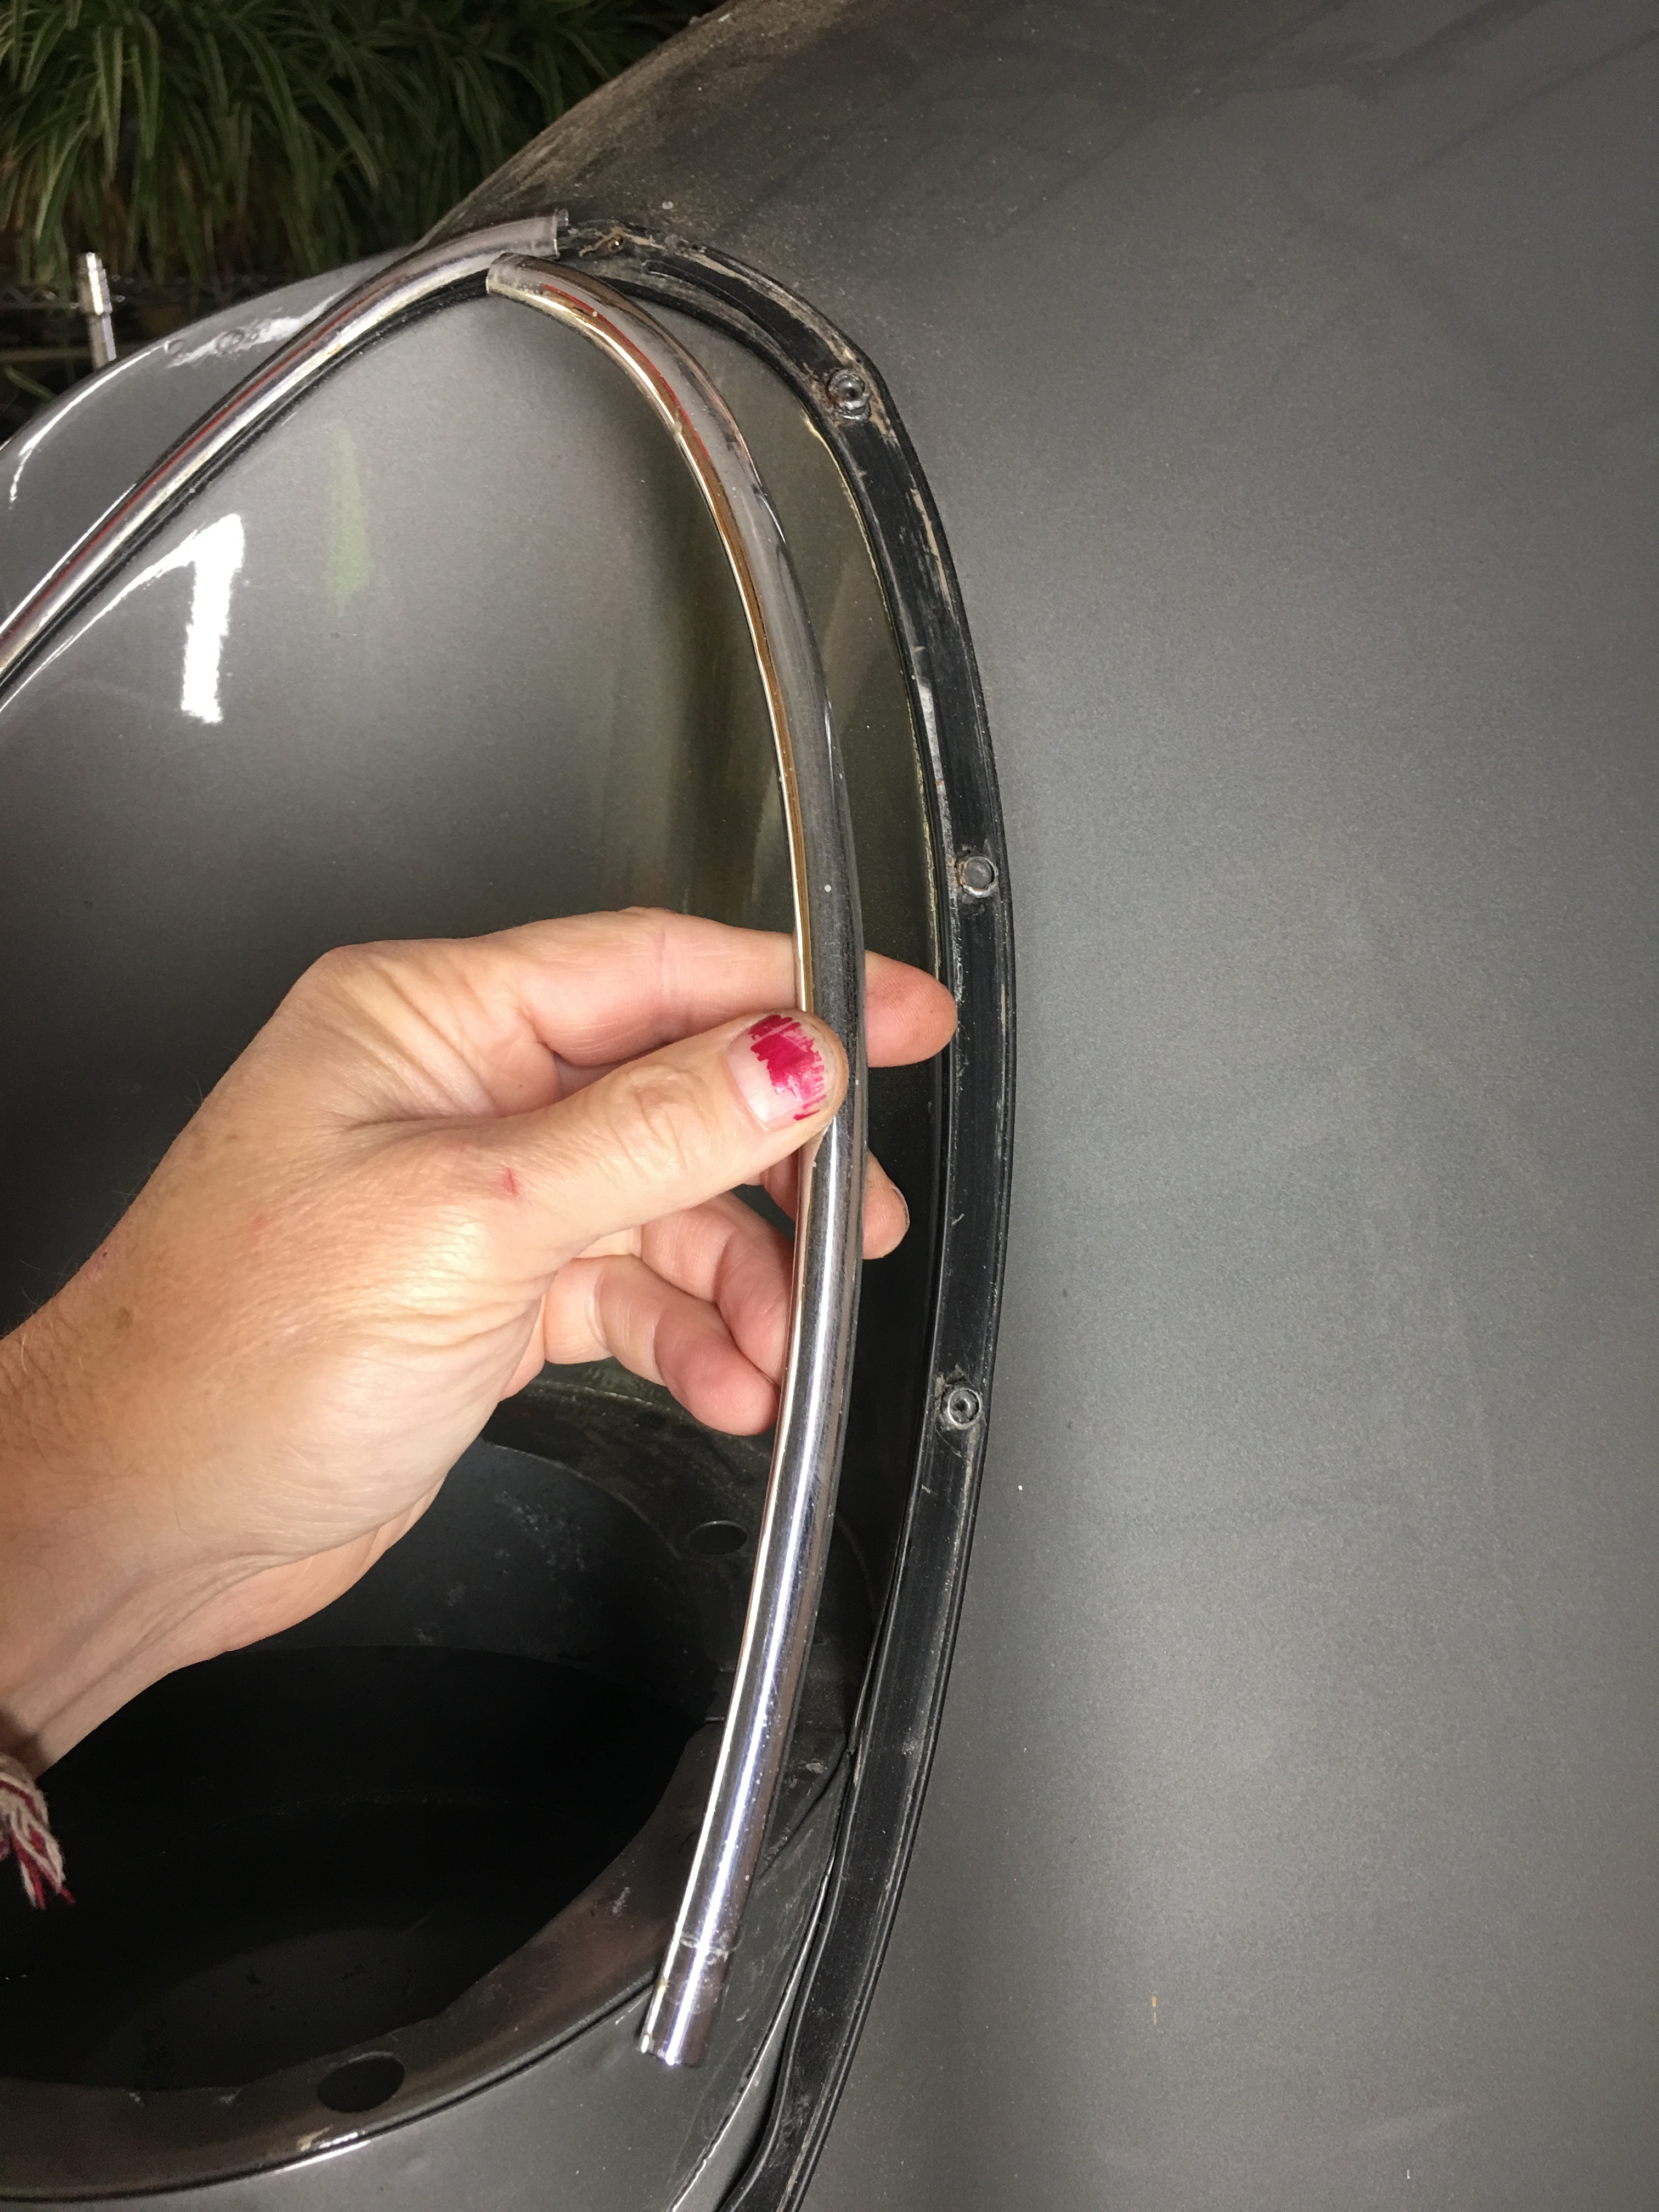
…specifically, how do I start in the removal of the headlamp? From the front or back?
On an open headlight car:
I use a plastic interior trim removal tool to gently pop off the trim ring, the ring about an inch wide that surrounds the headlamp. Work the tool between the eyebrow and trim ring and pry the trim ring toward the front of the car. It’s held in place by springy metal strips. Once you get the top off of it’s spring it practically falls off of the other springs.
Next remove the chrome ring that retains the headlamp bulb in it’s bucket. Three screws. I use a long screwdriver. I’ve also developed the habit of putting a piece of blue painter’s tape over the drain hole under the headlight. The screws have eyes and seek out that hole.
Then just pull the headlamp bulb forward and disconnect it
They must be men…
Male threads. ![]()
Male jokes! …sorry Erica. What can I say. We’re shallow
1 Like
If you are pulling the entire headlight out you might as well start by pulling the turn signal, then reach in and disconnect the bullet connectors for the headlight wires (3 wires coming down from behind the headlight), it helps to have small hands. You might have to pull the wires out of a couple of wire clamps, mine were badly rusted, I went to some nice new nylon ones. The chrome headlight ring is on 2 tabs and one spring, the spring is at the top, so pry forward there, I have found I can see the spring as I start to pry, it is bent into a horseshoe shape, open at the back, you can catch the top edge and push it down to release it. Once you take the lamp out (as John noted) the lamp support comes next, reach in, disconnect the coil spring, then work it off the adjustment screws, you don’t need to take the adjustment screws out and lose the adjustment. Then 4 screws around the edge of the bucket and you are done (just installed mine back this week, real fresh in my mind).
1 Like
Drivers side headlamp assy out. There was one spring clip under the chrome ring, but it wouldn’t release from the bottom clips because two of the four screws holding the assy were missing and the assy was too close to the body. Squeezed a small flathead between the chrome ring and loosened the two existing screw to allow the assy to move away from the body of the car. (No comments about the red thumbnail that keeps getting into the frame)


Simply for reference on my rebuild, are the gaps to big on this car?
This shows how difficult it can be to assemble an E-Type after major work. I recall seeing photos from the Texas restoration guys where they add lead to the edge of brand new sills as the profile of many reproductions isn’t crisp enough (I think chuck in Maryland addressed this with his parts). Sometimes it is a height error or curve profile oddity that makes a gap look bad. Point is, it isn’t easy to do and, once again, favors cars which were in one piece to start with. And yes, I’d say the gaps aren’t too great on this car, but it isn’t polite to criticize as long as a guy does his best and doesn’t charge for his work (like when you do things yourself). Some old tubs are so far off it’s just a miracle that they are back on the road.
1 Like
Overall, not terribly consistent, and the bonnet landing strip gap is a bit wide.
I’m the only rate I can afford!
1 Like
The driver door isn’t centered, way too gappy in the front and looks like it’s almost contacting in the rear. The bonnet is too far forward and needs at least one shim removed.
They need to redo that driving video and try and get out of second gear if they expect anyone to bid on that.
The rear hatch gap looks ok. The bonnet gaps can be improved with some finicky shimming though I think the bonnet/bulkhead/sill fit may not be optimal. The door gaps raise a concern. The gap at the front of the door is the most critical of all

because when the door is opened the leading edge closes in toward the edge of the A post such that it just clears. If the gap is too narrow the edges will foul and damage the paint. If it’s too wide, as this car’s is, it could mean that there’s body filler either on the door’s front edge or in the edge of the A post and the only way for the door to clear is to have it set back, which makes the shut edge gap too narrow. If that’s the case it’s not fixable.
Optimum panel gaps pre-paint should be about 3.5-4.0 mm, in my estimation.
Edit. Still, not a bad looking car.
1 Like
I’m writing up a contract for my bodywork and need to know what is reasonable and expected. I’m paying pretty good money so I want better results than I would do.
Then you want at least pretty good results.
I’m still not happy with my doors but I think they are now about as god as it gets. The front and rear gaps are consistent at slightly under 3mm. The bottom gap is about twice that; too much but unfixable without messing with painted surfaces.
On the car in the picture I’d be curious to see the side bonnet-scuttle gap on the right side. It could be that the bonnet is off center, i.e. the front is too far to the right. Easy to fix as the mounting of the hinge to bonnet allows for that to be adjusted.
Bodywork is optimising gaps and elevations within and between panels, Steve. Gaps obvious. Elevations involve the crowns of individual panels and how they fit together and flow unbroken from one end of the car to the other - eg. the “break line” highlighted here
.

And to achieve that the crown of the door in the horizontal plane needs to be almost flat, almost a straight line that flows uninterrupted into the bonnet and rear wings. I have noted several Es where there was an excessive horizontal door crown that was addressed by applying filler - either bondo or body solder - to the hinge and shut edges, which makes them appear overly thick. That situation is almost always accompanied by excessive front door gaps, for reasons cited above
I failed to do enough of the aforementioned, not wanting to piss off the owner, and the rebuild/resto of my car has suffered as a result…my suggestion to you is…don’t worry too much about pissing off the owner, just make sure your intentions and requirements are clearly laid out before the work starts, and then monitor OFTEN!
1 Like
Based my personal examination of your car, a ballpark guesstimate to fix, prime, fettle, and paint would be in the $18,000 to $25,000 range.
1 Like