'65 Mk2 4.2 // 700R4 (auto) to T5 (stick) swap thread

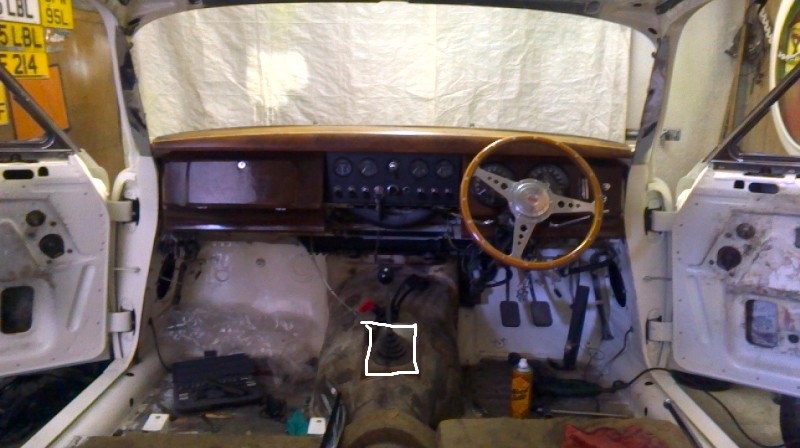
After years of dreaming and months of planning I’ve finally embarked on this project, the last real project on my car. The 700R4 has held up and was nice to drive for years but I just can’t love this car fully with an automatic. So here we go. I read loads but never found a single comprehensive thread about the job so I’m going to make one. Please leave questions etc. and I will try to answer so future members can have everything in one place.


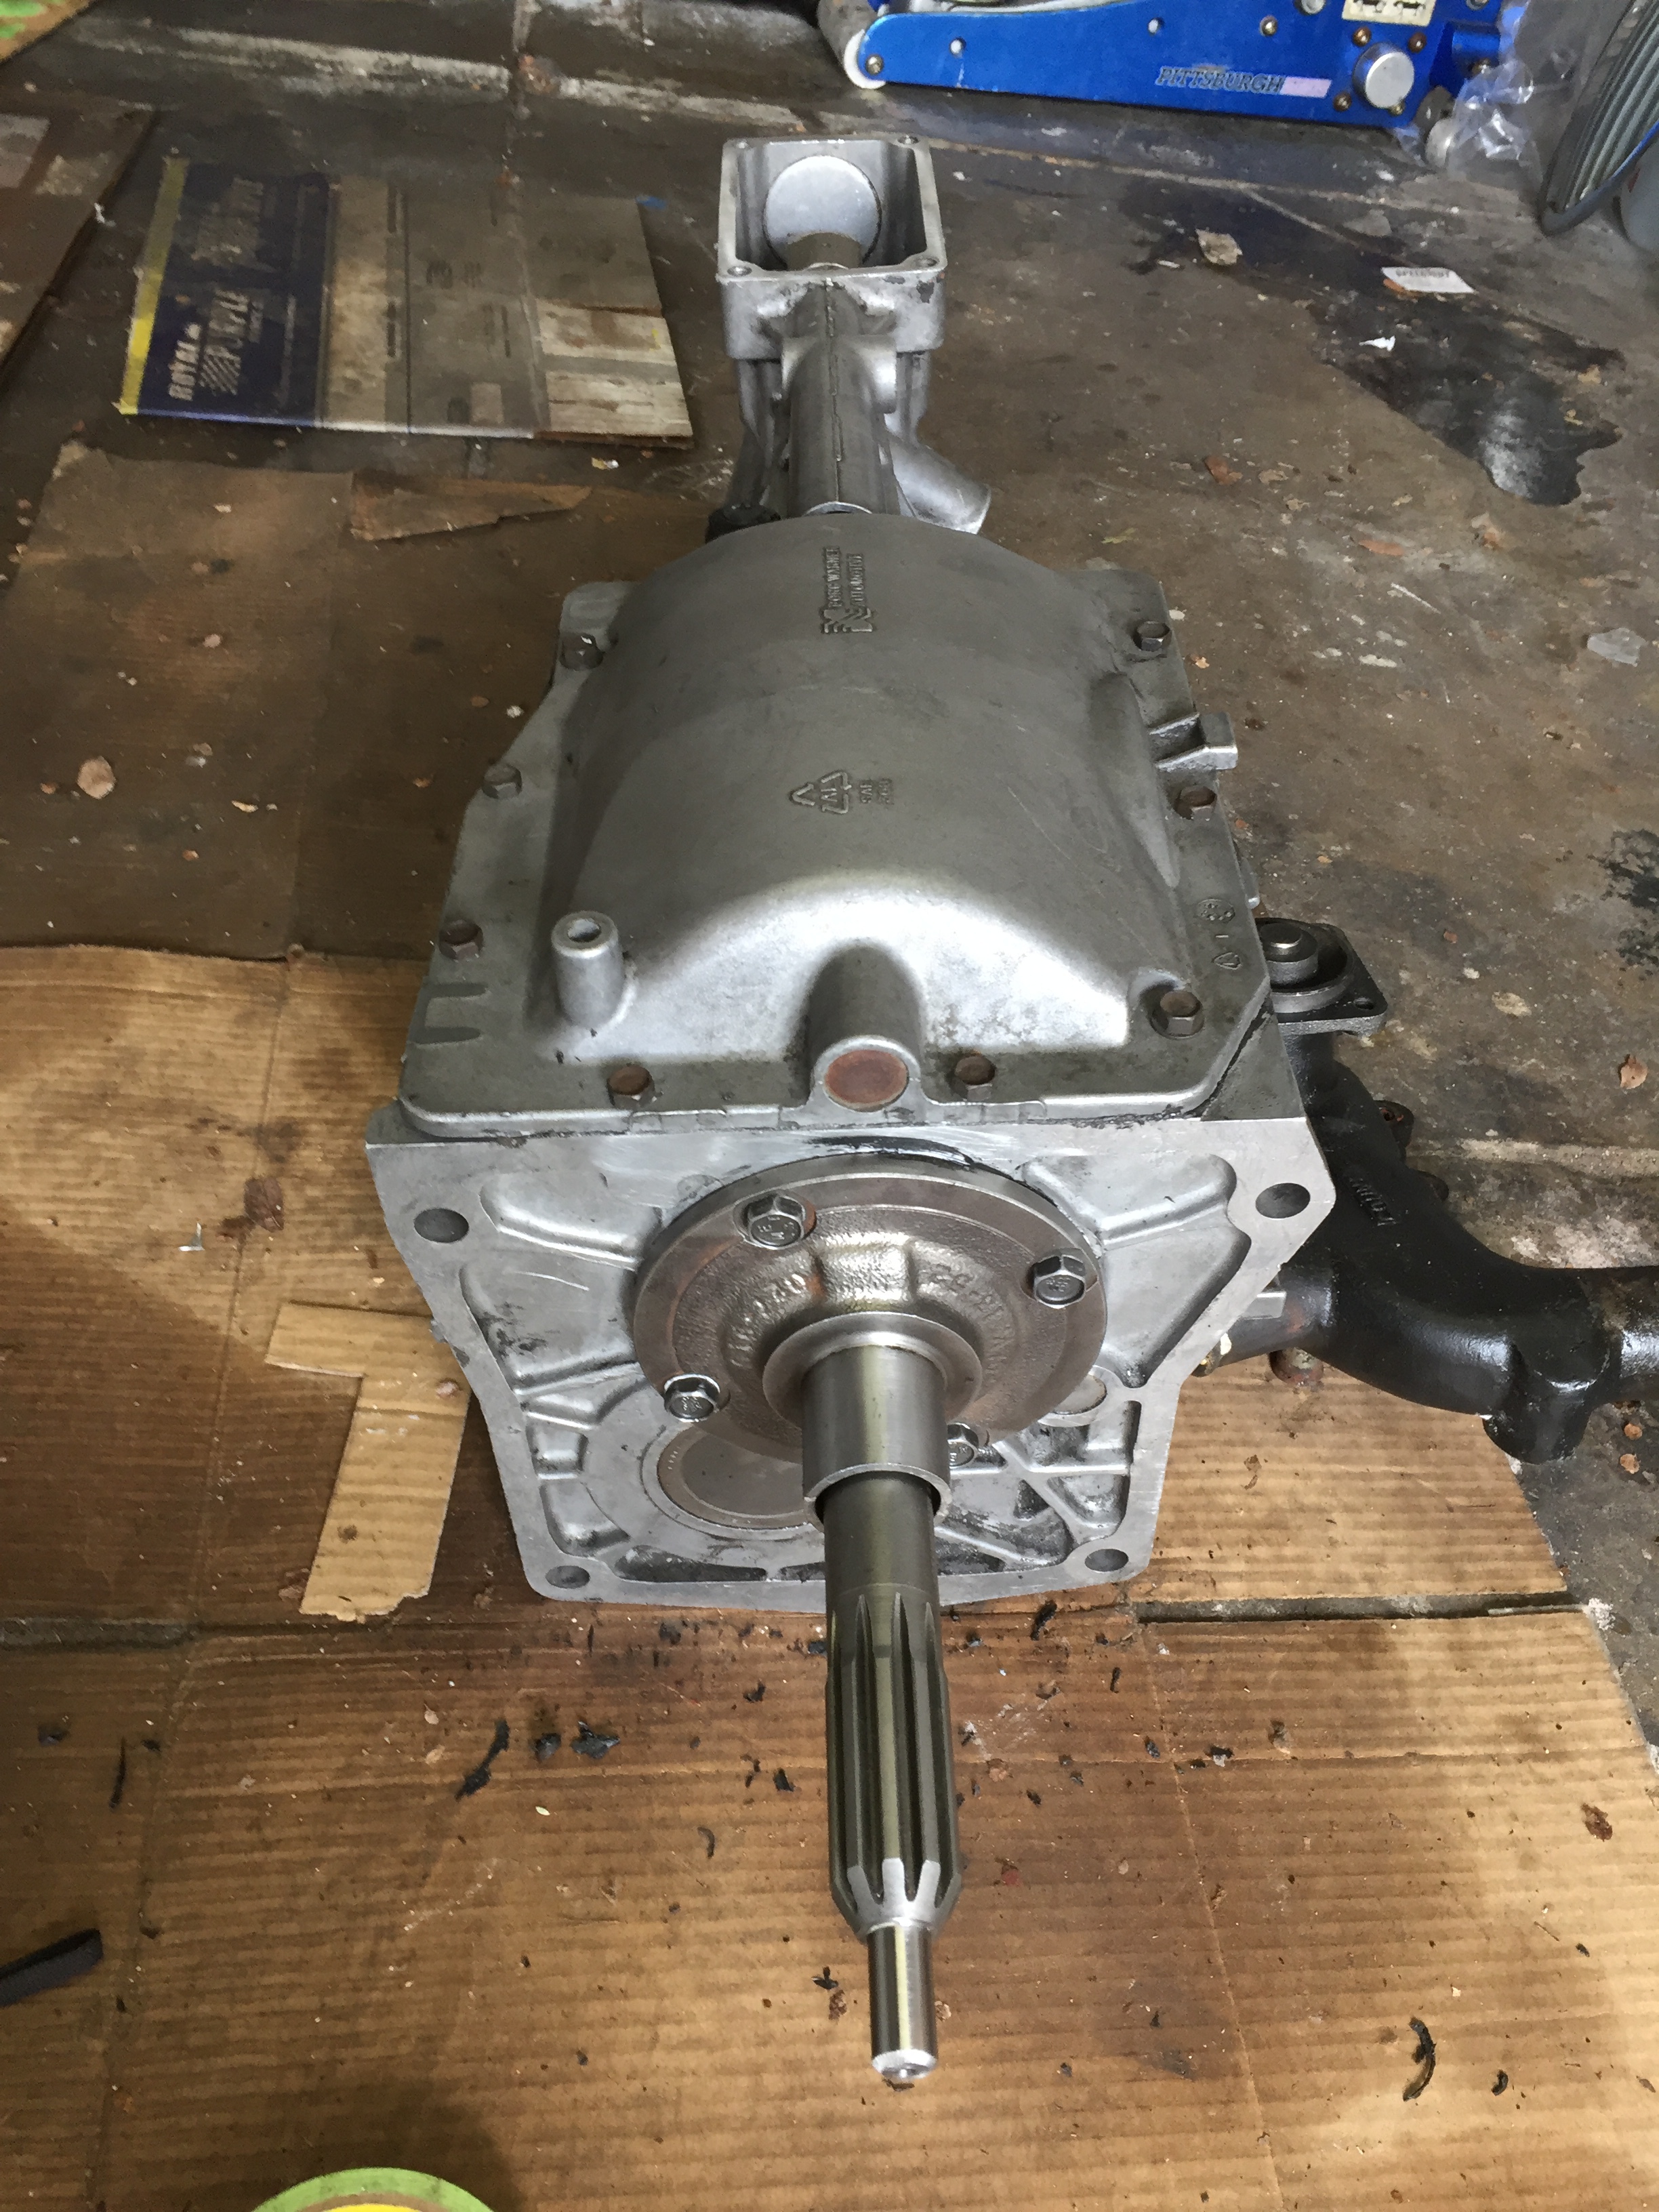
Transmission: I bought a rebuilt T5 from a transmission shop in Anaheim that builds and sells all kinds of boxes. I had them machine the input shaft down from the ford size (.67") to fit the jag bushing (.49") and shorten the tip 1/8". I had it shortened because Paul at Medatronics says sometimes the input shaft bottoms out in the crank and I didn’t want to have an issue at the last minute, so I preemptively shortened it. I will still measure before it goes in just to be sure. The other thing you need to do with these transmissions is to swap the Ford front bearing retainer plate with a long shaft Camaro unit. It’s got a slightly smaller diameter and fits the bellhousing, the Ford one is too wide and doesn’t fit. I got a regular sized T5, realizing the shifter will be a little farther back, but I don’t care, and it’s easier to just buy a regular mustang trans than trying to swap stuff around to make it shorter.


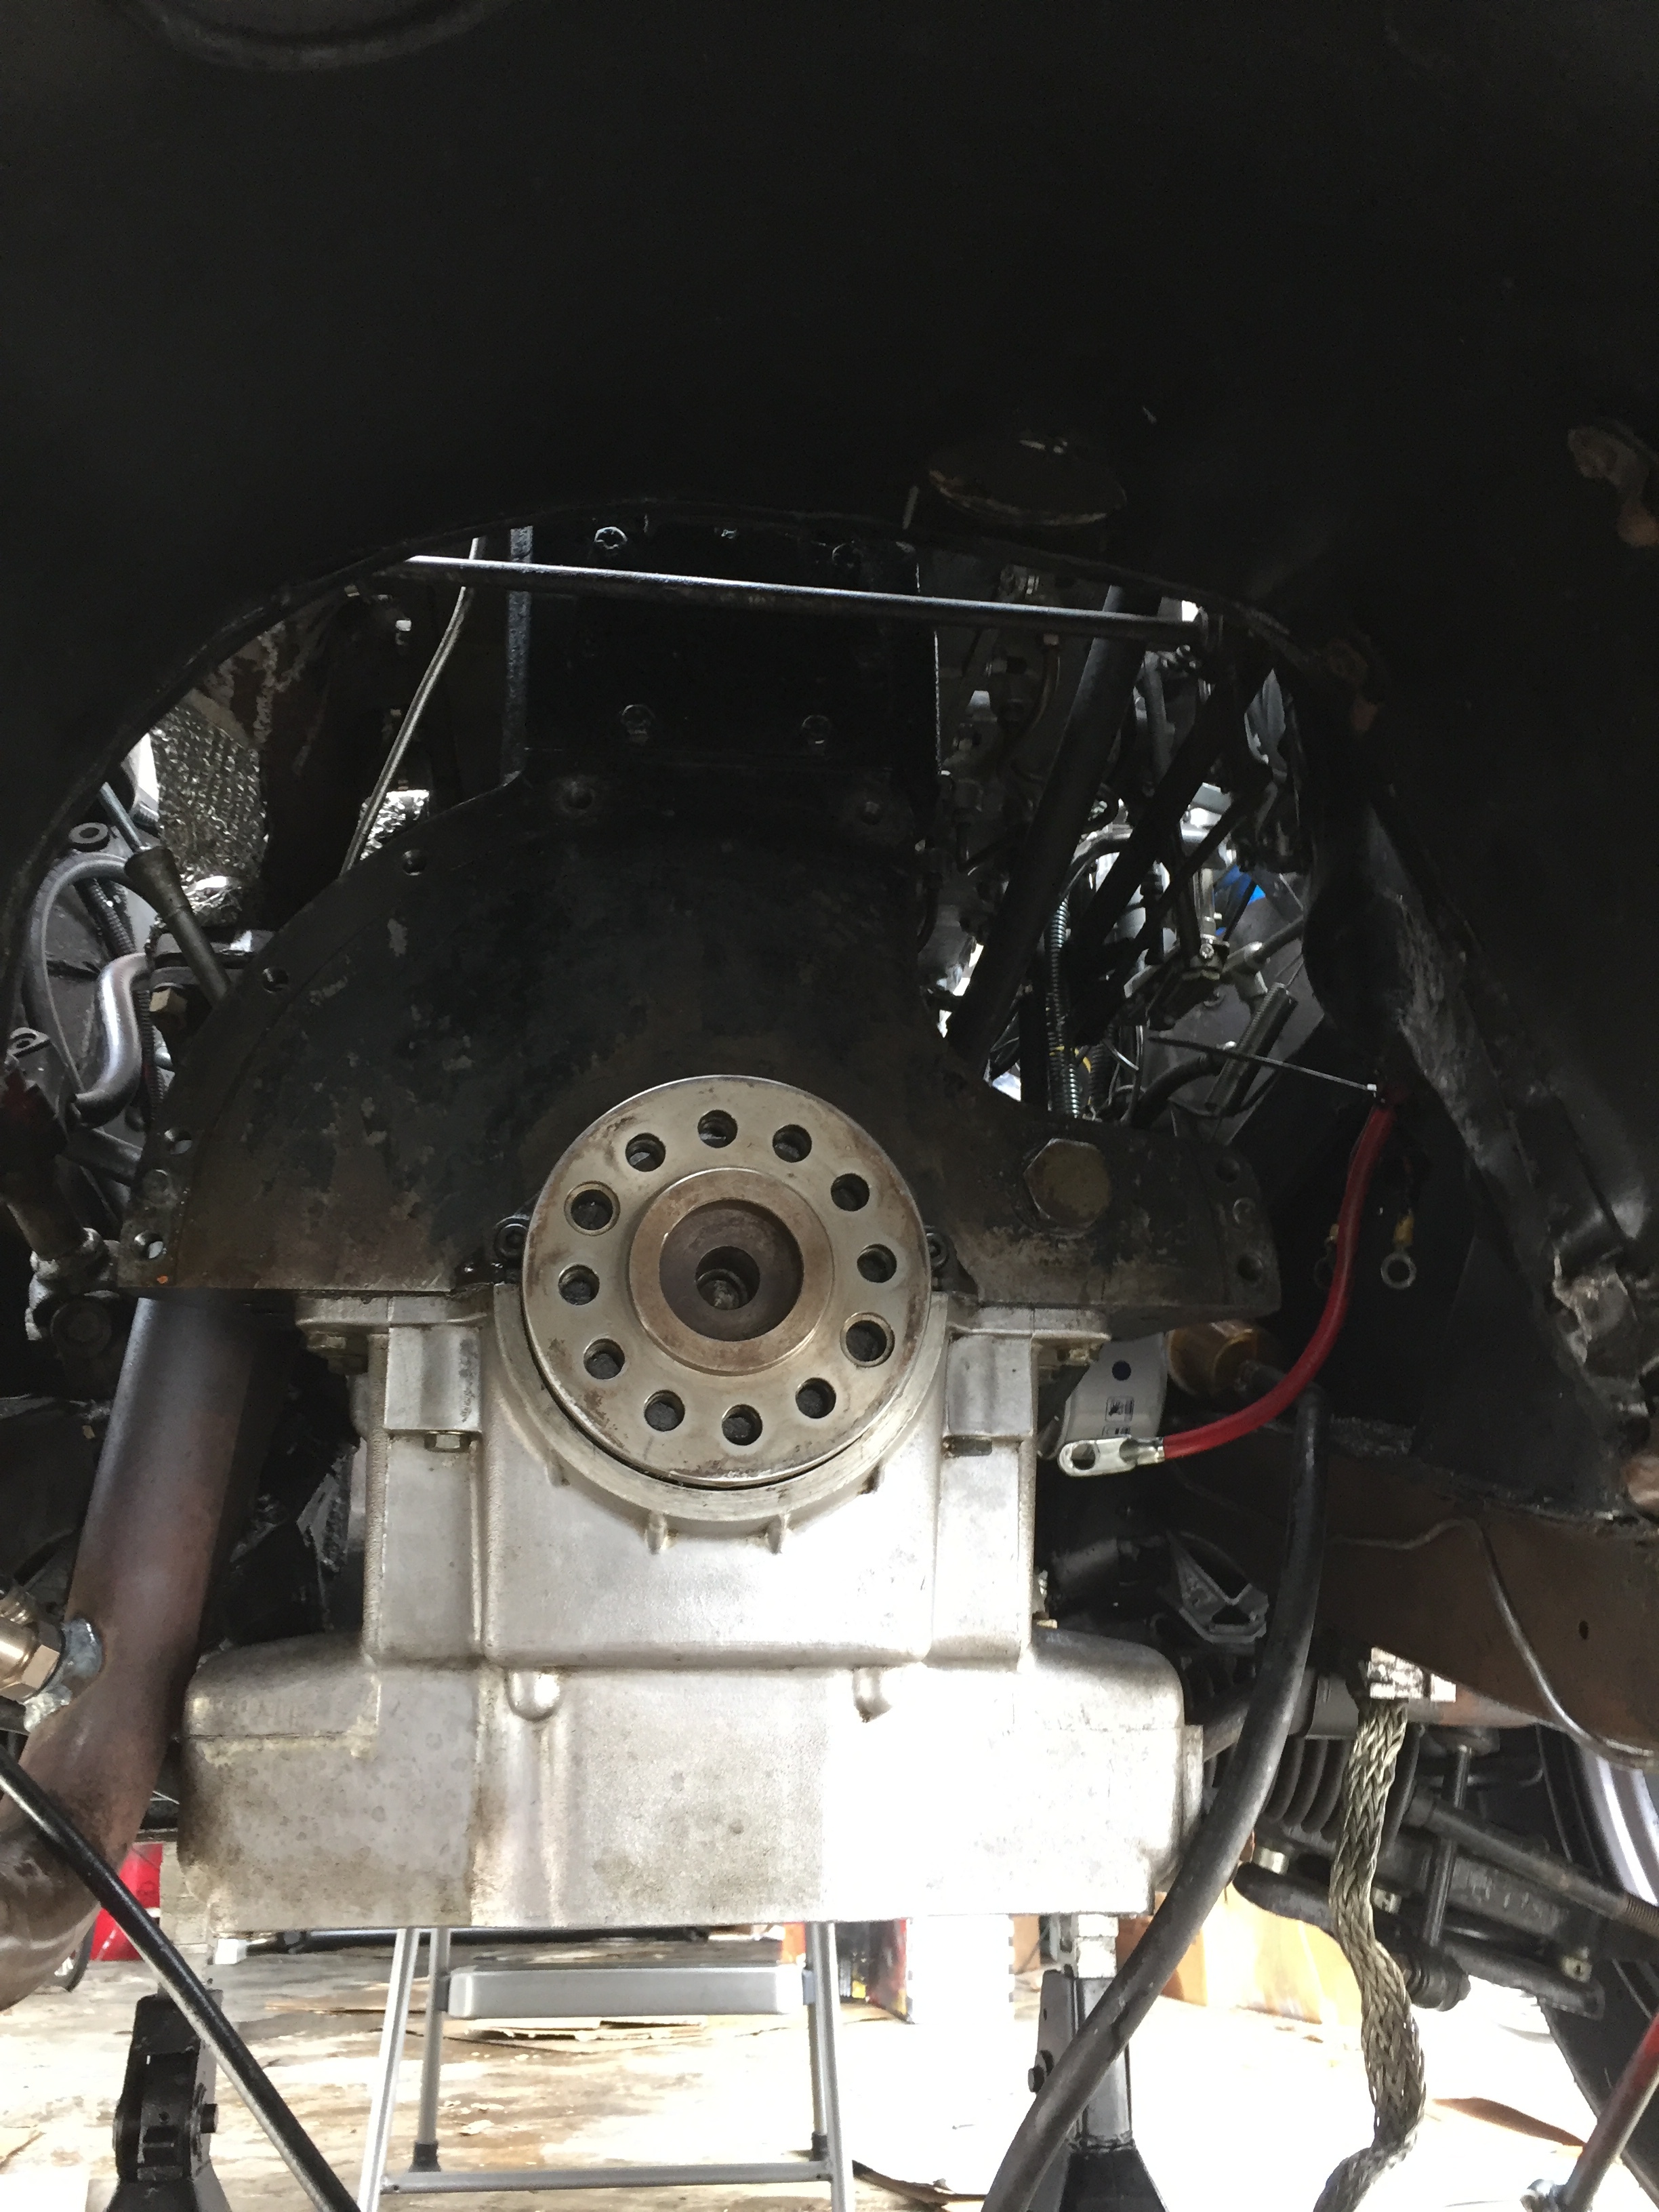
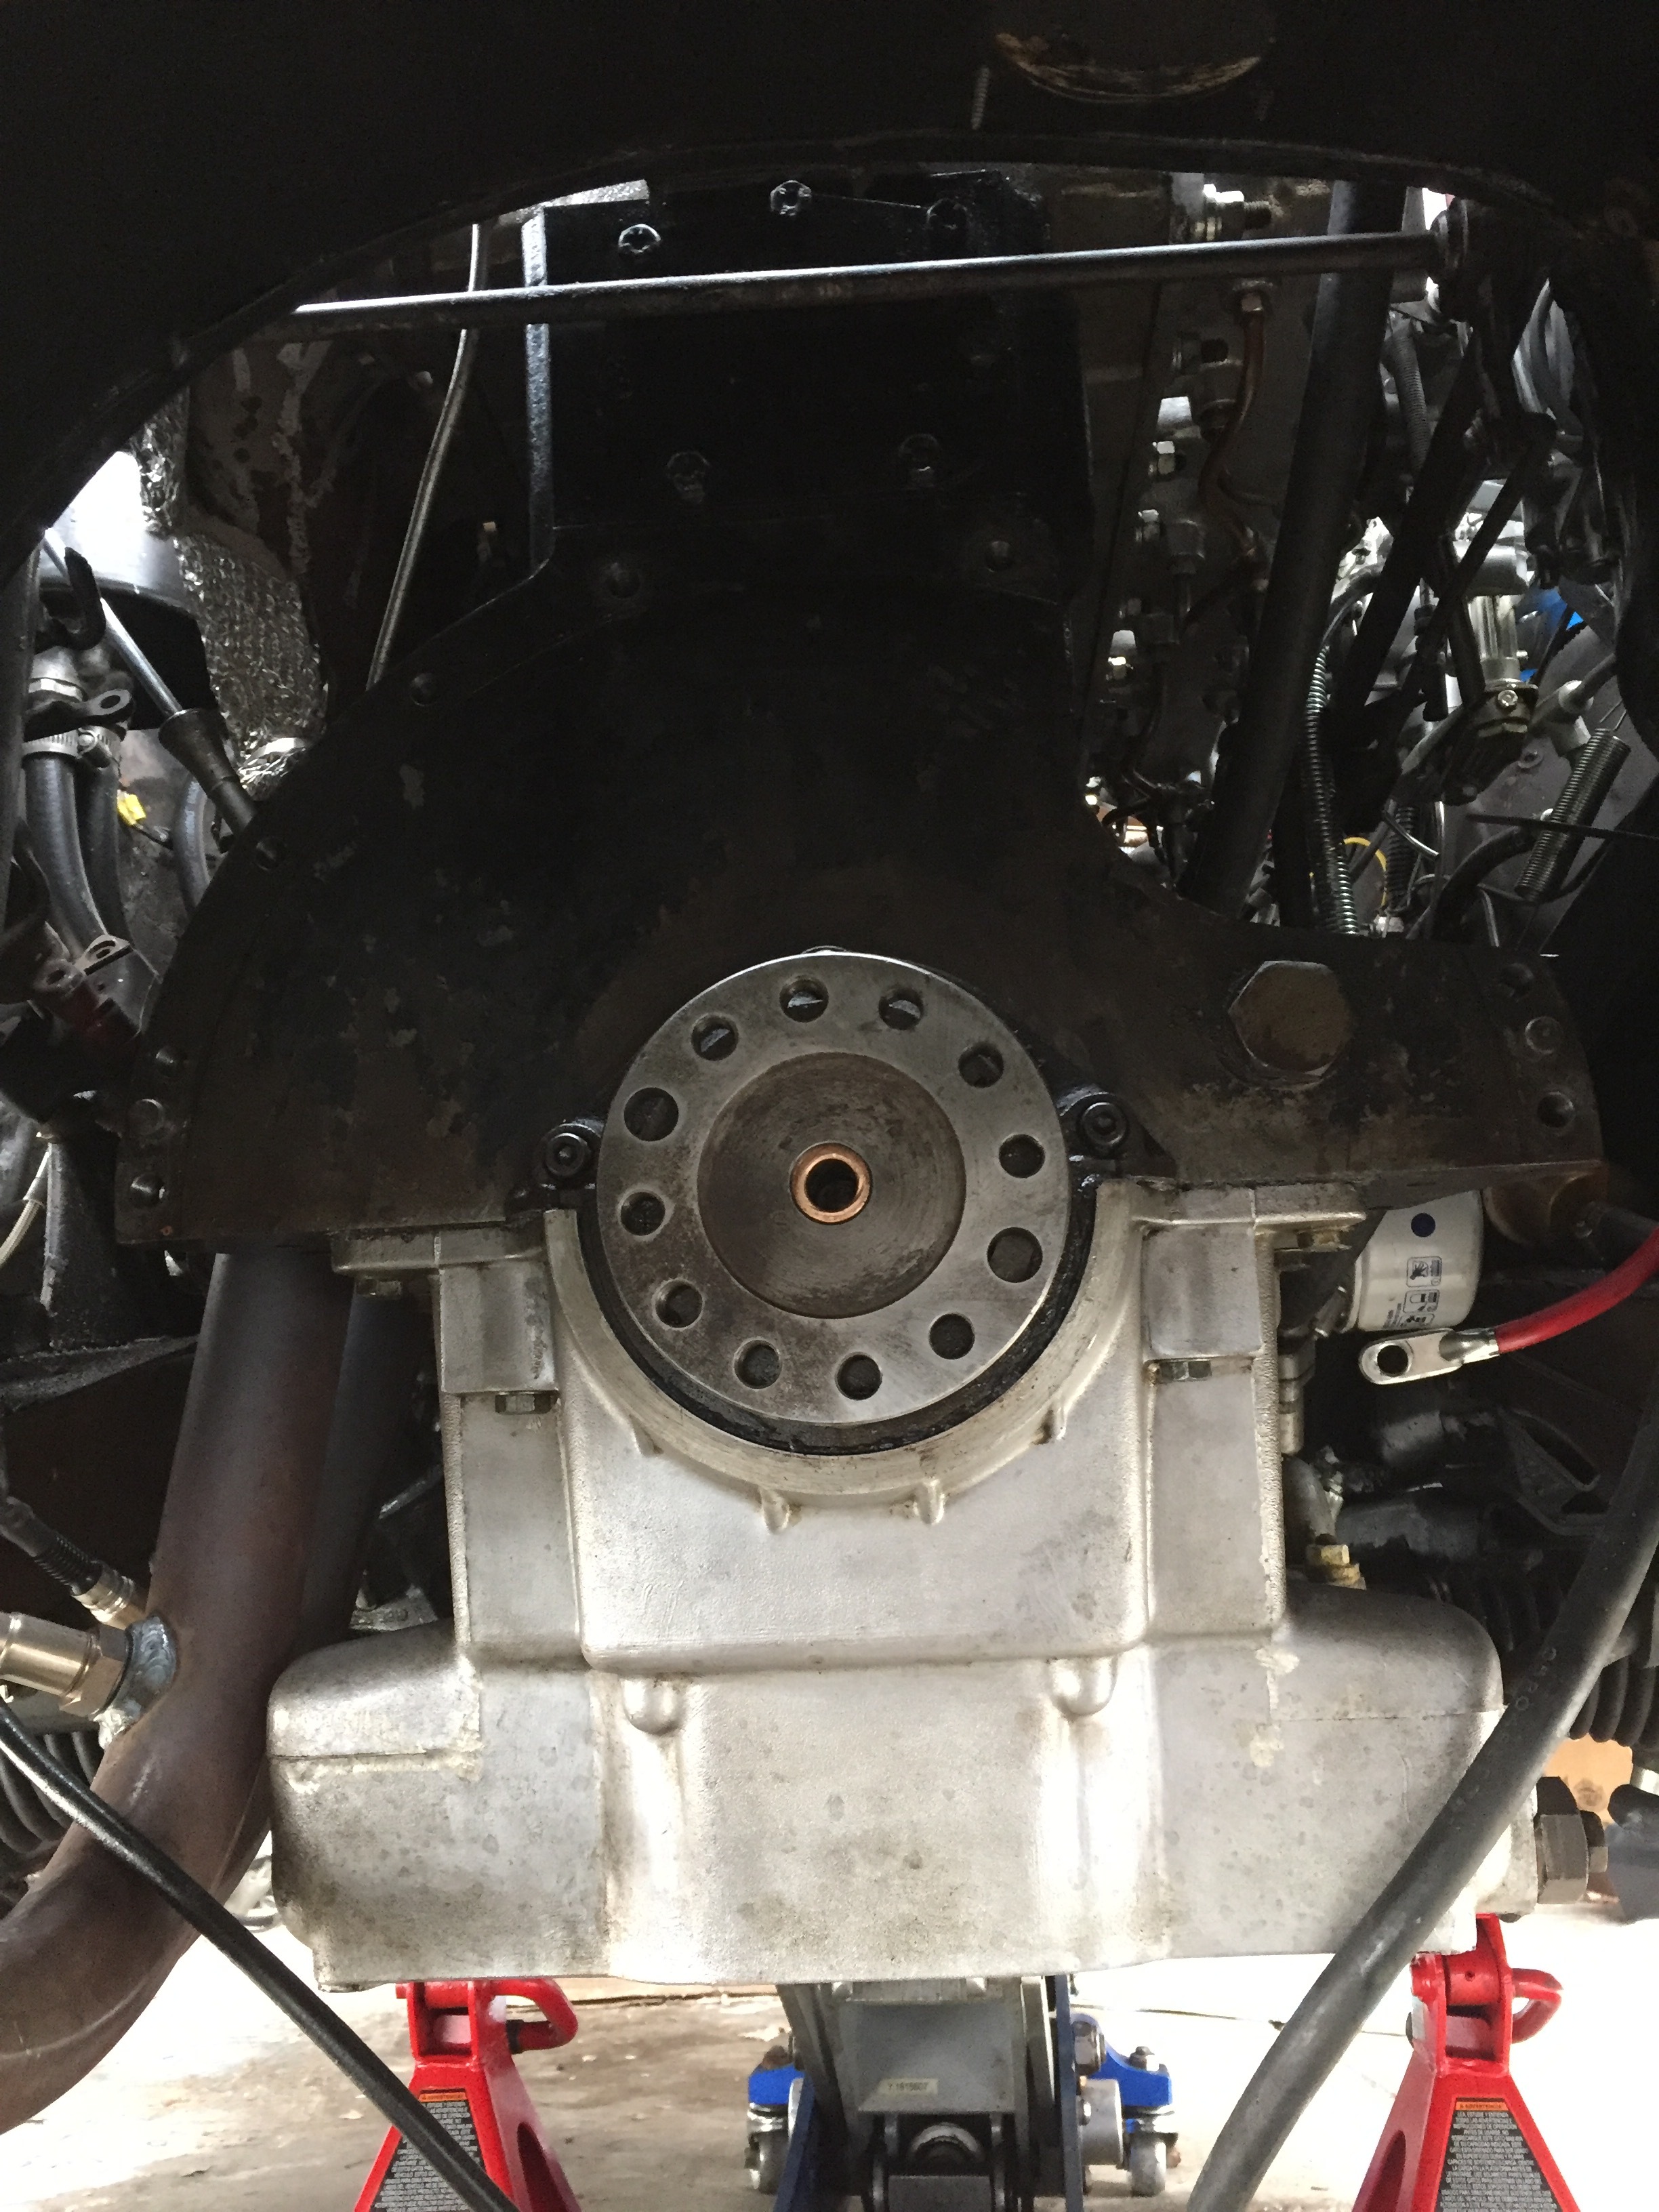
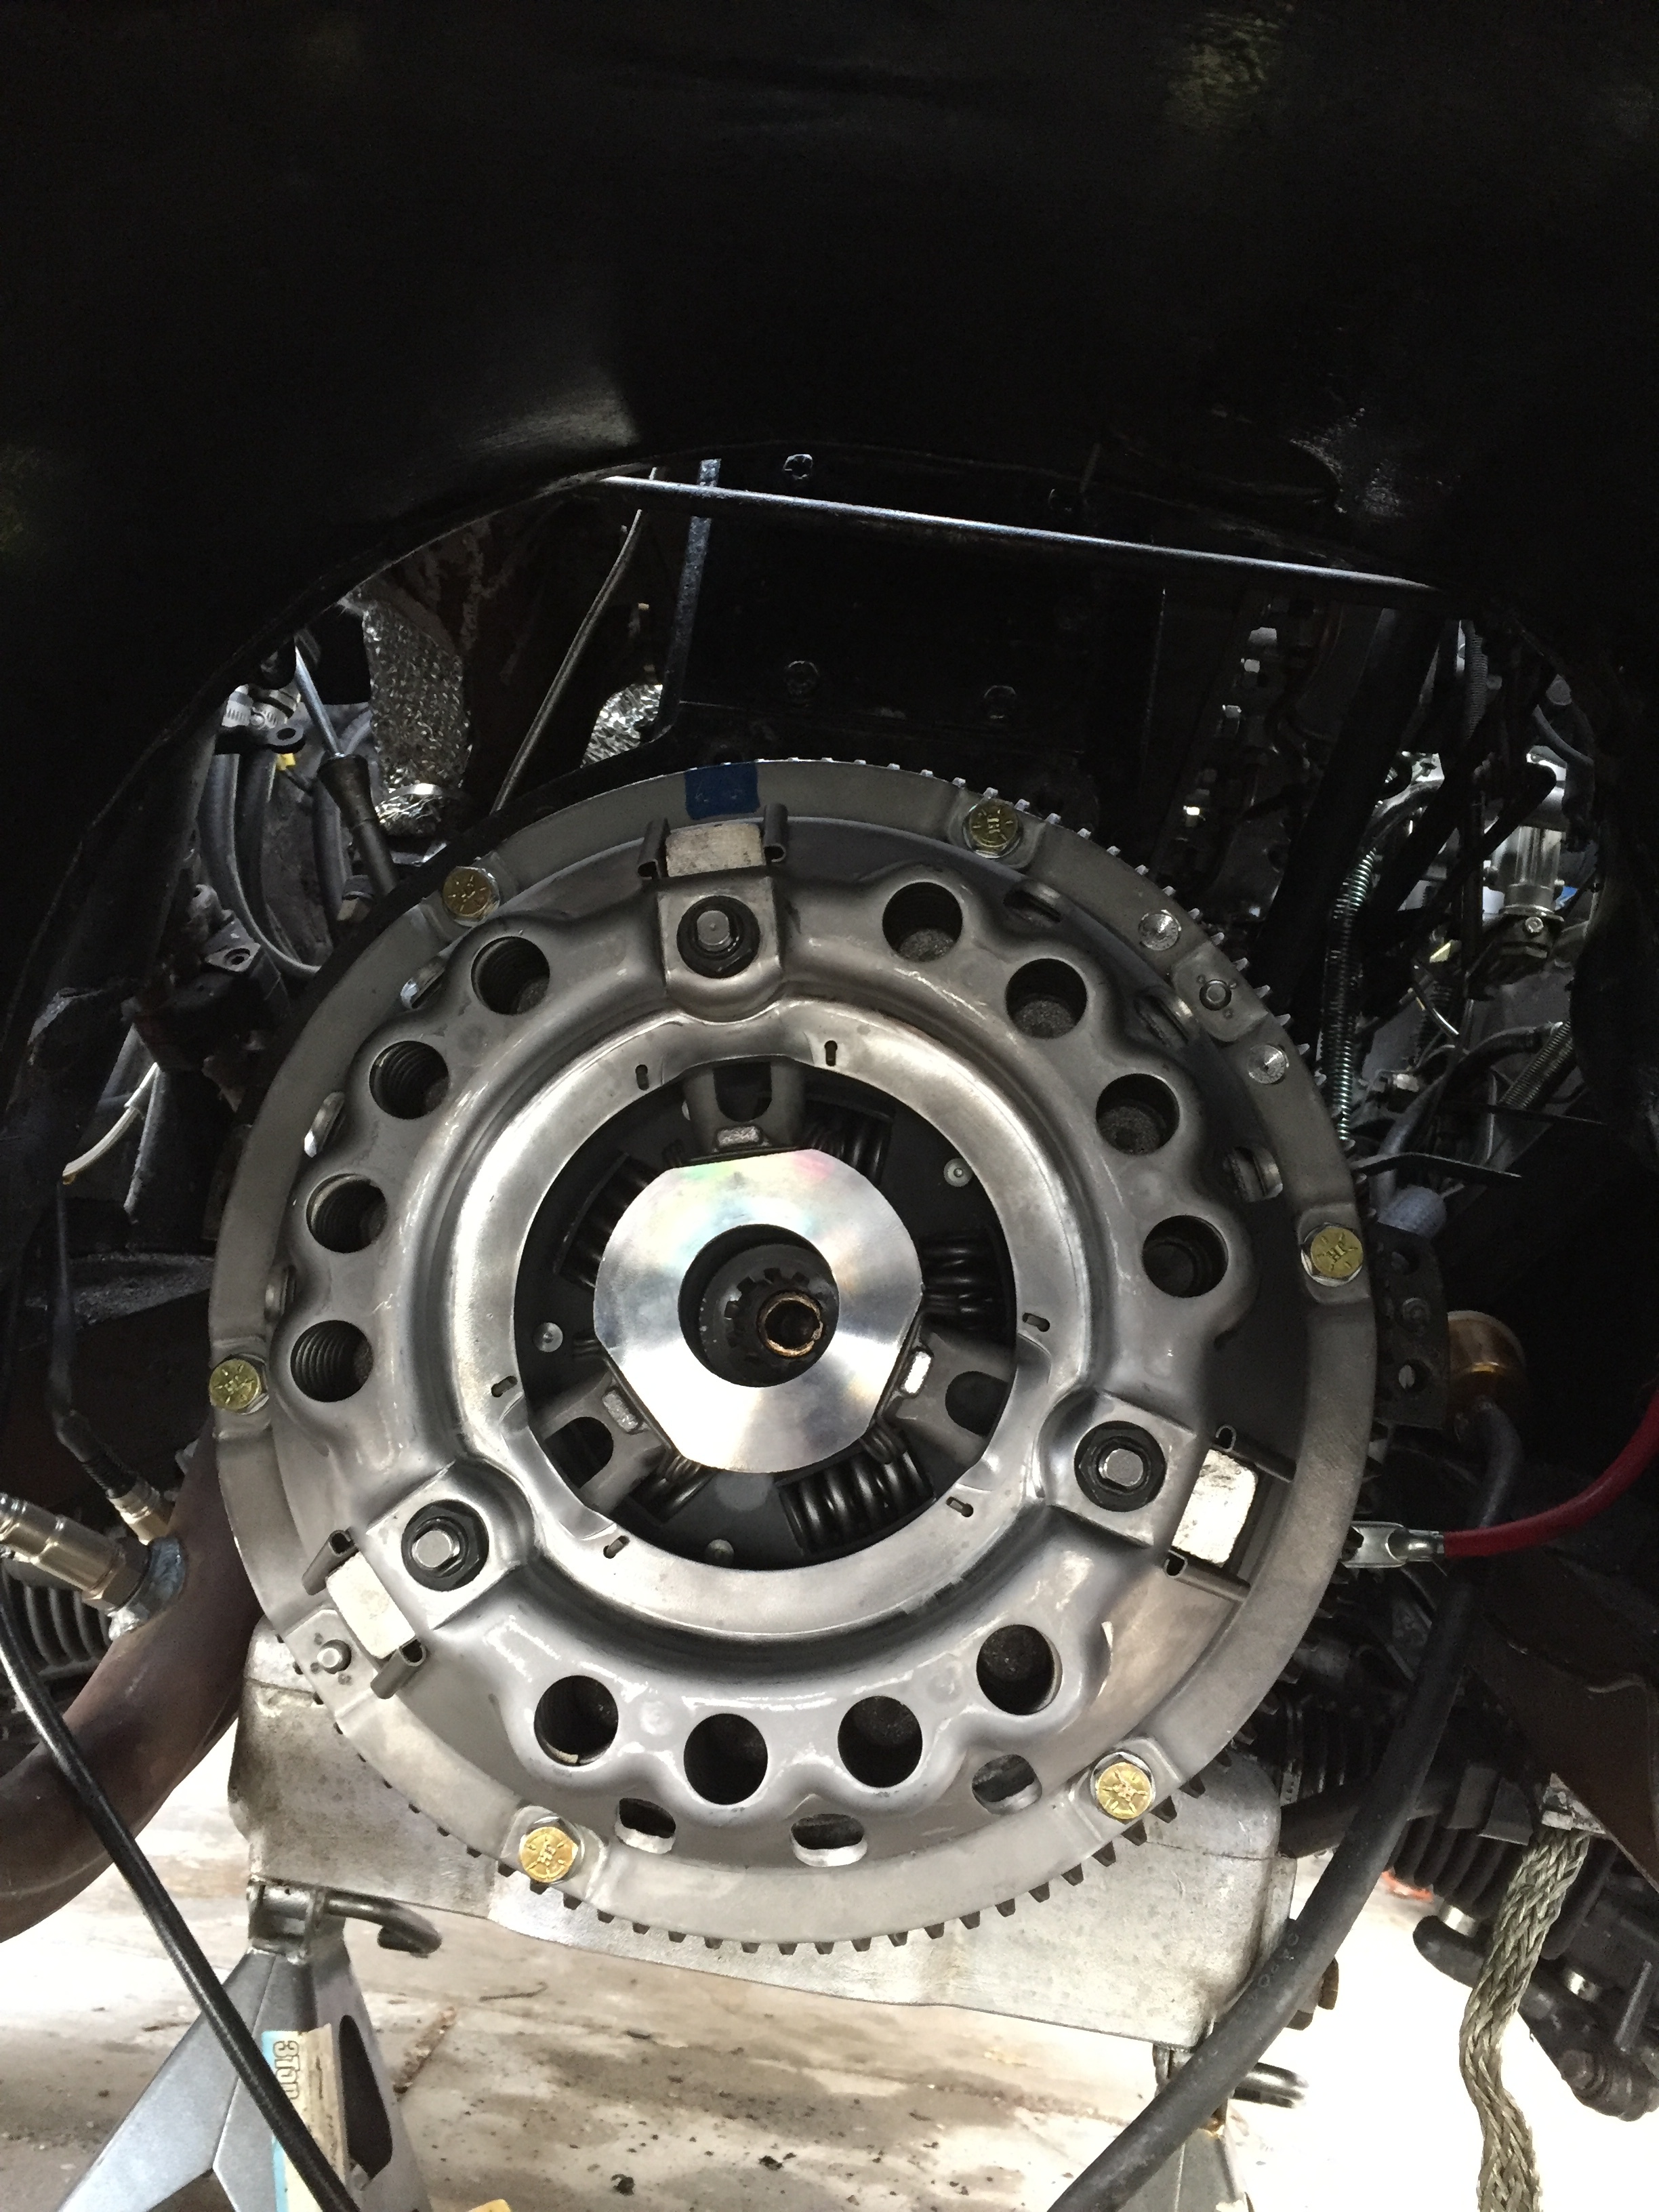
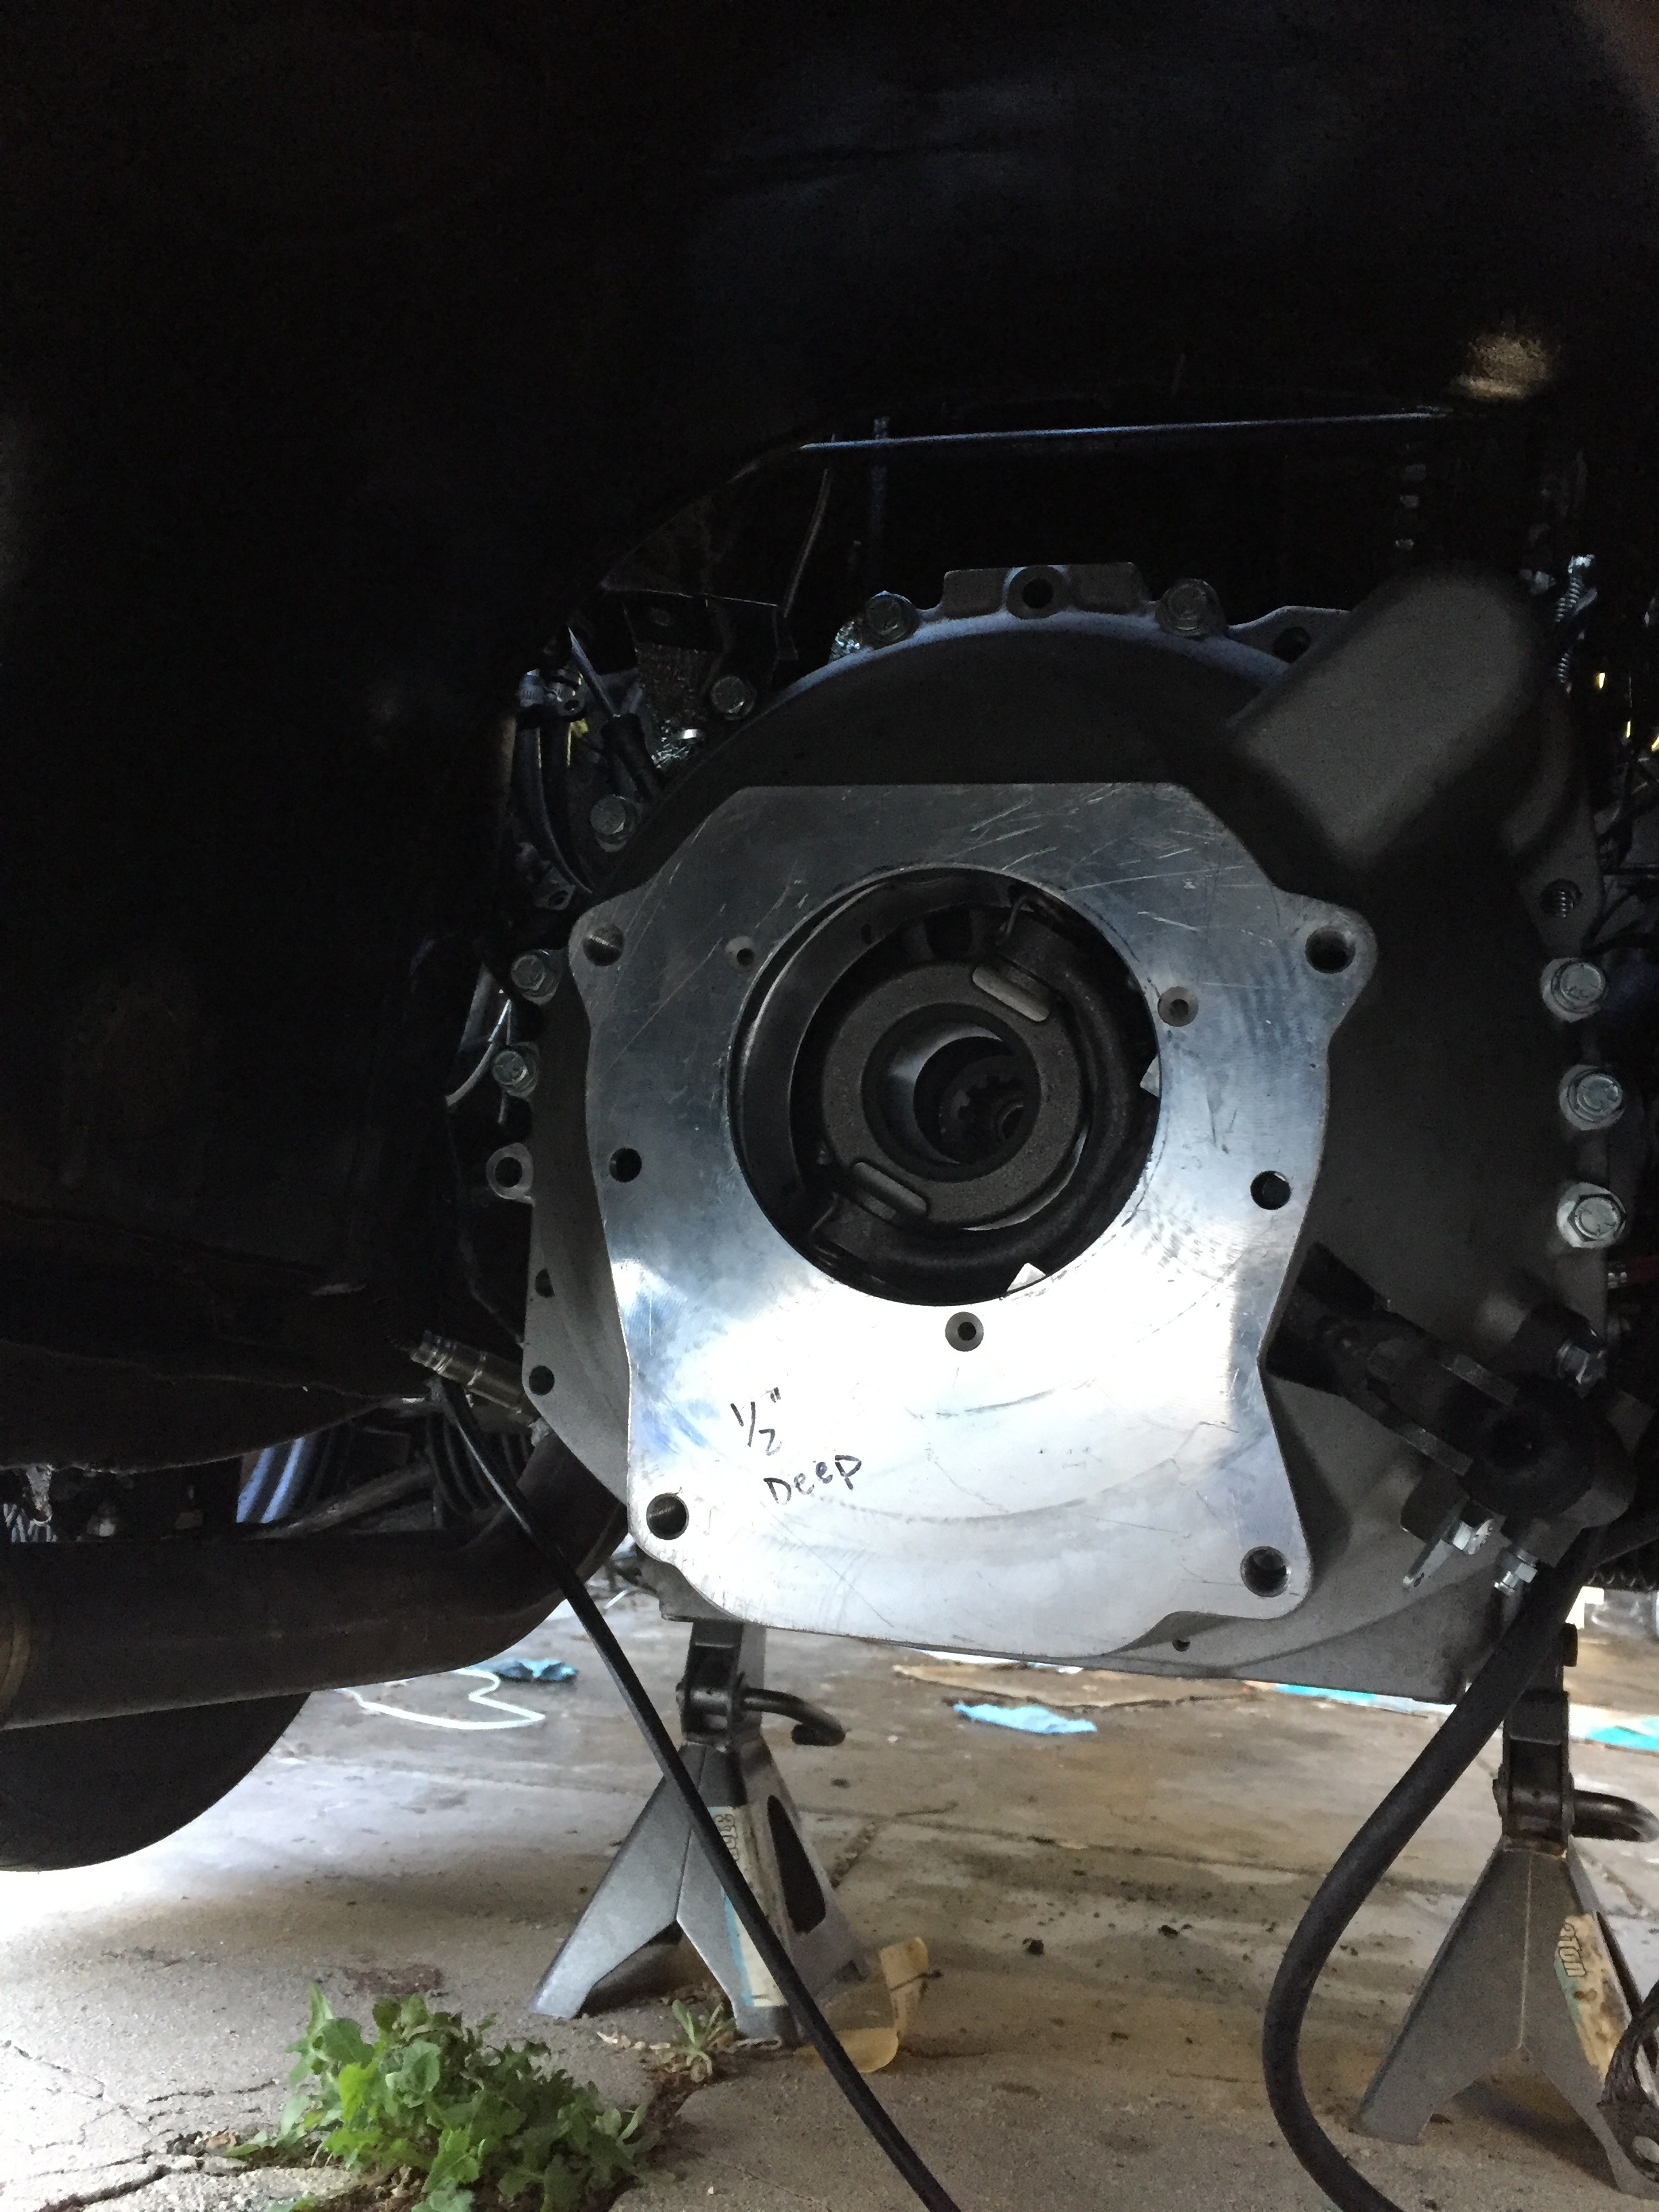
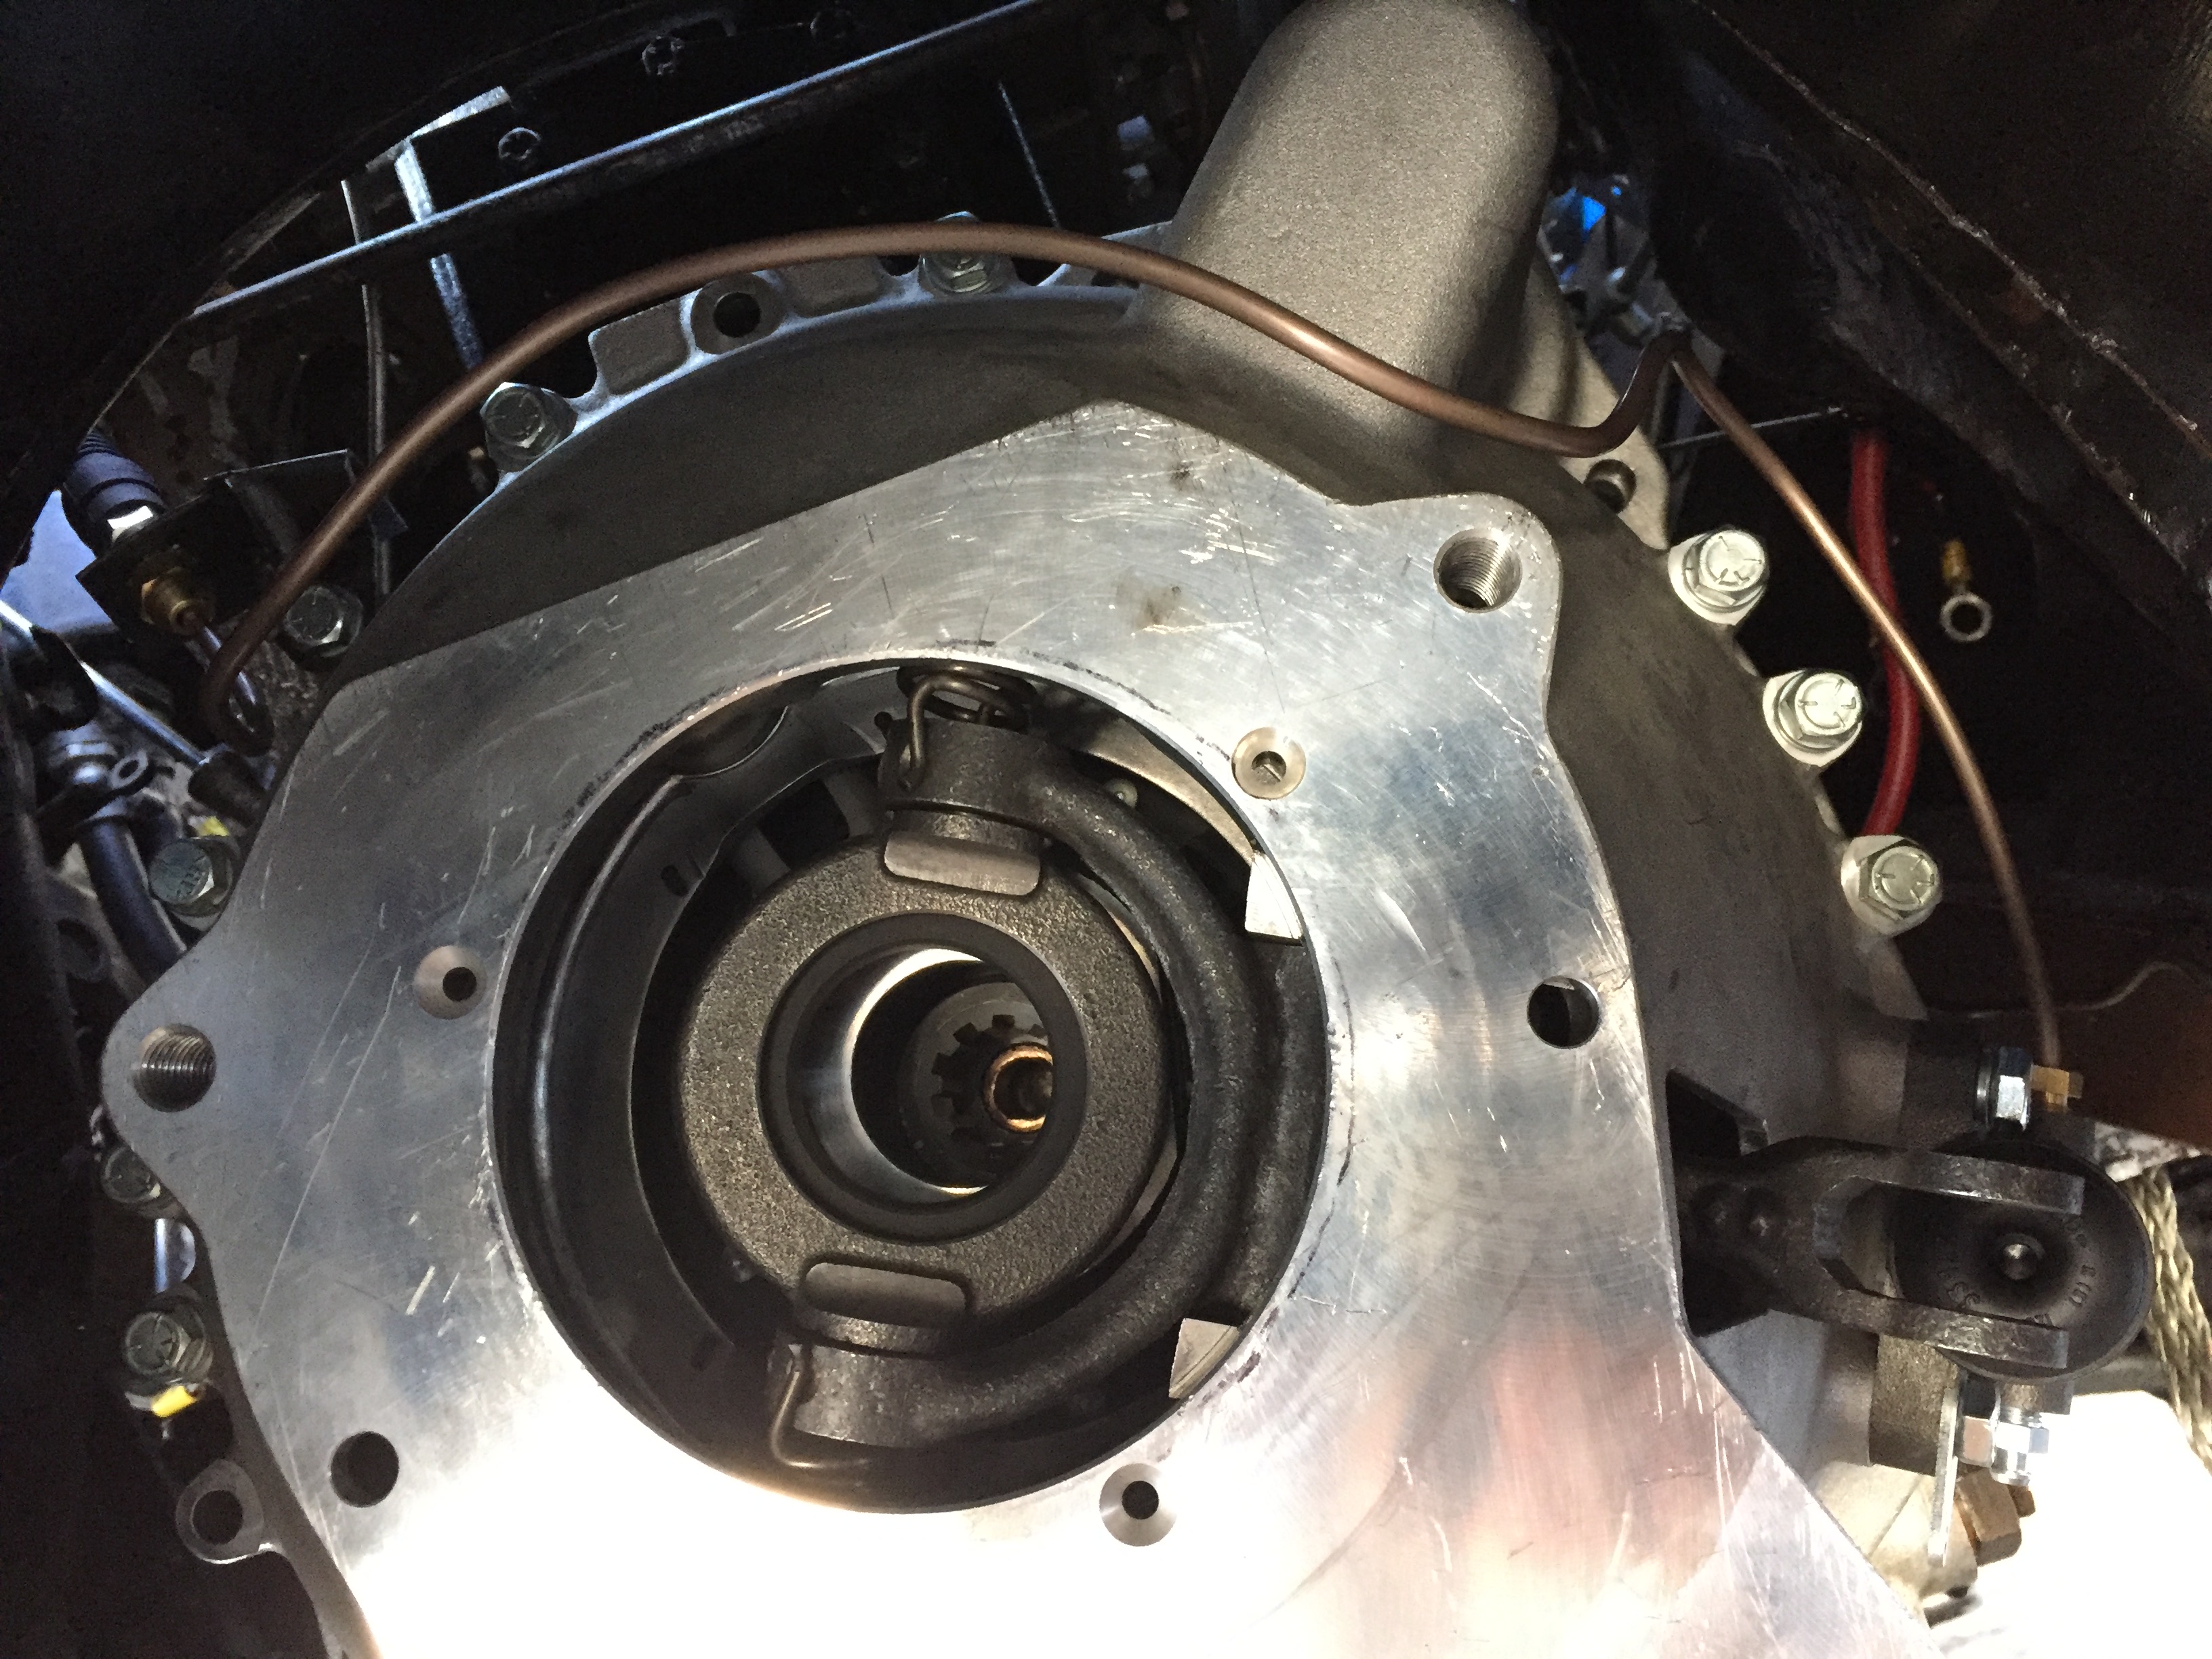
Here’s the medatronics bellhousing from Paul C in Florida. It’s a really nice unit, very light, fits the trans and the block perfectly. The threads for the clutch slave aren’t quite right so I will need to figure out the right bolts to mount that but I’ve test fitted everything and all looks great. The starter mounts have inserts that allow starter placements for both the 104 and the 133 teeth flywheel, so it works for either set up. Very nice unit and seems worth the price.


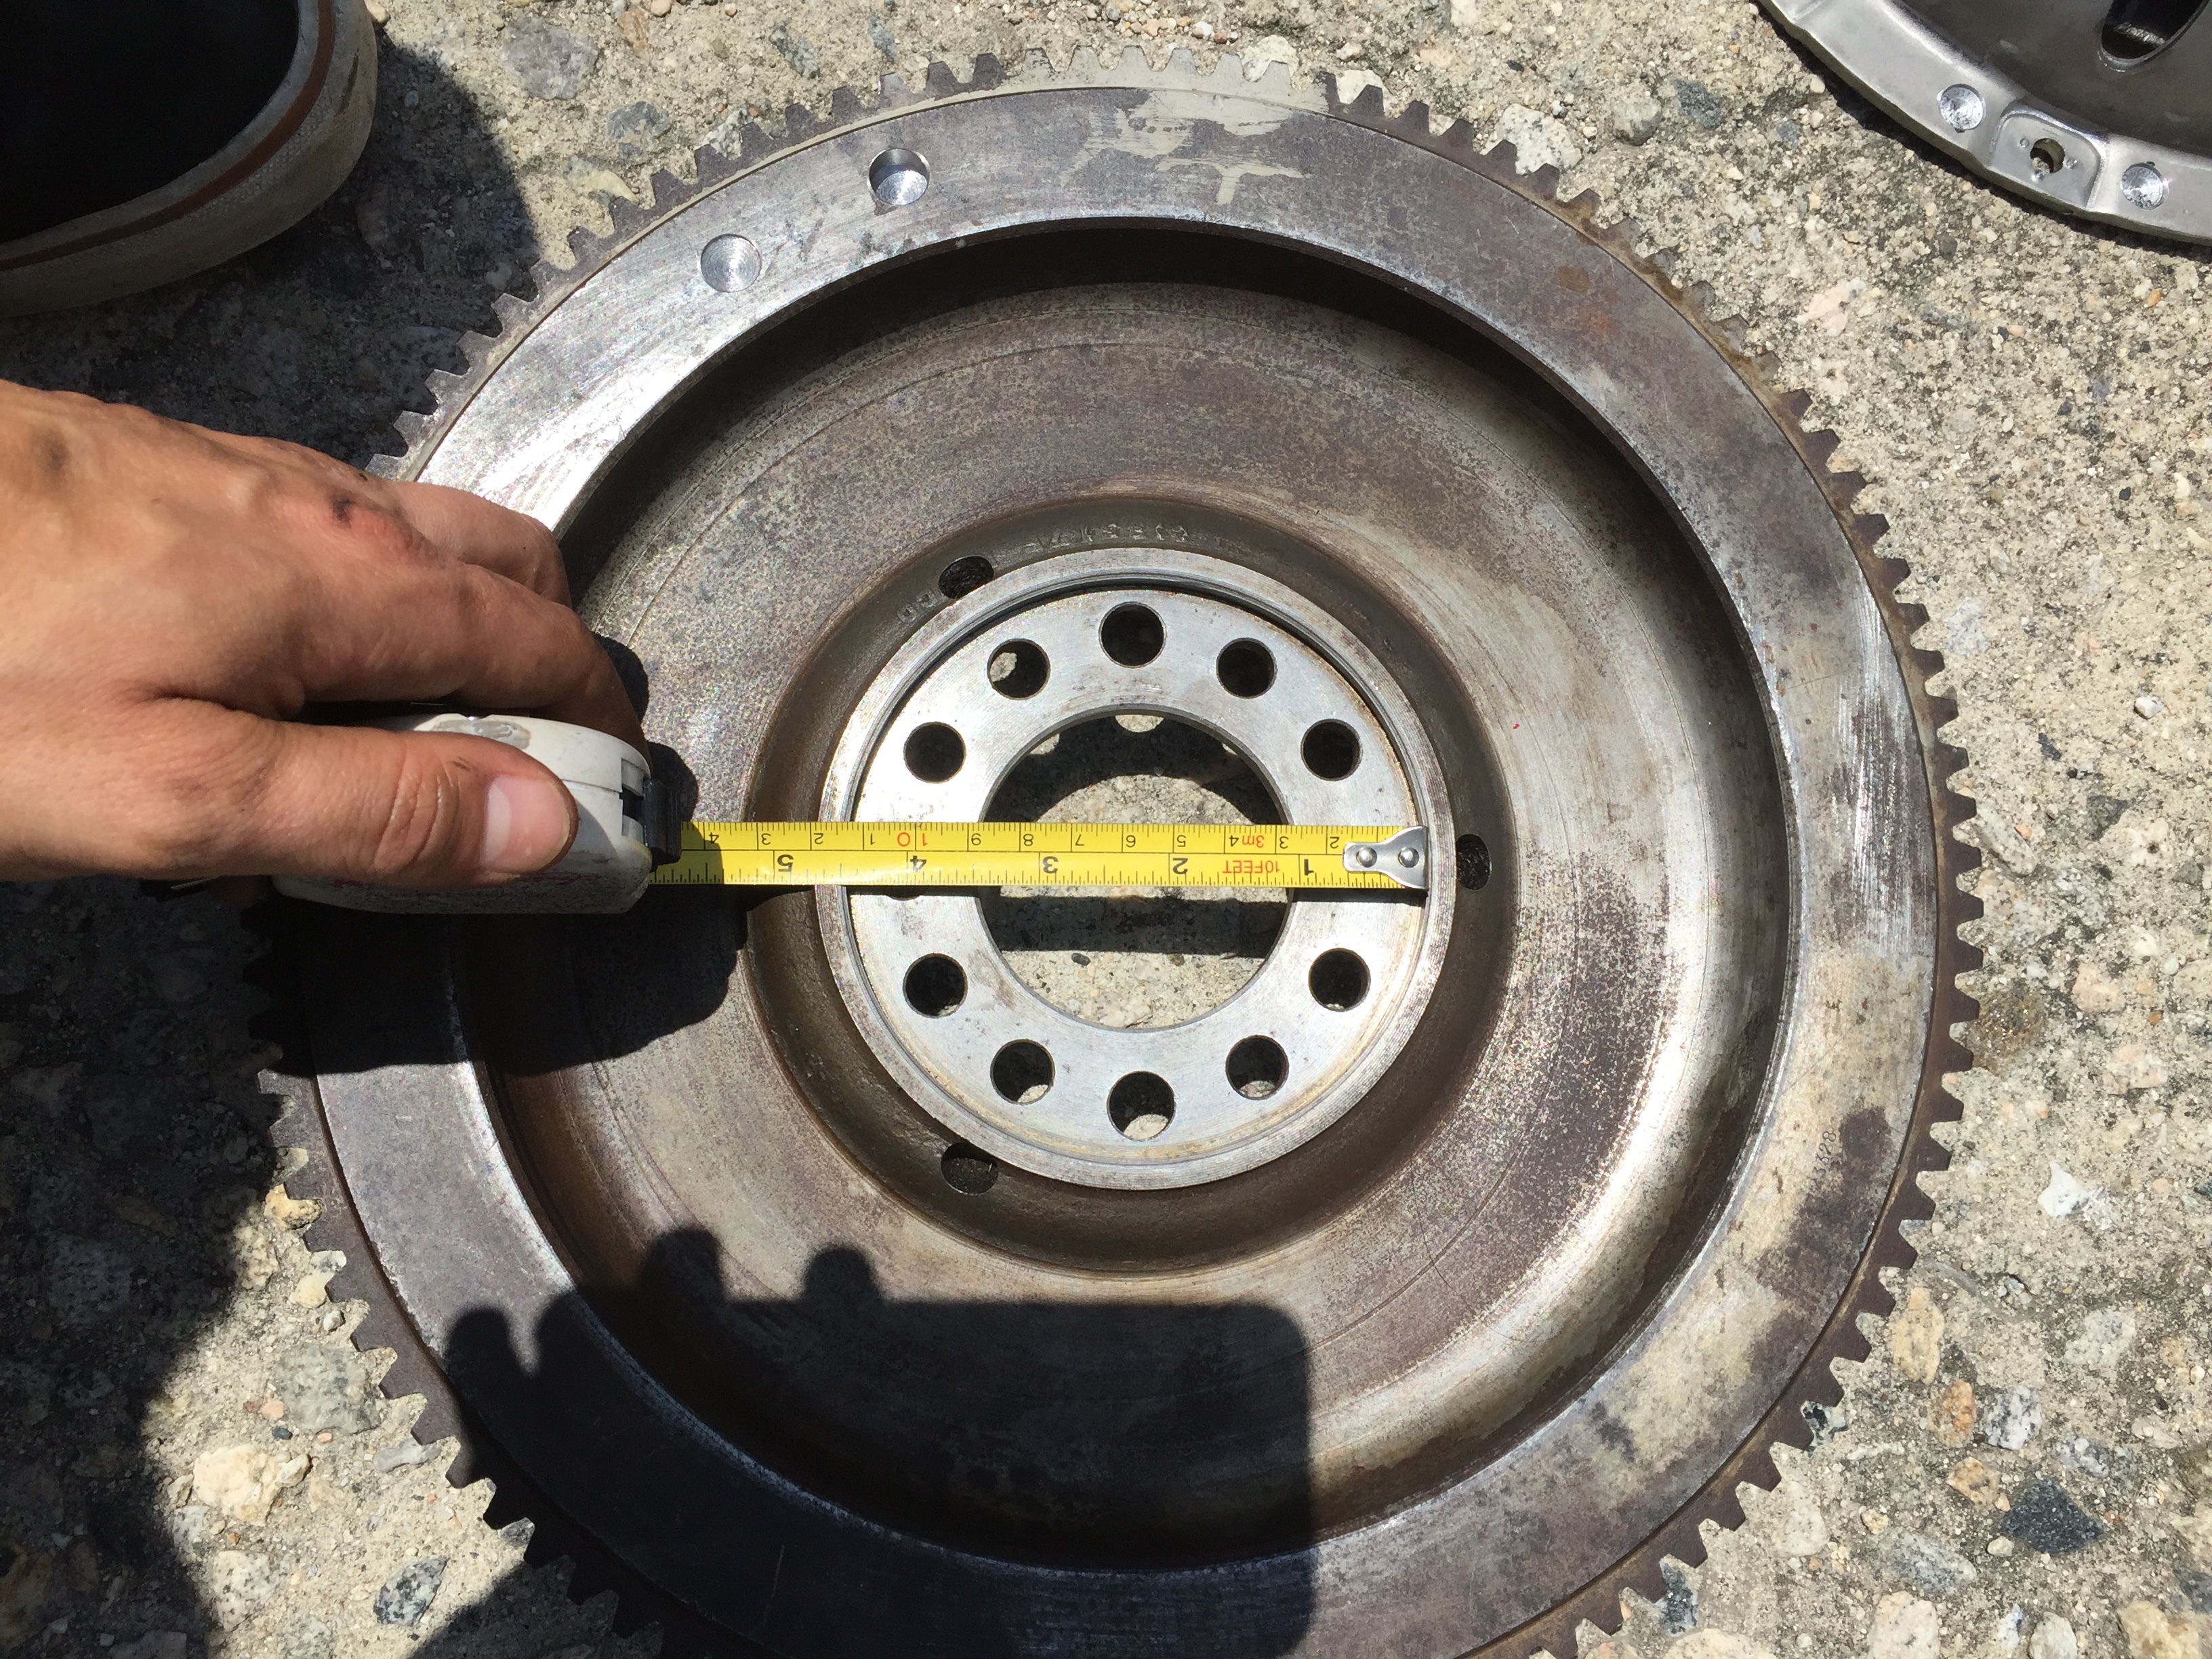
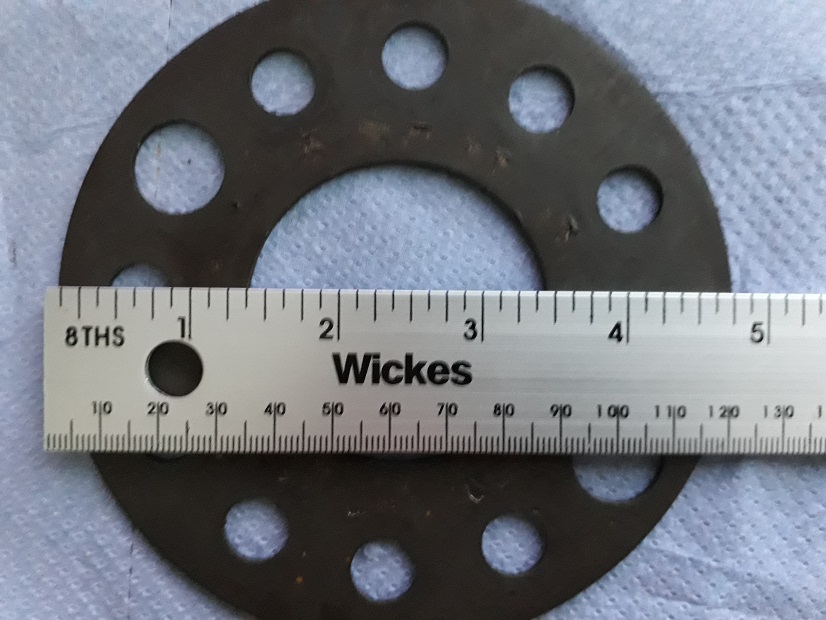
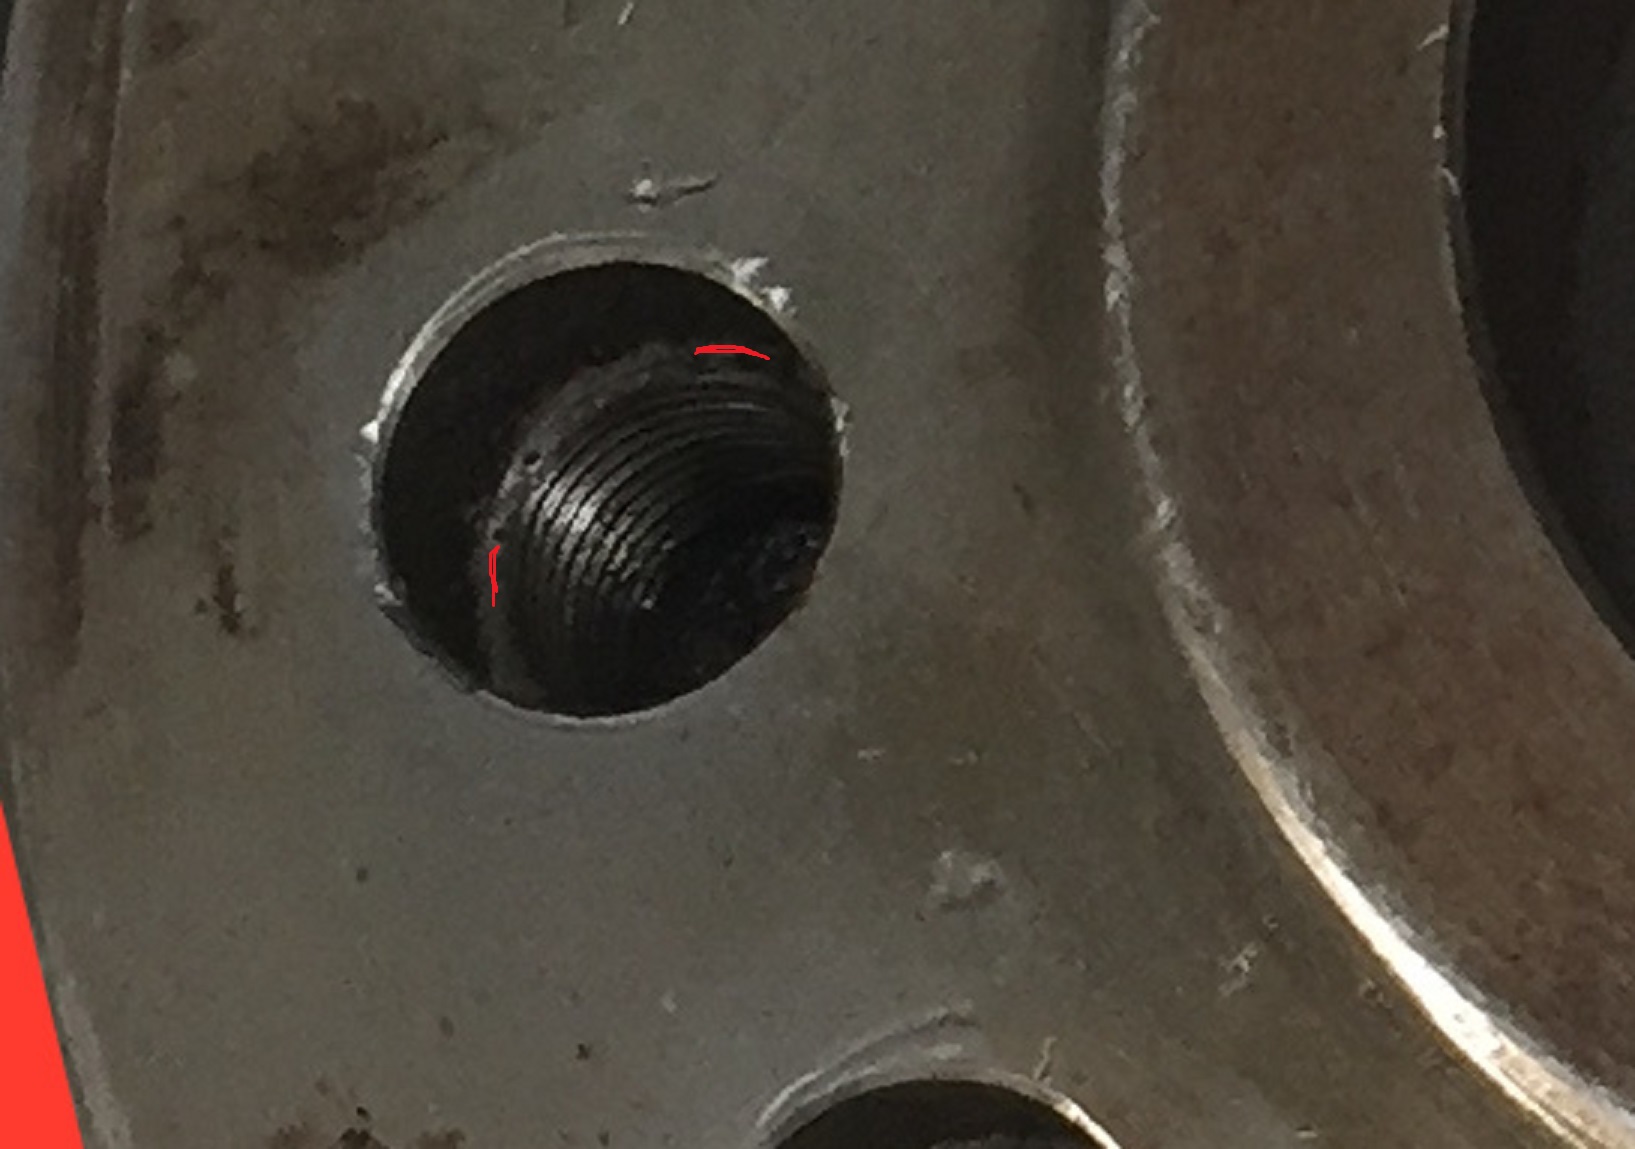
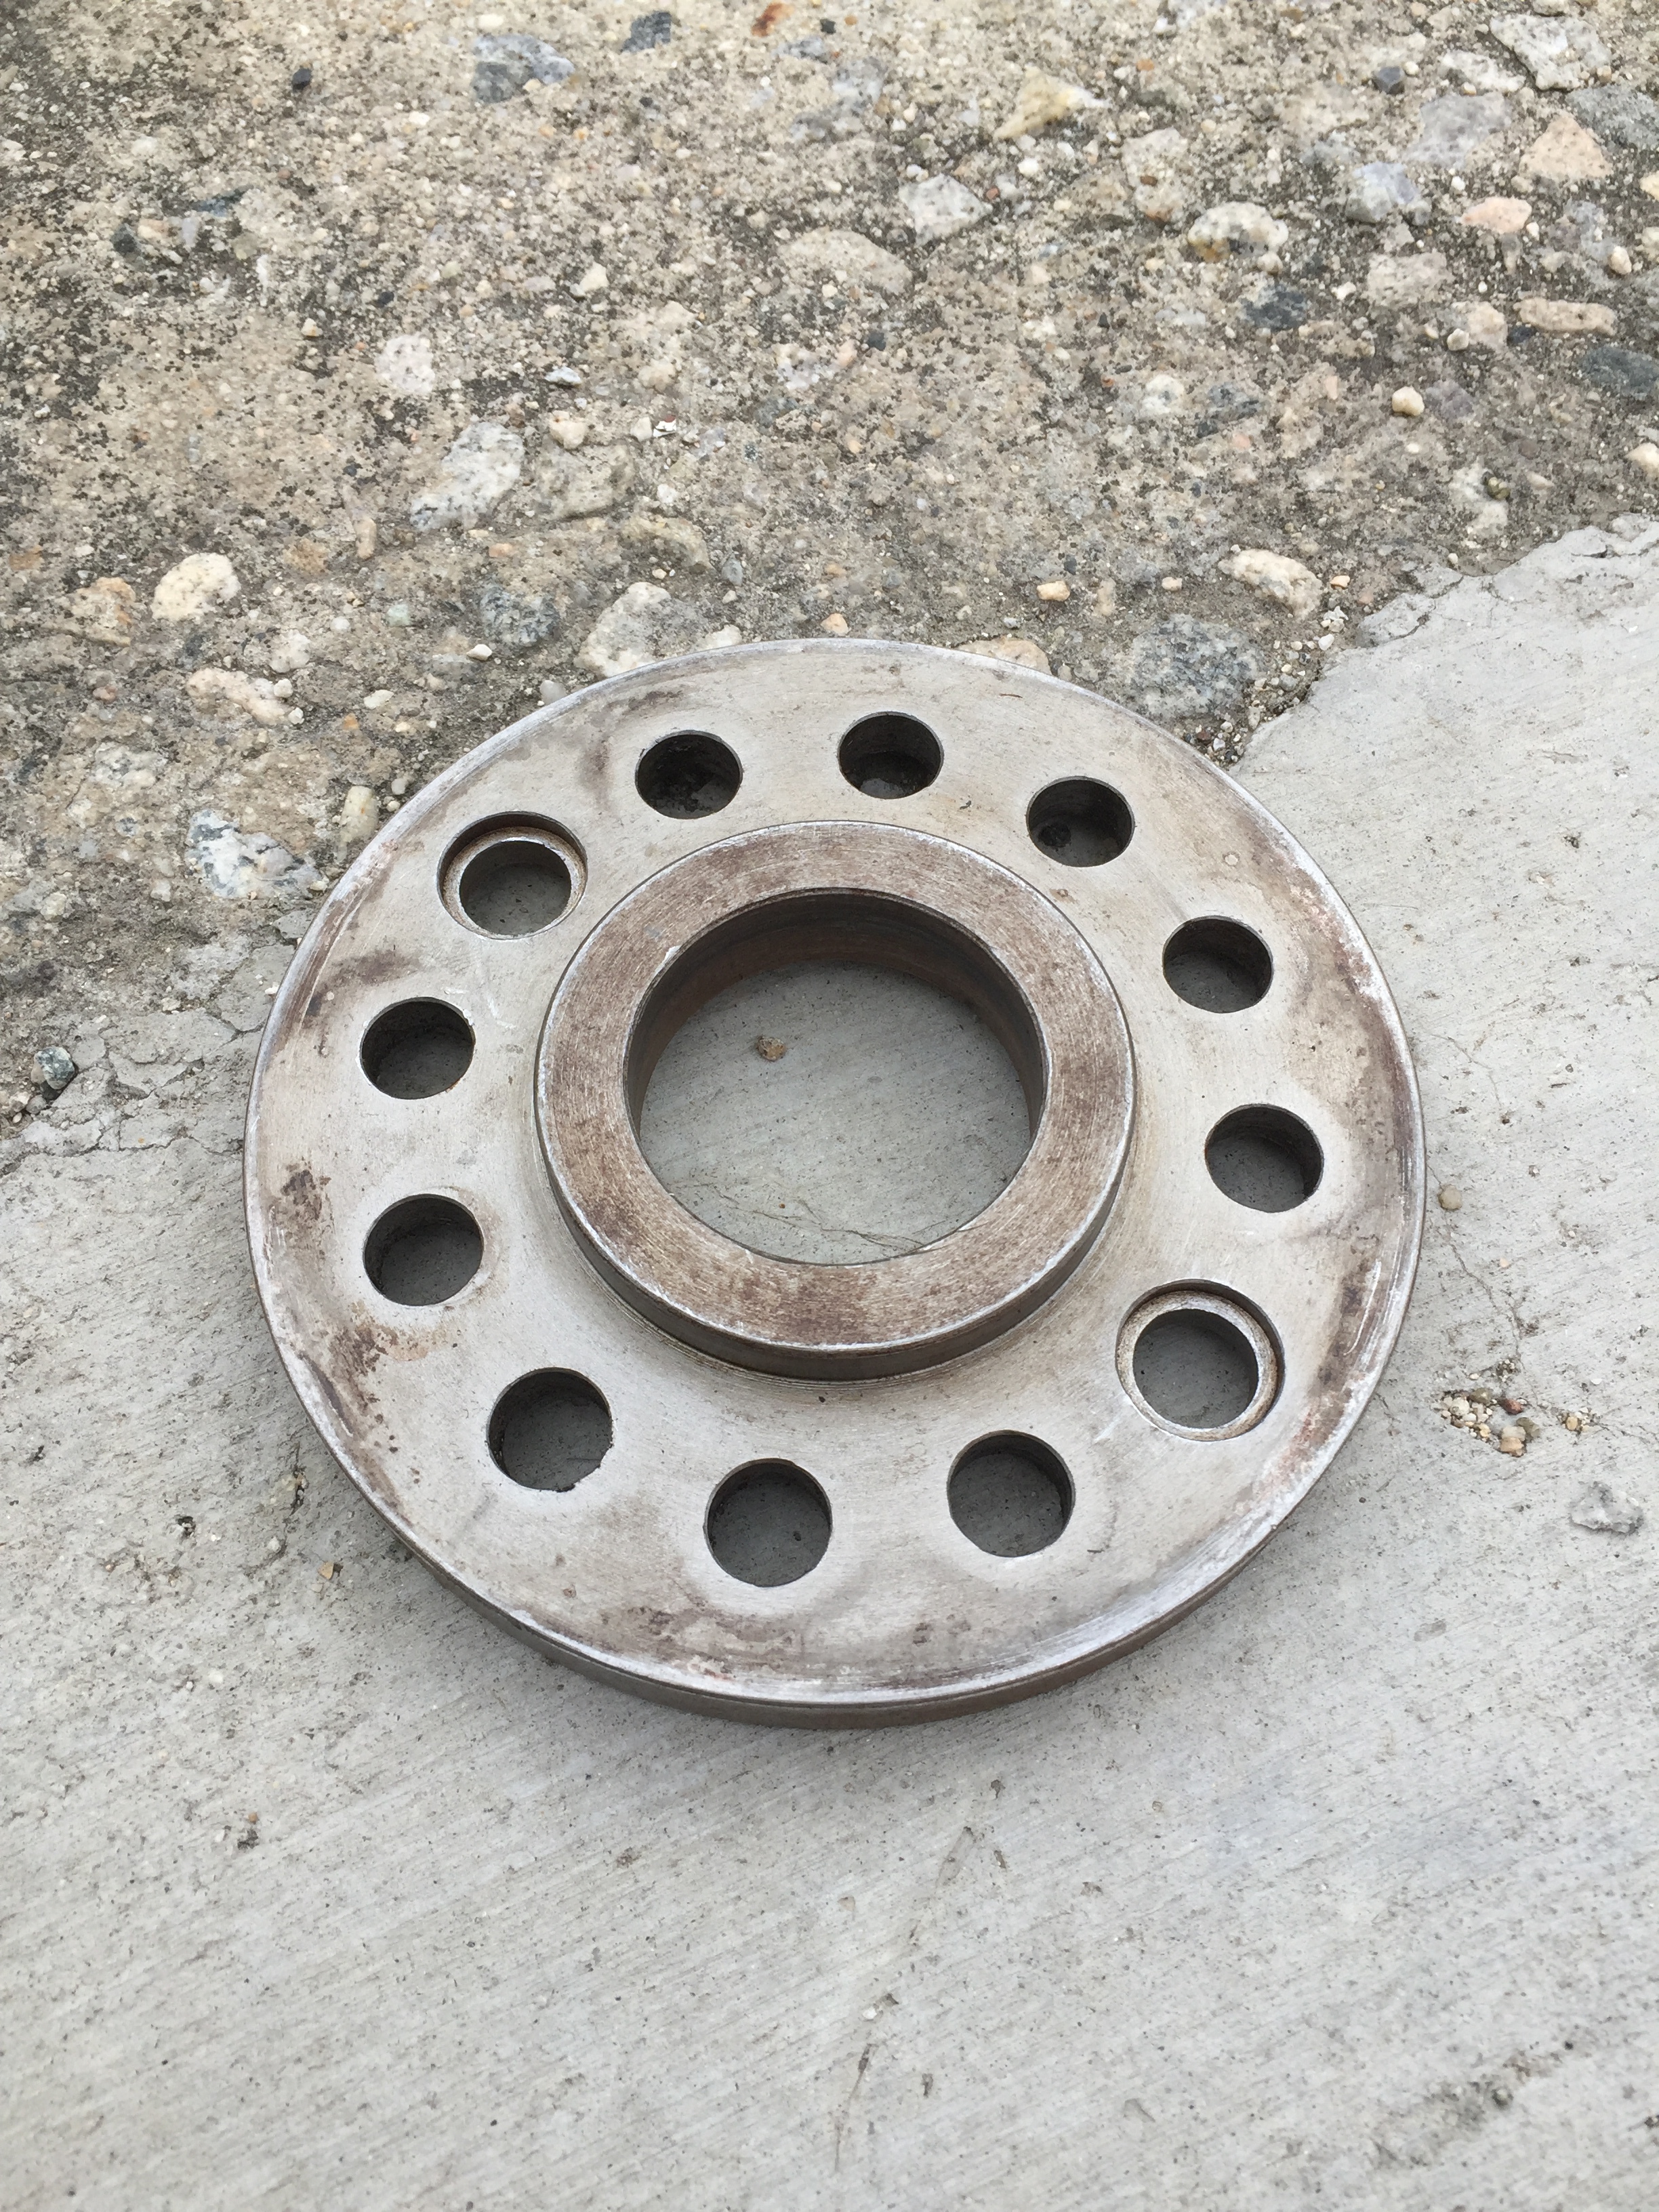
I sourced an original flywheel from a forum member, that was drilled for both 10" and 9.5" clutches. Paul C recommended 10" as it’s cheaper, works just as well, and easier to find the correct clutch disc. The jag clutch disc is actually close to fitting the mustang splines, but a mustang 10" disc is obviously the perfectly correct unit. I got it from Rockauto for like $40. I believe it’s from an 84 Mustang. I had the Flywheel and Clutch plate balanced locally.

I got a Pro5.0 shifter which is widely thought of as the best shifter ever made for the T5. A stock trans mount which will be adapted to my current mount, and a matching gear reduction starter motor. The flywheel teeth have to match the starter. 104 vs. 133 I believe. Also a stock T5 yoke to be adapted to my driveshaft.

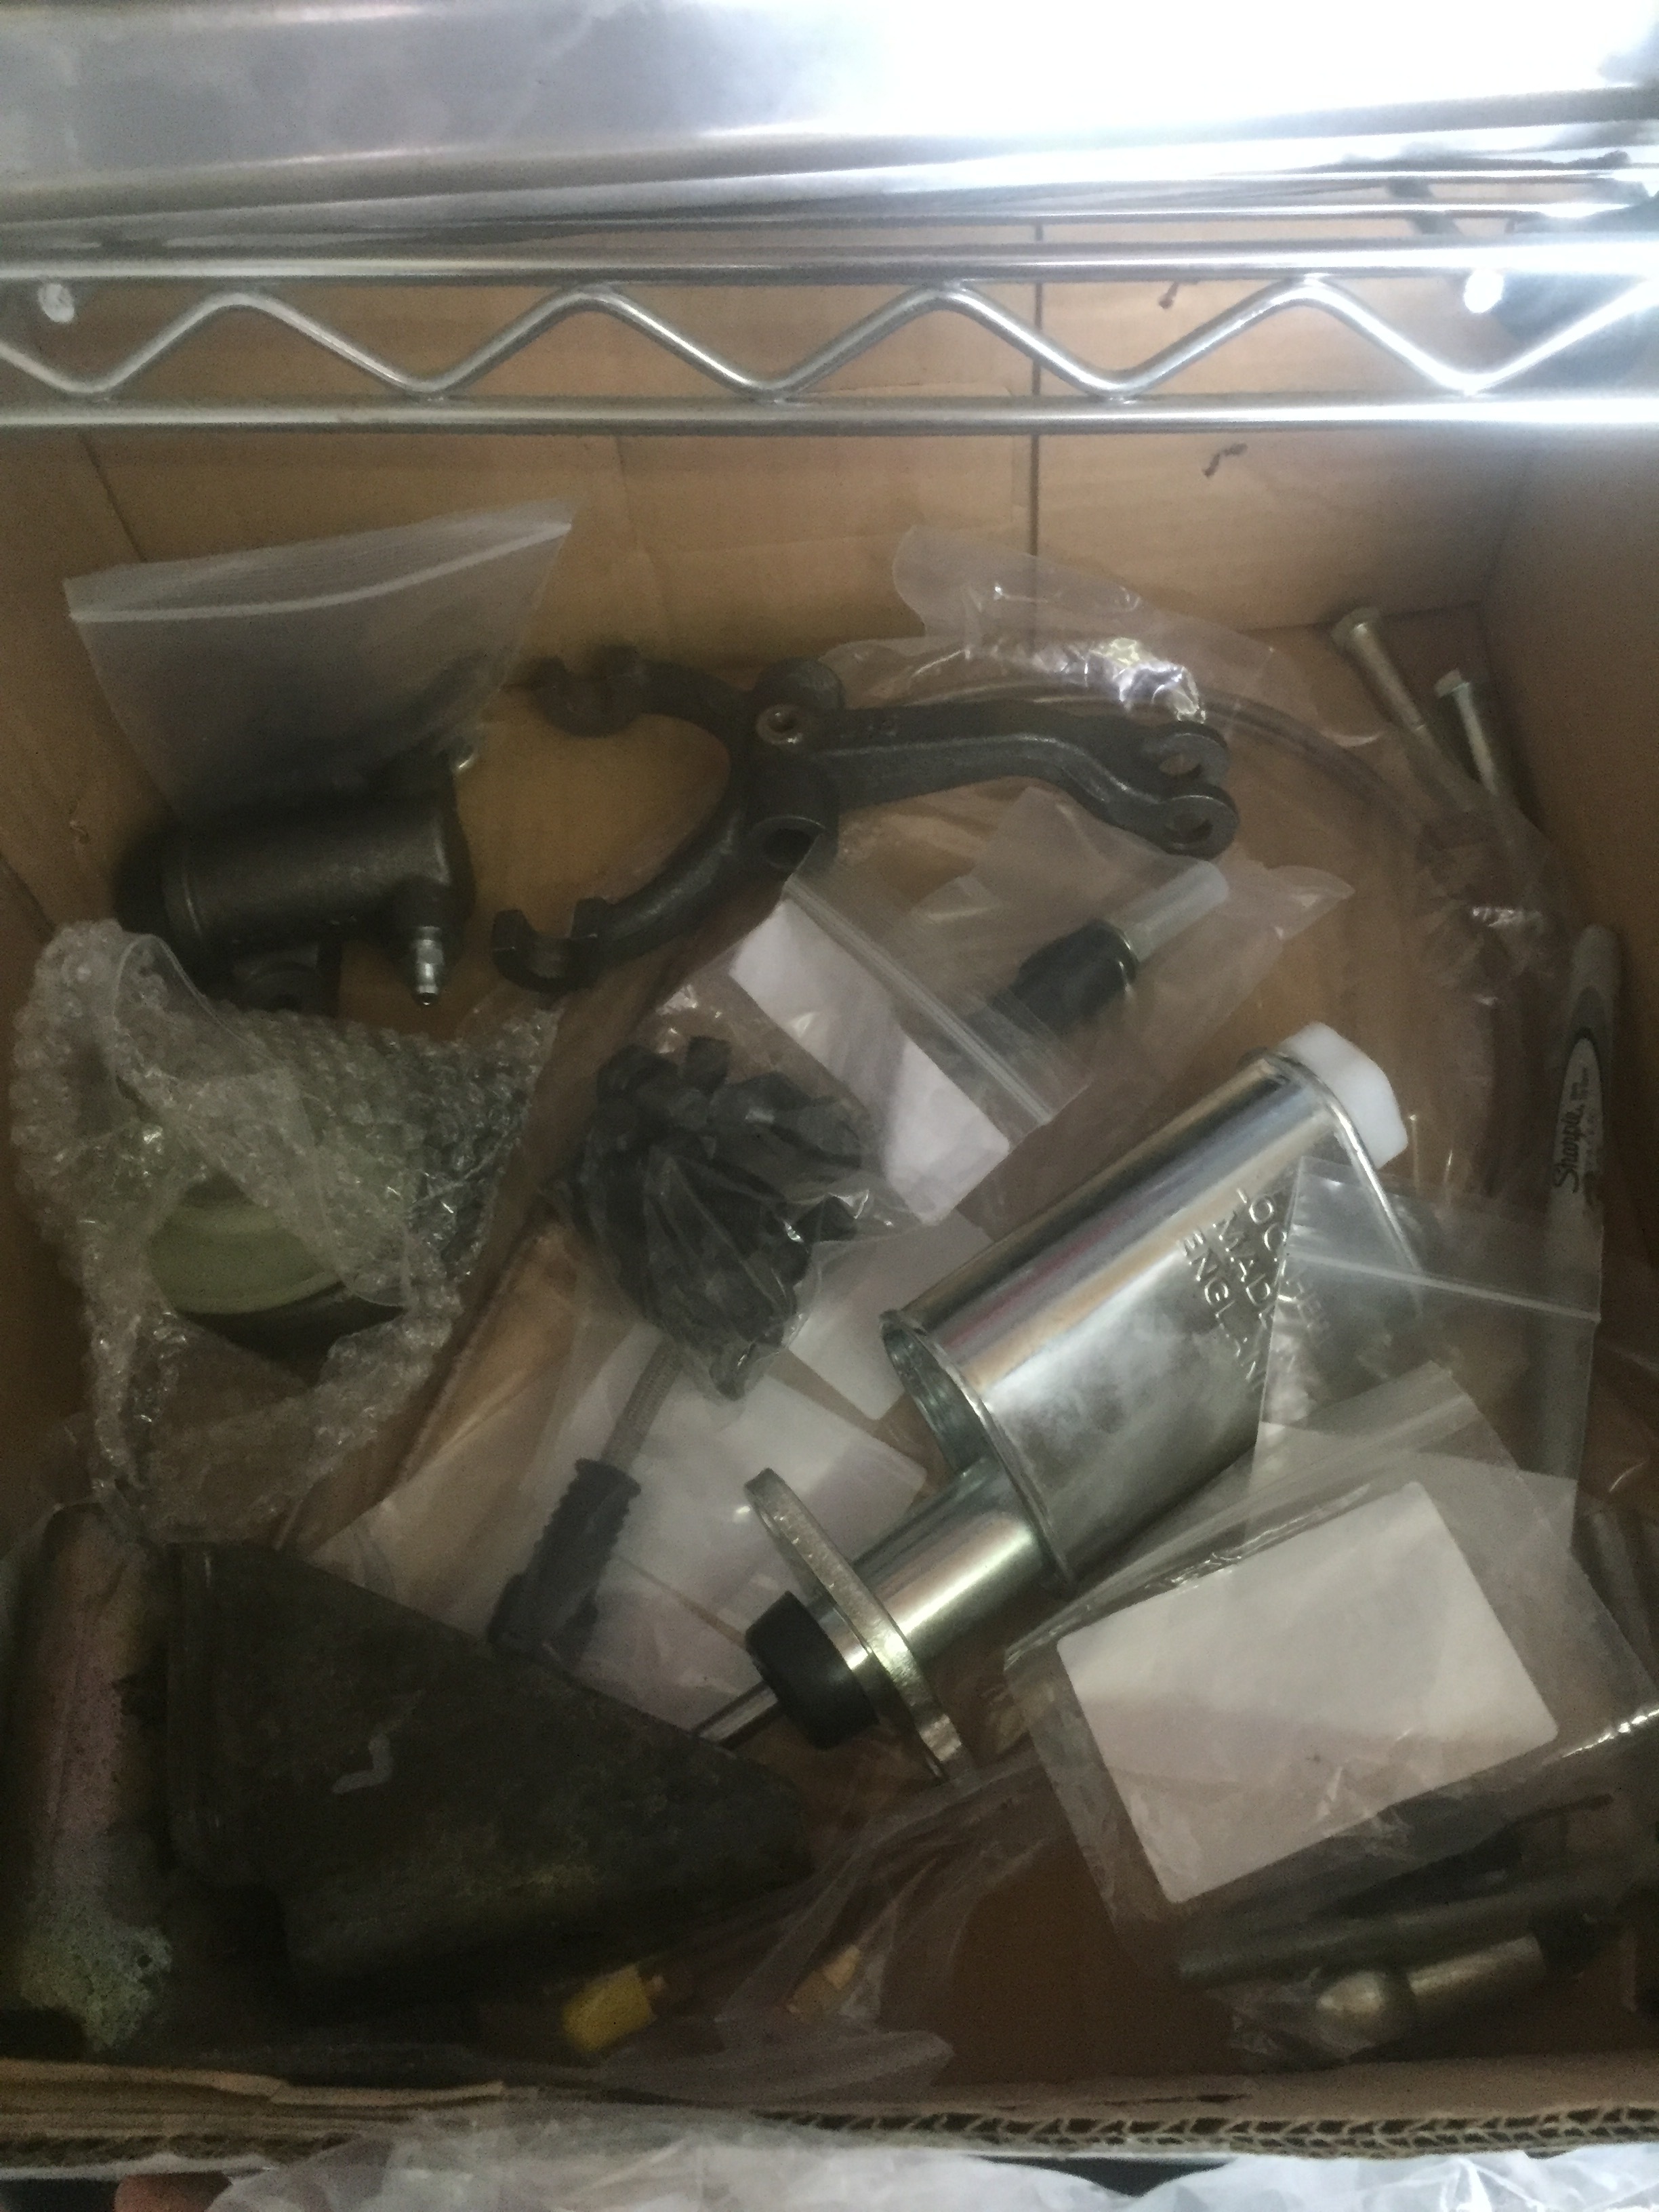
Finally, all the little bits.

  • Master Cylinder
  • Slave
  • Clutch fork, pivot shaft, grub screw, adjustable push rod
  • Two hard clutch lines, one stainless flex hose
  • Throw out bearing and clips
  • Pilot Bearing
  • 10 Flywheel to crank bolts and locking plate
  • 6 Clutch plate to flywheel bolts
  • 10+ bellhousing to block bolts
  • Two triangular brackets that bolt between bell and block (had to source as not present on automatic cars)
  • Two small rubber pedal pads

… I think that’s everything. One thing I have not yet figured out is how to adapt my stock speedo cable to the T5. Mostly likely I will just blank the speedo gear hold and leave it as is. I’m ok without a working speedo for now. Unless someone know a clever solution. So that’s everything. Next post will be the first day of work.

1 Like

Day 1 -
Disconnect shifter linkage
Disconnect dipstick
Disconnect TV cable from throttle
Disconnect Oil cooler lines and cooler
Disconnect speedo cable
Remove driveshaft
Remove trans mount

The torque converter is attached to the flexplate with 3 bolts. Had to rotate the engine once around to get all 3.

The 700 is held onto an adapter plate by 6 bolts, only 5 of which were present. A few required long extensions from below, a few I could get to from above.

Once all is loose, support trans with a jack, pull the trans back about 1" and lower down. Easy peasy.

Then 10 bolts for the flexplate, and 10 more for the adapter.


Here’s almost everything. Not pictured are the starter, oil cooler, and torque converter.


Cleaned up the rear of the motor and tightened up all the bolts I could get to. The pilot bearing was really tight so I threw it in the freezer to try and make it a bit easier. I also test fitted the bell and there is acres of space, so I’m not sure if my trans tunnel is stock or what but there is absolutely no space issues at all, in my car at least. All should go together without much issue, I’m hoping!

Looking at the big rubber grommet at the top of the last picture I would say the tunnel is that of a Auto , bell housing end is not a issue , but the selector part of the gearbox maybe , as the Auto tunnel is lower down , I had to cut a small part out , and make a cover ,

A few things not on your list , starter motor , top steering wheel cowl , pedal box , gearbox mounting , but I am sure you know all this .

I still have not sorted out my wiring , only been around 30 years , still time lol , you need to rewire the starting , think there is a box of some kind behind the glove box , the starter button wire goes to , on the Auto cars , so you can’t start in in drive , you need to bypass it , I just run a new wire from the start button to the starter solenoid under the bonnet , they do say you need to take the engine and gearbox out to change a clutch , I will watch with interest with your progress , good post :+1:

,

Good calls.

  • Starter motor, yes I got a gear reduction starter, and when I rewired my car years ago I got rid of the neutral safety switch all good to go
  • The beauty of the Mk2 pedal box is that there is already a clutch pedal installed, that was bolted to a large brake pad to match the brake pedal. Basically going to just cut the brake pad into two smaller pieces and the clutch pedal is ready to go!
  • Will need to cut a shifter hole for sure, tbd where and how large.

I havent thought about the steering cowl… what does the standard one look like?

The shell is the same , it’s just the bit in the middle !

Hmm, when hunting for a T5 tranny for my future Mk1 auto/man swap I was calculating that S10 T5 version has better shifter location, than rearmost Mustang ones. Won’t the shifter land between the seats in Mk2 ?

Day 2
“The day everything went wrong”

First off, after soaking the pilot bushing in oil and leaving it in the freezer all week, I found it relatively straight forward to hammer it into the crank. I did some measurements to see how things will mate up, and my calculations seem to show that the edge of the splines on the input shaft will JUST touch the edge of the pilot bushing. The distance from the block surface of the bell to the trans surface is 7.5", and the tip of the input shaft is 7" from the front surface of the transmission. The tip of the input shaft that fits the pilot bushing is 1" long. That means that the pilot bushing can be no farther than 1.5" from the block mating surface. I measured that and it seems to be JUST enough to all fit. Phew! But then the problems began. Looking at the crank, the mating surface on the crank measures 5" across (between the red lines).

Here’s the issue. The mating surface on the flywheel is only 4.5" across. This is the area inside of the lip. So the flywheel does not fit…

So… back to square 1 I guess. Are there different cranks and flywheels for different years and engines? I thought they were all interchangeable but obviously not. So it seems my choices are to source a new flywheel, or machine off that lip so the surfaces will mate up.

OK Forum experts, what say you??

What type of 4.2 engine is fitted Theo? the sump looks strange. All XK type engines have the same crank flange detail.
Other than early 120, ( thought i`d better make the qualification).
Is a ring fitted to increase the dta of the flange to suit the drive plate of the auto?
Peter B

I’m on my third engine in this car… long story. But this engine was described as a rebuild S1 XKE motor. It’s a high compression 4.2. The sump was retrofitted because the E sump doesn’t fit the Mk2 crossmember.

I didn’t think anything extra was fitted to the crank, but now that I look at pictures of other cranks this doesn’t seem right. It does actually look like there is some kind of adapter on the back of there. I will have to investigate.

My lightweight E-type flywheel bolted straight on to the back of the XJ6 3.4 Auto engine ,
The flywheel come off a 3.8 MK10 engine ,
So the cranks are the same 2.4 , 3.8 , xj6 3.4 , would Jaguar have made a diffrent crank for the Auto , on the 4.2 ?
I did notice the threads are a little back on the end of your crankshaft , on the 2.4 crank in my picture , the threads start at the face ,
There was a spacer on the 3.4 Auto , look’s to be about as thick as your threads are set back !
Looking at it , it looks factory to me , makes me think the crank is just for a Auto .

A good machine shop could take out the centre of your flywheel , may have to think about the thickness too , as the face on your crank looks thicker !!

Looking close up , the threads are set back quite a bit , maybe a spacer !!

The photo deceived me Theo. In a earlier post I see a XJ6 sump.
The crank flange seems to have a spigot for flex plate location, also the
toe bearing area looks to be recessed. The threaded holes and the two
counterbored holes for the locating dowels look “Jaguar”. although
the counterbored holes are are in the Jaguar flywheel.
A critical measurement is the block to flange face.
Obviously the crank has been modified but how? by just another flange,
or the complete rear of the crank.
Are there proprietry cranks available in the US for auto installation?
Peter B

OK It seems like crisis averted. I called John’s Jaguars and there is indeed a spacer fitted to locate the chevy flexplate to the jag crank. I will try to find time this week to pop the adapter and we should be good to go… stay tuned!

EDIT: There is an adapter and how about that, two screwdrivers popped it off to reveal a standard jag crank flange. OK onwards we go!

Result! Now you just need to redo all the depth measurements, if you have done them already :slight_smile:

Day 3 - Assembly begins.

Having removed the adapter, it was now time to start assembly. First, flywheel, which went on without issue. Hammer in the dowels, lock plate, 10 bolts.

Next up, clutch. With a jag pilot bearing and a ford clutch disc, I needed to make a hybrid clutch tool. I thought I’d be clever and cut off the tips of both tools and attach the jag tip to the ford splined tool. Of course, the plastic is hollow… so I ended up filling the inside of the tool with JB Weld and then putting a long screw through the tip of the jag tool and letting is all set. It did work, altho the tip was slightly too wide to actually fit into the pilot bushing once installed in the crank, so I had to sand it down a bit to fit the pilot bearing. (The clutch tool not fitting gave me minor heart attack so I stuck the transmission on a jack and just made sure the actual input shaft fits the pilot, which is does, PHEW!)


Next up, pressure plate, make sure to align the paint marks so the PP and the flywheel end up in the same orientation as they were balanced.

Next up is prepping the bellhousing. The Medatronics bellhousing has inserts that go in two different ways for the two different orientations of the starter motor. I have a 3.8 flywheel and matching starter - the 3.8 is slightly farther away so flipping the inserts should provide the correct location. Also installed the fork and shaft, and throwout bearing. The little clips that hold the throwout are quite finicky but eventually I got them on.

And now a big handful of long bolts and it’s all buttoned up! There is loads of space under there to put in all the bolts and still moved around. Don’t forget the little triangle brackets that attach the bottom three holds on the bellhousing to the button of the block.

Very pleased with today’s progress. It’s looking like the shifter will come up right at the front edge of the drivers seat which should be perfect, but is going to require a pretty good sized hole, so I’m going to do something thinking before putting in the actual trans. Next up will be clutch system and starter motor. Getting all the ancillaries done before fitting the trans!

1 Like

Day 4 - Fiddly Bits

Clutch lines - Buying a new set of clutch lines comes with two long pipes and one short flex line. I found the hard lines to be 6-8" too long for what I needed. The M/C line I could just use big wide bends to take up the extra length, but the bellhousing line I bent to hug along the bell and ended up having to cut off about 6 inches and flare the end. I also use some steel sheet to make up brackets to brace the joints between the hard lines and the flex line.


Master Cylinder - the lovely thing about Mk2’s (mine at least?) is that there is already a mounting spot for the MC, just remove the blanking plate and it fits right in. Also, there is already a clutch pedal, which was previously bolted to a double wide brake pedal. Remove the brake pedal, and VOILA clutch pedal is already there ready to go! I will have to fab up some kind of foot pads but haven’t thought about that yet.

Clutch Slave - Looks like my pushrod is actually too long which seems odd, as reading the archives seems to be that the push rod is often too short. Hmm, looks like the clutch fork has more than enough room to move backwards without hitting the bell, and I pushed the piston all the way as far as it would go and screwed the eye on as far as it would go… about 1 inch too long. So I will have to cut down the rod to fit.

Finally, the starter. My goodness there is barely enough room to get a gear reduction starter fitting, no idea how a stock jag starter ever fit in here. My question is the 3/8 bolts seem sloppily loose. But a 7/16 bolt doesn’t fit through the holes. I guess the 3/8 bolt is correct and there’s just a bit of play in the fitment? Doesn’t seem right but also searching the archives seems to say 3/8 bolts are correct for starter motors. I guess we will see.

That’s all for this week.

Comments.:
You’ll love the behavior as a manual.

Why does Paul not machine or cast his bell fractionally deeper to avoid the shaft splines ever fouling? The cheaper adapter plate option has no issue but is designed to work with stock 4/speed parts. I prefer the bell idea when going from auto to 5sp but why not make it one size fits all?

I would say the same about the Ford/Camaro retainer:- size the bell so either fits and thread the slave holes to stock coarse thread?

I expect the starter bolt holes are loose because of the moveable inserts. I’d think of weld or metal-filled epoxy once you have everything working. Spray some paint on the pinion and/or ring gear to check for adequate mesh spinning with the plugs out before you finally bolt everything up?

FWIW look up the Mk2 bolt ‘horseshoe’ which I use on any starter that doesn’t have threaded flange holes. The heads of the two bolts are welded to a curved bsr are inserted from back to the front, needing access from the front only to undo.

I hope your thighs are good. There are reasons Jag switched to the diaphragm clutch that is now universal: better grip, lighter pedal and no chance to go out of adjustment like the three-finger coil designs. The adjustment thing is rare but the others are real. I never use coil springs on a 4.2 and it’s the only type I’ve known to be grabby and slip on friend’s E-types.

Keep up the good work.

Day 5 - (attempted) Installation

Today started with installing the starter and exhaust side triangle bracket, both needed a second hand to get in and tight.

Then for the thing I’ve been dreading doing - cutting down the bearing retainer tube. The backstory is that the Medatronics bellhousing doesn’t fit the Ford retainer, it’s made for the slightly smaller Chevy retainer. My transmission shop said there are two Chevy versions, long tube and short tube. Paul said it doesn’t matter which. So I got the long tube.

Thanks to the serendipitous thread from @RustfreeMike I knew I would need to measure the gap between flywheel and the end of the tube to make sure there’s enough clearance for the clutch disc to slide back and spin off the flywheel. Well, turns out the gap was about 1/2" which is about 1" less than the height of the clutch disc. I called Paul and he told me to cut the bearing retainer tube pretty much off - Ford and Chevy clutch throwout bearings ride on the tube, but the jag bearing rides on the pressure plate, so there is no need for the tube.

It turned out to be very easy, 4 bolts, break the sealer, slide the retainer off making sure to keep the input shaft in place, and make sure the race and shims don’t fall out of the retainer. Slice it off, clean everything up, and re-install.


From there I was feeling good about installation.

First try - got the transmission up and into position, but the shifter area was hitting the trans tunnel and couldn’t get high enough to go straight in. So, time for the grinder and sawzall. I’m really pleased with where the shifter is going to be - perfect place for my short throw shifter and a short handle.

Second try - got the transmission in to about 1" from mating with the bell. The splines are in the clutch, but the input isn’t going into the pilot bushing. A considerable amount of wiggling didn’t get it in… and I was very wary of trying too much and letting things hang / bend. I guess my plastic hybrid clutch tool wasn’t precise enough!

So now I’m wondering what the next step is. Make another clutch tool and try to re-align it. Another thought was to get longer bolts so get the trans lined up and try to just “lightly force” it into place then replace the long bolts. I’ve also been thinking I could get the transmission close, and then press the clutch to loosen the disc and hope it gives me enough wiggle to seat the transmission.

Thoughts??

1 Like

I cut the heads off 4 bolts , they was around 4 inches long , screwed them in to the block , used them as guides , once bell housing was home , just took them out and replaced them with the right bolts !

1 Like

My bellhousing is fine, it’s the transmission that isn’t seating. I was thinking about using bolts as guides the same way but the issue is I don’t think the clutch disc is aligned. My thought was to use the guides and then press the clutch to release the disc, seat the trans all the way in, and then release the clutch.