Theo, the toe bush ,as we know, is interference fit, sometimes it can “close up”.
If the spigot machined on the constant pinion shaft / 1st motion shaft, however you term
it, is dead 1/2 inch this might be your prob. I know it`s a pain but take off the bellhousing
and check the shaft / toe bush fit.
Peter B
I checked this before installing the clutch etc. The input shaft fits the pilot bush, it’s an alignment issue.
Theo, mine was a PITA also. Took alot of jiggling around to get it in. Finally I had someone else push a lever between the tunnel and the right side of the trans to pry it left and it popped in. I wouldn’t force it but I think that cutting off 2 bolt heads (one for each side) and threading them into the block as guides would be very helpful. I eventually kind of just layed in 2 bolts in the right place to find the angle. 2 threaded in headless bolts would been better
Don’t know if you saw the other thread… I modded the standard ford clutch tool by attaching a socket that just happened to be the right size within a few thousandths. I just screwed it on the end.
Mine is in now. Drove it the other day and it’s working well.
~Mike
Have you tried putting the gearbox into gear and twisting the output shaft to line the splines on the input shaft to the clutch plate?
Day 6 & 7 - Installation!!
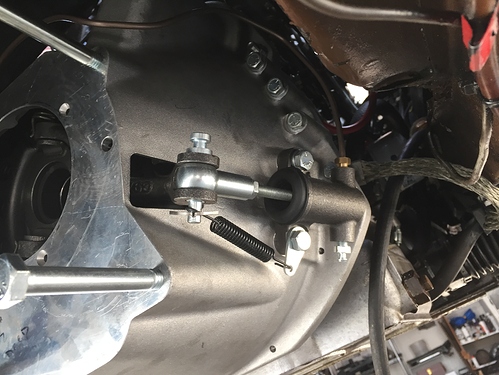
I set out again to install the trans, first, by adjusting the pushrod and priming the clutch system. My thought was, if the trans doesn’t fit, I’ll press the clutch and try to wiggle the input shaft into place.
I also bought a 7/8" rubber expansion plug from pep boys to plug the speedo hole. Just a fiddly bit to take care of.
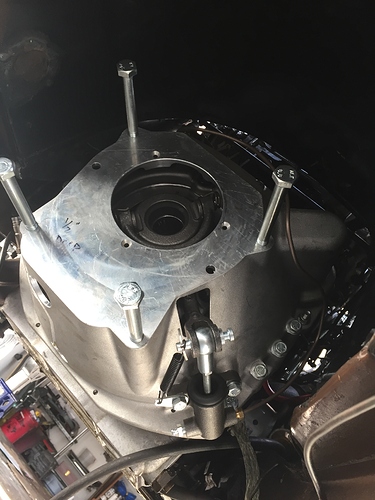
Then I got four long guide bolts which I hoped would make it simpler to slide the trans into place. This photo is before the first attempt, second attempt I cut the heads off the bolts so I could just slide the trans right onto them without any fuss.
The guide bolts made it really easy to fit, but alas, once again the trans didn’t fit. I pushed in the clutch and wiggled away but no dice. OK, the clutch is clearly out of alignment. My plastic tool didn’t work. On to the next day.
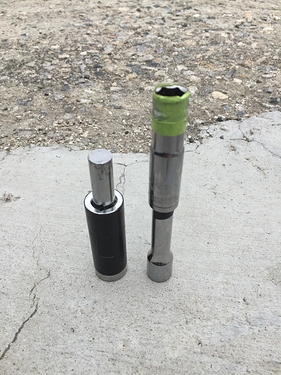
After a night of thinking, and inspired by @RustfreeMike socket tool, I found a solution. A 5/8 deep socket with a single layer of electrical tape around it is a perfect fit for the clutch disc. And a 6" long extension is the perfect fit for the pilot bushing. So I cut the end off the extension, put some tape on the fitting so it was tight in the socket, and then stuck another socket in the other end so I could actually move things around. Had my lovely assistant push in the clutch, while I used this tool to wiggled the disc. Once I got it in the right place, the tool slid in and Voila - perfect disc alignment.
From there… smooth sailing! Transmission slid right along the guide bolts and into place!
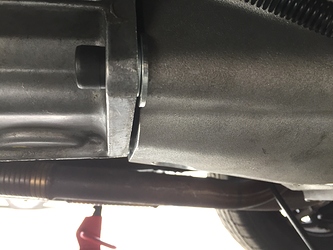
So satisfying. The issue now, sadly, is the transmission doesn’t seat against the bell, it’s bottoming out on the crank. I think the actual splines on the input shaft are contacting the face of the crank. I slipped in thick washers but will need to make up a spacer from 1/8 or 1/4 plate (hopefully aluminum) to make a better mating surface. But that shouldn’t be too bad, I can make it in 2 pieces with the trans in place and slide them in.
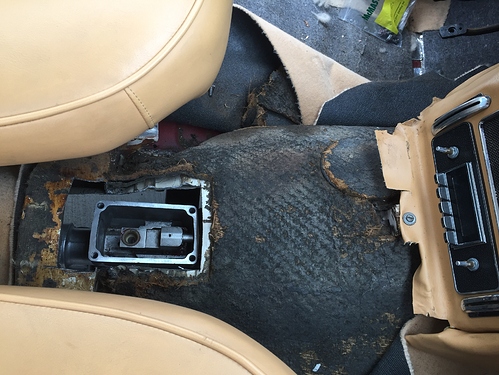
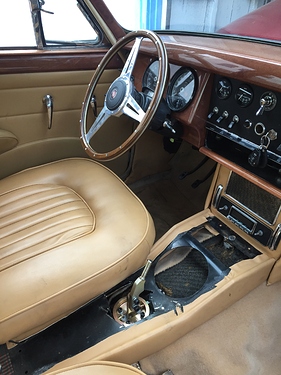
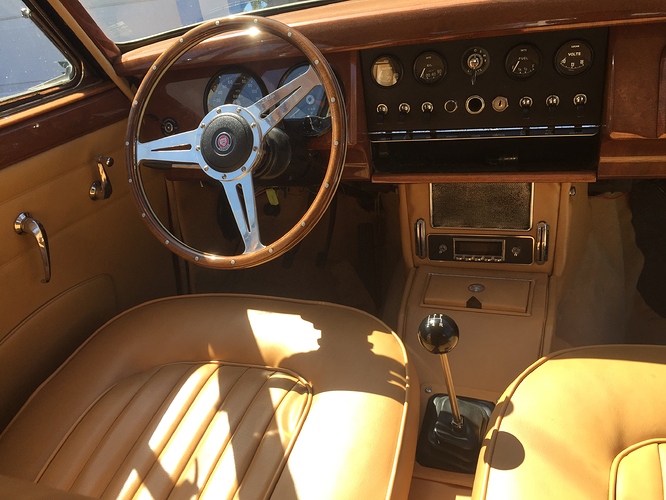
Lastly, a shot of the shifter mount. Fits perfectly in the hole I cut last week, and am really excited about the placement, think a short shifter handle with a forward bend will look really sweet.
I will measure for the driveshaft tomorrow and next week if all goes well might be able to go for a test drive!
Exciting! Are You planning to stay with 2-part A/T driveshaft ?
Is it anywhere near the compatibility (lengthwise) ?
As for fitment - why not shave off some splines + further shorten the pilot ?
This would be easier - no CNC involved …
My thoughts as well, better to get it correct now rather than do an unnecessary mod.
Ditto. Plus a caution to any modifiers who read this to measure and measure again so you can be forewarned (and know who to ask for a partial refund for a mismatched shaft or bell). Either the shaft is too long or the bell too short. Spline and nose protrusion are easy to measure off a straight edge across the bell.
A Jag bell is about 7 1/8” between faces. The tip of the input shaft is about 1/8” to 3/16” below the engine face of the bell. My Elite T5 with no bell but fitted with a Jag adapter plate has a shaft sticking out just under 7” so will be fine with a 7”+ bell, but without the 3/8” adapter plate would foul. If the custom bell is the same depth as a standard Jag bell but needs no adapter I would expect the nose to stick out fractionally beyond the front face and foul the crank drilling.
How would I cut down the splines without removing the input shaft and using some kind of machinery?
I’m open to suggestions but to be honest it’s only 1/8" I will most likely make a spacer from a sheet of aluminum.
If its only the nose of the input shaft that is bottoming out on the crank then it might be possible to shorten it with a grinder, taking care to mask off all important areas in the bell housing, if its the splines then you would have to remove the input shaft and take it to a machine shop and get them to set it up in a cylindrical grinder and remove the offending area
Day 8 - Baby Steps
Was away last weekend at a wedding, so there was ample time to over-think my approach to getting this finished. Quick refresher - the input shaft splines are slightly too long, so they contact the crank shaft, meaning the transmission needs to be distanced back off the bellhousing for the input shaft to spin freely. I got a shim kit from harbor freight and started at 1/8" and kept adding shims and spinning the engine to see if it’ll spin freely in gear / clutch in. Got to 1/4" and still binding.
Stopped to take a lunch break, and read some forums about clutch not disengaging. I rechecked the pushrod and ended up reducing the clearance a bit, since I thought maybe it was too much play and not releasing the clutch disc. Then I bled the slave a few more times. At this point my thought was the disc wasn’t releasing. So I had my lovely assistant push the clutch in and I tried to spin the rear wheel by hand… turns out the disc was stuck. After a few turns it got easier and easier until it spun freely.
So now the engine turns over nicely in gear with the clutch in. Unfortunately, the battery was too dead to actually get the motor running, but everything is now spinning freely. So I think I have too much clearance, next weekend I will reduce the shims until I lose free play, and then use that spec to make a spacer plate.
In the meantime, I started putting the interior back together. I cannot believe how short the throw is on this shifter. Am getting really excited to get this done…
My plan is to cut a hole in there and make up some kind of boot out of left over material I have to match. Looks like you can buy steel rings on summit racing to finish the hole and hold down the material.
Day 9 - Test Drive!
I began by removed small amounts of shim and retesting for free movement, with the gear in first and clutch in. Found at 3/16 the wheels moved a tiny bit but then spun freely, so I feel this should be a good spec. Ordered a sheet of aluminum plate at 3/16 from McMaster, might put 1/64 shims on top of that too just for peace of mind.
From there, I was contemplating how to mount the trans, since the existing crossmember is less than 1" from the mounting point on the T5. The OEM T5 mount is about 3" tall so that won’t fit. The other issue is, for some reason the mounting face on the T5 is maybe 15% tilted up to the driver side. The trans, engine, and car are all level left/right, yet the mount is angled up. Strange. In the absence of a more clever solution, I used to thick steel bar, large bolts, spacers, and rubber rings to more or less hard mount the trans to the crossmember. I raised the trans as much as I could to ensure a good drive angle.
Time to hit the starter - took a while to start, and I think the carbs are gummed up, as it doesn’t idle well and smells gassy at tick over. I think the AED is flooding, and the idle passages are gummy. Will need to take it out and blow it out try to open things up. But in the meantime, took it for a drive around the block and it’s driving really well. The clutch disc and synchros need breaking in, things are a bit stiff, but all is well, no weird noises and shifts up and down perfectly.
I just ordered a boot to finish the interior, and next weekend I’ll make up the spacer plate and take it out for a longer drive to break things in, but we’re in business!
Day 10 - Spacer plate and long drive.
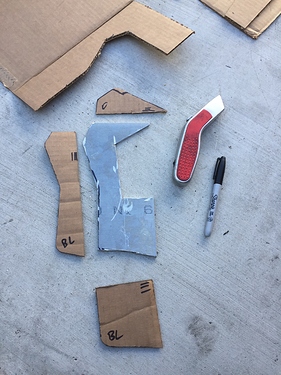
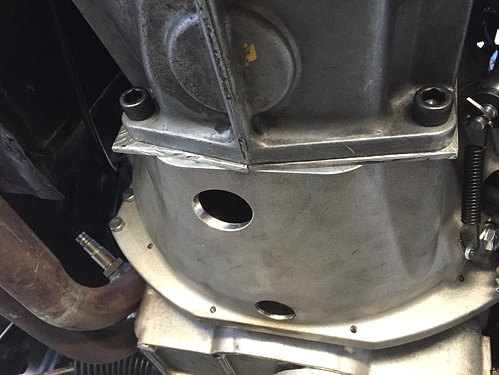
My 3/16 aluminum plate came from McMaster, time to make the spacer and final bolt in. I didn’t want to drop the trans, but I did want the plate to be snug against the bearing retainer, and I wanted to the two halves to be snug against each other. So I made the plate in two halves by pulling the bolts out on one side and using cardboard to create a series of templates, at specific angles to the bearing retainer. Then, used all the partial templates to make one complete half. From there, cut the shape from the aluminum plate and fiddled with it until it fit snugly. One thing for first timers - aluminum plate is much harder to cut with a cutoff wheel than steel! It took forever and was VERY finicky, the grinder was hopping all over the place. Safety first!
Once one was in and bolted tightly, I did the same for the other side, so the halves were tight against the retainer and each other. Voila!
So now I’ve taken the car for two days of long test drives. The clutch and synchros are starting to break in and it shifts very nicely. I love the Pro5.0 shifter, the throw is super short and fast. In terms of driving feel, two things I’ve noticed are how short 1st gear is and how long 5th is. In the 700R4 first was decent off the line and had some legs before it shifted up. And once you hit 40mph you’d shift into overdrive, it was useful in town. The T5, first gear puts you off the line so fast you’re at 3k in a blink and it’s time to shift. Makes for quick launches but a lot of shifting. I will have to get used to that. And 5th is so low that it’s not very useful in town. I think it will be great on the highway, which is why I wanted such a low 5th, but I haven’t taken it up to speed yet, just cruising around. But the feel of the car is much more raw and direct, it’s a lot more work but a lot of fun too!
A couple things remain:
- finishing the boot and console
- making a just-right shifter handle
- I might make a heat shield for the exhaust pipes, theres a bit of heat coming up through the hole in the floor
The hard part is over!
Yup better to use a jig saw rather than a cut off wheel, less heat and easier to control.
Days 11 and more
After a few more drives, the clutch needed adjustment, as the spring pressure plate seemed to settle a bit, but now it’s back to shifting smoothly. So time to finish the interior. The Pro5.0 shifter is too short, so I needed to make a new shift handle, and make some kind of boot.
I got a universal black rubber shift boot and chrome metal bezel made by Hearst, but didn’t like the idea of a chrome ring so I took some left over vinyl from my interior and wrapped the bezel. Then, I got a universal black ball 5 speed shift knob, and bought a 6" bolt that threads into the knob. I had a buddy weld the bolt to a piece of steel stock which I cut and drilled to fit the shifter.
Installed with the black ball knob and vinyl wrapped bezel, I’m loving the way it turned out. It’s the perfect height and perfect location. I think it actually looks factory!
So that’s pretty much it! The transmission is installed and all signs point to perfect operation. All there is left to do is keep tuning the motor!
