I’m trial fitting all door fittings prior to blasting/priming/paint. The trimmed door card is fractionally too big … so I have an overhang of about 3 mm in both dimensions to accommodate. So looking for input … seems like shut face or sill overhang could get me into interference trouble, but encroaching on front top trim area (small bent piece of trim over drain hole), wouldn’t look right either. Maybe just “spread it out”. What do you think guys? Thanks. Roger

There are so many clips holding that “spreading it out” is unlikely to happen. It’s just going to kind of end up where it ends up. I would do a trial fit with all the clips attached, if you haven’t already. If you still have the overhang, then loosen the foldover, put it back on the door and mark it the edge of the board with pencil. Pull back the vinyl enough so that you can go at it with a sanding block or belt sander to pare it back to the pencil line. Then reattach the vinyl.
2 Likes
I had to do as Erica described on my 67 2+2, to get a good fit.
1 Like
Thanks Erica and Ferris. I have not yet installed all the clips, so that’s the first step. That said, and with a sample size of three, clearly the door trim cards can be oversized. So I’ve got some grinding to do!!
Thanks again guys!
Be advised that the fit at the top, where the 2 chrome strips are, and with the door cap, has the least adjustment capability. Be sure the door card is placed correctly to get a good fit there and then evaluate the bottom and rear edges for trimming. I find that once I get the door card where it needs to be, you will be rotating the clips to allow them to meet the holes punched in the door.
1 Like
Very much. I even had to use needle nose to yank the clips as far as possible to one side for a couple of them.
Harvey, Erica, guys, I see your point about the clips, and regarding the more critical fit at the top, I get it but I’m feeling a bit lame … something about can’t put a three piece jigsaw together!
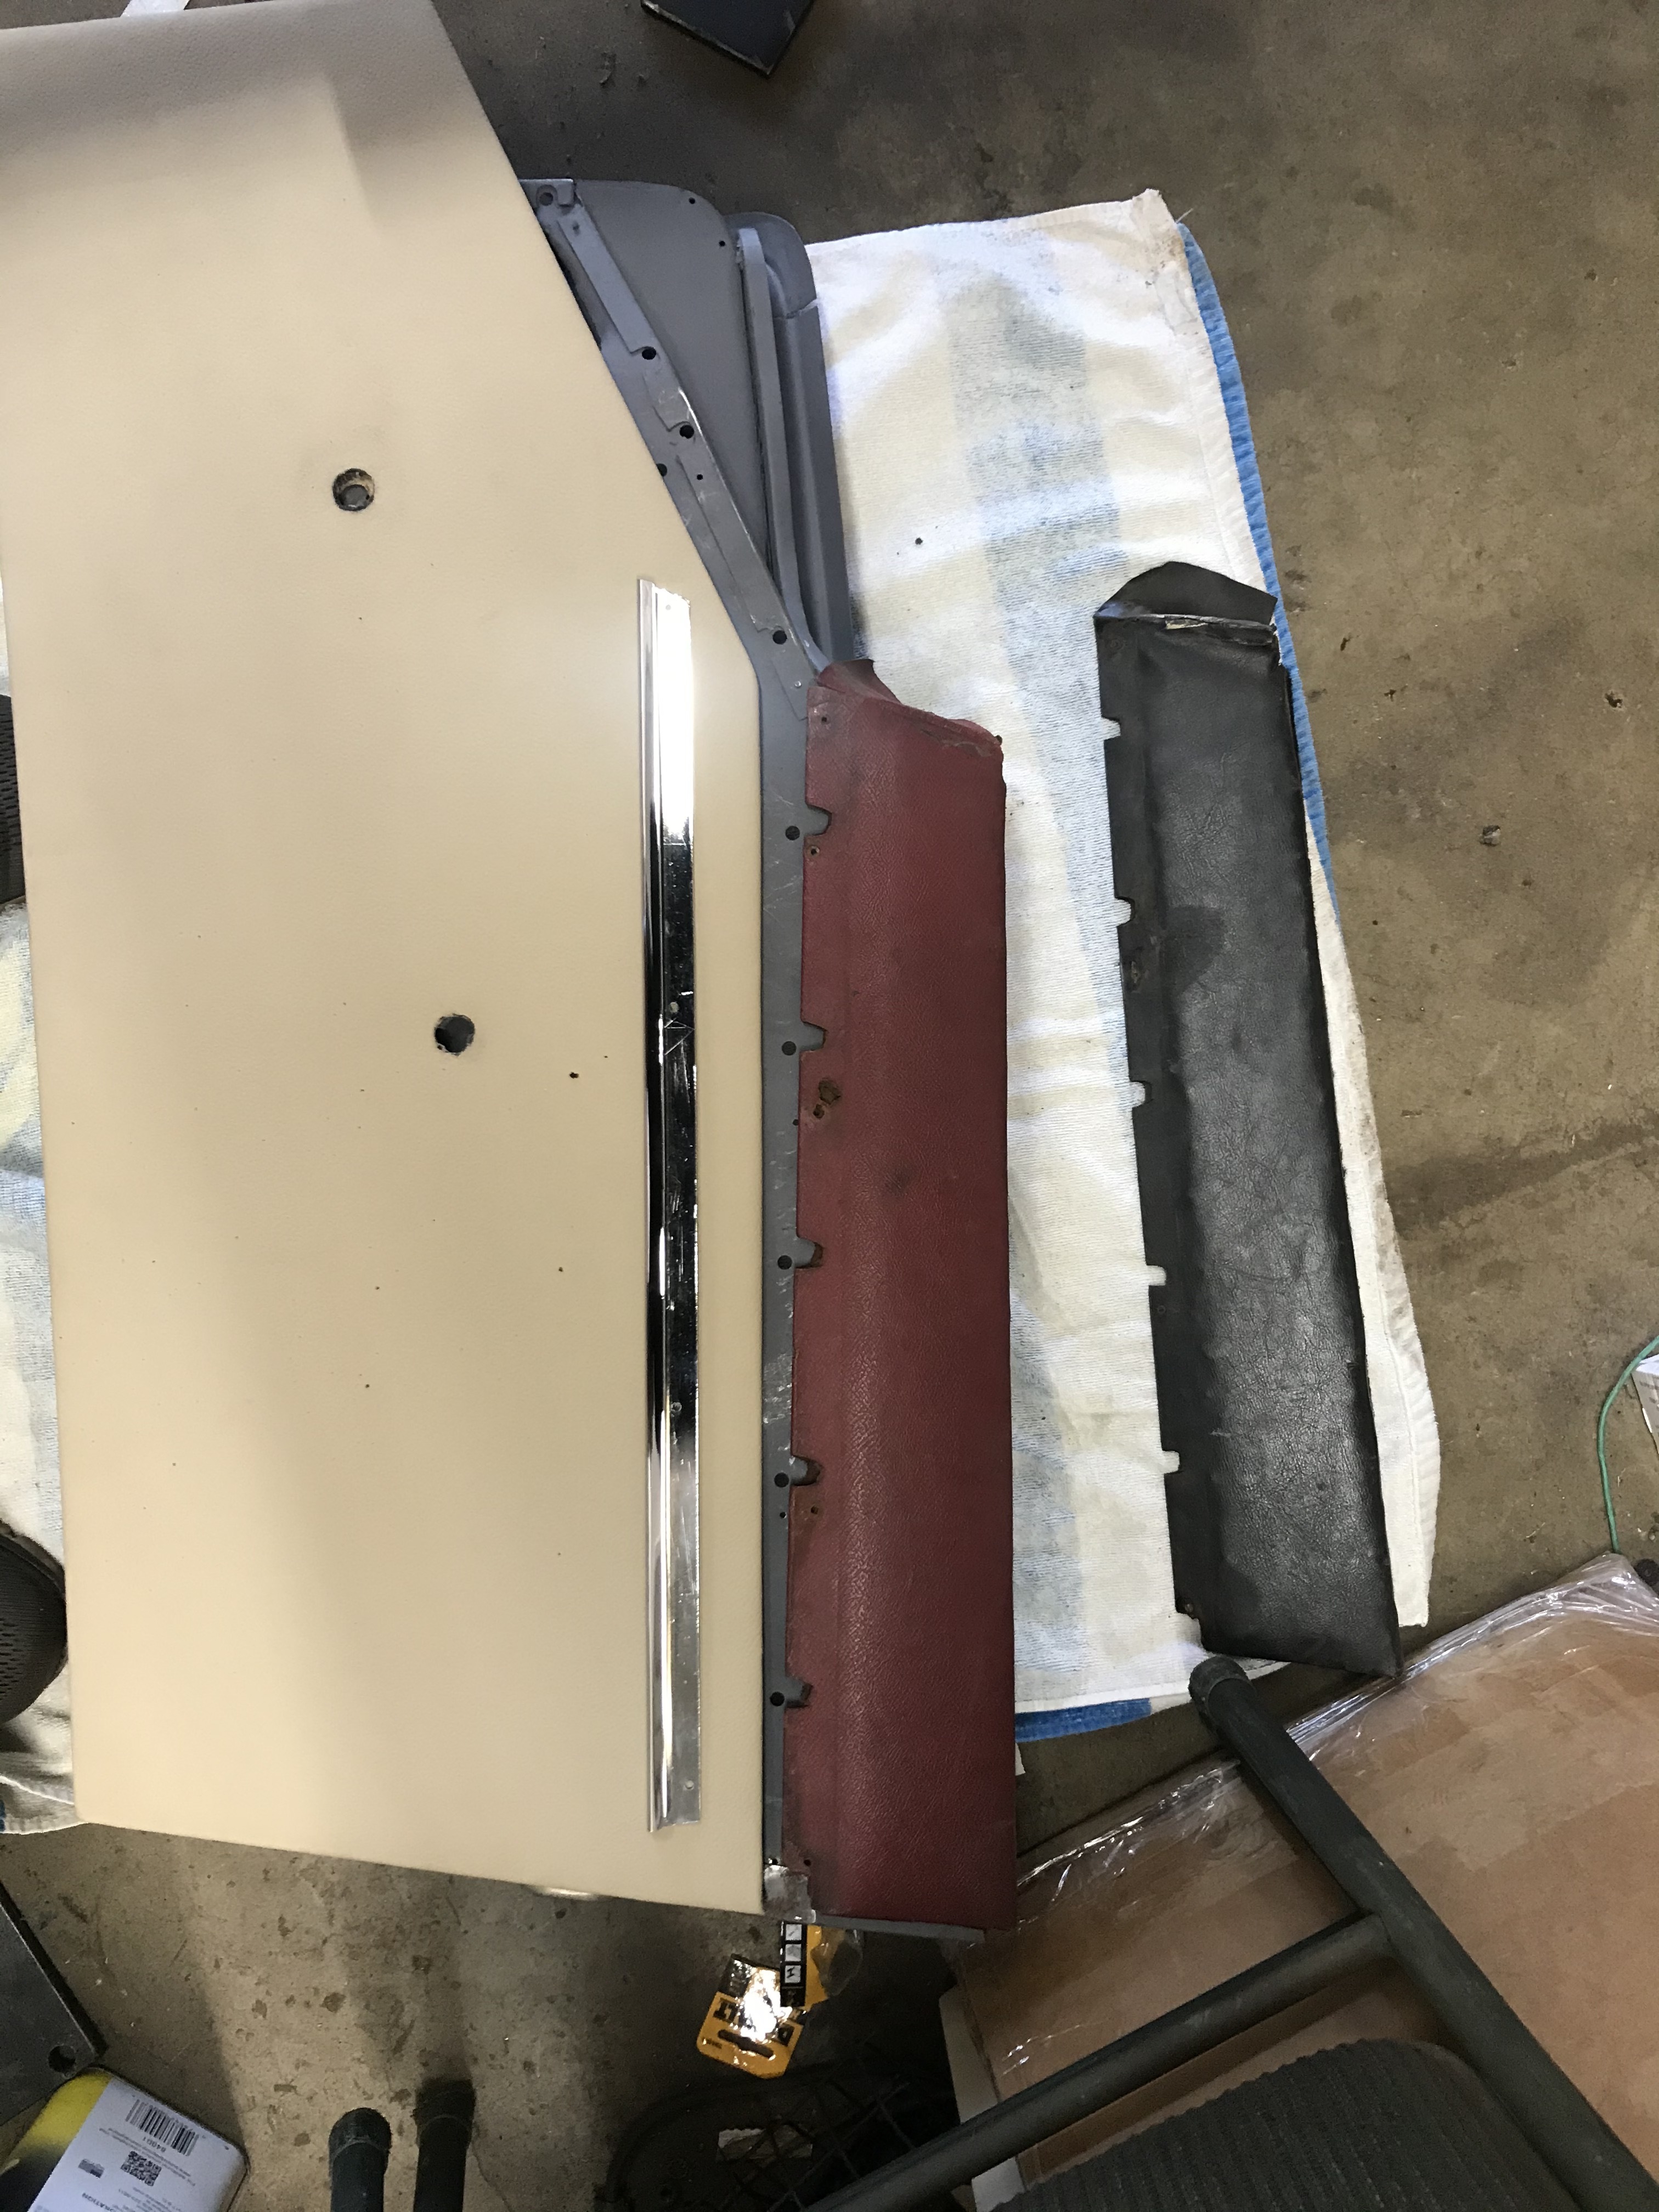
I attach a pic of the pieces I’m struggling with.
The beige card (new) has no holes in this area; the red crash panel has large cut-outs/holes that match holes in the door inner, and the chrome has holes that match the small self tapper holes in the door inner. However, I cannot for the life of me see a way for the J shaped section of the chrome to cover all holes/screws. I’m sure this is going to be a Homer “doh” moment … please put me out of my misery!
Thanks. Roger
You’ve lost me. Are you saying there are no holes on the back side of the card to attach the door card clips? Or are you saying the card doesn’t align with the top of the door when the winder and door handle holes are lined up where they belong?
I think you need a 4 piece jigsaw to cover all the holes.
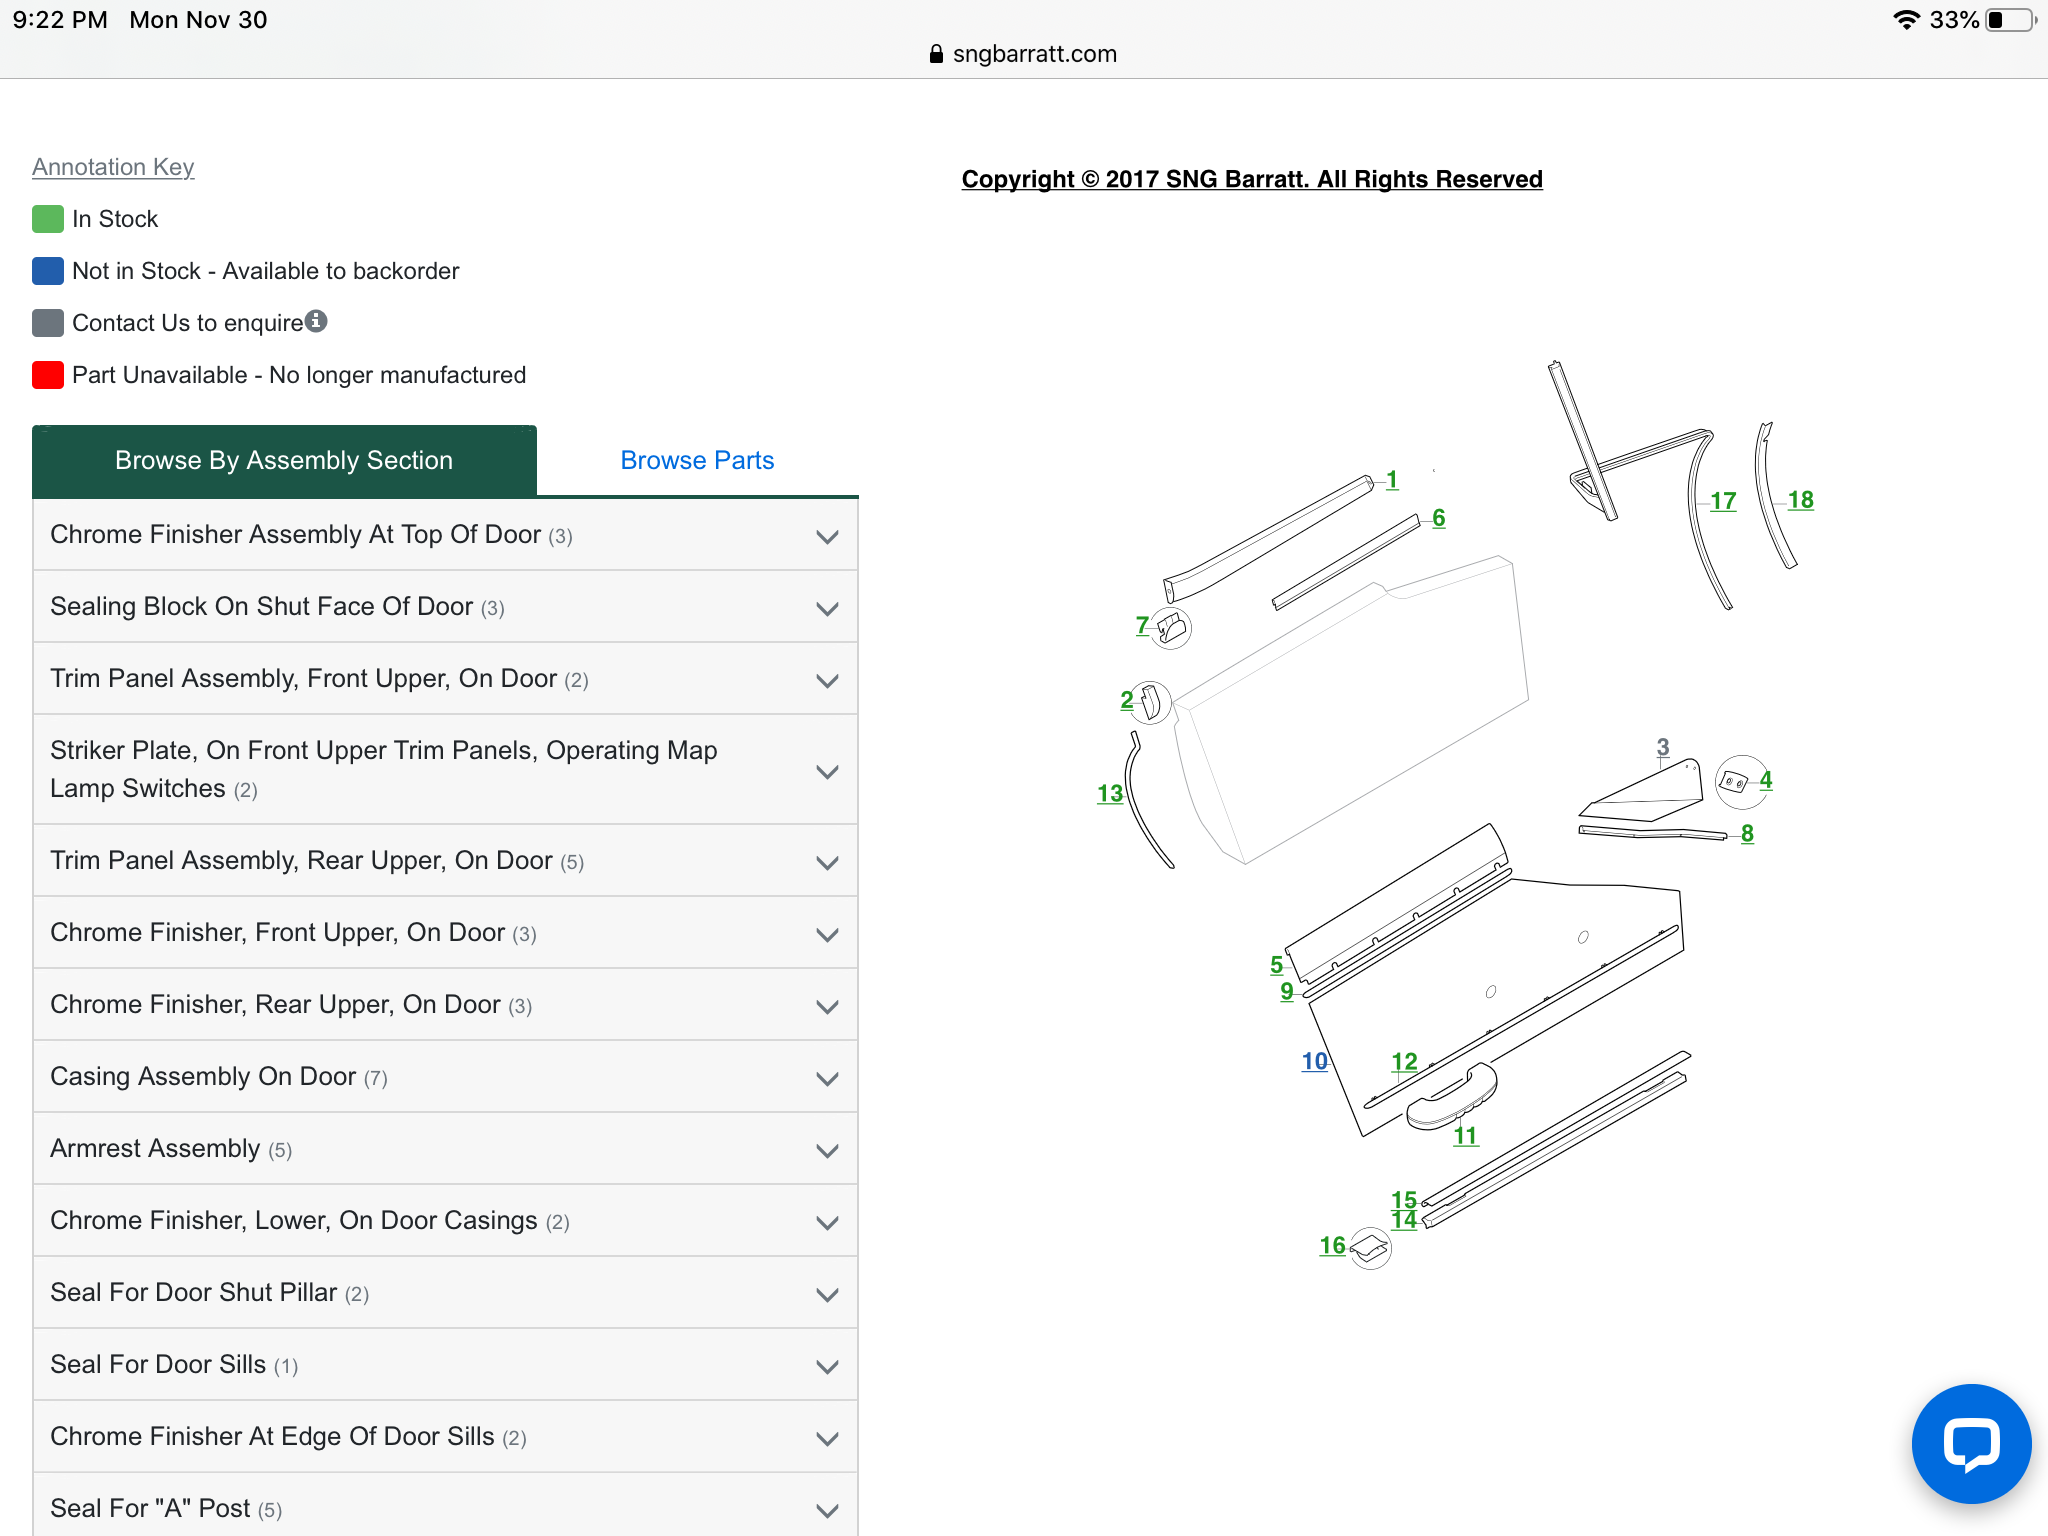
You need piece number 8 as in this picture A# well for a series 1 4.2.
Geoff - I understand that issue - I have that curved piece of chrome and can see where all the screws go. No issues I think.
Erica - I was not clear … the holes in the card are all there as required for the offset clips, and as far as I can tell the alignment issues you refer to are “OK”. My confusion is here … what parts overlap and which go underneath at the junction of the top of the card, the bottom of the crash panel, and the chrome.
The first piece to install is the door cap, then the two chrome pieces. Finally the door card fits into the chrome U channel along the top of the chrome pieces, and use the clips to secure the bottom and sides of the door panel.( In the photo you posted above, the chrome piece is upside down. The U channel should be on top, with the U open on the bottom, so the door card can slide in and be held in place.)
Also the bottom row of clips should go inside round plastic retainers, inserted into the holes in the door, and not the bare steel door.
Finally, what I do to get the clips oriented where they are needed is to put blue masking tape along the area where the clips engage. When you go to install the door card, if the clips don’t go into the appropriate hole, it will leave a white mark on the blue tape where it landed. Now you know how much and where the clip needs to be moved to get it in the hole.
Bob, guys, Well I feel totally exonerated as I did call it a likely “doh” moment going in! Seriously though, big thanks … all clear now. I would add for anyone interested that the new chromes from Martin Robey need some grinding at one end, and a couple of the holes don’t quite line up, but the base metal is heavier than the originals, and the chroming itself is very good. No affiliation etc etc.
It’s pretty self explanatory how and where the crash pad attaches. The chrome less so because the card needs to engage with the chrome channel. When it came time to install my upper chrome bead, I set the card in place on the door then pushed the chrome on. I then marked the chrome’s place on the door with tape, and then removed the card and figured out how to get it attached to the door.