The head is always tough to get off, never seems to want to move square and binds on the studs on the way up. And yes, I applied heat directly on the block around the stud though the hole. As far as getting the plugs out I hit them with a punch in the center to dish them, then moved the punch to one side to rotate them out. To install new ones I found a socket that just fit inside, and tapped them in with a mallet with a little sealer on the edges. Make sure you clean the edges of the holes, if it has been leaking it can be rusty, you want to clean that off so you have a clean surface to seal to.
1 Like
My block was in a similar condition as yours, except I had the engine completely disassembled. The studs do thread into the block just behind the freeze plugs, and the heat was applied to the stud/block interface, although I’m not sure if applying the heat was necessary. The pan was removed, as well as the freeze plugs. I got the idea to try this based on my experience in trying to remove ball joints using a threaded spreader tool. What seemed to work there was to load up the joint with the spreader tool, then smack the end of the ball joint shank with a hammer. That hammer blow seemed to provide a relative movement between the parts that allowed the steady-state load from the tool to overcome friction. I think it’s the same principle that a nylon self locking nut is designed to resist.


2 Likes
After removing the studs, I ran a tap into each threaded hole using a drill bit extension rod. I then installed the new studs wet with blue Loctite to lock in place, and to fill voids so that there was no open volume in the joint for water to occupy.
2 Likes
Great pics !! Couple more questions , how did you get the 4 end studs out and about how long were you using the air hammer on each stud ?
The end studs don’t go into the water jacket, they are short.
The end studs are short, and came out easily using conventional methods. After applying the static unscrewing load, it only took 5 or 10 seconds for the bucket to drop, and then the stud was loose.
1 Like
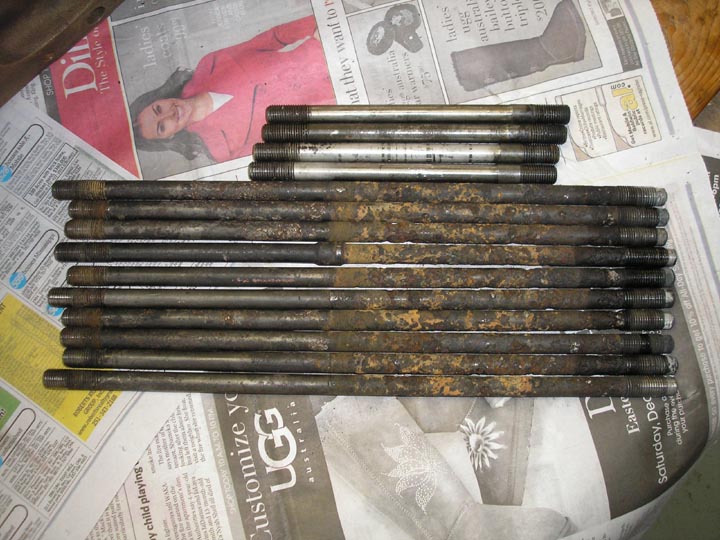
The two rear studs, which have been soaking up PB blaster for quite a while, came out quite easily with a stud remover. The front two were not co-operative so far. Removed all the frost plugs. The exhaust side ports were pretty clean but the intake side were filled pretty solid with crud especially the rear three. Still working on them. … going to have to build a stand or platform of sorts to try your method.
Did you find one side or the other harder to remove?
No, they were all easy. And they are badly corroded in the exposed areas, as you can see from the photo.
Hi John, I would add my ditto to those members advocating engine removal with the head on. The ancillaries are easily removed in situ but the head will be needed to lift the engine up slightly to clear and remove the engine mounts. Also, if you plan to have an engine shop do the work, they will appreciate having access to the engine areas of concern ie head, bores, crank etc without having them disturbed. The bonus being that if any studs show a lack of interest, the shop has more ways to deal with it than yourself and the work will be warranted.


1 Like
Working on getting set up for the removal process


Nice …
Simply magnifico!
Did you do all the tear down and rebuild yourself?
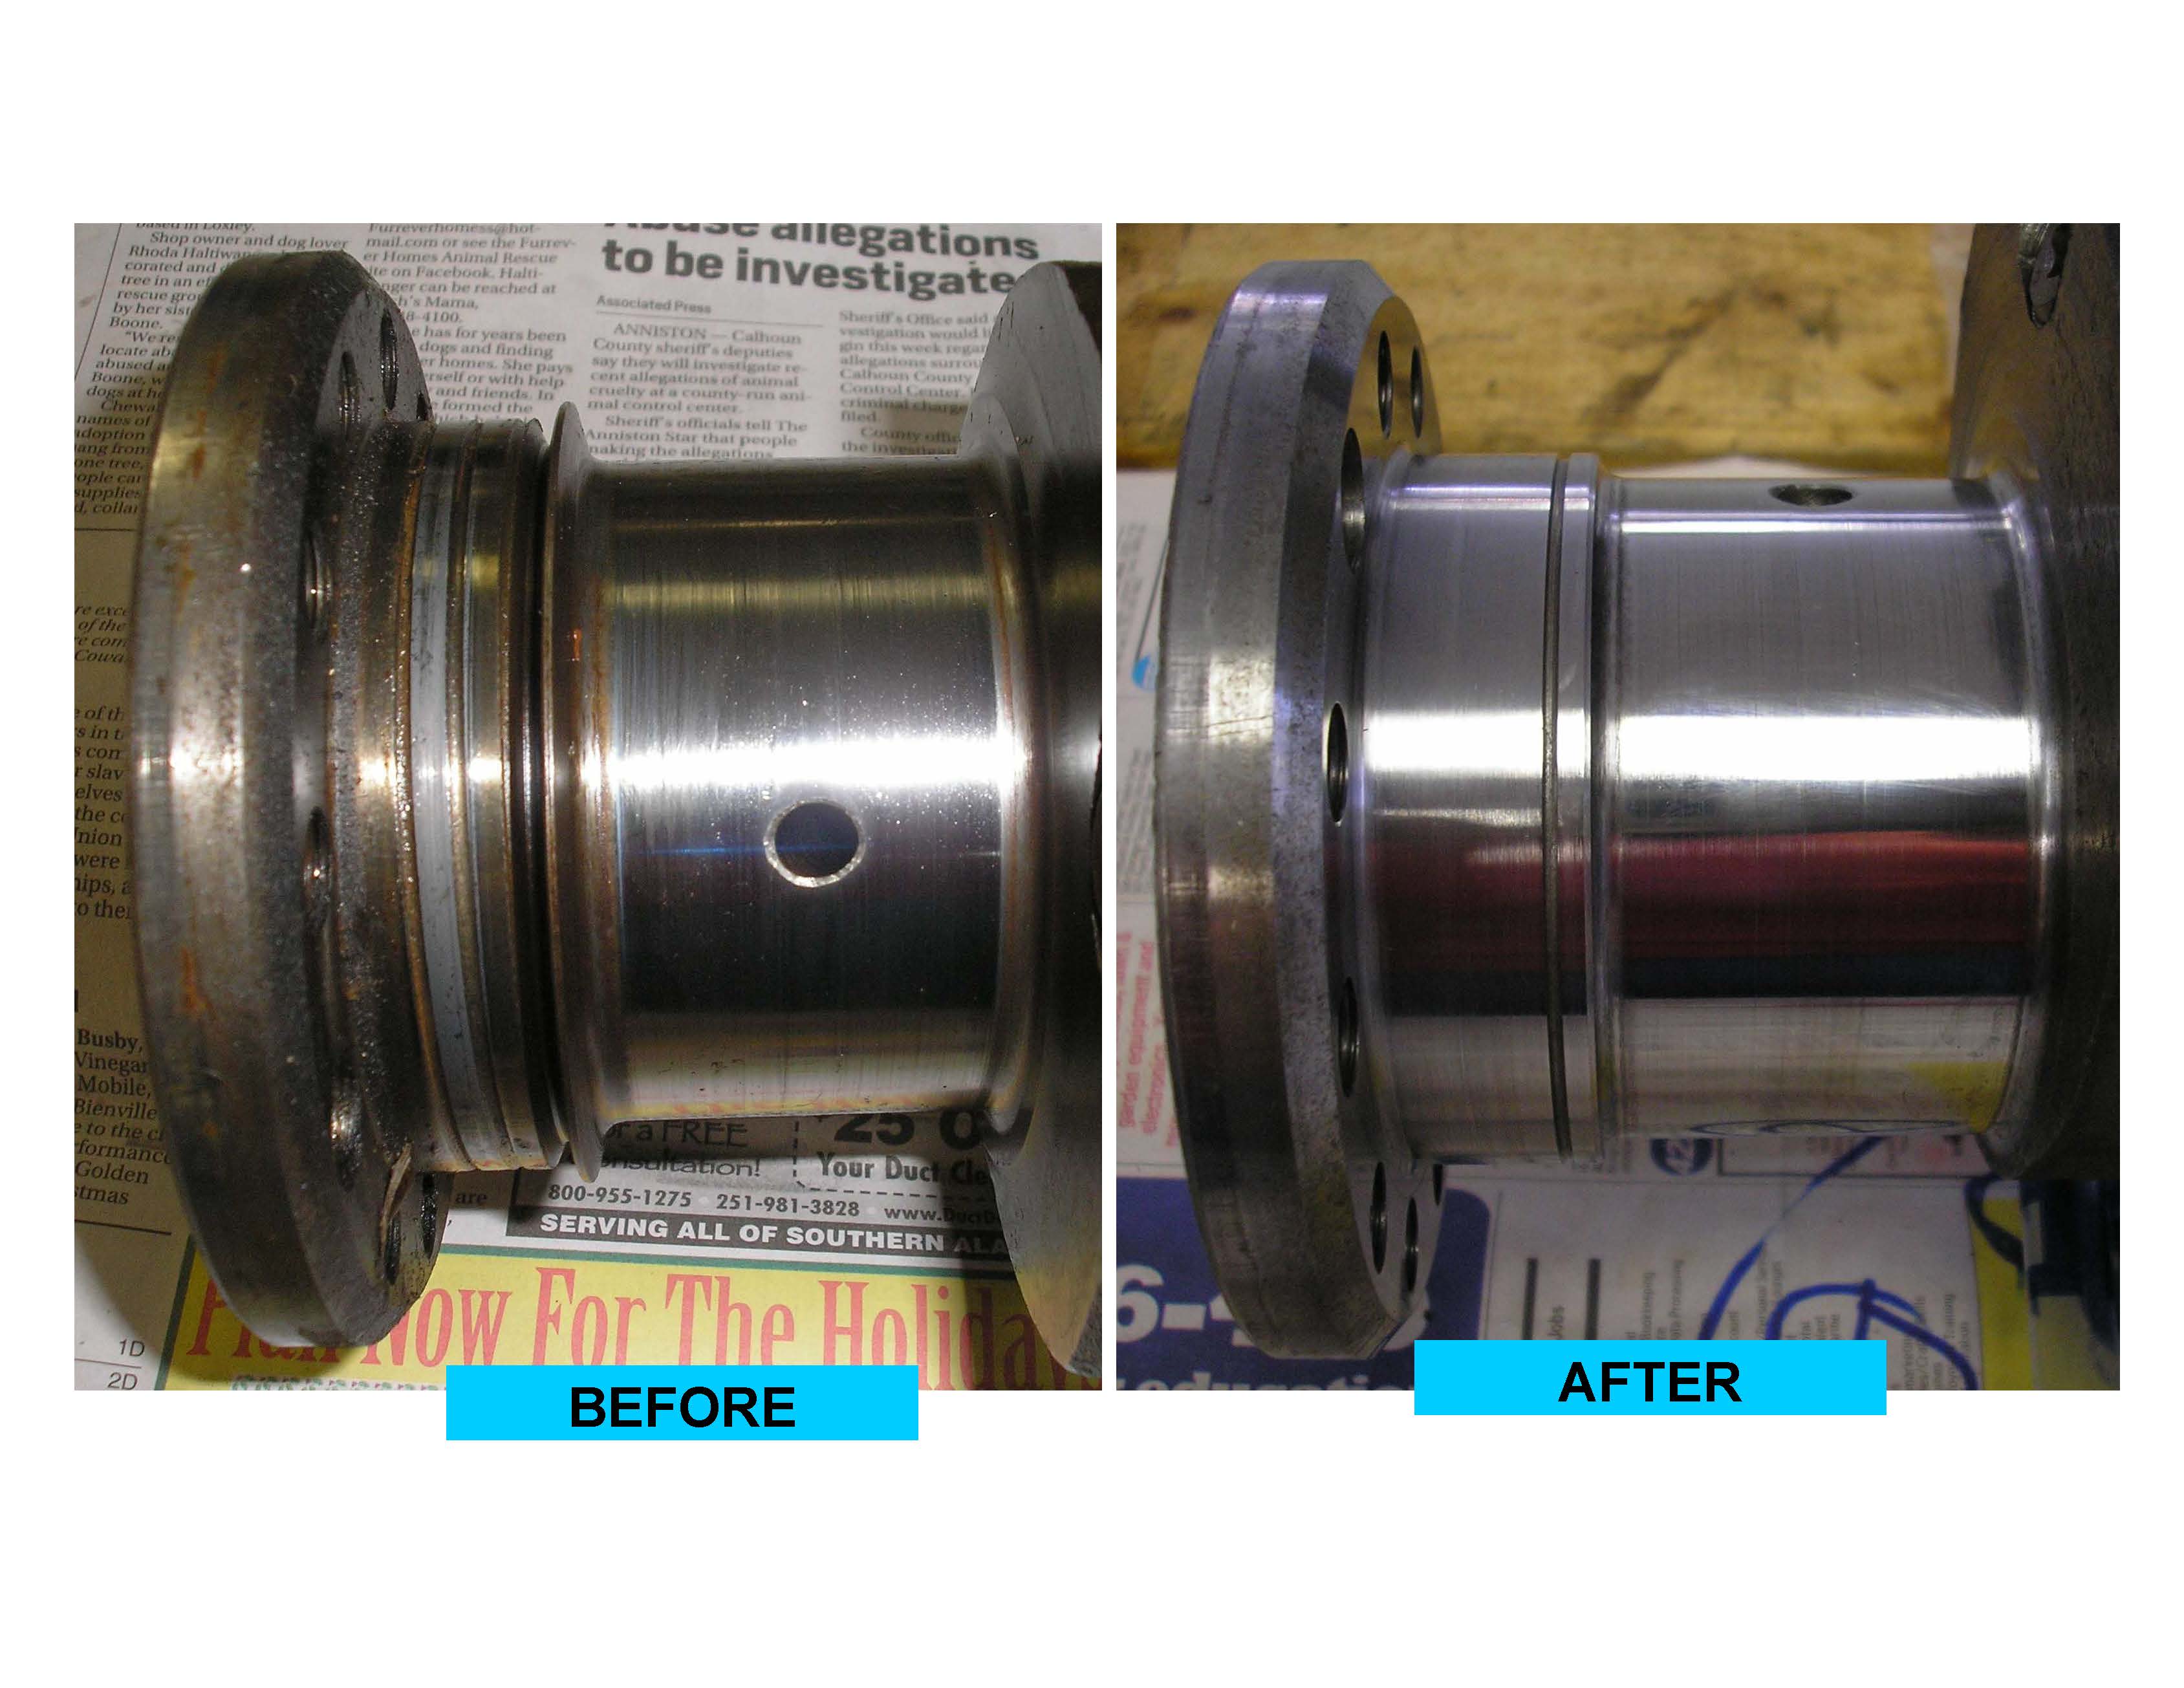
Yes, I did. I also overhauled the manual transmission. If you are going to completely disassemble the engine, you may consider installing a rear crankshaft seal modification that uses a modern lip seal instead of the original packing type seal that will always leak. These are available at SNG Barrett, and probably others also. In order to make this upgrade, you have to have the sealing surface of the crankshaft machined down to the proper diameter to interface with the lip seal
1 Like
Good advice. Haven’t found a machine shop yet in my area.
Hey finally got my head studs out They soaked a long time, and I used the air hammer and a stud remover a bit to try and loosen them up without success. I continued to soak them in pb blaster also . This week it’s been cold and I think the gap between the
block and stud may have actually expanded a bit because I gave the stud remover another go with significant force and they all popped loose. $20 well spent.

3 Likes
John
CONGRATS - that can be a hair-raising procedure.
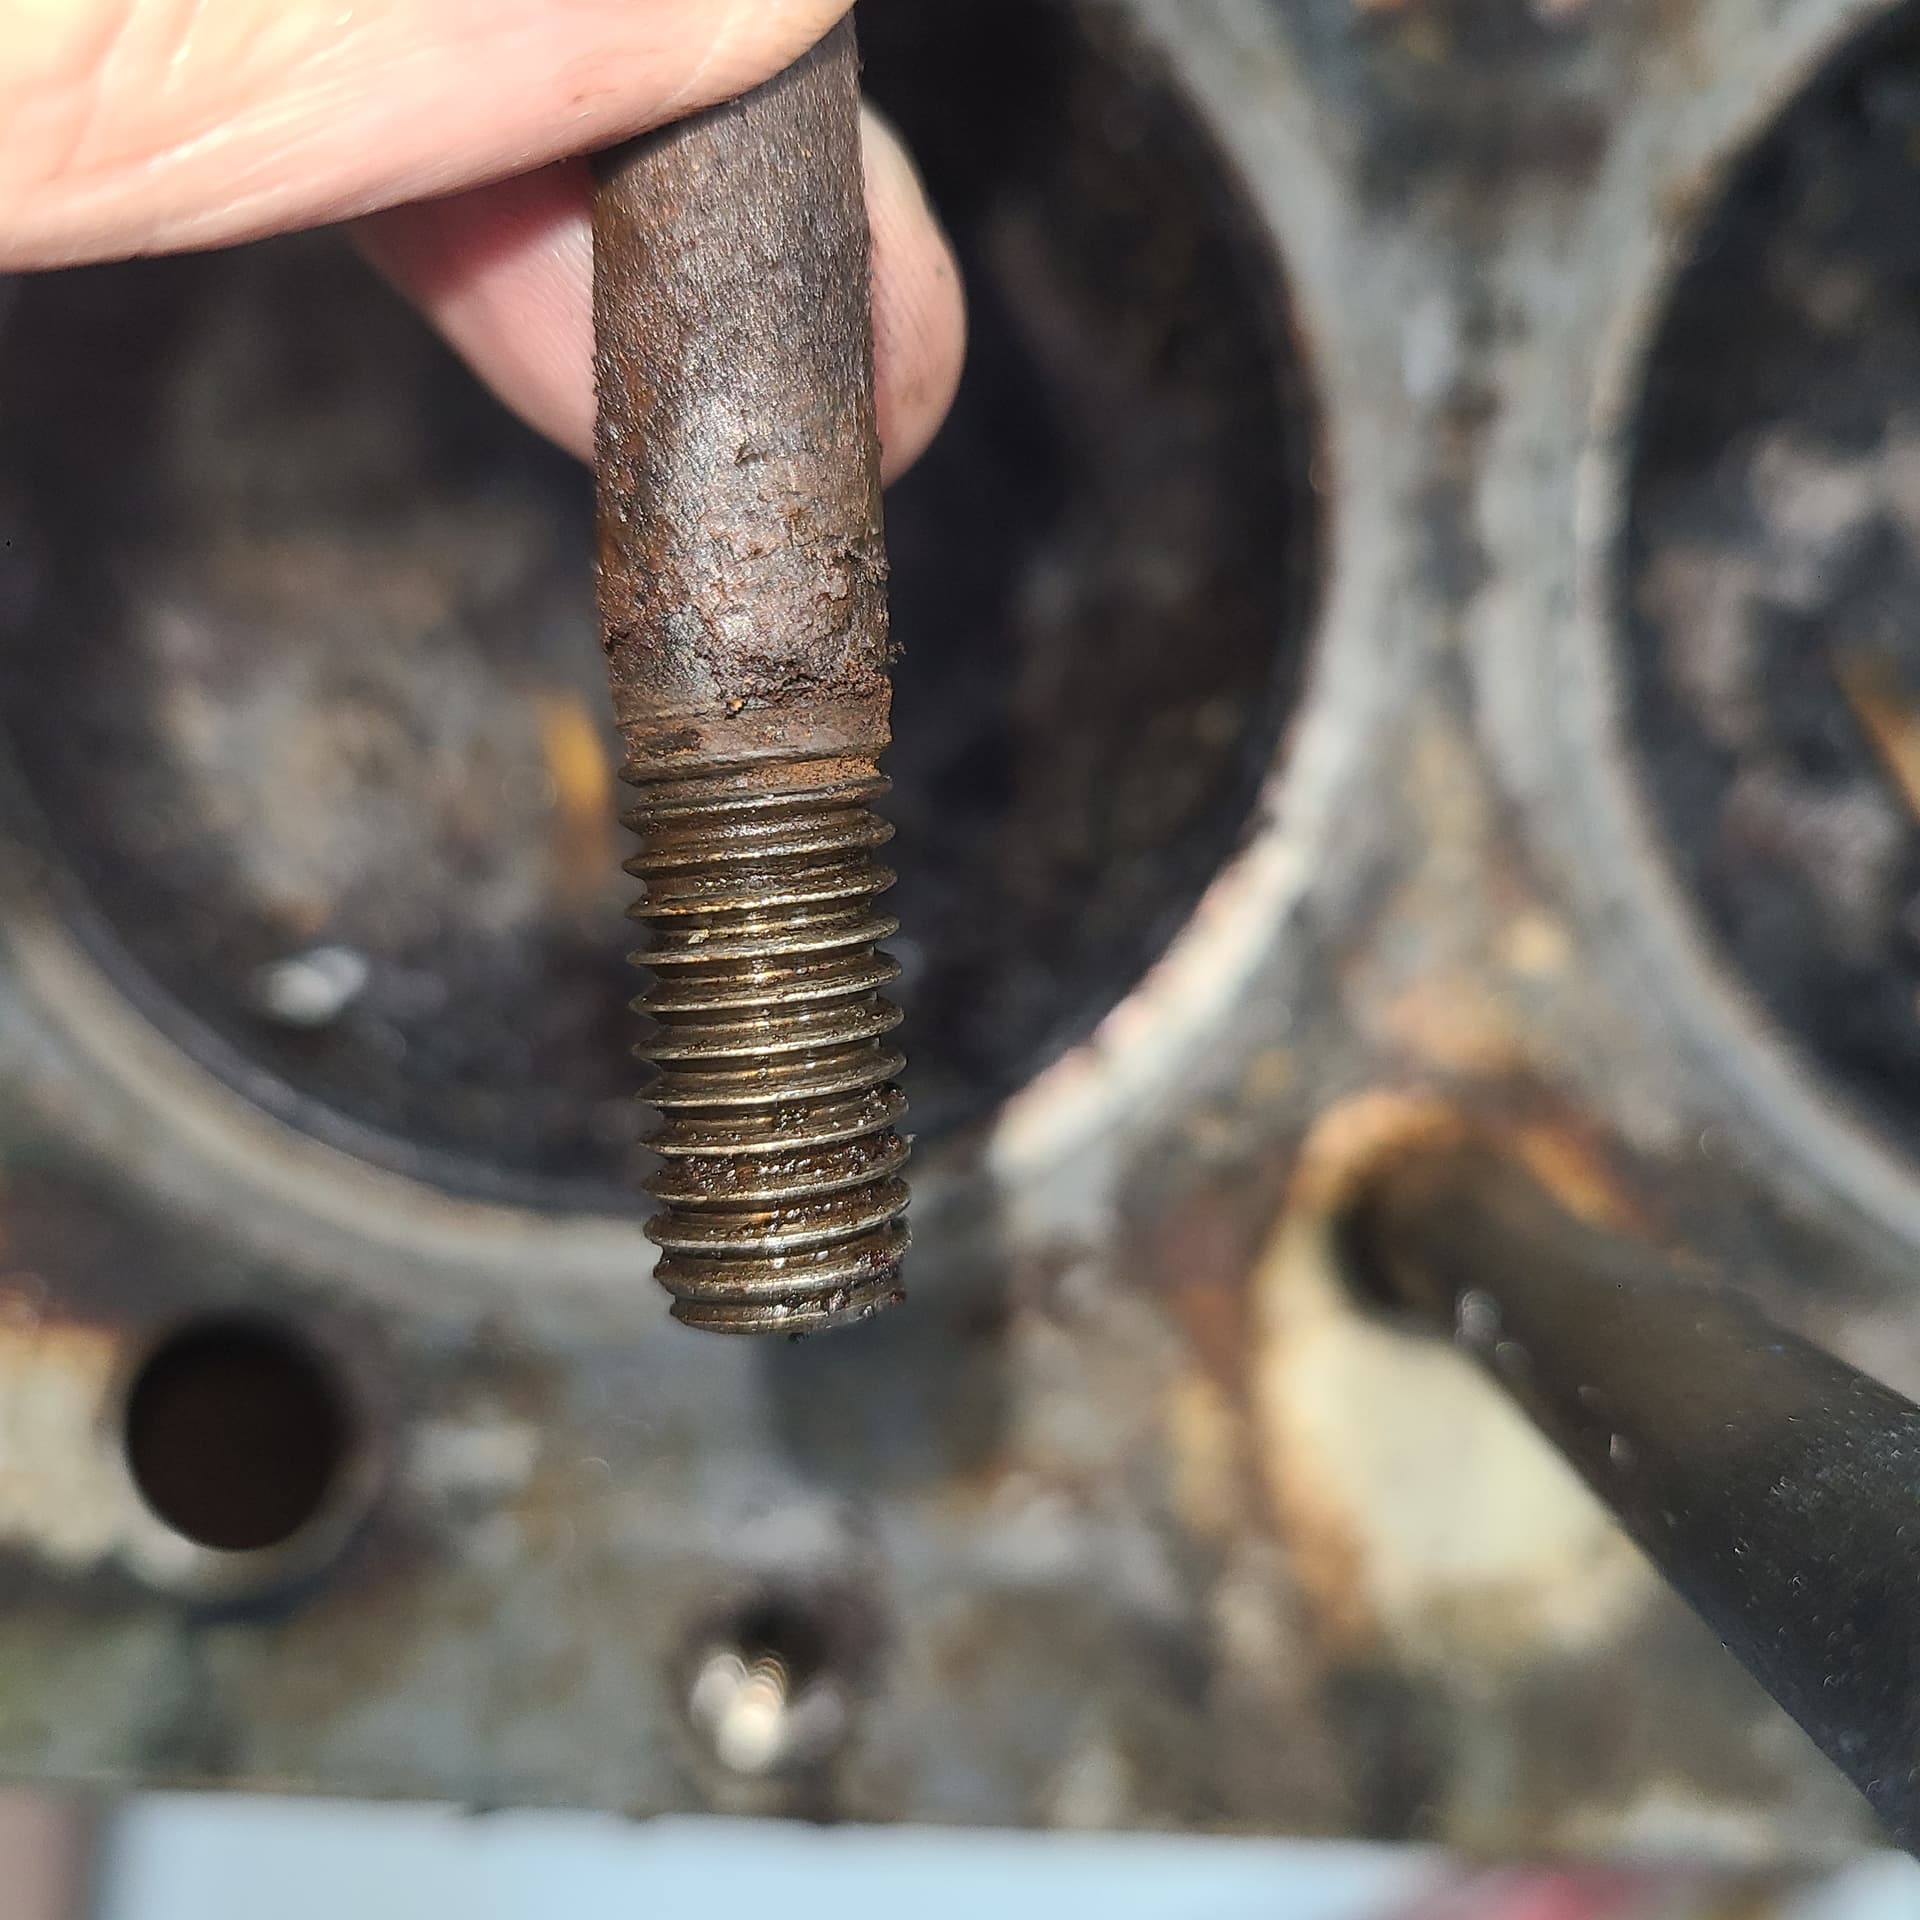
I would recommend a close inspection of the block-end of each stud
I needed to pulled about half a dozen studs from my V12 block.
All seemed to go well – but then I took a closer look.
This is what most of them looked like – good to go
BUT – one didn’t go as well . . .
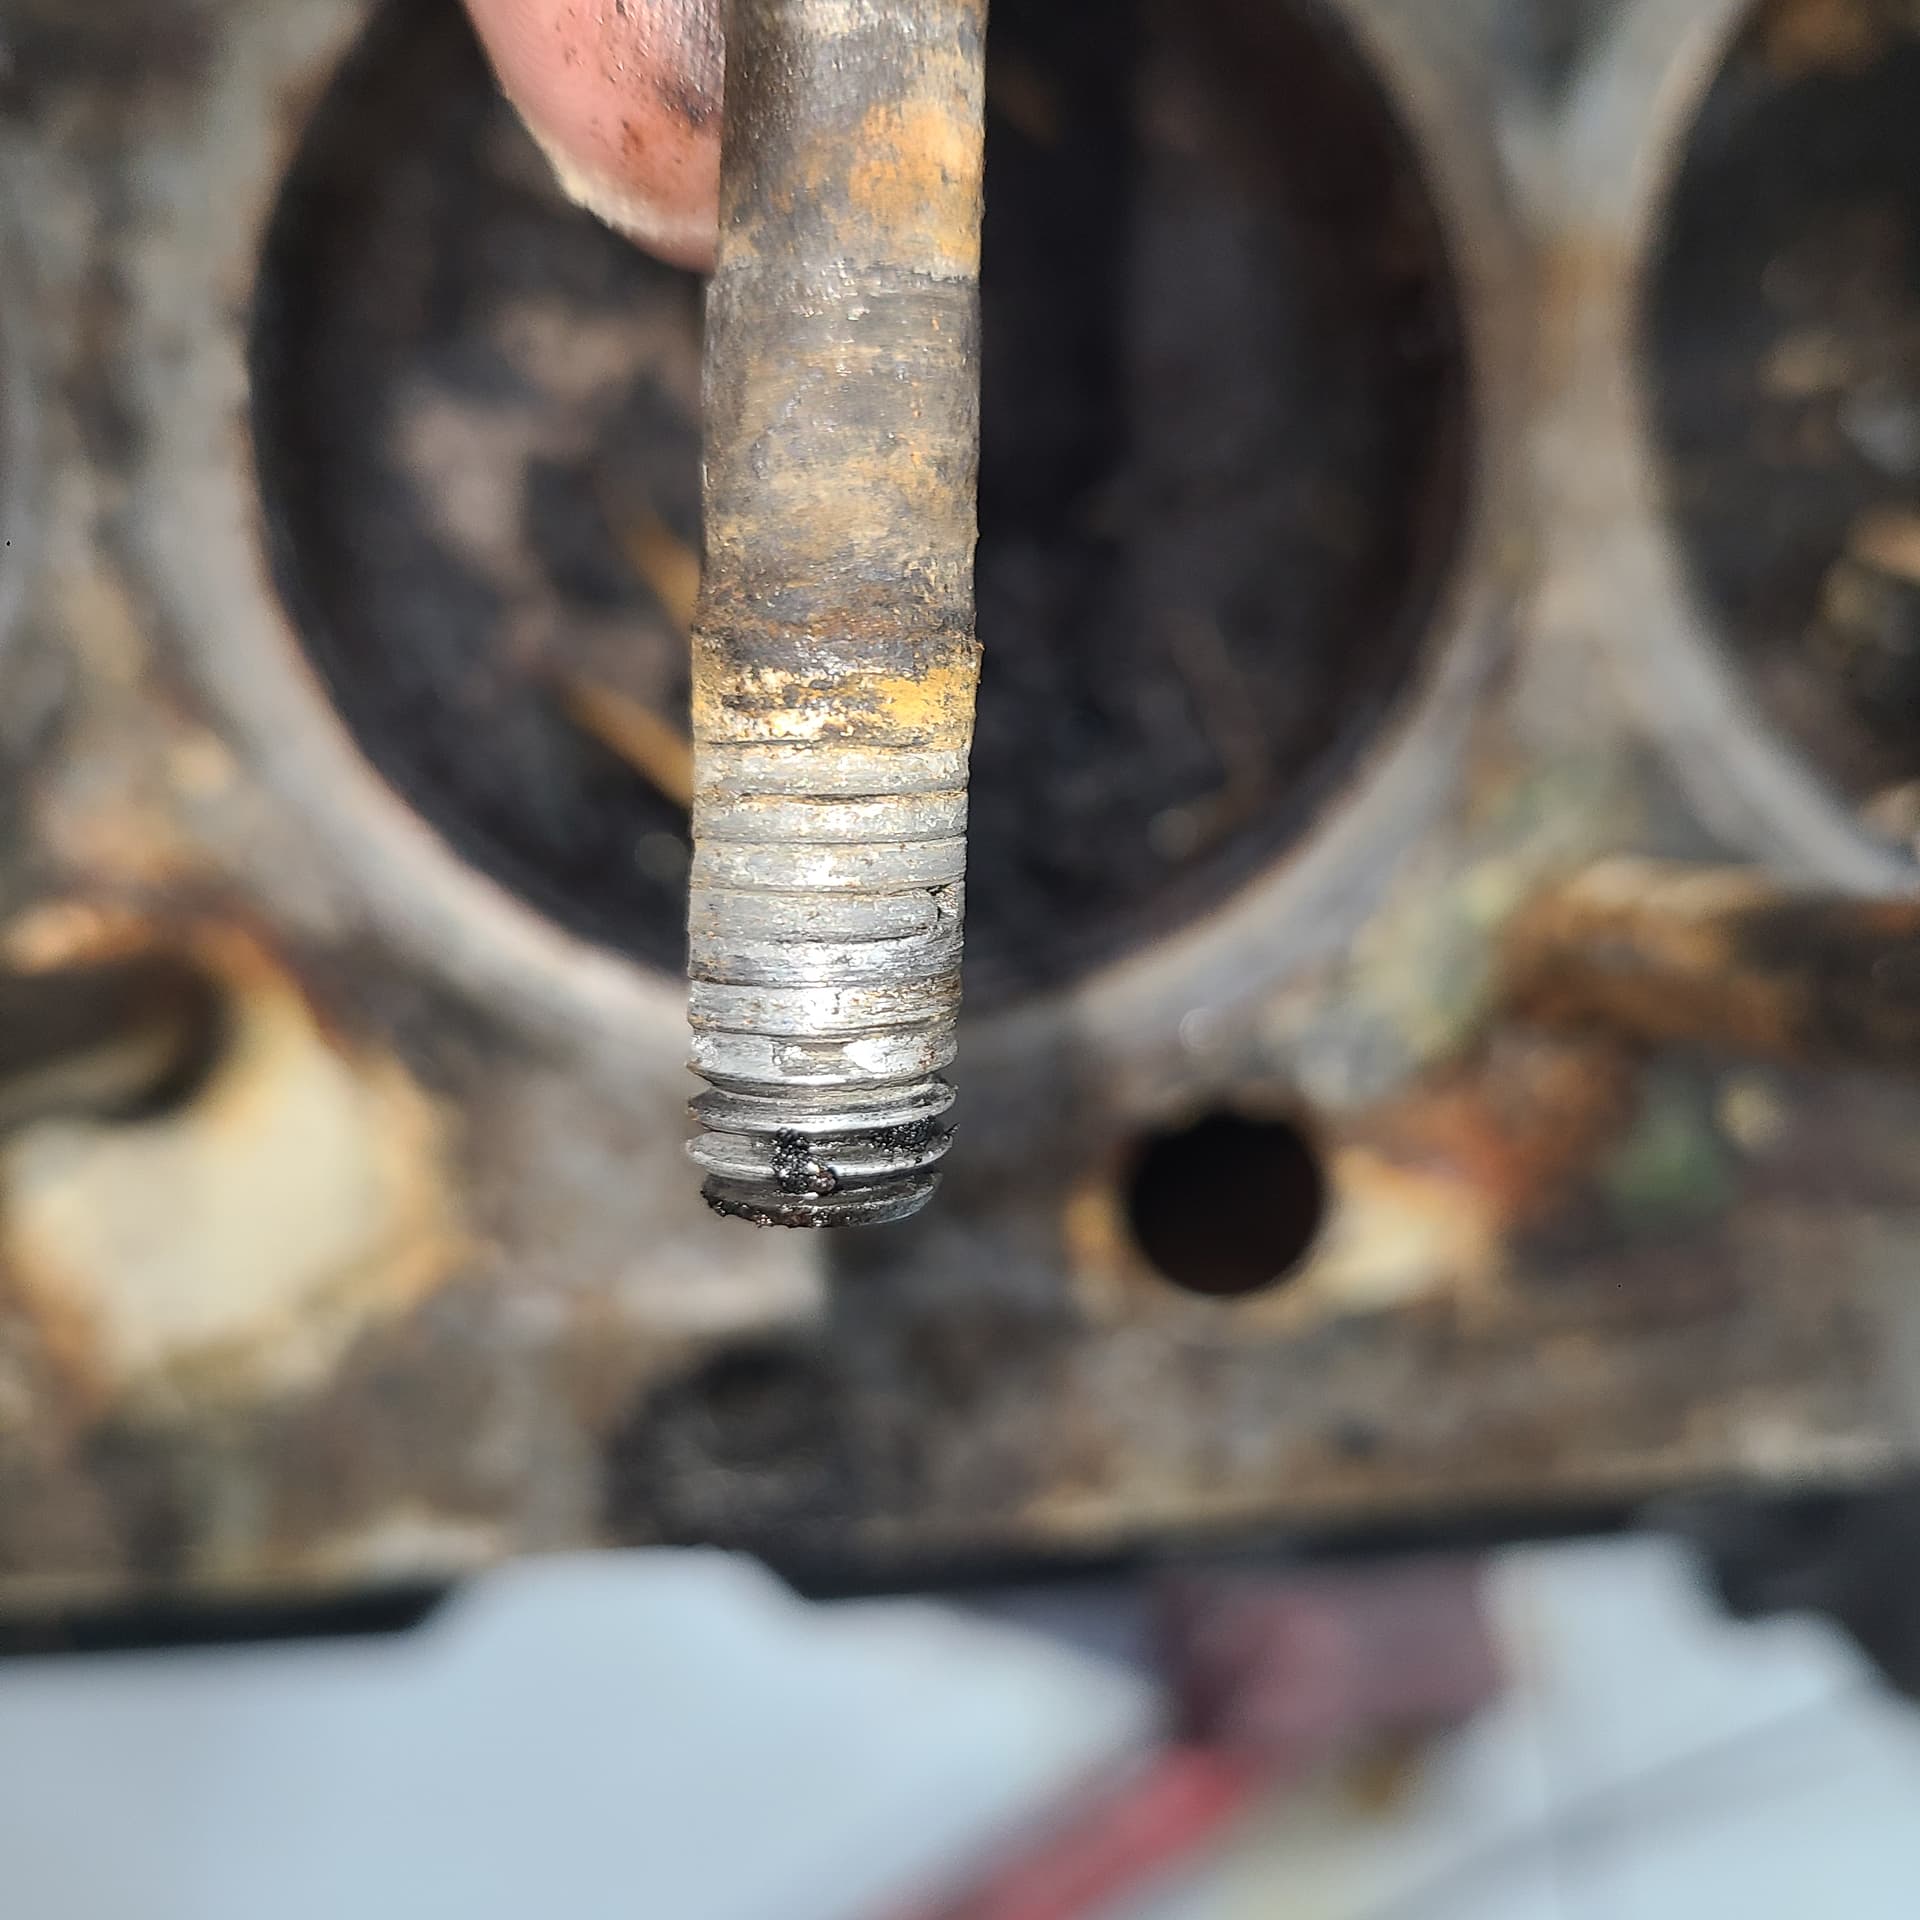
. . . which required a machinist to heli-coil that one stud hole (some have the skill/confidence to do this repair themselves – I do not count myself among their number).

When all was said and done - the repaired hole (center of photo)
2 Likes