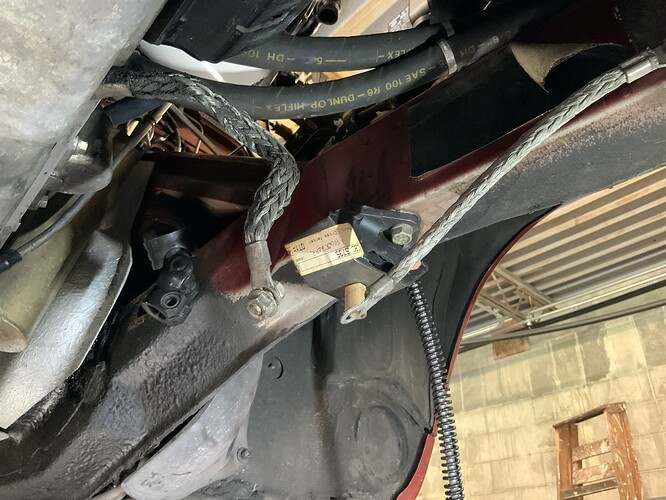
Yes, now that I’m taking new and closer look at it, it’s slight, but definitely cone shaped, you are absolutely correct. This clarification relieves any worries of backside protrusion, makes it a no brainer. Tighten the S—t out of it, (or three grunts as Kirby says) and carry on with life.
Main thing you need to know with a '94 4.0 is DON’T TAKE IT TO NTB FOR THE JOB. I still can’t believe they wanted to double their usual price on me (quote of almost $200.00) b/c supposedly the car needs “special shims” to do the job. ![]()
Yeah thanks, I appreciate the advice.
Somehow, I just don’t see myself handing my keys over to some ham fisted “I always wanted to work on a foreign car” numb nuts at an alignment shop that can’t even pronounce the name of marquee “Jaguar” correctly. It just ain’t gonna happen. If it comes down to it, I’ll use some 2x4’s a few nails and a rope if I have to (which it won’t).
A week or so ago, when I first attempted to dismount and separate the rear springs from the shocks I didn’t think it would be a big deal because I had a spring compressor in my tool box.
After quite a bit of fiddling around trying find the right position, turn it by hand with a ratchet proved useless, so out comes the air gun and what a scary ordeal that turned out to be. I did finally manage to get the spring compressed enough to remove the keepers, and then slowly released the tension. The prongs were stuck to the springs and had to be pried out so that wasn’t good, because even if I went forward with this setup it would’ve gouged the powder coat and made a complete mess of the new springs. Mind you, all the while I kept hearing the voice of the “Lost in space” robot screaming “warning, warning, danger Will Robinson”. I had to find a better solution. I saw Bernard Embden’s solution, as well as a few others, but I couldn’t be bothered with trying to cobble together something that was going to take a lot time of running around and searching for the right stuff, not to mention the trial and error involved. Besides, I know that this exercise is not going to a one time thing and above all else my safety comes first.
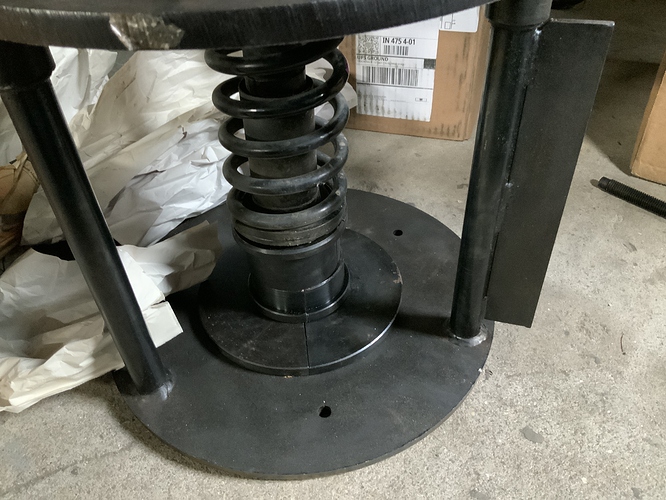
Enter “The Beast” I’m calling it because it is one beast of a thing.
32kg shipped and the top plate alone is about 9kg. This is actually a Dodge dealer item used for the Viper. I had to improvise a little to make it work because the legs on the thing are way to tall for the rear shocks. I had a few items laying around the shop that enabled me to build the base up tall enough to allow the top plate room to press downward. Also the hole in the top plate is way too large for the top of the shock. As luck would have it, my front rotors were already disassembled and provided a darn near perfect hole opening to press against the shock flange and still allow enough space to get the keepers out once compressed.
I am really excited
 about this tool because once I got fiddled around and got it setup properly it made quick and trouble free work of dismounting the old springs and mounting the new springs to the new shocks. Why did I need to dismount the old shocks you ask? The new shocks came with their own keepers but the OEM collar that fits inside the spring still needs to be used in order to hold everything together.
For some reason I’m anticipating that the rear ride height may need to be adjusted with the addition of spacers, if so then removing the springs will at least be tolerable.
Are you sure that the lower “ring” goes in between the coils ?
I’d say it should be 1 turn lower, ie it’s flat face mating the lower colar, and the upper curved face locating the spring
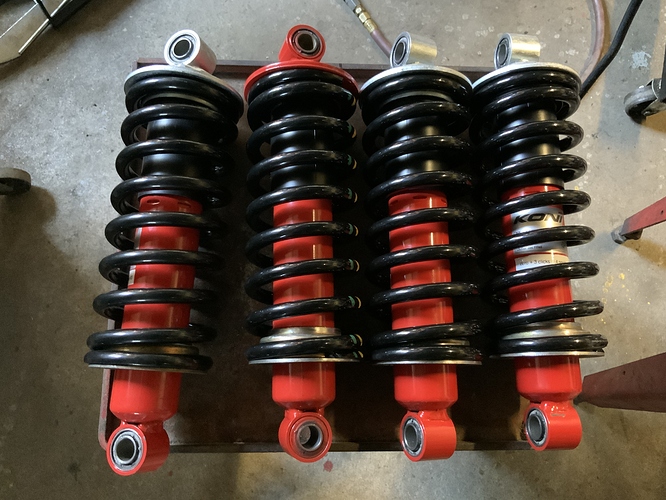
and why one red cap, when the 3 other are silver ?
Oh yeah, the has to go in between the coils because otherwise the coils wouldn’t have anything to press against. The ring was in the same position on the coils that came out of the car.
The setup with the new Koni shock setup is slightly different than with the Boge shocks
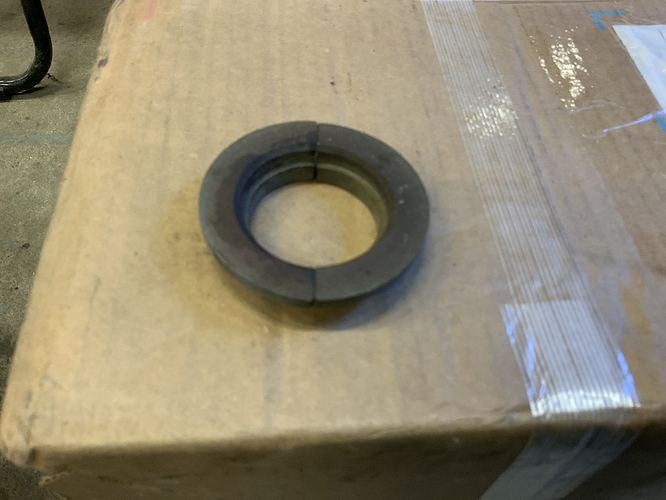
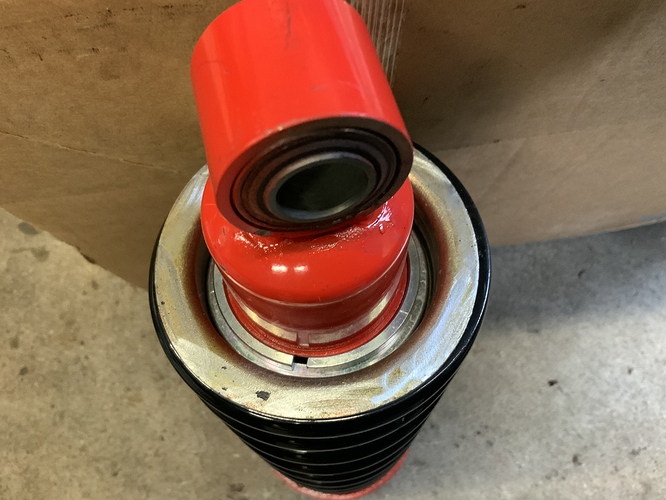
You see that lip off to the right side of the Boge shock, I guess it’s actually called a spring retainer, and it’s way more pronounced than the one the Koni. That spring retainer is where the keeper sit. The ring as you are calling sits on the coil and it is actually what the compressor butts up against in order for compression to take place. Once the spring is compressed far enough past the spring retainer you then drop in the two keepers and then your able to decompress.
The thing that I like about the Koni’s are that the spring retainer is actually a removable circlip that fits into a groove on the shock body. There are actually three grooves which allow for preload adjustments. The bottom groove was the setup out of the box and is for, as they put it “occasional extra load” in my mind that setting should yield the most travel. Next level up would be “often with extra load”, then finally “always heavily laden(e.g. with a gas tank” I’m not sure what they mean by gas tank. As far as I’m concerned the XJS is a two seater car that under normal can be loaded with luggage, groceries, and things like that, your not really hauling anything with a car like this, I left it in position 1. There are 4 rebound damper settings that can only be set with the springs removed. The settings were a bit funky and I hope that I got the setting in the middle of the range. I’m not looking to go too hard for fear of introducing a skiddish rear end.
Anyway back to the spring retainers.
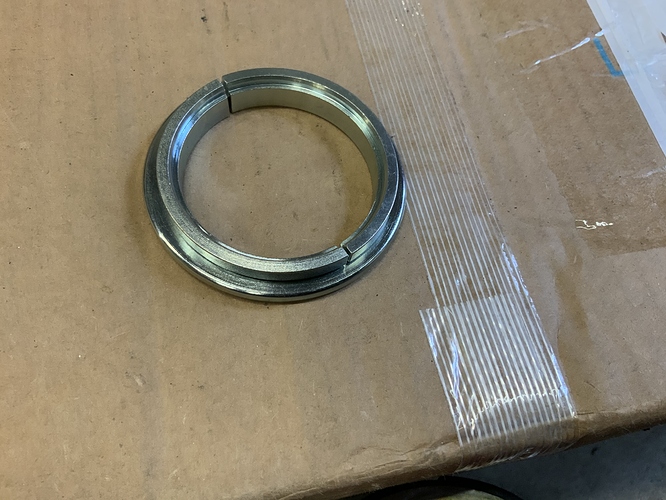
With the Koni’s the OEM cap is the only thing that’s reused and still in the same fashion as the originals but the keepers are much smaller and they add an additional ring that the keepers fit into
So, just to be clear, the original cap sits inside the spring, the spring is compressed, the ring gets dropped in first, then the keepers get dropped in, then decompression slowly takes place making sure that the ring surrounds the keepers and the keepers rest in place on the spring retainer i.e. circlip.
Oh, I forgot to show you the inside of the setup
Do you see the red circlip. Directly underneath are the two keepers, and beneath that is the ring.
Yeah, I didn’t notice the red top until I had finished mounting all the springs. It must be from a different batch is my guess.
thanks for sharing the pictures
It all makes sense : I was confused by the silver cup showing through the lower part of the coil, which is in fact the upper part of the spring platform (which is held in place by the keepers and ring)
Sorry A.J but I have a serious case of CDO (OCD in alphabetical order that is)
Two springs are mounted one way, and the others the other way… ![]()
And why is that one top painted red?
Just spin 'em around, they’ll all look the same.
Haa! Correct…!
How didn’t I think of that?
I just grabbed the springs and mounted them. Believe me, I have a bit of that OCD thing going on as well, but there was nothing I could do about the orientation, so I let it go.
The pictures don’t show the labels that I made displaying the current rebound settings for future reference.
The one red top, I’m guessing, must have come from a different batch ![]()
Brake rotors also work. Any garage should have a collection of used rotors they’ve removed in the past.
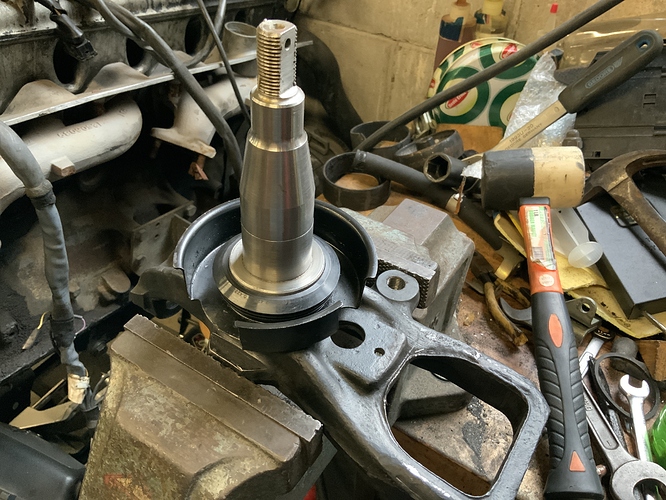
Ok, the axel shaft is mounted and the bearing seal is installed
Loctite 640 will be used to seal the inner bear to the shaft as suggested.
I will then temporarily mount the hub and tighten it down to preload the bearing into place and allow at least 24 hours for curing time.
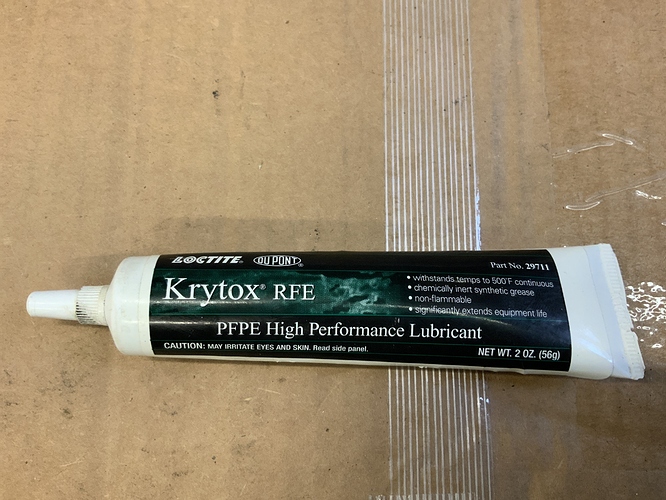
Obviously the bearing will need to be greased prior to mounting. Instead of using traditional bearing grease I’ve elected to use a much higher grade of grease in the Loctite line Krytox RFE - PEPE High Performance Lubricant.
This little 56g tube was super expensive but covers a broad temperature range from -26C - 260C
Just wondering if there might be any opposing thoughts to using a product such as this?
A lot of years ago when I pulled the distributor from the 5.3 and went through it as Kirby instructed in the book, this is the stuff that I used to lubricate it. I never got a chance to reinstall the distributor and it’s been sitting inside a ziplock bag ever since then.
Thoughts!!!
Now that I rethink the process you are correct.
IIRC the seal is pressed beforehand in the hub in front of the inner race and then the whole assembly goes into the stub axel.
You will not be able to remove the hub again to add grease as it will pull the seal out of the hub housing.
I am quit e certain that the seal’s ID is smaller than the inner race’s OD.
Well, I not so sure about that.
First of all when I initially removed the hub and then the inner bearing both of the seals on each one of the inner race’s were difficult to pry off. If taking the seals off wasn’t bad enough I went through holly hell trying to press the seals onto those race’s, carful not to damage the spindle in any way, believe me it was no joke.
So, anything is possible, but I don’t envision any difficulty with removing the hub. At any rate, assembled and preloaded everything last night New York eastern time zone, so it will be some hours before I am able to definitively answer the question about the seal coming off with the hub, because I will need to remove the hub once again to look at my work and I also need to grease up, install, and set the preload on the outer bearing.
By the way, being mindful of your advice about lubing up the bearing, I was able to get the Krytox grease packed nicely into the bearings by hand and avoid ending up with a huge greasy mess everywhere. I am quite satisfied with the inside cleanliness of the hub where all of that unnecessary packed in grease once was.
Yup. Note, however, that the seal arrangement changed with the introduction of ABS brakes. I think a toothed wheel had to get mounted in the vicinity. Supposedly the wheel bearings did not change but the seal did.
It’s been a long time since I did this, so I don’t remember all of the details… But If I was you I would not try to take the hub out again.
I am quite certain that the seal will stay at the stub axle, together with the inner race, and when you put it back you will have no way to verify if and how it’s inserted into the hub.
Good thing you pre-lubed the bearings. It’s all in place now and you know everything is mounted correctly. And there is always the nipple if you want to add more grease.
I can’t really follow that thought because pressing that seal onto the inner race was a real B—-H. I expect that the seal will remain mounted on the inner race not only because it was an interference fit, but also because, if the Loctite 640 did it’s job the way I expect it to, the inner bearing should be stuck to the axel which would prevent the seal from moving. Anyway, I hear what you are saying and I will be mindful of it when I attempt to pull the hub off. I am really, just curious, and want to actually see what affect the Loctite has on the bearing.
This suspension rebuild is obviously taking a lot longer than I would have hoped, but in an attempt to document this rebuild and keep it this thread in tack for anyone else to follow in the future I will continue to update it accordingly until the very end.
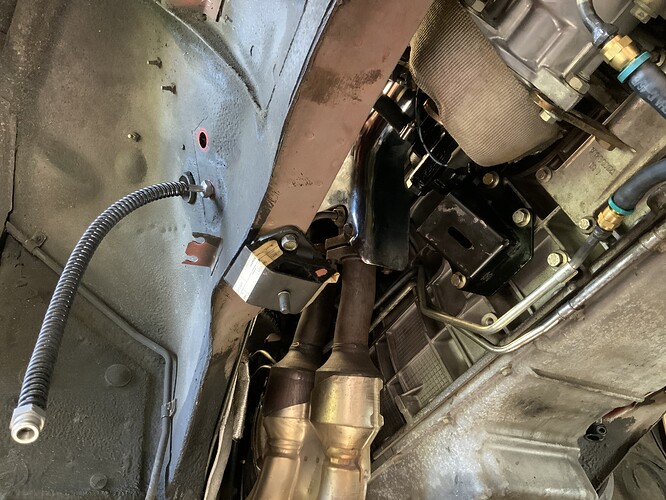
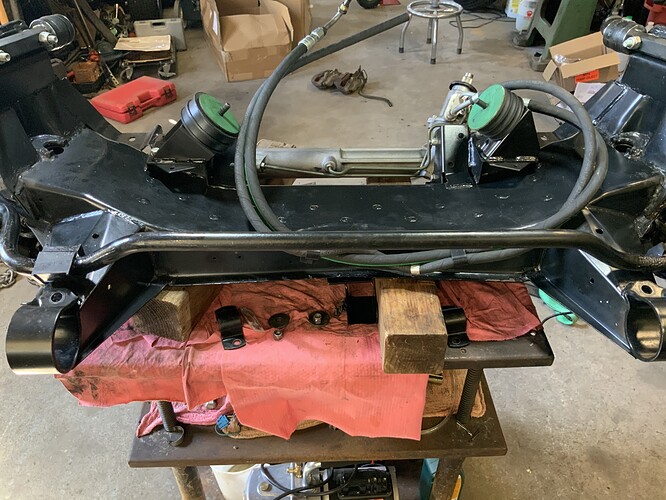
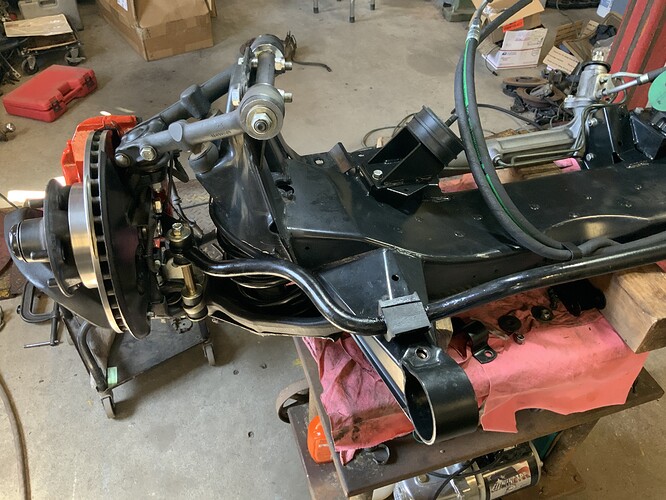
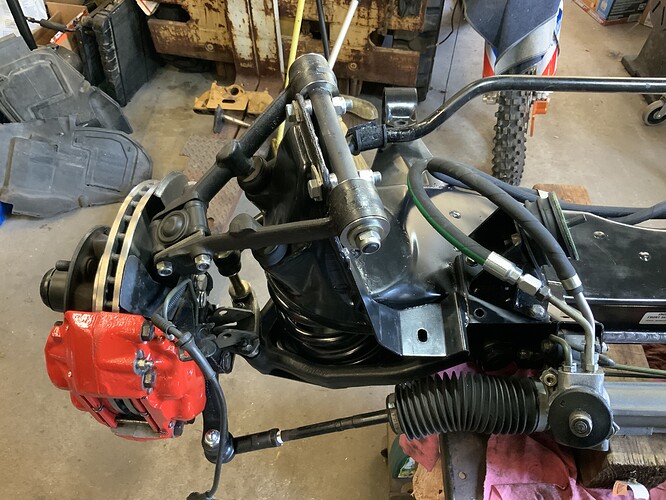
I’ve finally gotten to the point of mounting everything back to the front subframe. Stopping and starting for sometimes months at a time ended up complicating the process that turned most of it into a puzzle to put back together. For various reasons I’ve had to mount and dismount the springs three or four times. The biggest issue that I found with the springs was not the springs themselves, rather with finding the right alignment of the spring pan. I finally wised up and purchased some extra long guide bolts that solved the problem. I desperately wanted to remove the rear subframe to work on it simultaneously, but thought better of it because while having the engine suspended the rear frame also kept the transmission from falling, which would have been a complete disaster, inch by inch one thing at a time.
Every single bushing was renewed with Poly except the actual subframe mounts which were renewed with OEM mounts.
The original front sway bar was replaced with a larger 22mm bar as well.
The upper and lower control arms are left lose and will be torqued once the subframe has the full weight of the car on it. It is beyond me how anyone could accomplish that final torquing without the use of a lift and some sort of stands to rest the full weight of the car on.
Next step get the subframe mounted and onto the rear.


