I need Air Conditioning here in the center of the USA. And I mean cooling, not what I is mentioned in the operators handbook (vents, heater) There are a few solutions available. After thorough research, I have determined my plan.
The A/C compressor is a direct bolt Sanden 7H15 with 6 groove pulley. Rear GM style connections.
I bought pulleys for the crank, water pump, and alternator from Rob Beere.
The alternator is a Dynamator which replaces the generator. It has a mount for the existing power steering pump.
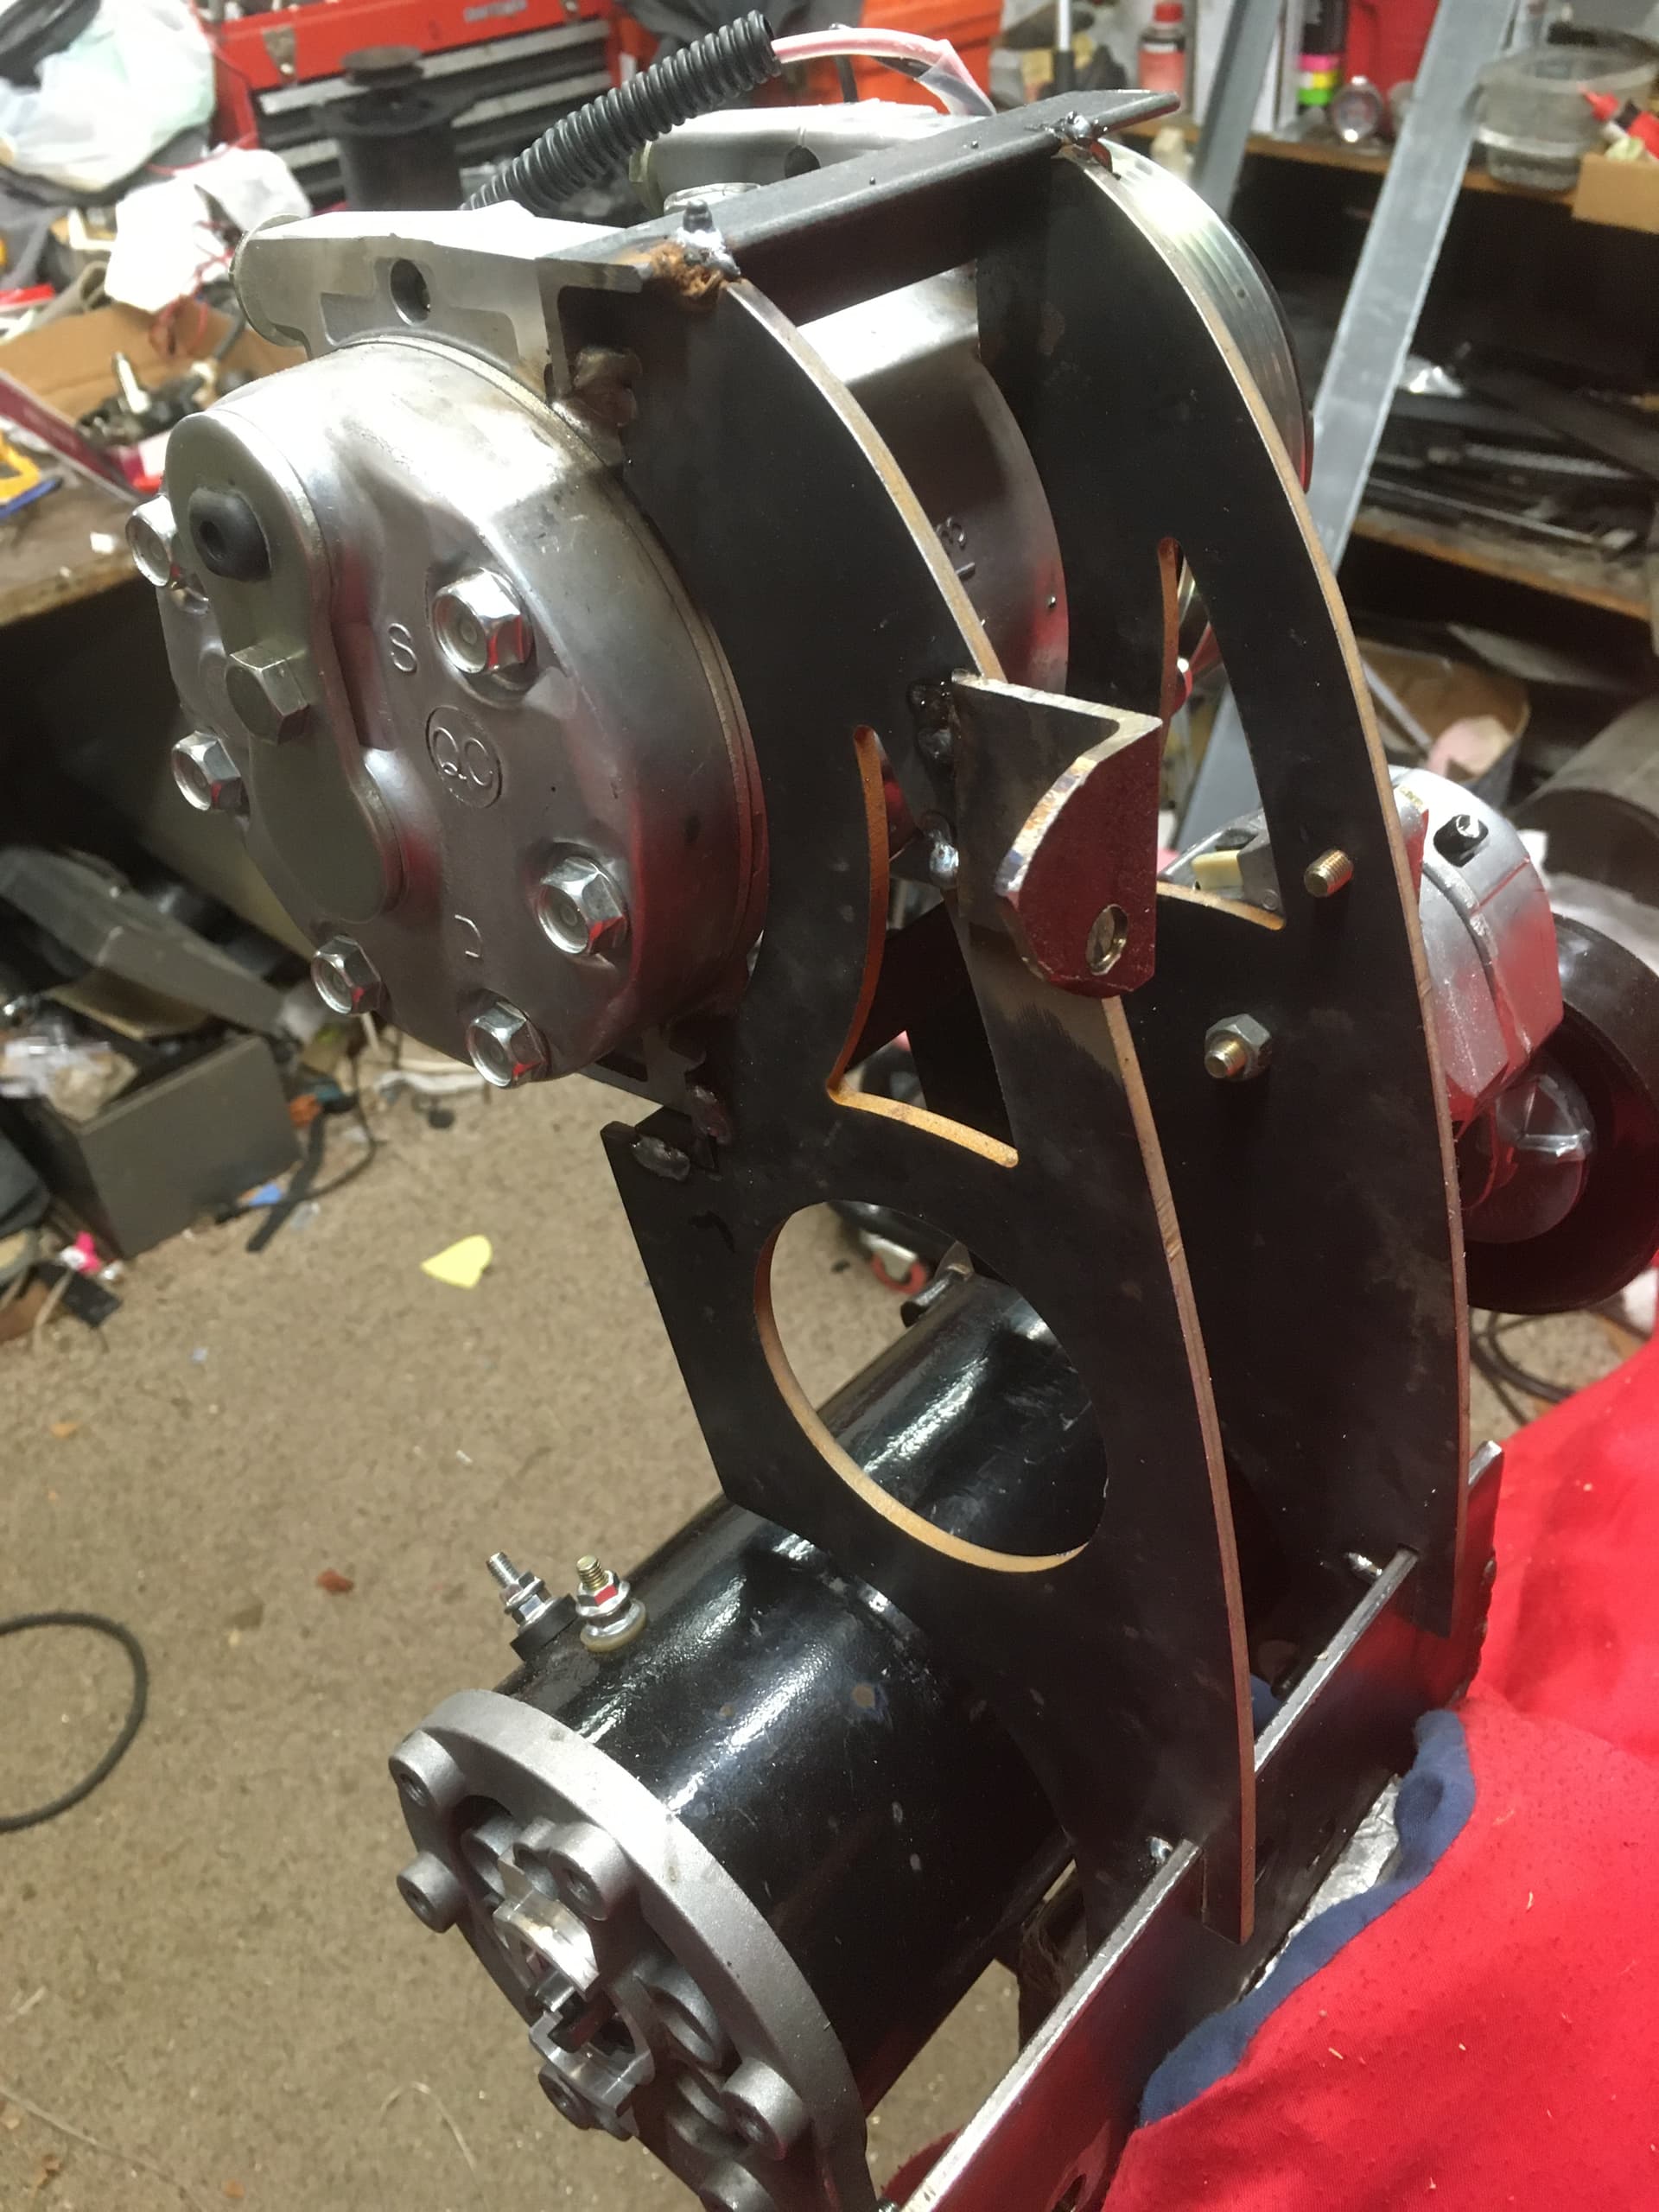
Then I had to design brackets to be able to use a tensioner. That was a challenge, but I drew out what I wanted and a local waterjet company cut out what I needed. I assembled them, adjusted a lot, tack welded temp. and after a bit…
Hallelujah, they all aligned perfectly! I found the right size 5 rib belt, and I think it is all going to work perfectly! It will be a while before I crank up the engine again, but I think I found a great solution. The whole deal attaches to the block at the generator bracket area, and to one exhaust manifold bolt.
I guess You need to powdercoat (or something) this chassis, as it may rust badly if left as it is.
Could You take also a top view photo of the installation, showing how it clears the manifold ?
After mocking up available units, and researching possibilities, as well as seeing what has been done, I have decided on keeping the units tucked out of sight. I will go with dual air. The front unit will be the IP800HC from Old Air. It tucks in the middle of the dash in front of the floor heat vents, and will be ducted to center under dash and out to upper right and left “in-your-face” outlets that will not disturb the original wood. It will be heat and cool. It is the only unit that can be inside and completely out of sight.
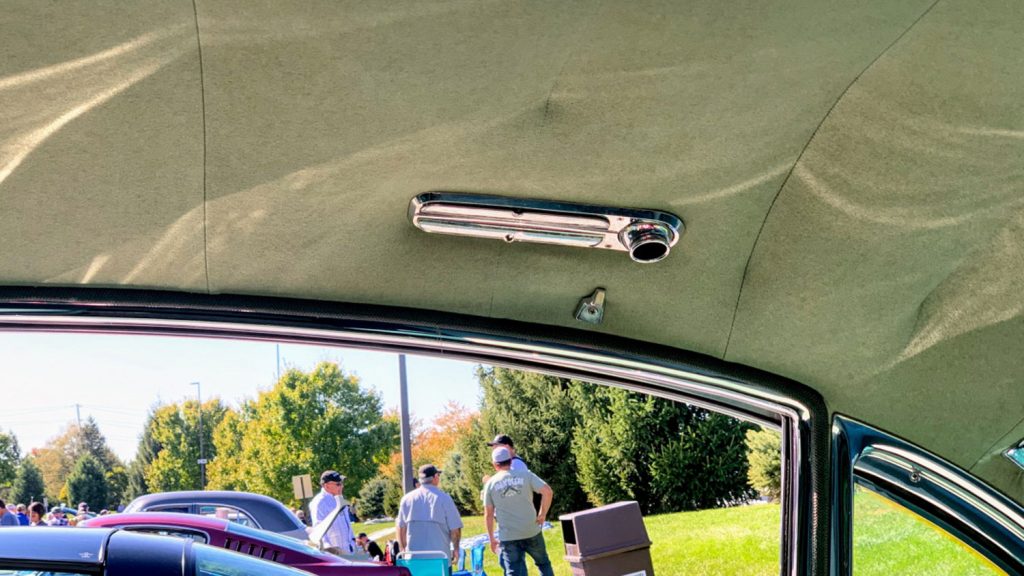
The rear trunk package will be cool only IP-700. It will draw from the rear seat and exit through two center package tray vents and two ceiling mounted vents above the rear doors. The controls will be driver’s side, above the rear door. Cadillac used this system from 1953 to 1971, Ford had package tray vents, and optional A/C was offered on Jaguar and Rolls as trunk mounted units. Today’s SUVs have rear air of various configurations. I have not worked out all the ducting yet.
Together, front and rear, I think we can get a cool car. I will be heat shielding the exhaust. The car already has full Dynomat and thick jute in floor and firewall.
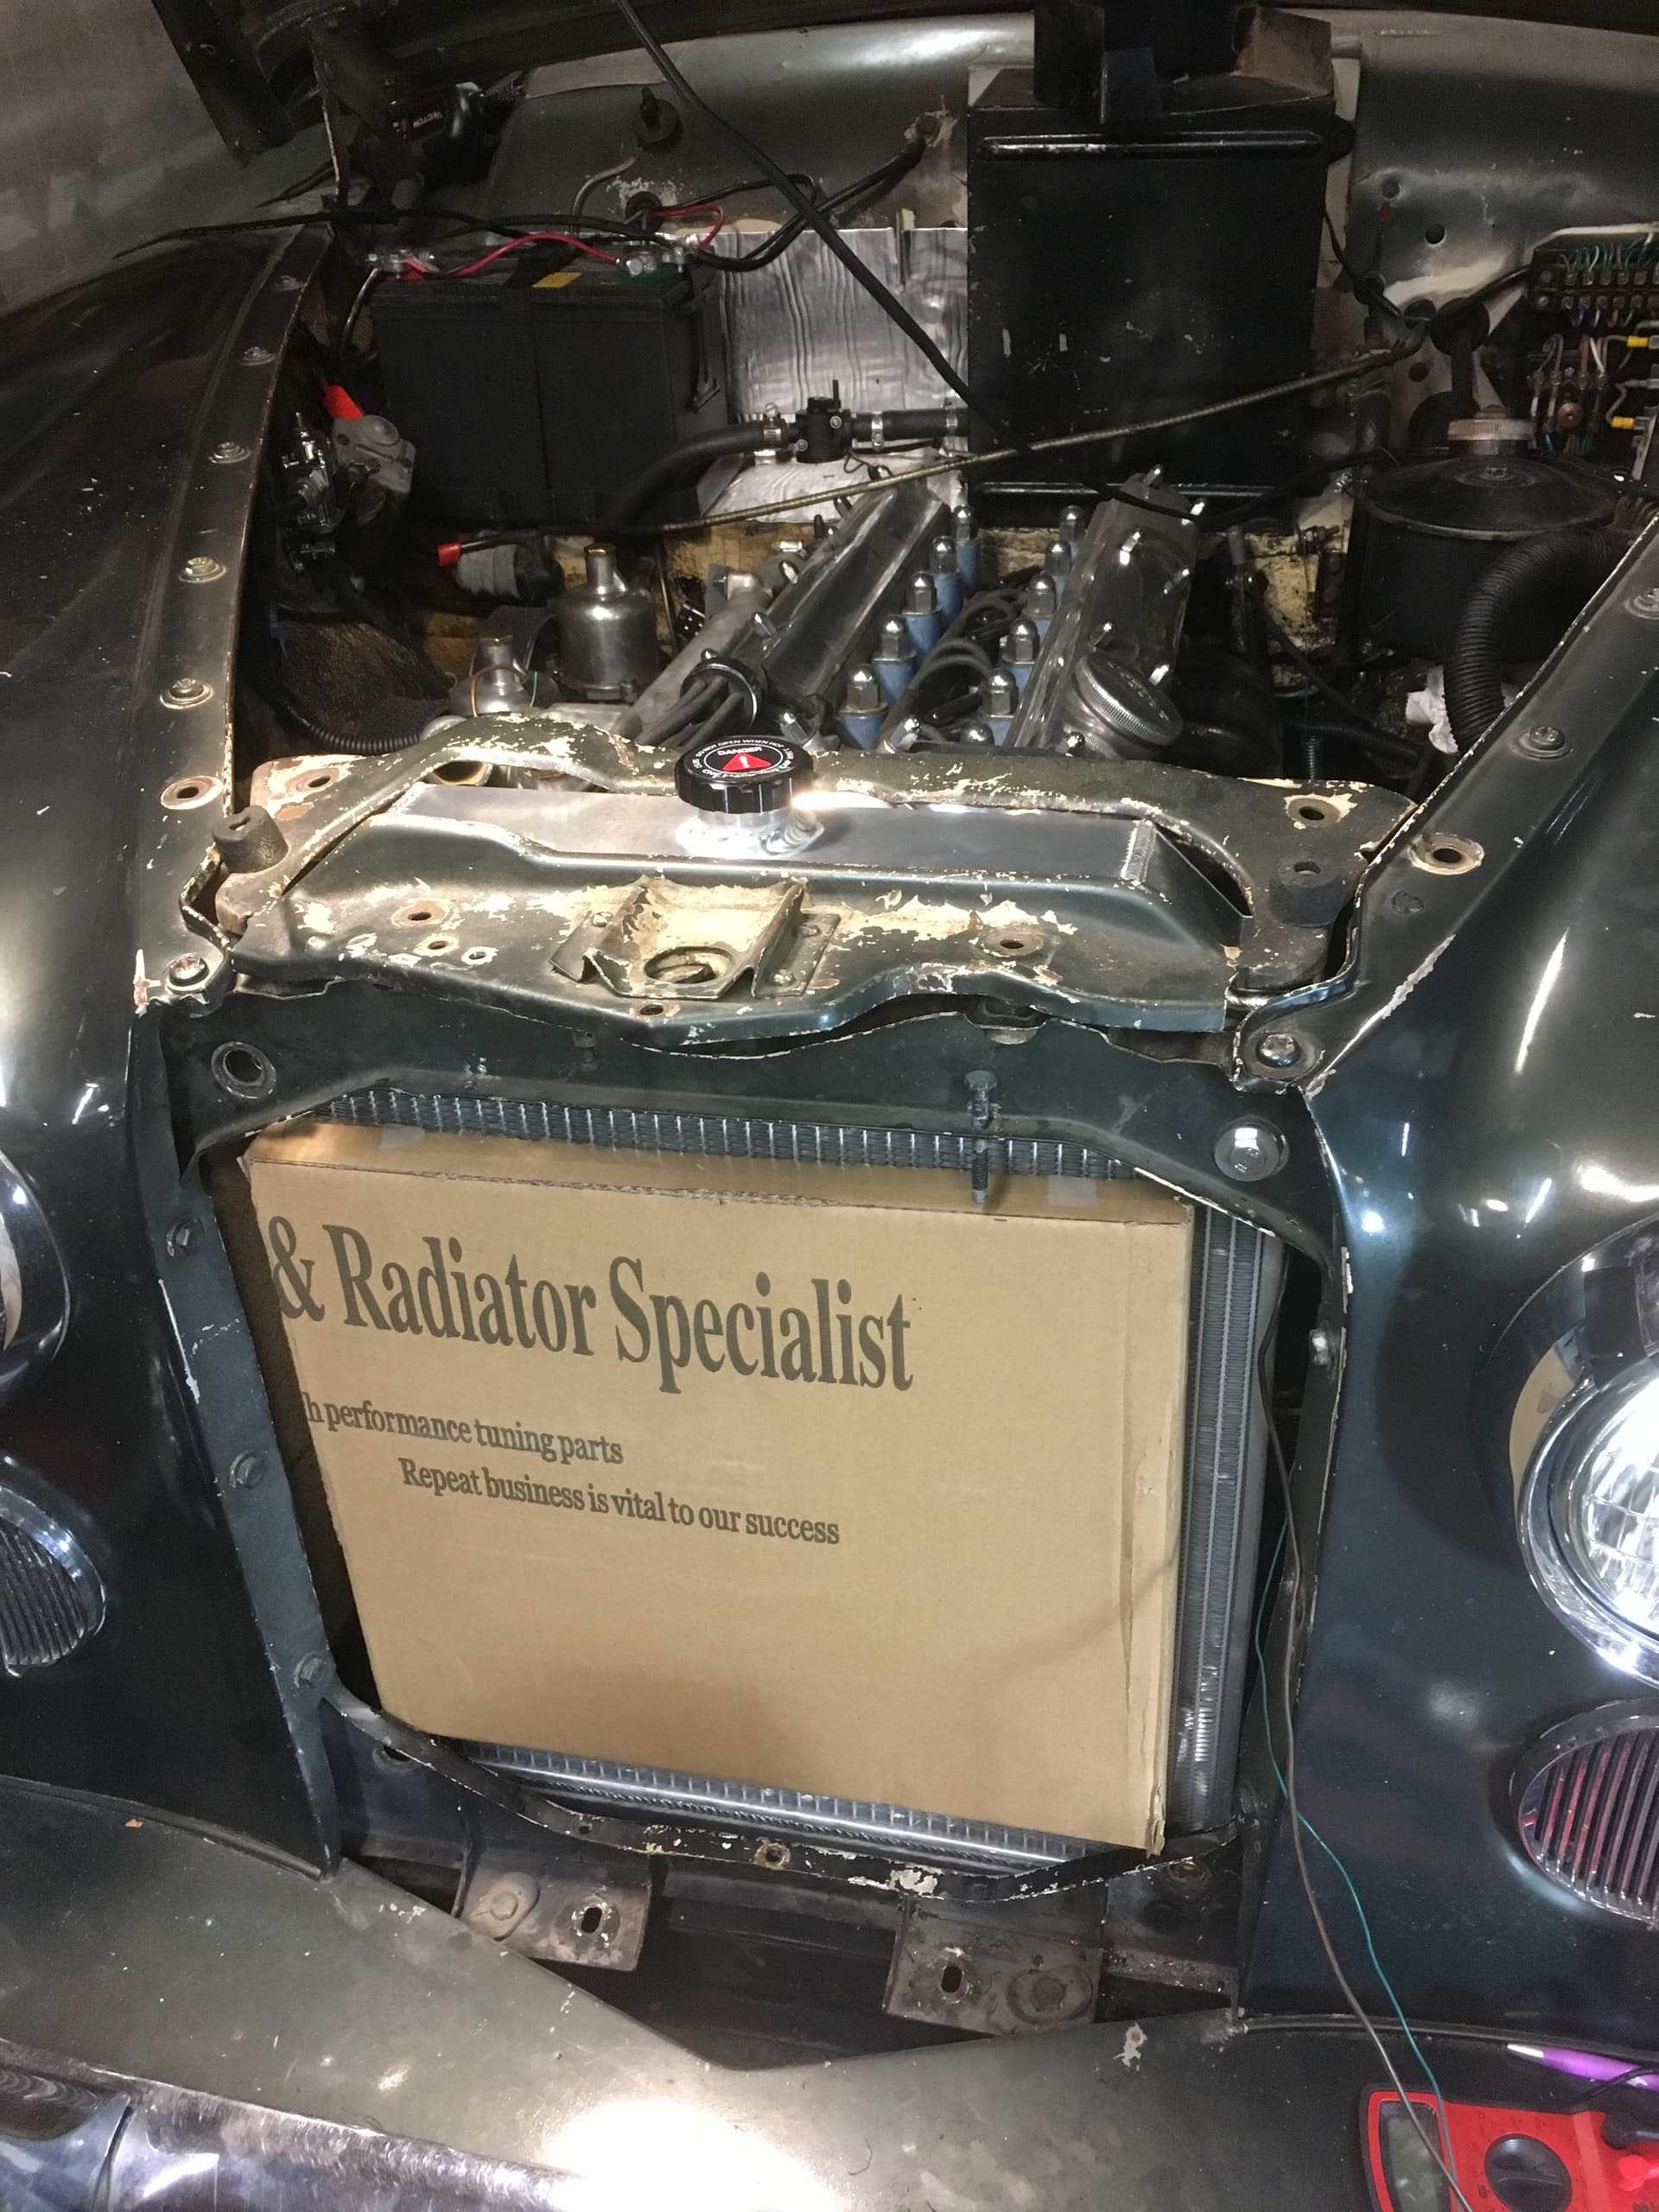
The 14x16 condenser will be in front of the radiator, with a two speed electric puller fan in a shroud and aluminum radiator. The front controls vents and under-dash vents will take up a minimum amount of space.
The other choice I considered was Vintage Air’s Mark IV, but it is a knee-banger.
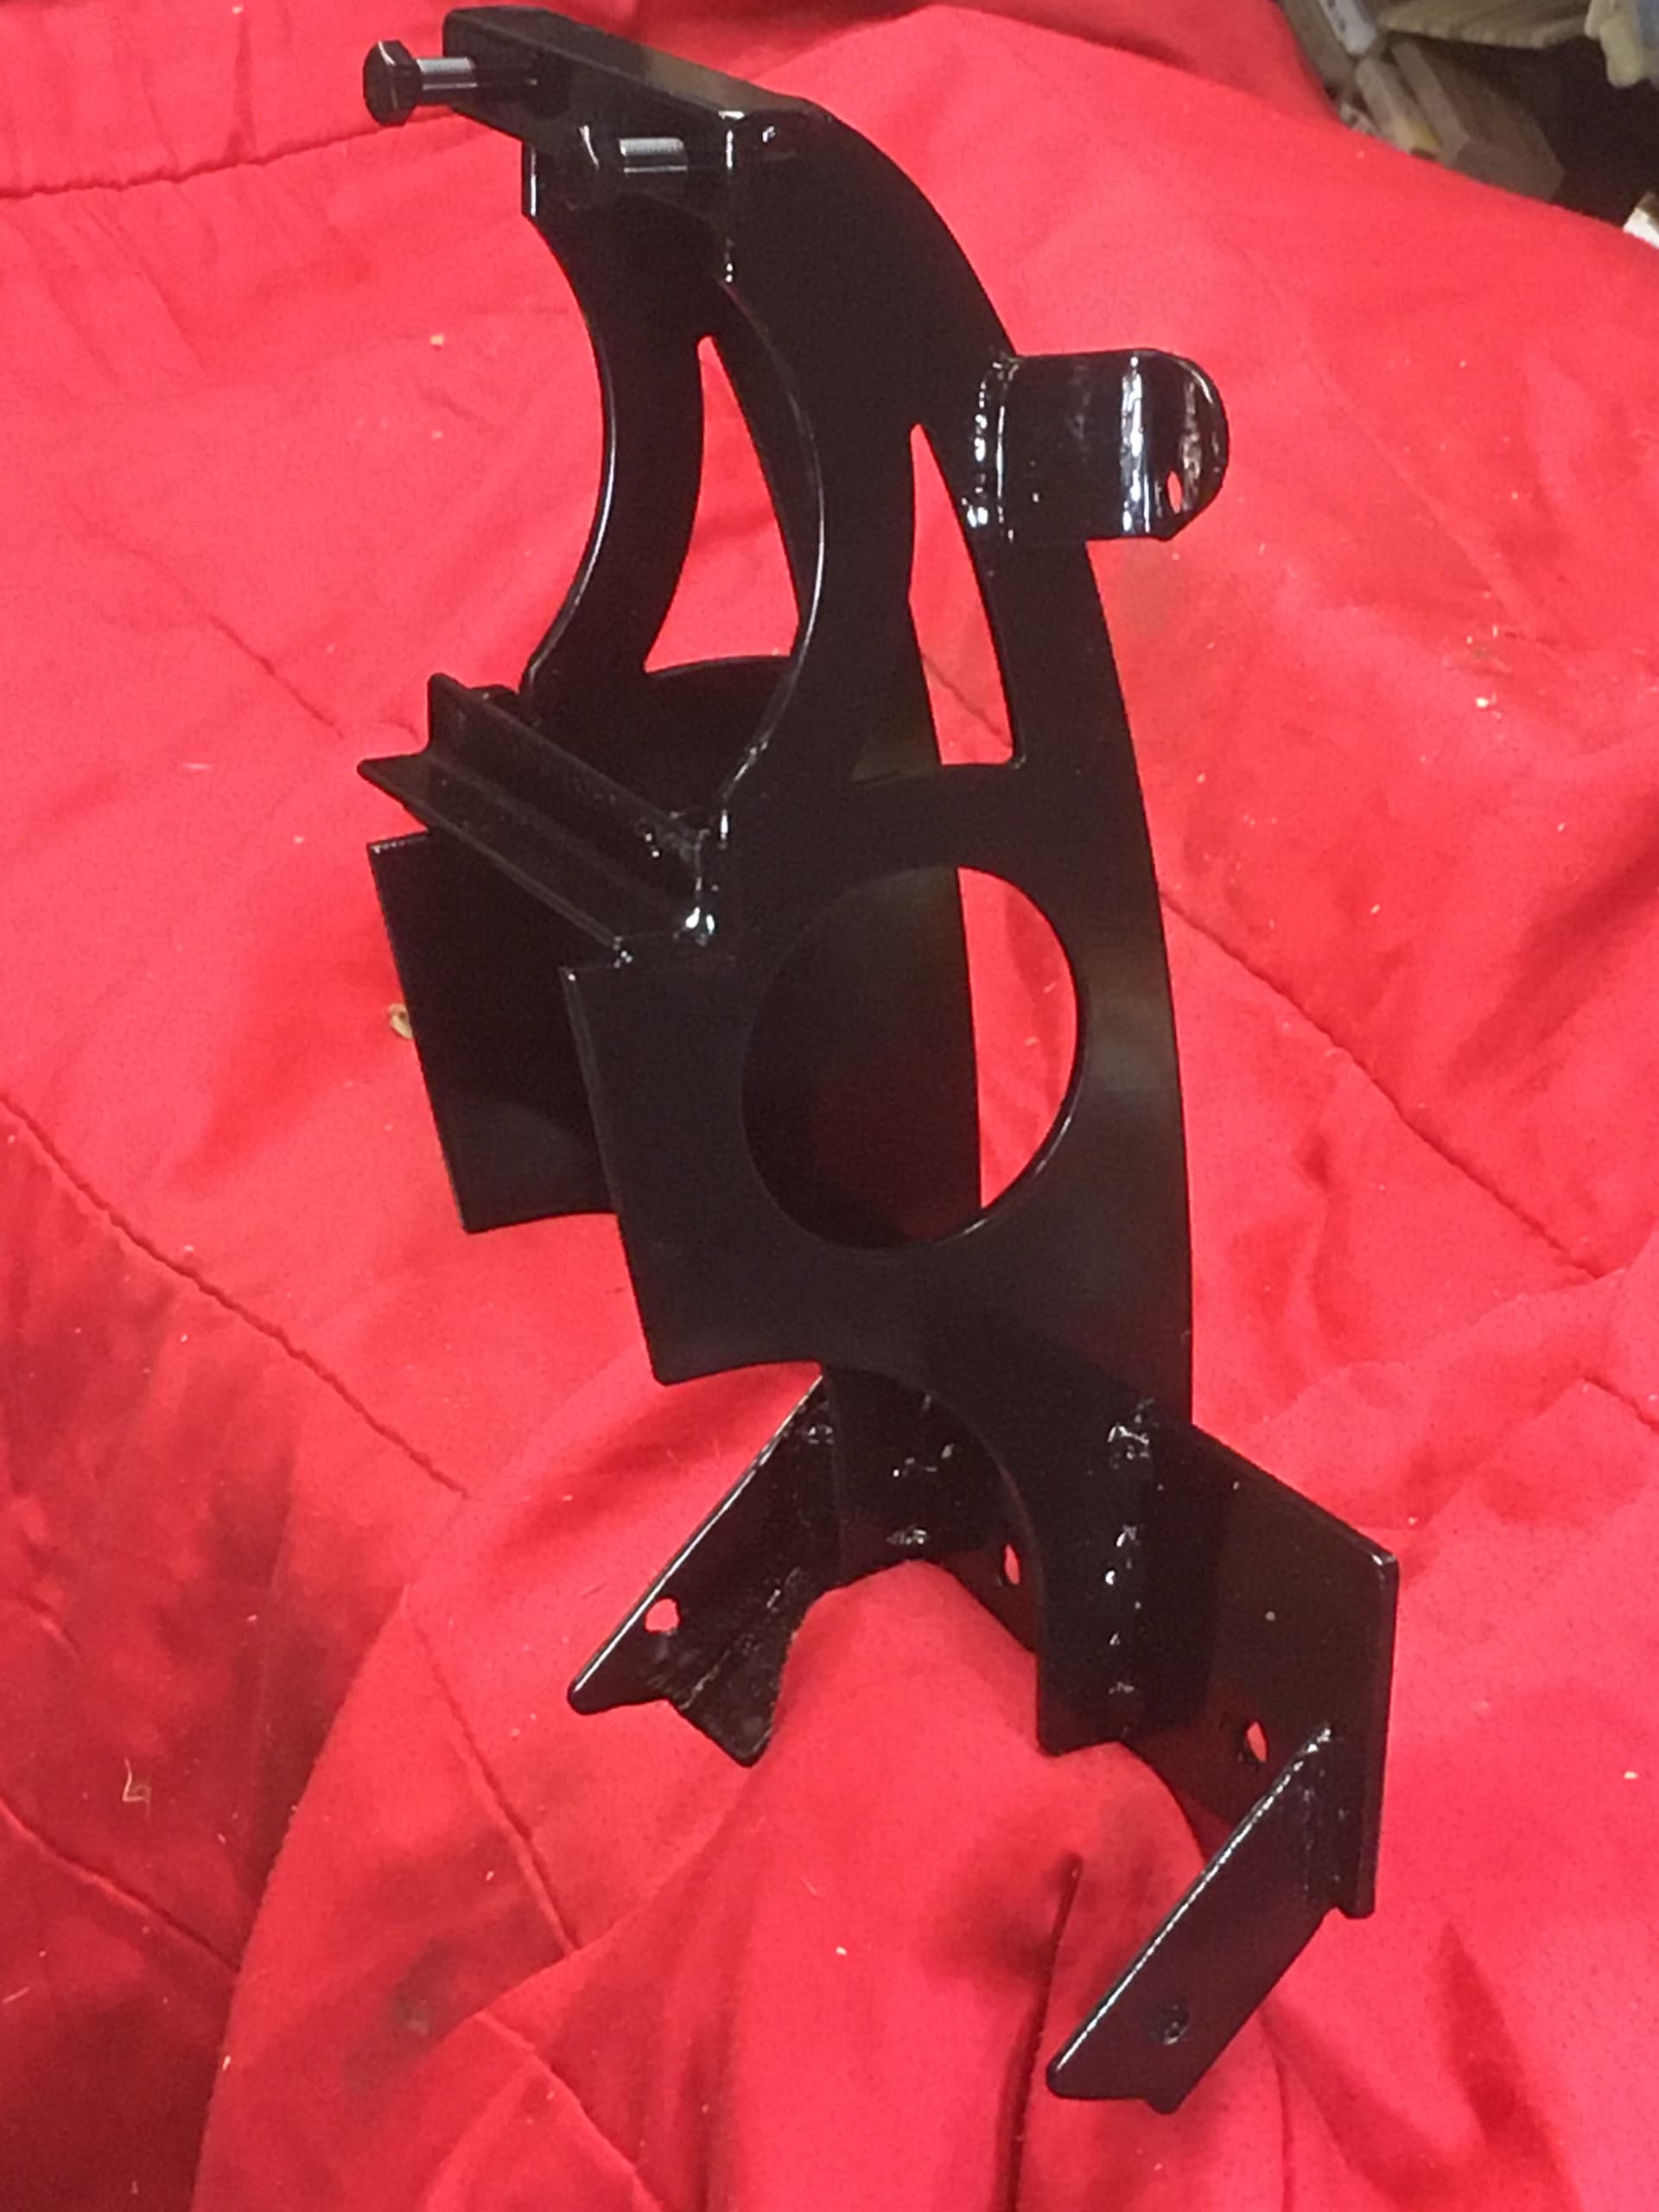
Yes, I will be finishing up the welds, smoothing and rounding and powder coating black. I will post a top side picture later.
I have about 1" clearance between exhaust manifold and back of compressor. The compressor tucks nicely in the upper front corner with no cutting of the inner fender. The exhaust manifold will be heat sheilded
Lovely build. Looking forward to seeing the completed project. The Mk10 did have the rear package tray unit as you mentioned made by Delanair. Since the cover is simply that sitting on the rear parcel shelf, you could easily use that to direct air if you wanted something of Jaguar origin. I would think that there are some of them as take-offs from parts cars or with the a/c deleted. I have one loose that I can send photos of, although nfs as I hope to eventually reinstall.
Thanks, the work is coming along nicely. Accessory bracket is to be powdercoated tomorrow 5/26/22. I found O rings and shaft seal for the power steering pump locally. It is rebuilt and mounted on the alternator.
Unobtrusive and efficient, blending into the original design is my goal. Originality, or concourse, while admirable, is someone else’s domain. I have examined the factory correct system. I hope to improve on it in comfort and the by the use of today’s technology. I don’t have it all worked out yet, but solving engineering challenges, being creative, and holding to a high respect of craftsmanship are my guiding principles. We will see what comes of it. Thanks again.
I wrote Vintage Air. They did not see any problem with two evaporators and told me how to run them and wire them. The high pressure cut off switch should cycle off the compressor when there is enough pressure on the high side. The TXV (thermostatic expansion valve) should regulate your evaporator flow. The fan should remove the cool, and if the low side pressure is within range according to ambient temp, (such as 35-40 psi at 70F, or 40-45psi at 75F, then the 134a will not freeze water, but blow about 38-45F degrees. It is physics.
Perhaps the TXV is not working, or your orifice is too large (R12), or your system pressure is too low, but I will not diagnose from afar.
I also learned that you can not use a variable capacity compressor with a TXV. Good article from Vintage Air taught me that.
No, I think I will go ahead with my plans.
I fit the new aluminum radiator today. Some “adaptation” will have to be made on the top core support/bonnet latch. I ordered the 14"H X 16" W condenser today. The cardboard mock-up fit well. The powder coating on the accessory bracket is outstanding. Just $20! The two brackets were cut for just $60! Things are moving along nicely, but too slowly for my liking. John of John’s cars said he is putting together my transmission adaptor order today. Soon the 4L60E will be ready to install. Goodie!
The Dynamater is in. The shaft is a different size, so the fan does not fit. The pulley I got from Rob Breer does. I do not know what I will do for a fan. The radiator fan blade covers 1/2 of the alternator.
There is about 7/8" between the back of the a/c compressor and the exhaust manifold. The compressor is higher.
The alternator wired up really simply. Small F wire jumper with Small D wire. Large D and large B on same lug. I will see if I need a larger wire or voltmeter.
One thing you could consider is using a flex fan, readily available at auto parts stores. It basically sandwiches between a plate and pulley flange, and you can trim the plastic blades with a pair of snips. I’m running them on my Mk2 and on a Morris pickup. Both cool well. The Mk2 has a GM alternator for which I built a mounting system (not so elegant as yours) to mount through a hot-rod bracket and a stand-off block at the water pump. It has pretty tight clearances to the radiator and alternator belt. My only complaint about it is that I think it’s noisier at idle.
If you are interested, ask me for photos.
Update - L60E trans, A/C, Alternator.
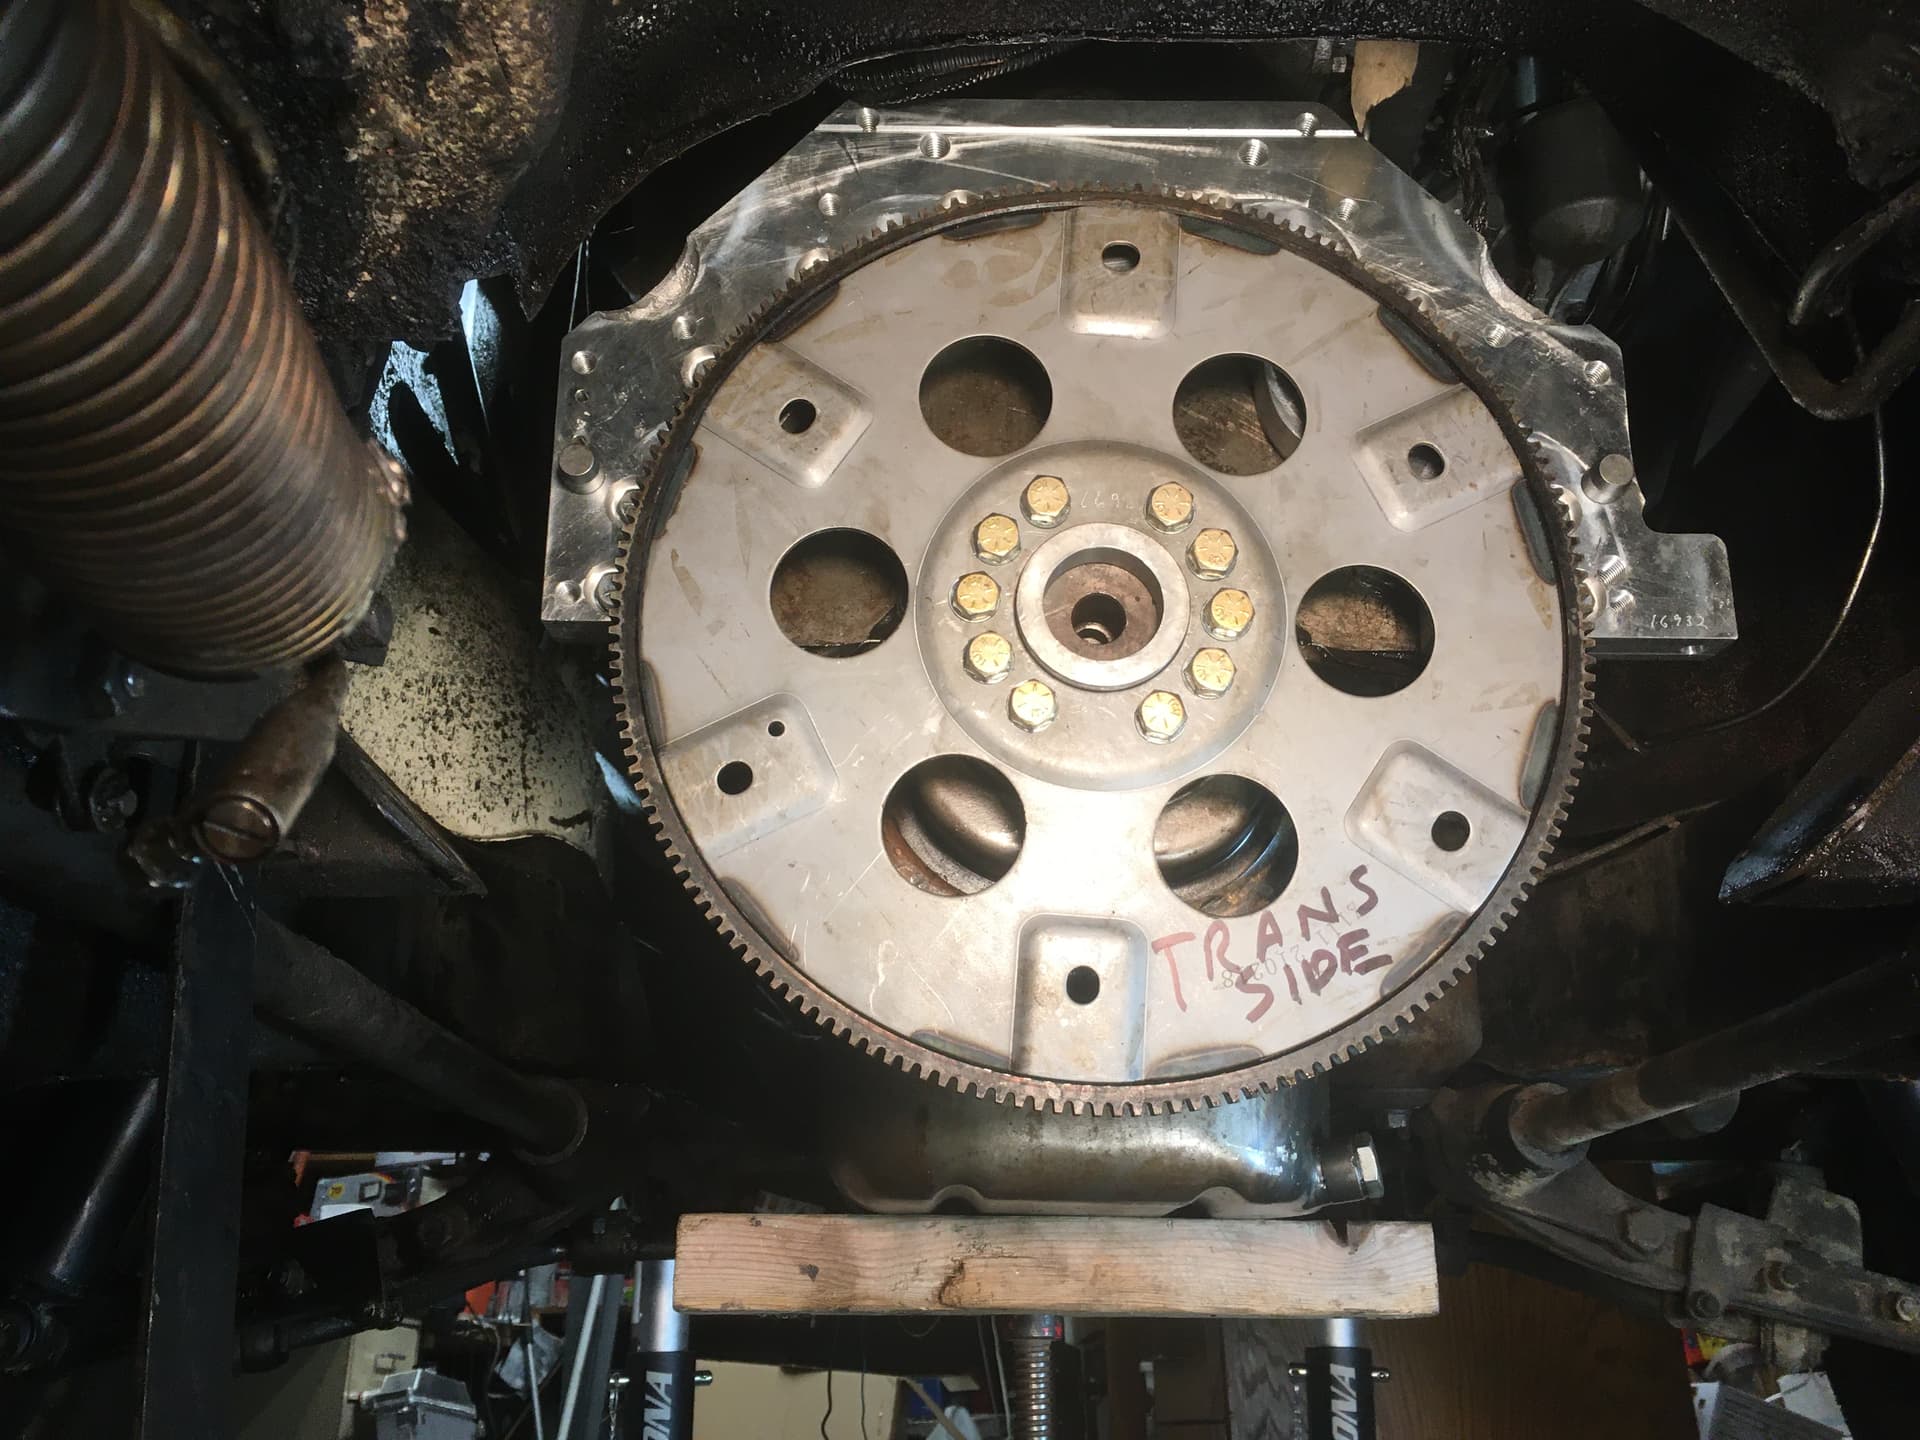
Got the transmission in today. Nothing like a real transmission jack! Able to set angles. Slipped right in once I flipped the flex plate. One would think I had it right in this picture. Not so. The adaptor from John’s Cars is a real nice piece of machining. Nice to have bolts supplied in the kit, too
. I will have to cut the exhaust pipes to get the trans. mount in. Then there will be rerouting the handbrake cable. Still a lot of work to do before this car is on the road again. TCI install, make driveshaft, finish A/C, mount tranny cooler, exhaust routing, etc, but it is going well.
I have a 63 mark II with air conditioning. Who ever installed it used a piece of steel with heat treated material between the ac unit and the exhaust manifold. I like the covering on the manifold in your picture where did you get it?
Thanks
Hi I read your comments and I have a 63 Jaguar Mark II with air conditioning and an alternator set up. My power steering pump runs off the alternator. I would like to your pictures of your set up.
hard to get good photos, but here are some. Basically the flex fan sandwiches between two plates with pulley behind it and bolts to the water pump flange. You can trim it with a pair of tin snips, either in length or depth. I think it’s a bit noisy, but moves a lot of air.
It’s the standard Mk2 shroud, which should be available from multiple suppliers. I’m doubtful it would be a good fit for the mk9, but can give you some basic dimensions if that would be helpful. Summit Racing has generics, but they aren’t cheap.
I have used a Derale electric fan for over 10 years. I have it set up with a manual over ride in case I get stuck in traffic and I don’t want the engine to reach the point where the fan kicks on by itself, use a relay. I have it attached with something similar to cable ties which are shown in their kits. Another advantage of this unit is that it kicks on AFTER the engine shuts down to continue cooling and avoid boiling the fuel and subsequent vapor lock problems on restarting. Consider this much quieter option…