A tip of the hat to DOT5, and solving remote rear brake bleeder issue

On my to-do list this summer was renewal of brake fluid after three years and 6,000 miles. I’ve been using DOT5 for the first time and wasn’t entirely happy with pedal feel so was contemplating a return to DOT3.

The only reason I went to DOT5 is because of the damage DOT3 did to the paint and cad plating on the car prior to its second restoration. At the same time I installed remote rear bleeders, because I dislike the job of taking out the spring/shocks that’re in the way and still skinning my knuckles and getting brake fluid all over. I do like those remote bleeders, but on bleeding the brake system rebuild I was able to achieve only an acceptable pedal feel, not as good as it was with DOT3. A little mushy, made firm by a slight double pump. That double pump said “air bubble” but despite bleeding the brakes a half dozen times more I was unable to improve it. Online posters cited DOT5 compressibilty, which goes against what I learned in liquid physics. DOT5 is not in itself compressible, but it has an unfortunate propensity to retain microbubbles of air. Maybe nanobubbles. Regardless, the brakes worked fine without the little double pump, as a couple of panic stops later demonstrated.

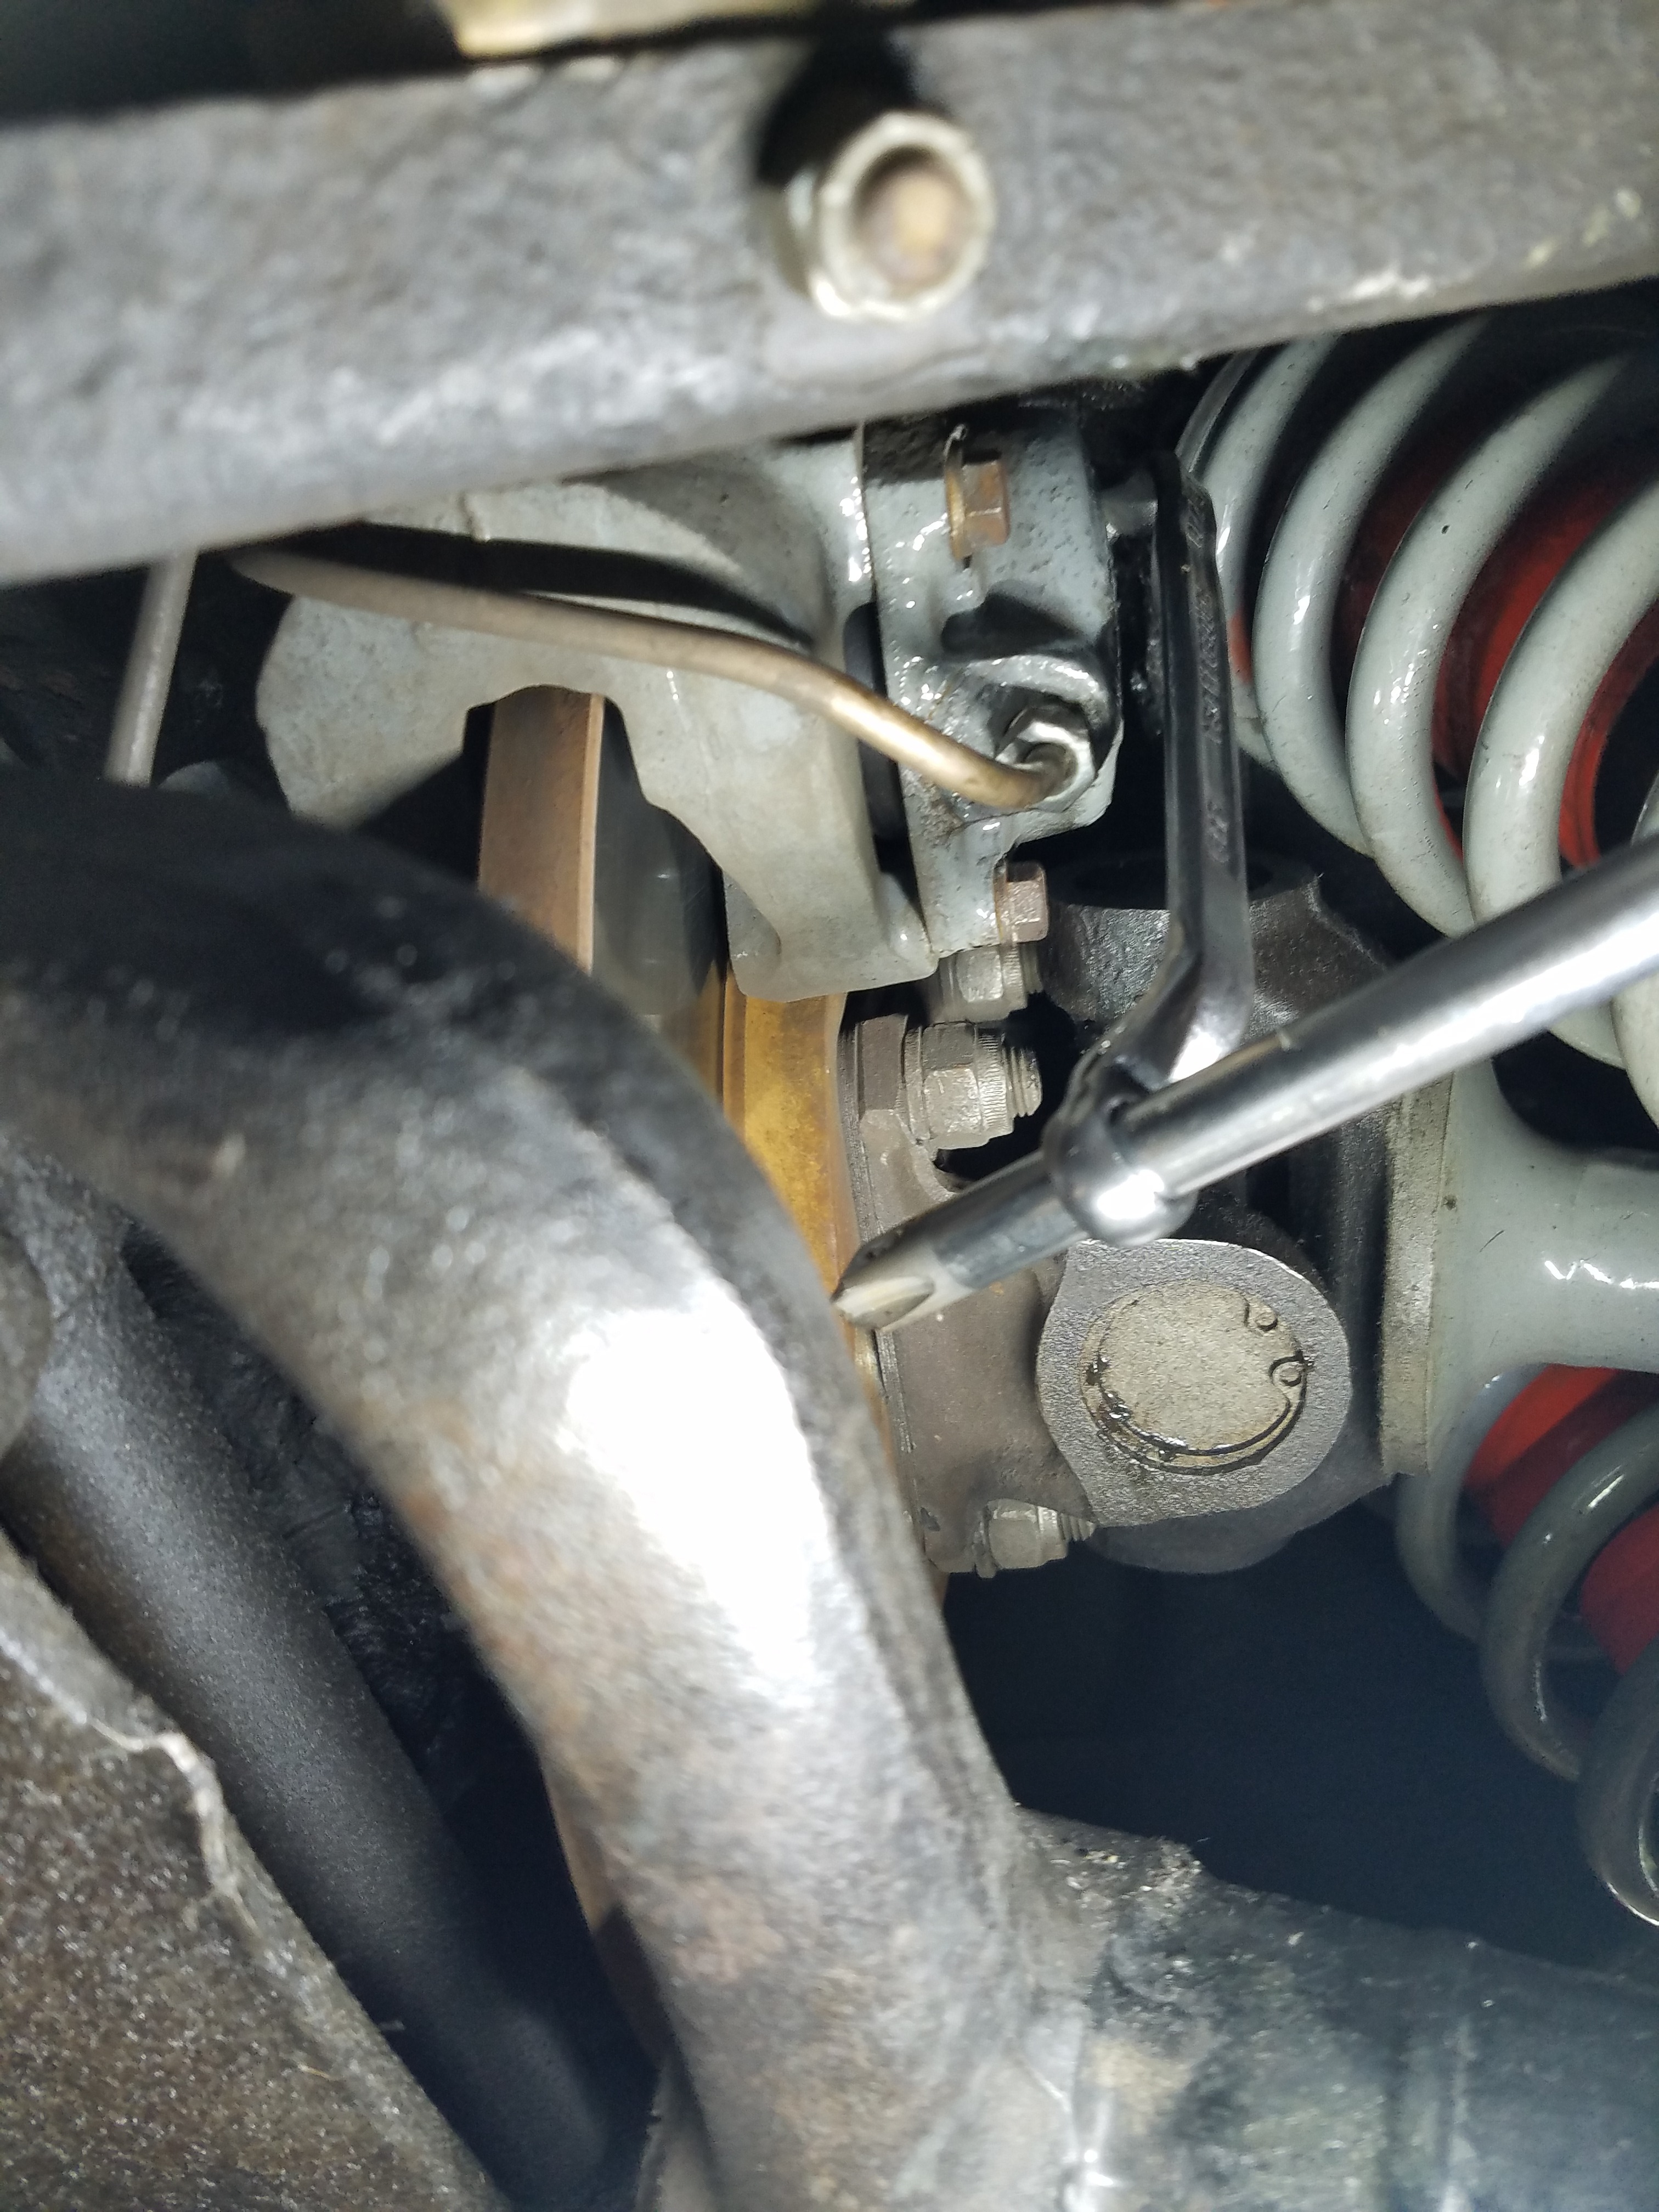
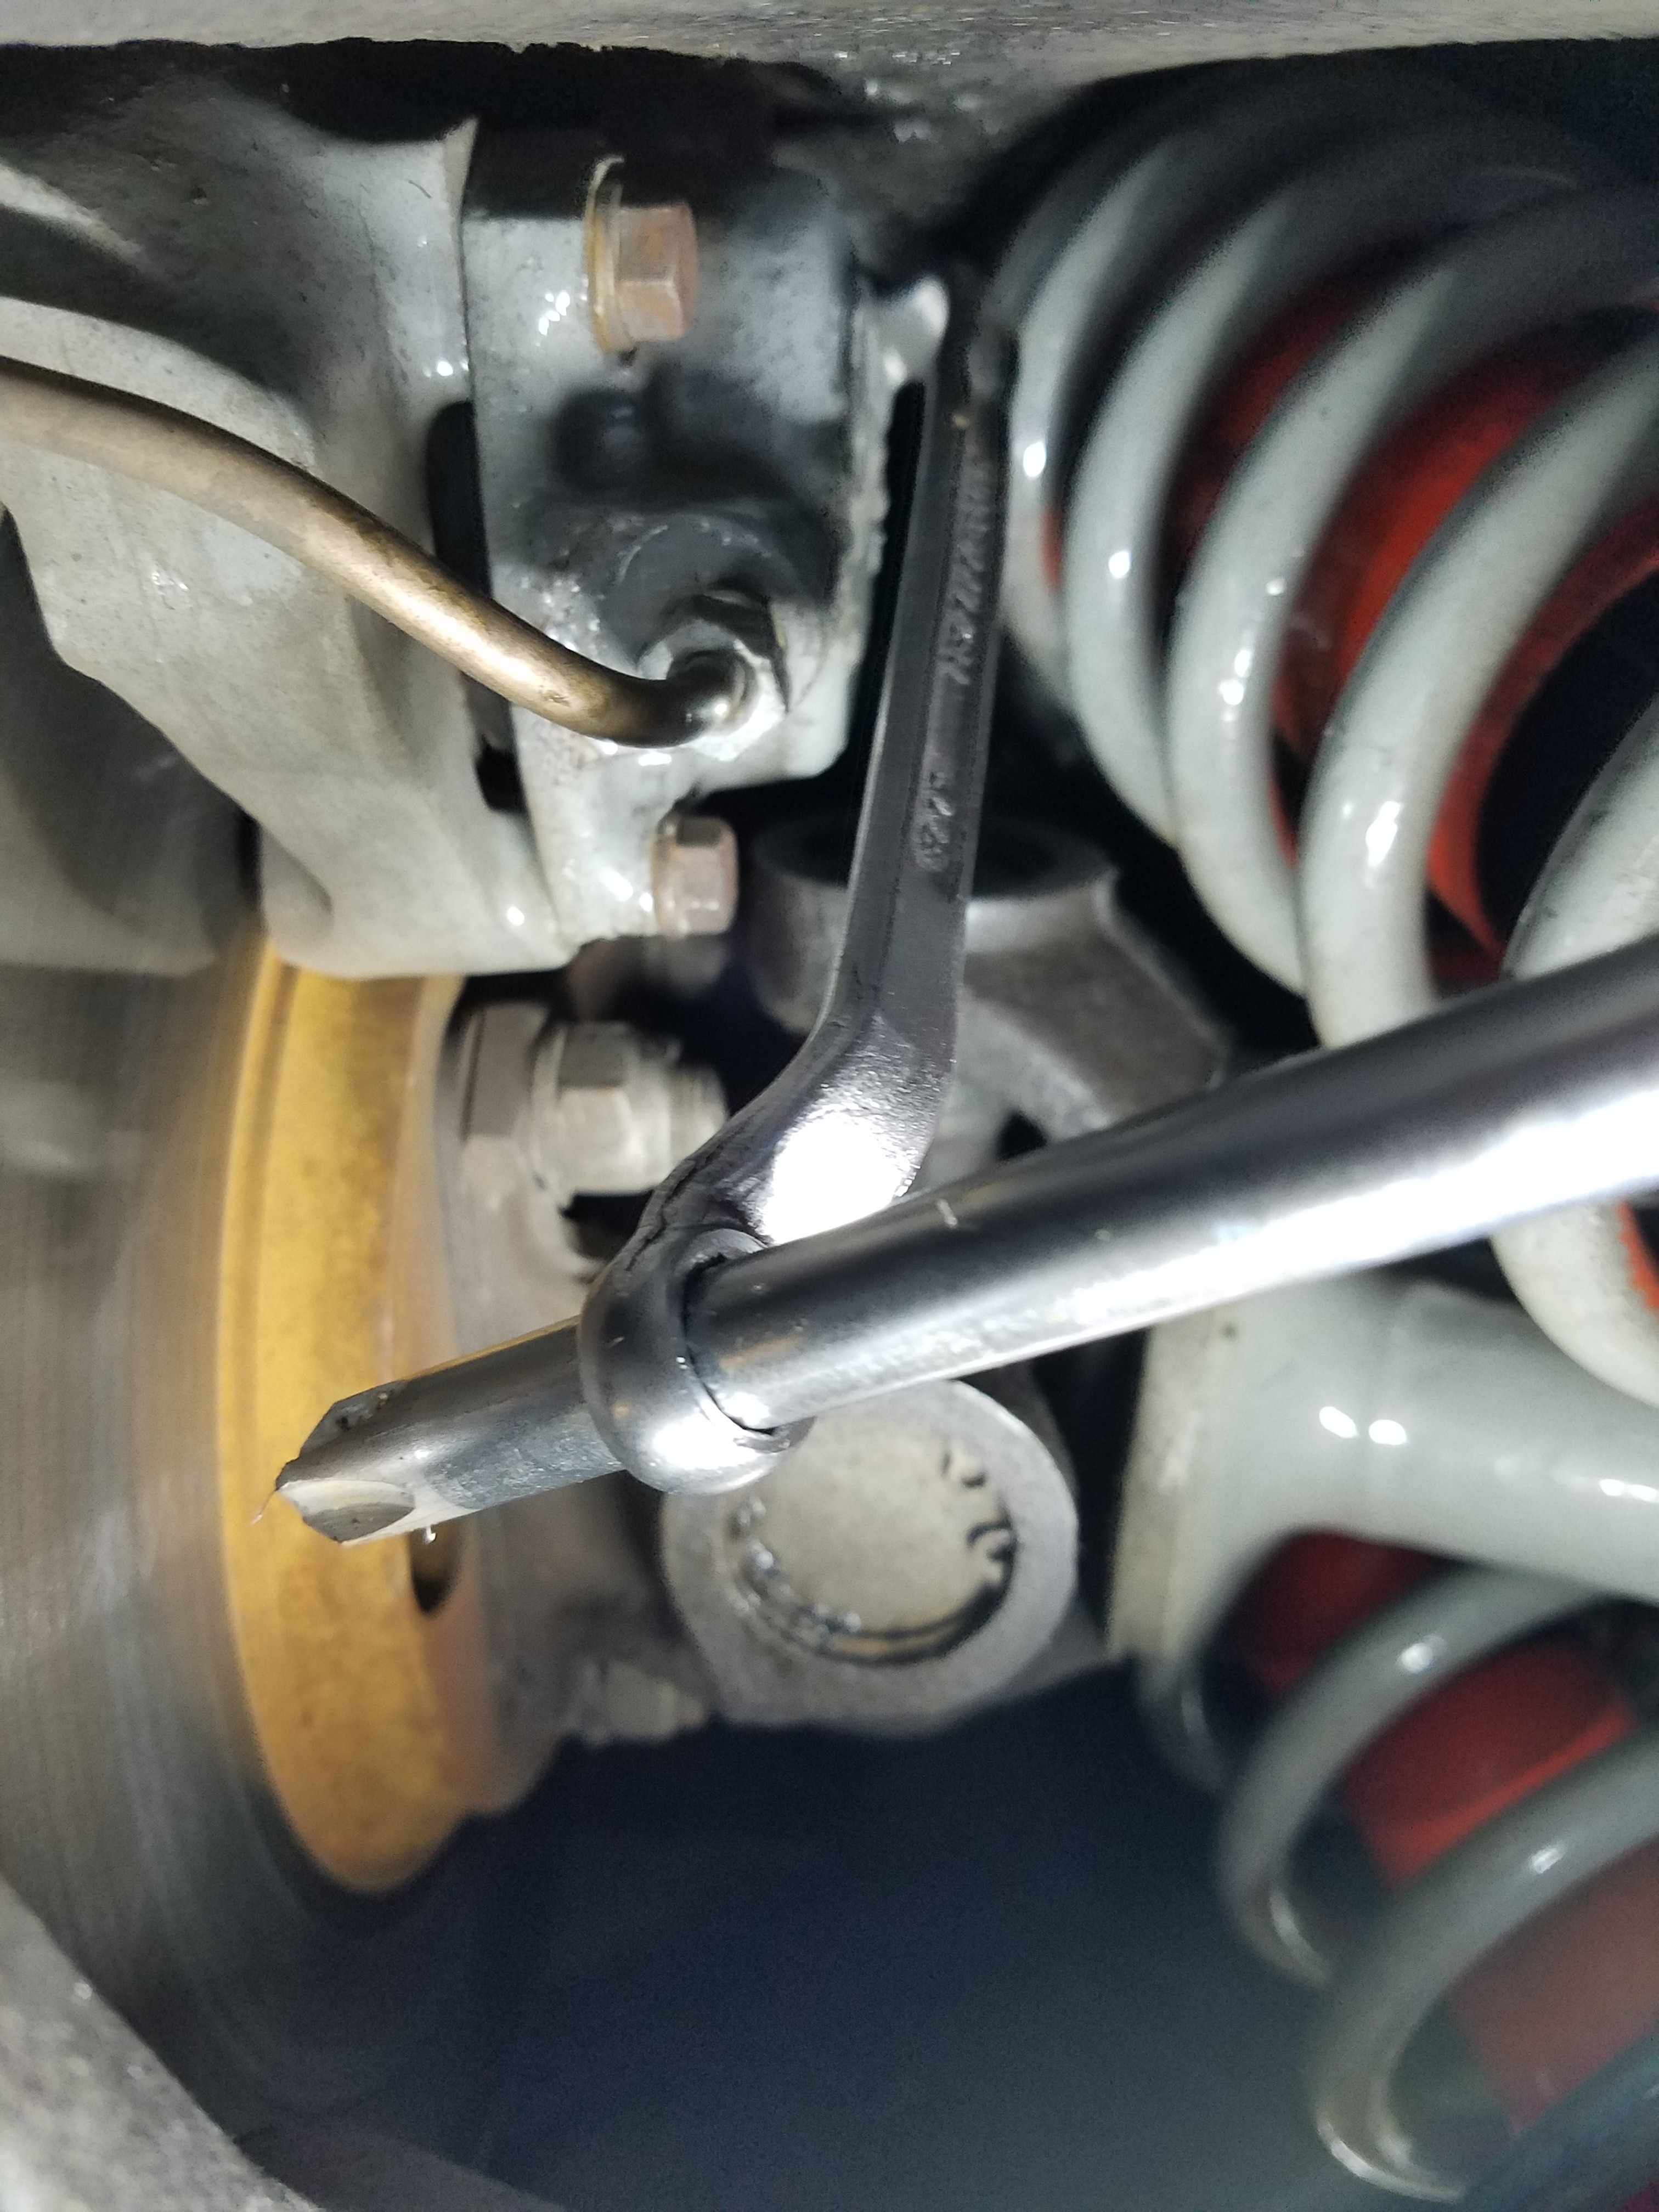
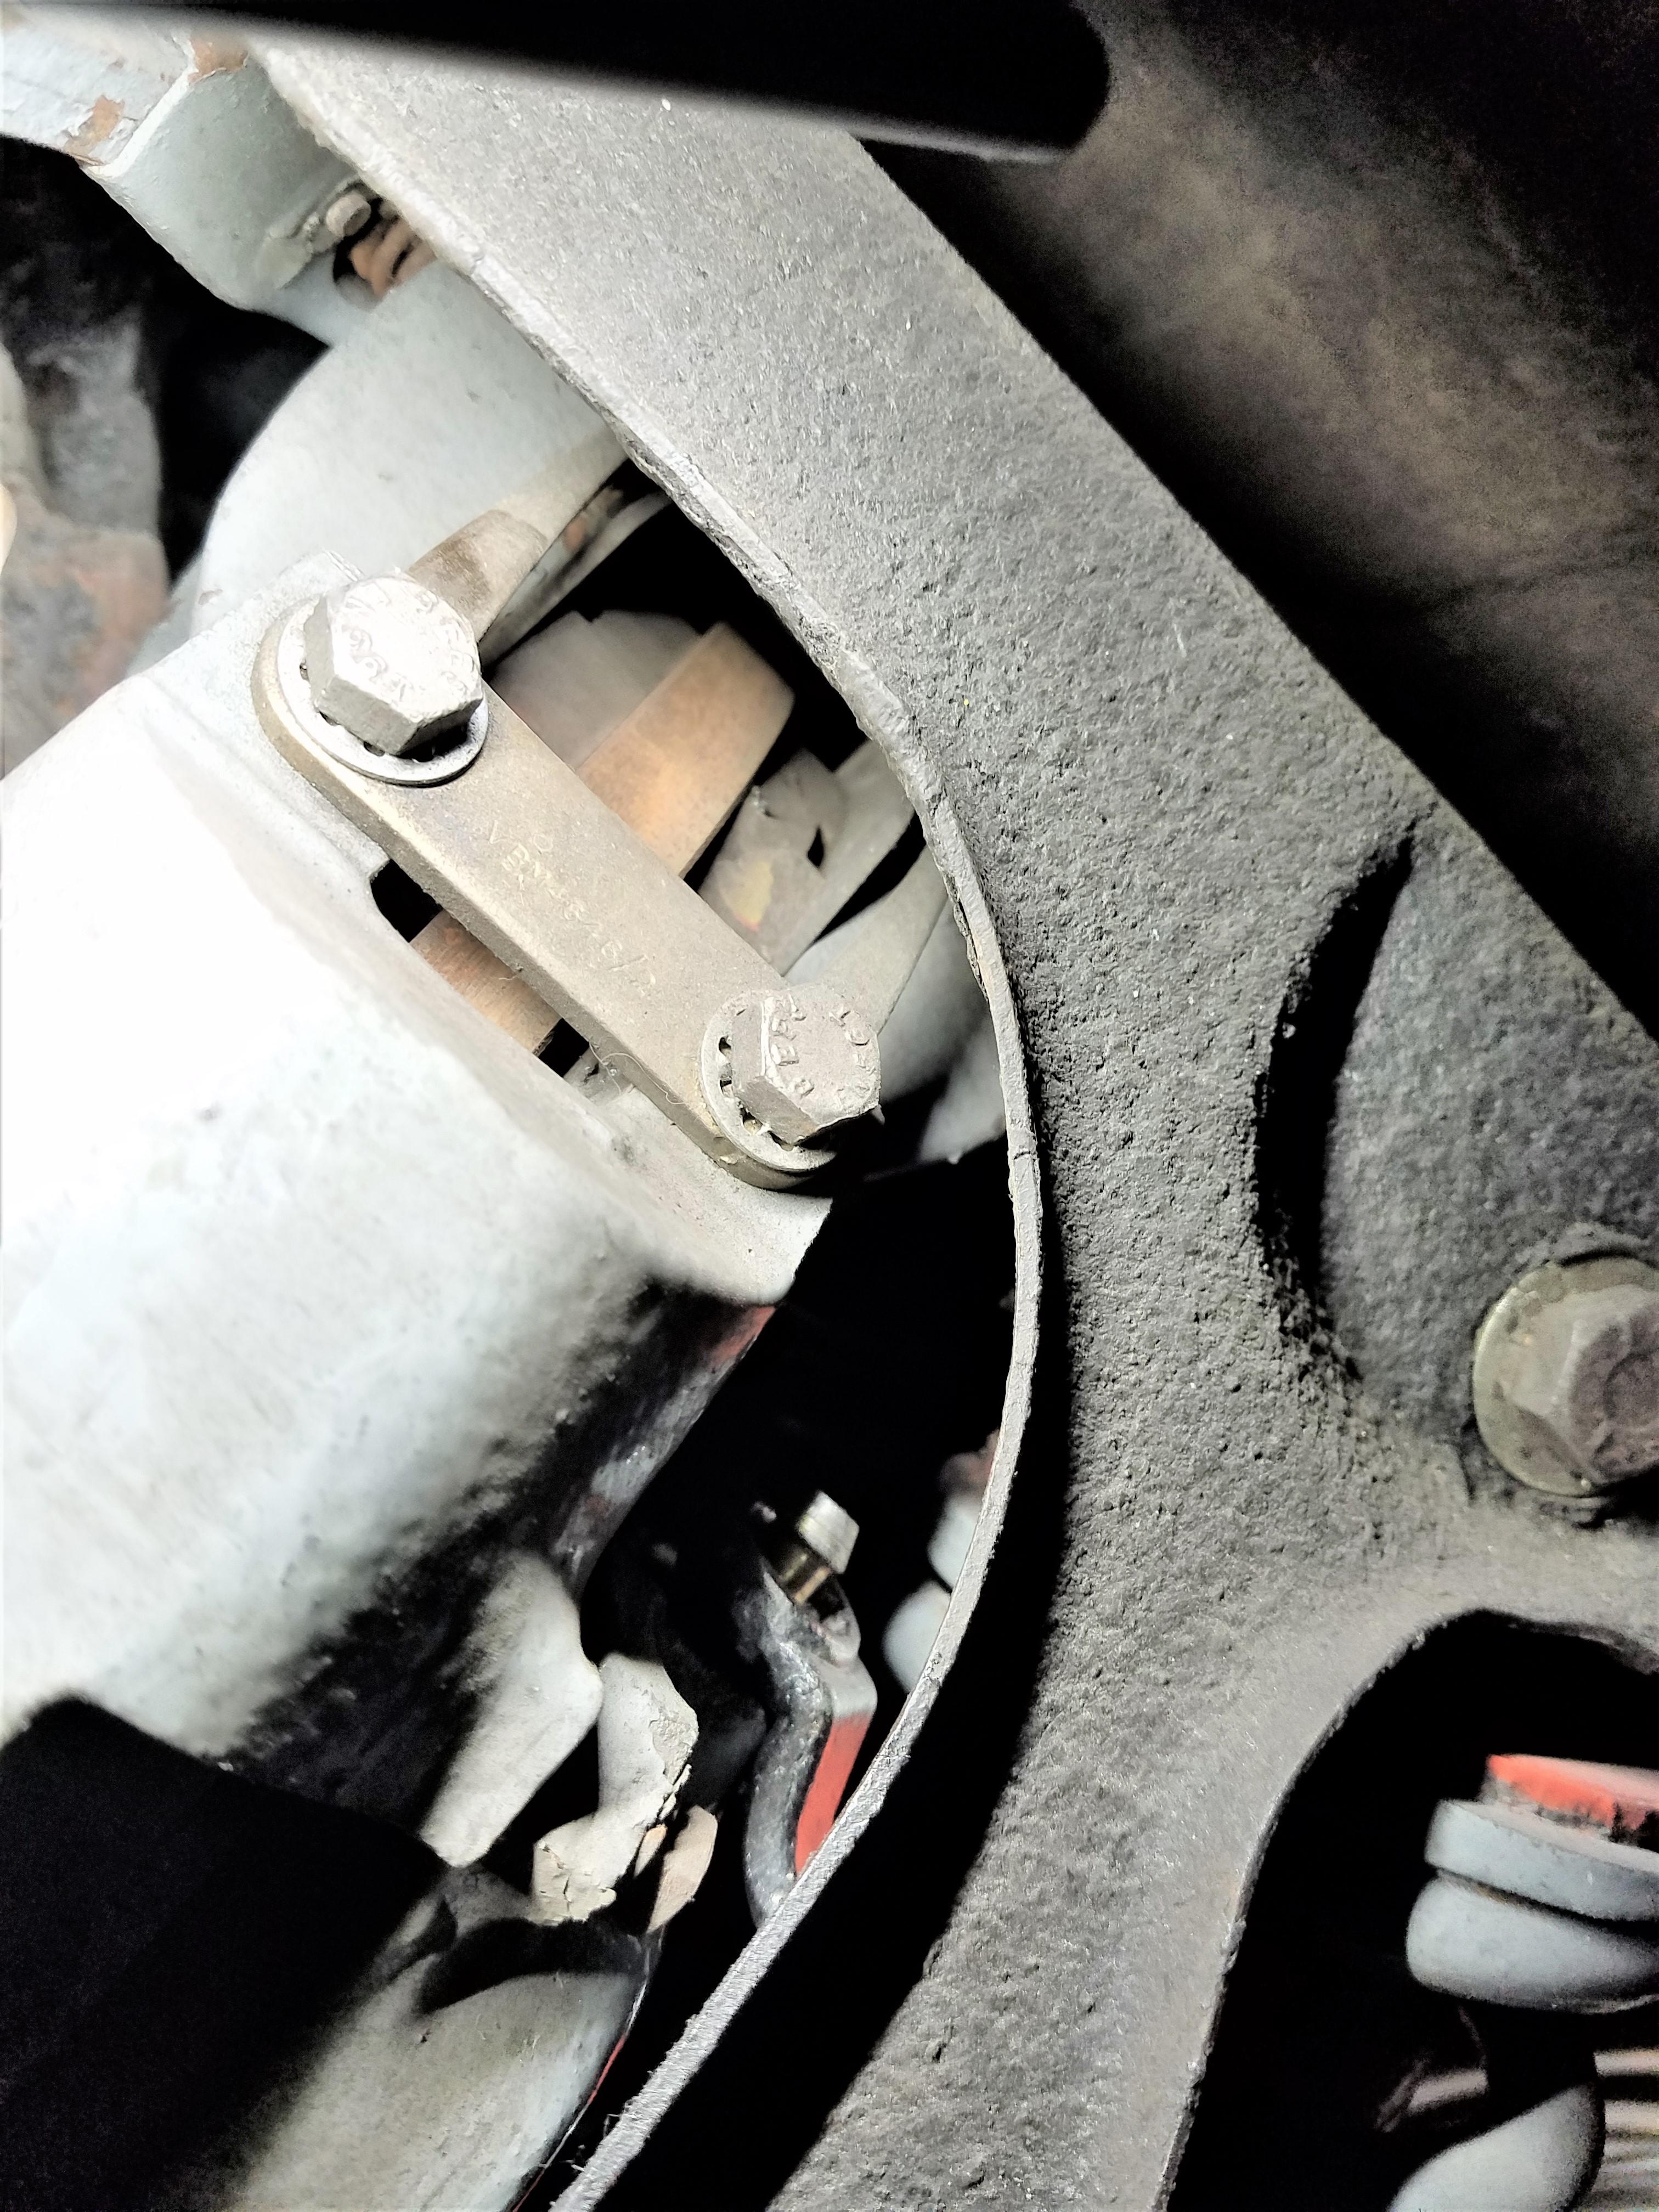
Now, the problem was compounded byt the remote bleeders. They require takeoffs from the tops of calipers that travel downward:

It’s especially a long way down from the left brake caliper but the right’s not much better. Even pushing an air bubble downwards a couple of inches can be a challenge: anybody familiar with bleeding the clutch slave will tell you that.

Back to the summer’s project. Before I got to it I noticed a small wet spot on the garage floor that turned out to be DOT5. One of the aftermarket brake fluid reservoirs had cracked and was more than half empty. The DOT5 was on several surfaces in the engine compartment, including the left subframe, vac servo, mud shields etc. Had it been DOT3 or 4 there would have been considerable cosmetic damage. As it is, none at all.

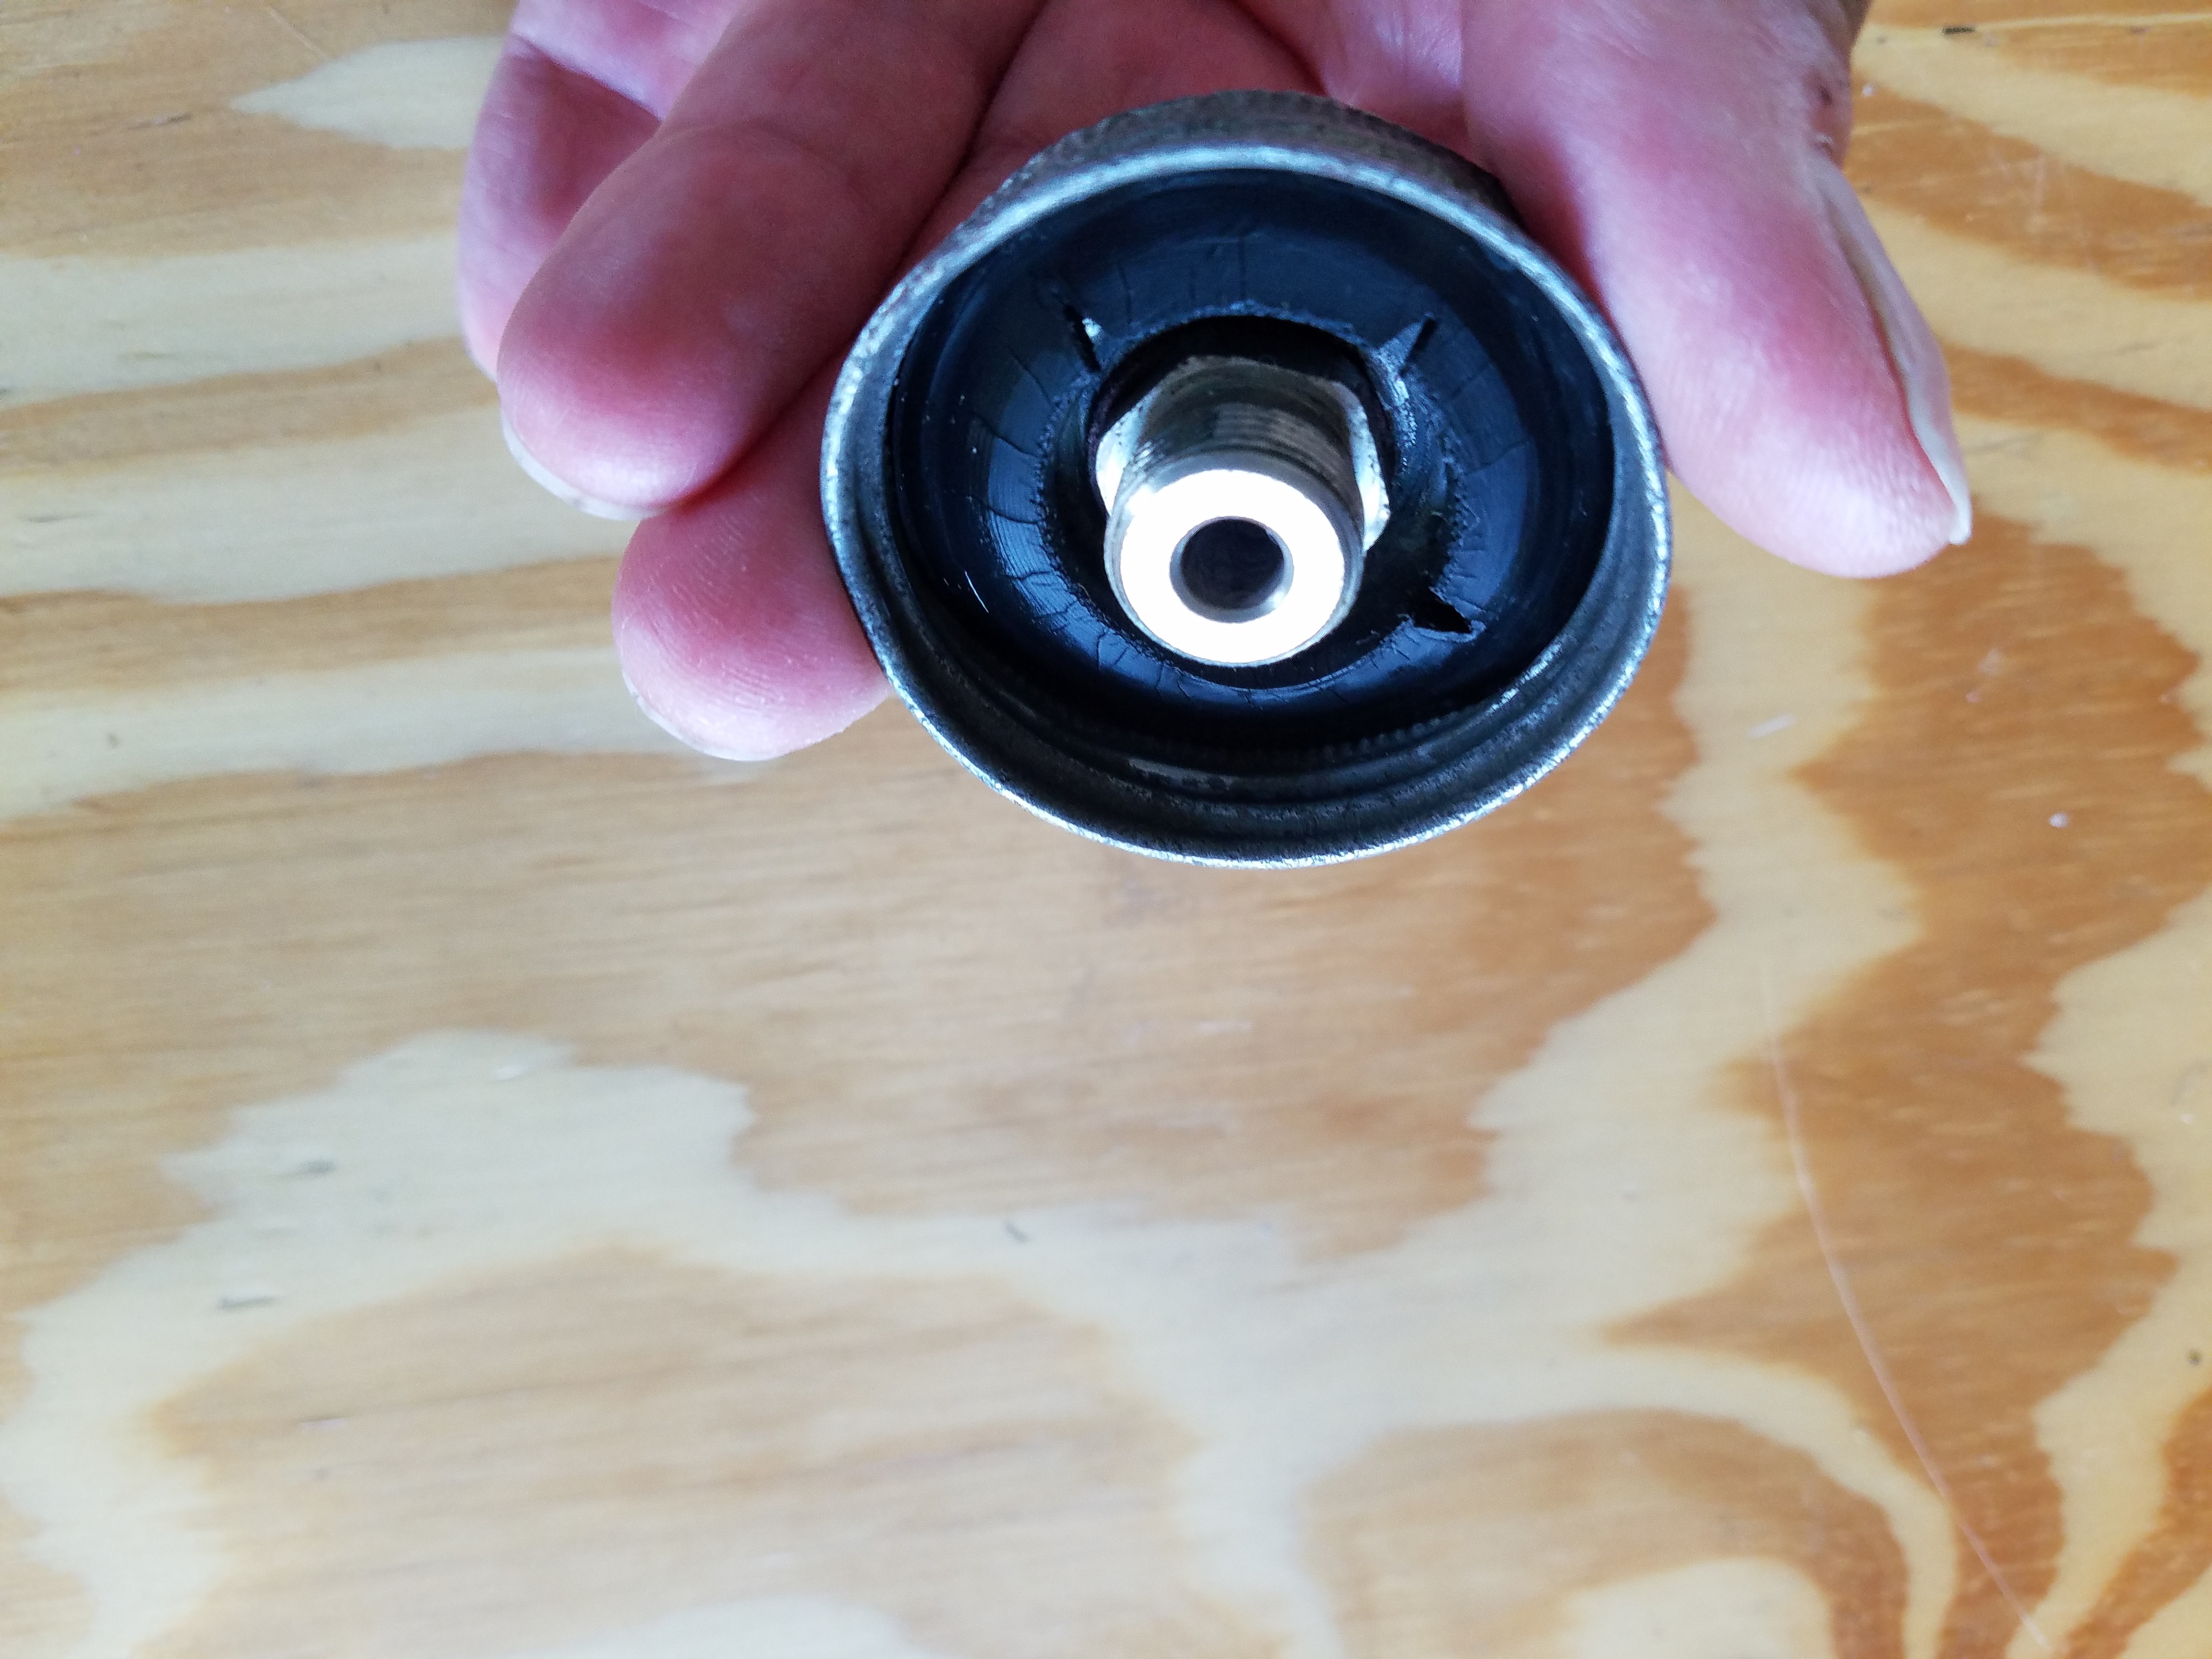
On cleaning up and putting back my original reservoirs I decided to stick with DOT5, at the same time figuring out a way to bleed the rear brakes in such a way I could be sure I didn’t have any remaining air in the system. I used this to pressurise the front reservoir at 15 psi:

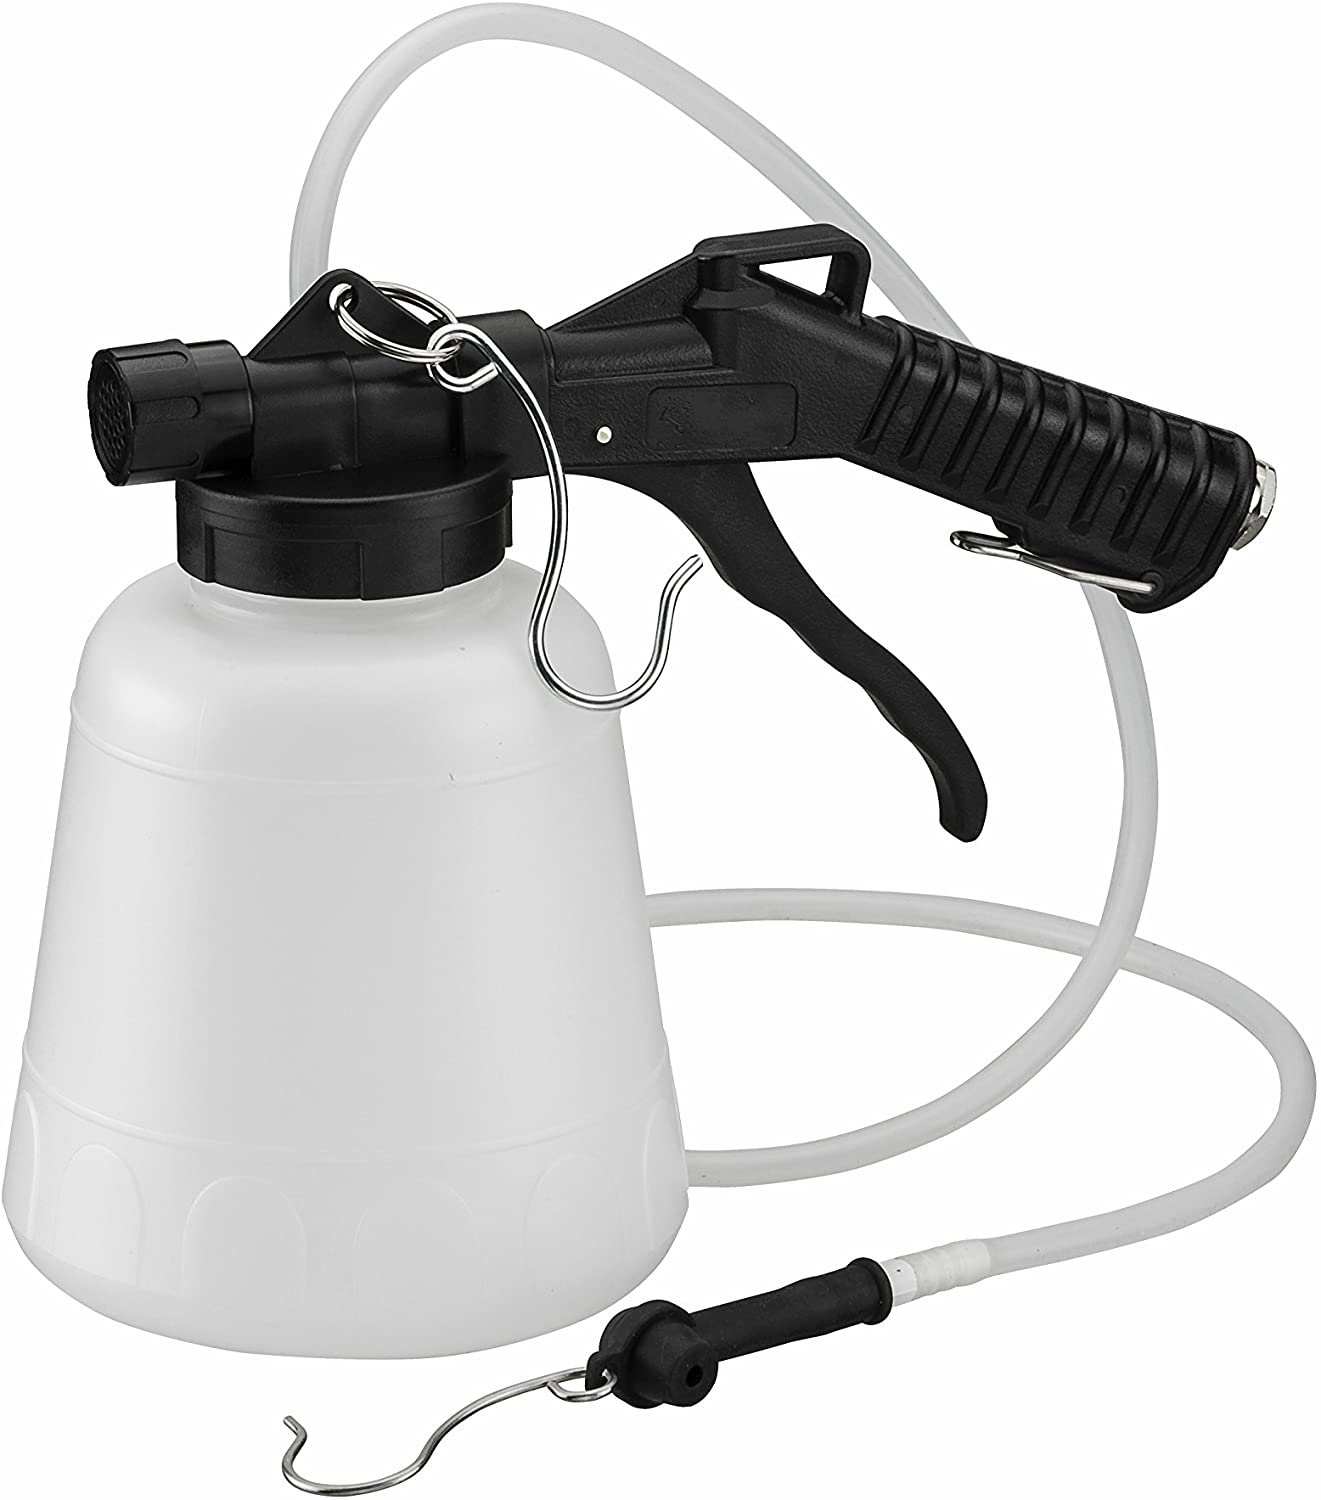
And I made this to put the other end under vacuum at 15 inches of mercury:

With the reservoir under pressure and the bleed jar under vacuum I cracked open the bleed nipple at the remote and the brake fluid gushed forcefully into the jar, taking any possible bubble with it.

I made two lids for the bleed jar. The one resting beside it in the pic has just the one nipple to attach to the vaccuum pump. I 3/4 filled the jar with fresh DOT5 from the FLAPS, screwed on that second lid and put the contents of the jar under 15-18 inches of mercury vacuum. Sure enough, microbubbles came out of the brand new brake fluid, probably just from transporting it home. I did this to the entire litre of new fluid before using it. The brake pedal is now the same as I remember it was using DOT3 and the entire job took no more than ten minutes.

5 Likes

Excellent. I try to buy DOT5 well ahead of when I need it so it can ‘rest’ on the shelf for months. Never occurred to me to introduce a vacuum to coax the tiny bubbles out. I will have to try this.

What evidence did you have that “microbubbles came out”? Was there a drop in vacuum as you watched?

You could see the microbubbles forming in the fluid and rising to the top. Hundreds of them. I should have taken a video. Still might.

1 Like

I’m using DOT5 for the same reasons as you Nick. I bled with a bicycle inner tube cut in half, one end wire tied to the mouth of the appropriate reservoir and the other end bent over and sealed with heavy black duct tape. Then I used a hand pump to keep about 10psi in the tube. Yes, a little air would seep out from around the wire but a helpful assistant simply kept pumping slowly while I worked the bleed valves.

The bleed process on a totally new system was very easy. I never “pumped” the brake or clutch pedals at all and the resulting pedal feel is totally acceptable to me. I’m not going to do heavy racing so I’m not overly concerned with boiling water out of suspension. It goes without saying that I will flush the system every couple of years to keep water from pooling and setting up corrosion, especially since it’s so easy to move the fluid through via pressure.

Secondary to stopping the car, saving the paint is my primary objective.

One last thing, I found that suction at the bleed valve drew enough air from around the valve that i couldn’t tell if it was from inside the system or not. Pressurizing the system eliminated that confusing issue.

Absolutely agree. Vacuum bleeding doesn’t work with these systems because the cracked nipples suck in air through their threads and you can’t tell when the line is bled free. I used high vacuum in conjunction with pressure not to bleed the line but to increase the velocity of the fluid flow, forcing any entrained air out of those two, long remote bleeder tubes. Alone 15 psi pressure at the reservoir provides a fairly relaxed rate of flow at the bleed nipple and is sufficient to continue flushing the system of old fluid without the possibility of a microbubble being trapped by inertia. I doubt the addition of vacuum at the bleed nipple would provide much benefit when bleeding a conventional setup, except maybe with DOT5.

That makes sense Nick. A good nights sleep and a cup of coffee later, I re-read your post and learned even more! Interesting results pulling the air out of the fluid.

The other advantage to a pressure (or vacuum) bleed is that you don’t move the piston in the master or servo past it’s usual end of travel. This isn’t a problem with a newly rebuilt system with all new pistons, bores, and seals, but with a car which has been running for a long time the M/C often fails not long after you’ve bled the brakes using the “push the pedal” method.

What happens is you push the seal past it’s normal travel and into the ring of rust/crud at the end of the normal travel, this either damages the seal, or pushes a lump of crud downstream into the system. It’s fairly common to have a problem shortly after bleeding/flushing a car which hasn’t been bled/flushed in a long time.

One way to avoid the issue is to use a pressure/vacuum system which means the M/C piston stays put during the bleed/flush, the other is to use the “Press/release” method once a year (which prevents the buildup of the ring of crud in the M/C.

Put some thick grease around the bleeder thread with the bleeder wound out quite a bit, then wind it back in until it is just open when using a vacuum bleeder - this helps a bit with the problem of pulling air past the bleeder threads.

So, getting ready to tackle the brake bleeding on my 66 FHC I researched threads here for tips. They range from remote bleeders, to Dot 5 conversion, to bent box wrenches, 7/16" distributor wrench, remove front shocks, inner tubes for pressure bleeding, vac bleeding , wife bleeding, etc. I have a Motive pressure bleeder but not the right adapter for our cars (German). Always bled well with it.
More importantly, how was I going to access the bleeder, even with my lift? I looked and it wasn’t pleasant. When I saw the suggestion of a distributor hold down wrench, I remembered my dad had one, but couldn’t remember if I kept it. I couldn’t find it but started looking at all the different configurations of wrenches I have when I came across a “custom” 7/16" wrench my dad made. While he had a Healy, this tool looked like it would do the job, and it does. It’s really perfect, use a long screwdriver for leverage to open and a stubby one for rotation for bleeding. In addition, I also found another custom tool of his, a Girling cap with an air nipple on it. Sure enough, it fits the Jag bottle perfectly. With the compressor set at 10-15 lbs. pressure, I should be in good shape. I’ll follow up when I do it. Thanks Dad!

1 Like

Nice writeup.

Where did you find a jar cap to fit the brake bottles? I’ve looked high and low and have never been able to fine one that fits properly.

What about an old steel oil can? Looks a bit like the thread on one of those.

I pressure bleed at 5 to 7 psi no more, not necessary. Made a pressure adapter for bottles using big rubber stoppers from plumbing dept. A small one for clutch bottle and larger for brake bottles. Drill a hole through center and insert a barbed brass air fitting. I use a clamp to hold it in place.
Glenn

1 Like

69 Coupe

I just bought this to bleed my brakes by myself and it was a breeze! I was very happy. I’m not touting this brand, type etc. Just was very happy to be able to do it without needing someone to press the brake, hold …

mark

1 Like

File under – Cats, skinning, ways to

That cap John shows is still available – as a TR3 part and other marques.

For the clutch I just tried various jars in the the spice cabinet until I found one that worked good enough.

Now I use the inner tube method.

I agree with Glenn’s point - go easy on the pressure, you just need enough to keep things moving, no need to test the reservoirs & their hoses under pressure.

This is very much a ‘whatever works for you’ task.

2 Likes

Geo do you have a good source in the USA for this cap ?

David
68 E-type FHC

I found it in Pat’s pantry. I think it may have been off an olive jar, but it’s been so long I no longer recall.

2 Likes

I bought one a couple of years ago but I do not recall where and have since sold the car (and sent all receipts with it). But I think this is a TR3 cap:

https://www.ebay.com/itm/Girling-Hydraulic-Clutch-Cap-Washer-500201-for-Triumph-Austin-Healey-MG-etc/193052864251?epid=1052676637&hash=item2cf2d8eefb:g:qwgAAOSwryBaX3vE

That is a UK source but does include shipping in the price (I think - ad is confusing).

But let me stress - I did not use this cap on the plastic E-Type reservoirs, I’m just showing what I think is the same cap that John L pictured with a air quick-connect added. It may work but I have no personal experience with it in that application.

…I hope you ate the evidence…:smiling_imp:

Shhhh. I put the olives in a different jar.

Don’t tell Pat.

1 Like

Ah, Ok, thanks. …

I didn’t, well not technically. I found it in my toolbox which is a combination of a lifetime of mine and my late father’s tools. My dad made who knows how many years ago.