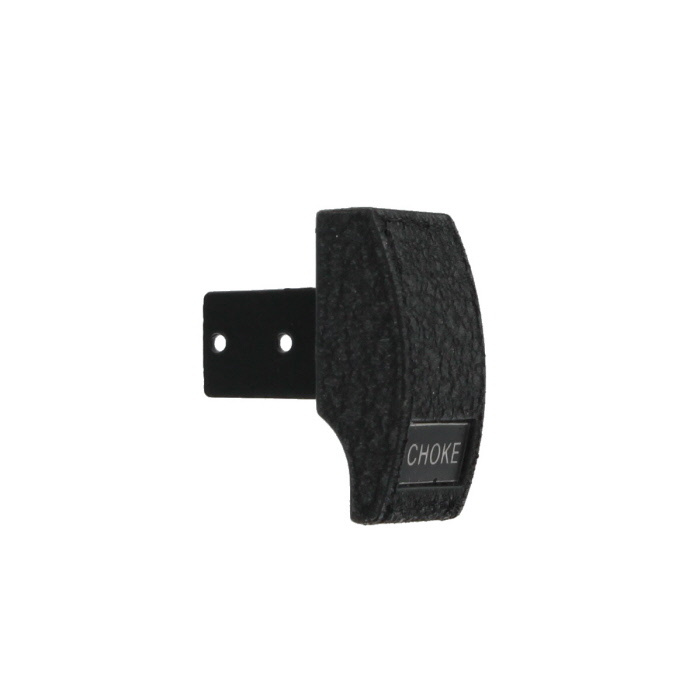
My choke knob is showing its 51 years of age and to spruce up the cabin I purchased a new choke knob. However, upon taking the two minutes I expected it to take to replace it I discovered that unlike the heater knobs with convenient screws on the side, the choke knob has it two screws on the back and the bracket that holds the knob to the choke mechanism is riveted on with two small rivets on the side.
The new choke knob has the two screws on its back too, so the obvious way to replace it is to loosen the two screws on the back of the old choke knowb However, I am not an anorexic contortionist able to hang upside down to get to these two screws. Is there a trick that I’m not seeing to get the old screws off and the new knob and screws back in? There simply isn’t room to get a screw driver in there to loosen the screws.
I wonder if undoing the cable at the carbs would allow the knob to come out farther? Stlil a tight space and possibly calling for a right angle screwdriver (like this):
Great minds think alike, I tried that exact tool (thank you Harbor Freight) but it won’t fit. I even tried taping the flat bladed tool into a box end wrench think it was thinner. While it fit, I could only do 1/4 turn and then I would have to remove the tape and re-tape it ever 1/4 turn. That’s when I gave up for the night and came here…LOL
Thanks. I’ll give that a try in the AM, I’m done messing with it for tonight. I have multiple Jag projects underway, now all waiting for parts in the mail…
Bob,
If you are only replacing the black plastic knob, then it is removed by loosening the set screw on the side of the knob. Pull it off and install the new one. Simple and doesn’t require the removal of the lever assembly that you are showing in your photo.
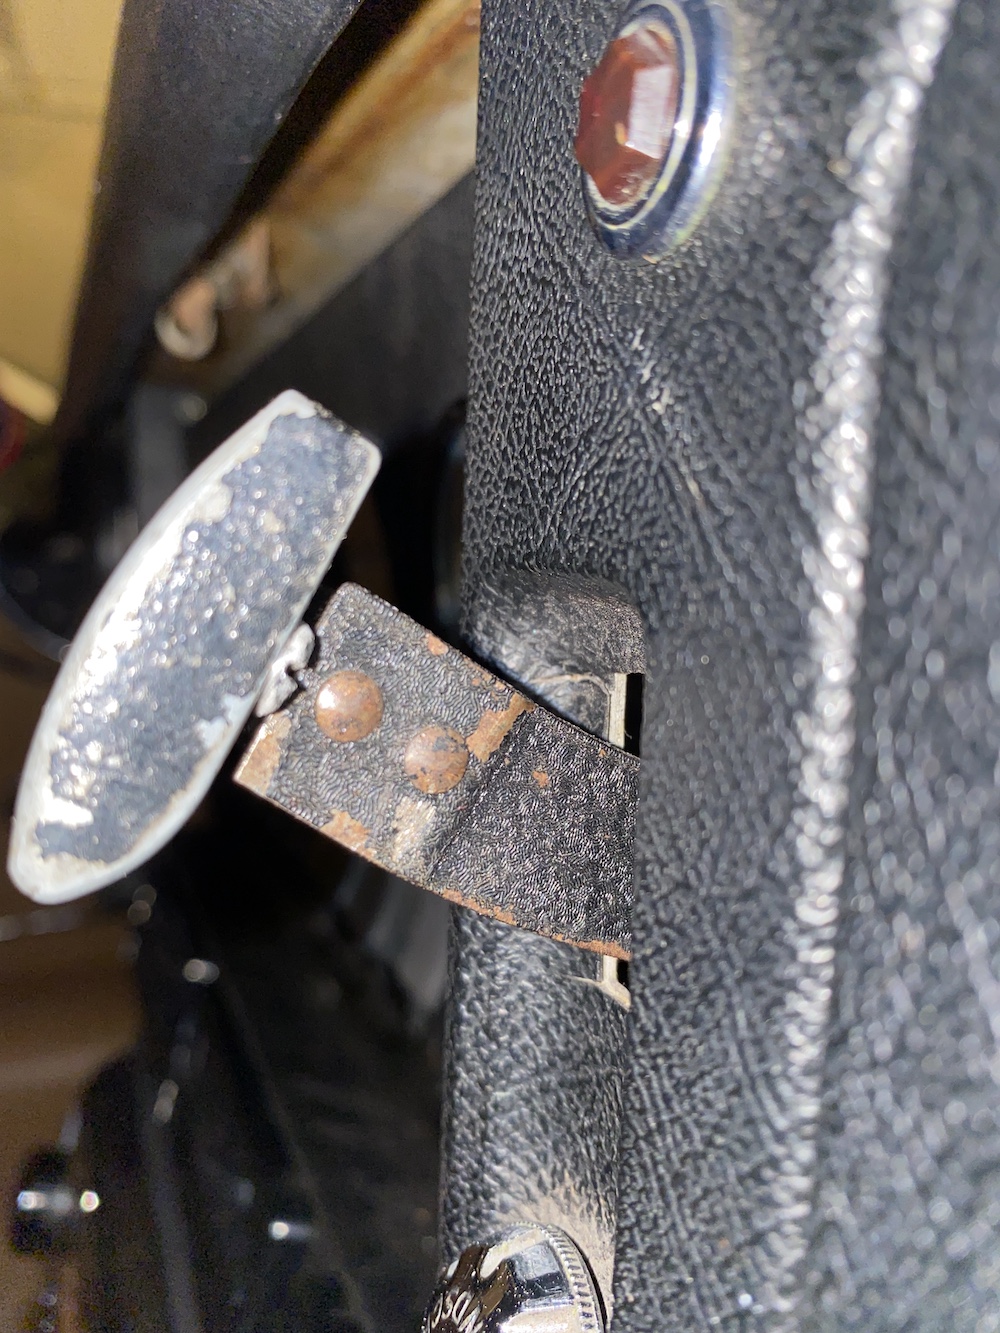
They are for the rivets and the rivets on mine were loose so I hammered them tight by putting a solid piece of metal behind them then hammering them a few timesQ
There are small rivets on the shaft section (rusty as it is) and two screws on the back of the old and new choke knob. It has been more than a bit fiddly to get the screws out. I will give it a go again tomorrow and I’m sure I’ll finally get it, but it is more time consuming than I expected. I replaced both heater/air knobs in less than two minutes.
Mine comes loose and drops off periodically (so does my choke knob… ). I use a scrap of hacksaw blade that fits into the screw slot to turn the screws a little at a time. Painfully slow, but gets the job done.
I have a screwdriver here that would get that. Very thin with very stubby blades (about 1/16" long) - one at a right angle to the other. Also tedious so perhaps the hacksaw blade is as good as it gets.
I finally gave up on trying to remove the screws on the back of the choke knob, they were tight and nearly impossible to turn. I drilled out the two tiny rivets. After getting them out, I determined that the holes in the brackets were only slightly smaller than the smallest rivets in my kit (3/32") so I drilled the bracket and the dash lever out so ever slightly.
I then used wrinkle paint to re-paint the bracket that attached to the new choke knob. After it dried, I used the new screws that came with the new choke knob to re-attach and then used two 3/32" rivets to to re-attach to the choke lever. A dab of black touch up paint on the rivets and it was as good as new.
#1 Excuse the dirty dash, I just got the car two weeks ago and a deep clean has not hit my to do list yet #2 I will ultimately get the correct shade of black and touch up the rest of the choke bracket
FYI if anyone needs to remove the choke actuation mechanism for repair and/or adjustment, these rivets need to be drilled out and the two “L” shaped pieces that hold the knob must be removed in order to get the device back out through the glove box panel slot.


 ). I use a scrap of hacksaw blade that fits into the screw slot to turn the screws a little at a time. Painfully slow, but gets the job done.