As recommended to keep these types of threads manageable, I am starting Part II of my restoration saga. Part I covered intro to my car and the purpose-built hobby shop, and mainly preparing to, and pulling the engine and then separating the tranny from it.
My next major focus is pulling the wiring harnesses out and IDing short-falls in my gaskets and seals holdings.
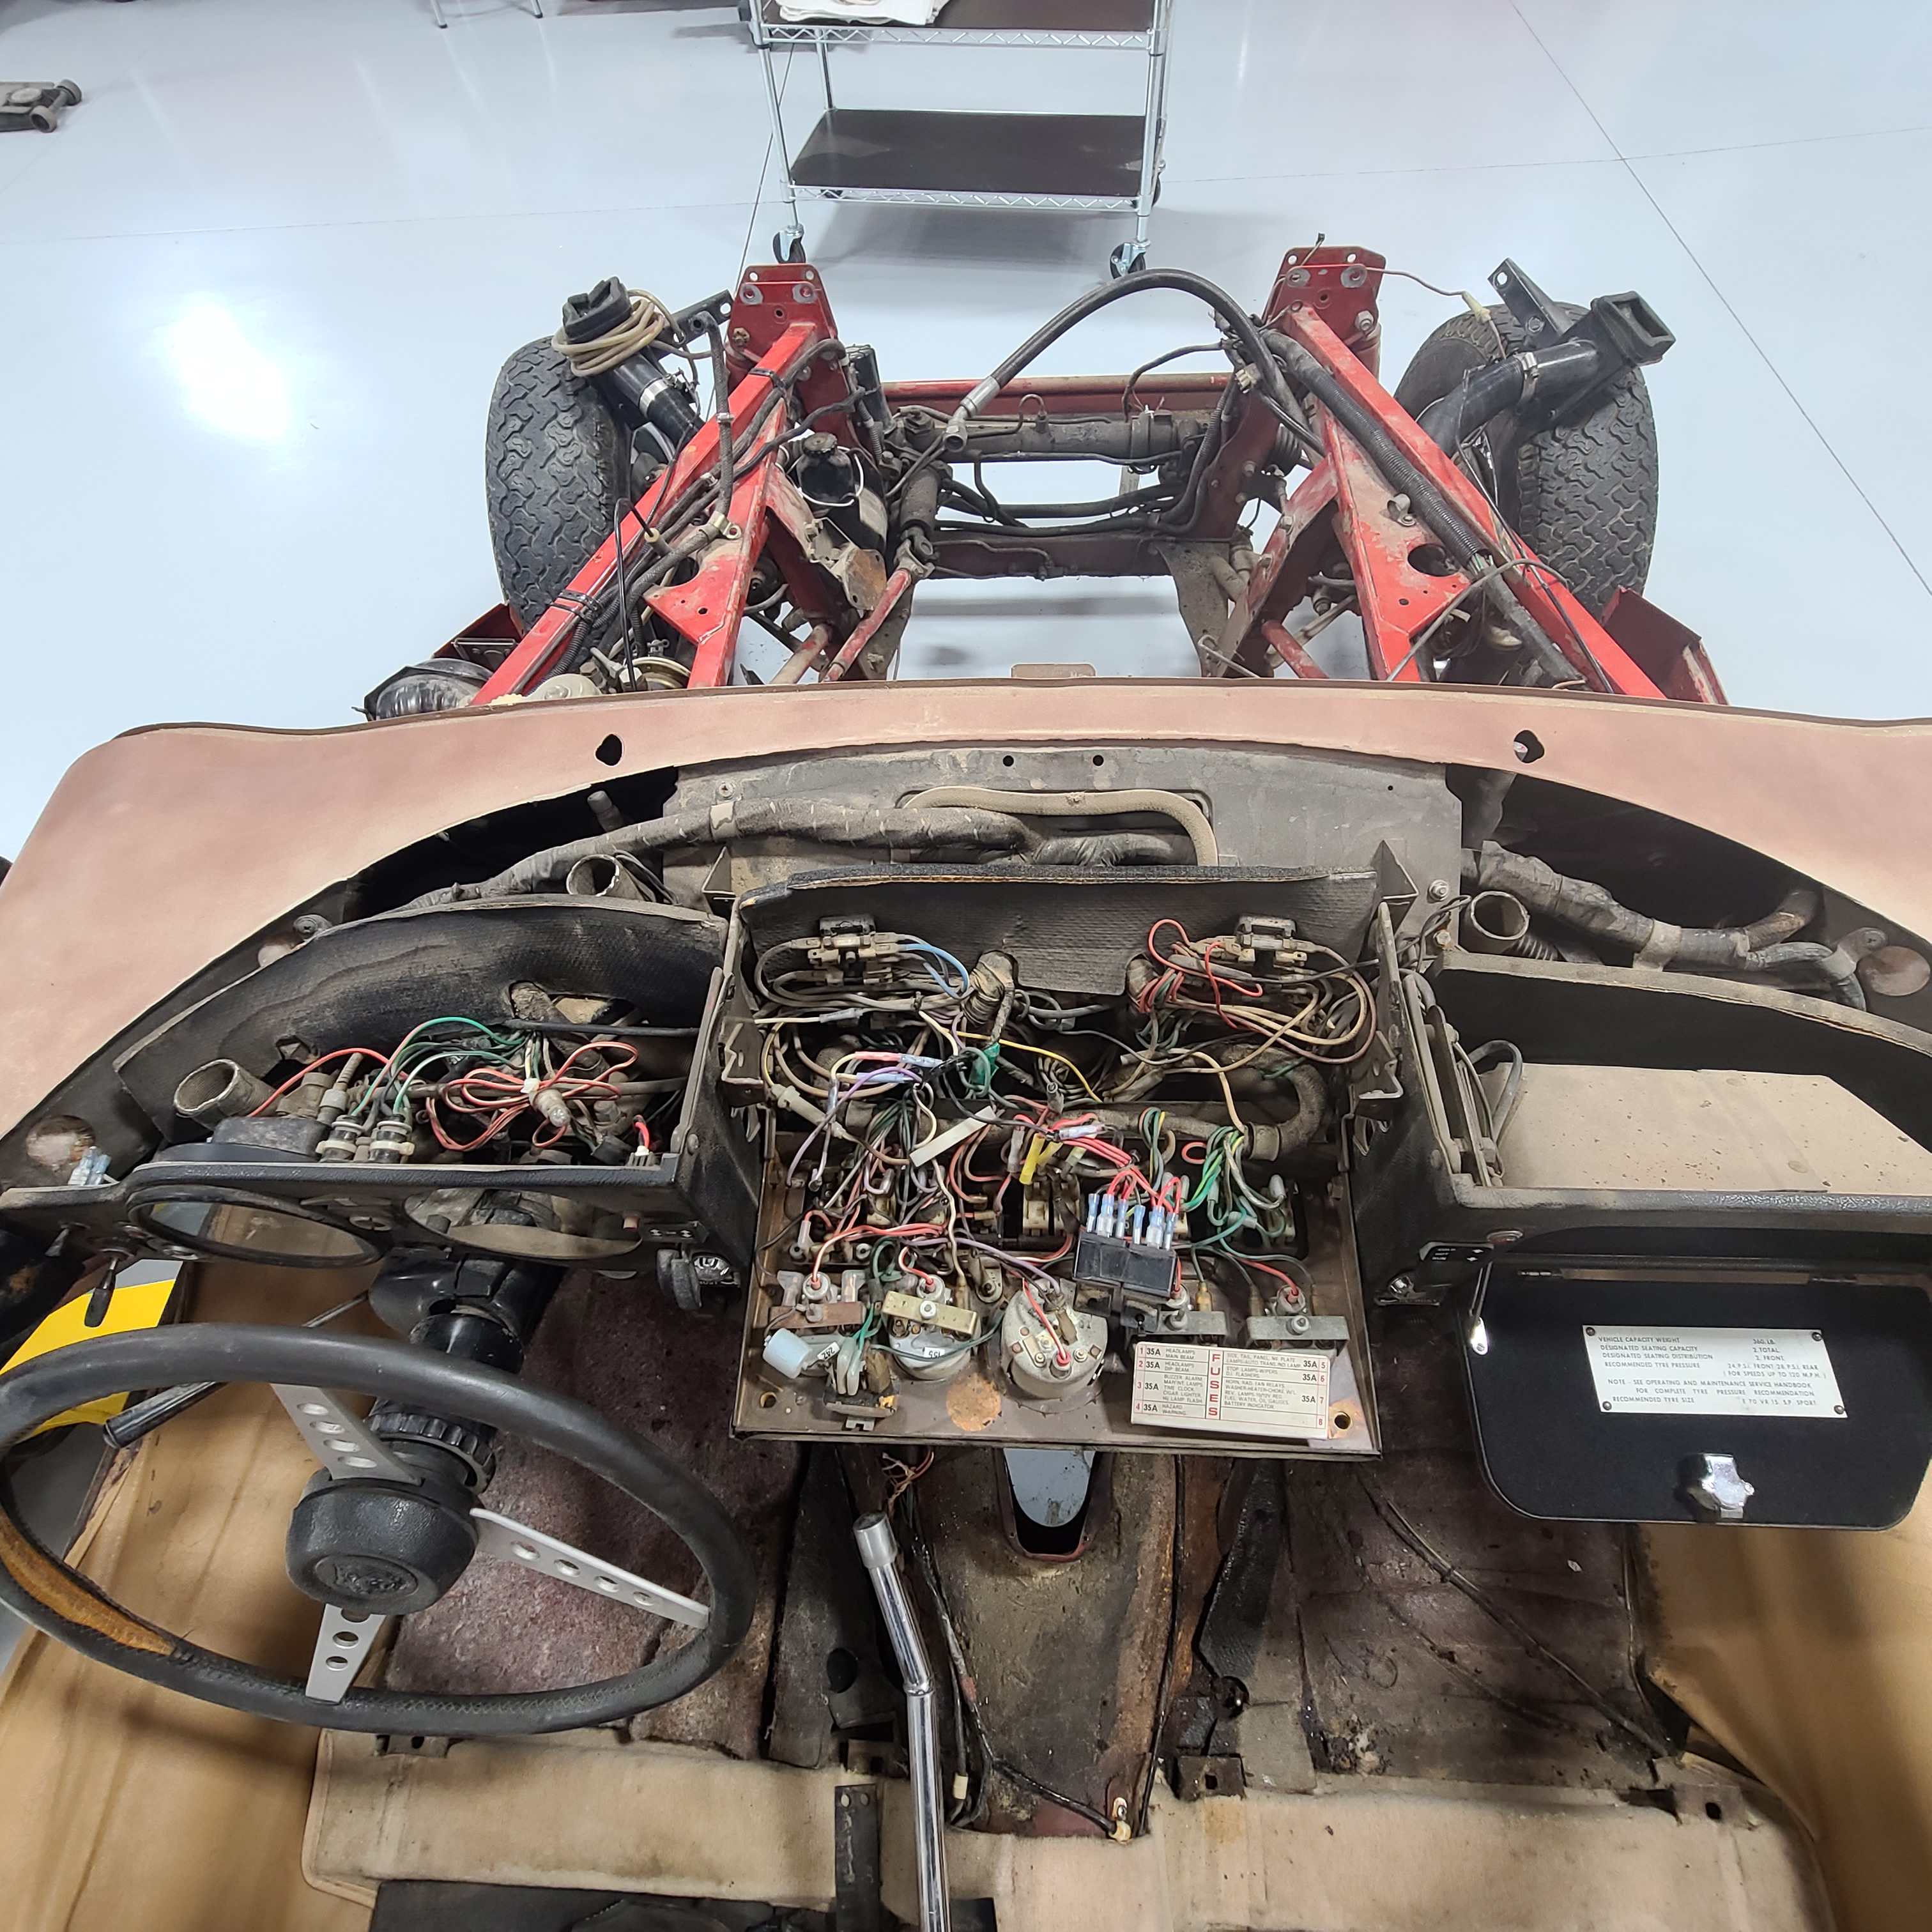
I’ve looked at the lay of bulkhead harness and how it connects to the gauge harness for three days and can’t figure how it interlaces around the cars structure. This is a poor photo that IDs my conundrum:
In the center of the photo is what appears to be 2 harnesses in the rectangular opening in the center of the dash – it is actually all one harness. The right side splits and enters the fuse box area beside each tower of fuse boxes. The other splits twice also: one dips downward and to the left toward the steering column (I think) and the other runs under the structure – but I have no idea to where.
The solution is easy: spend $2,000 for EVERY wiring harness in the car and then lay them out on the floor to get a guide as to direction and connection(s). That box ought to arrive this weekend (26/27JUN21) - then the fun begins anew . . .
While waiting for what I hope to be the (a?) solution to the run of all the harnesses, I decided to get a better handle on where I stand vis-a-vis gaskets and seals and the like.
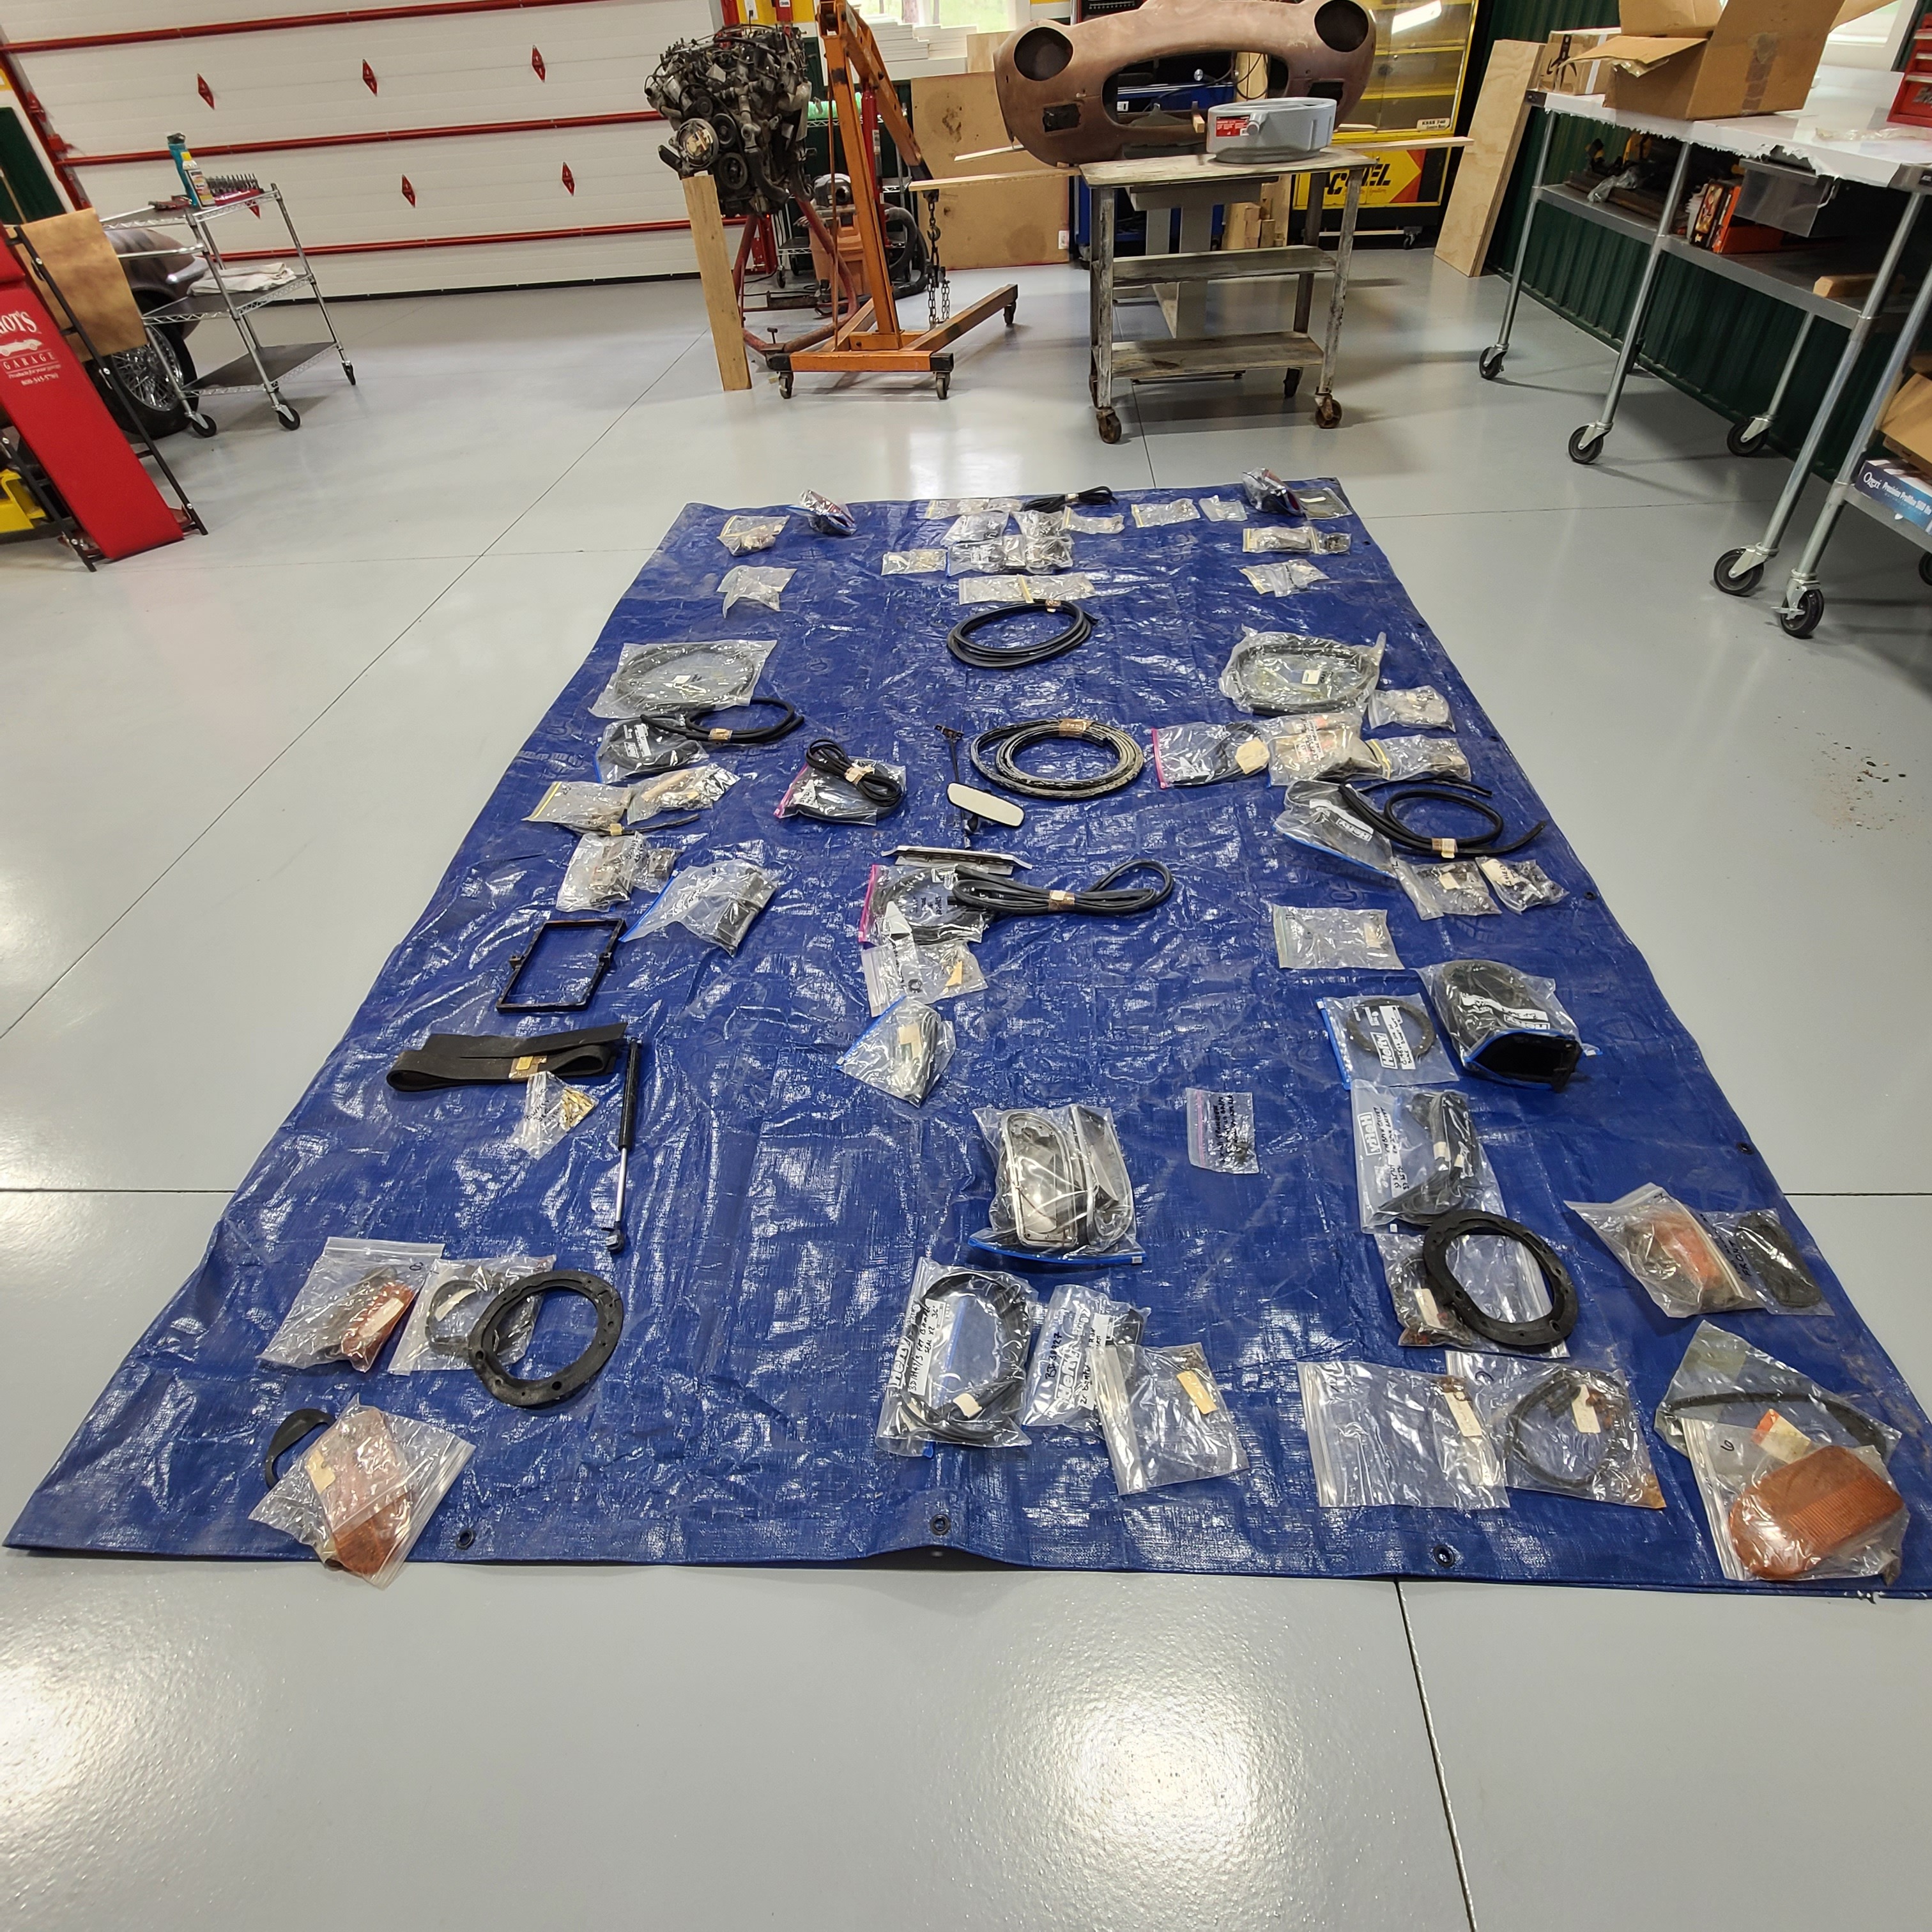
Here is the overview (it’s so nice having lots of open floor space to lay this out) of my efforts:
This lay-out has the same orientation as the car: the bonnet bits are in the foreground and the boot lid seal is way in the background.
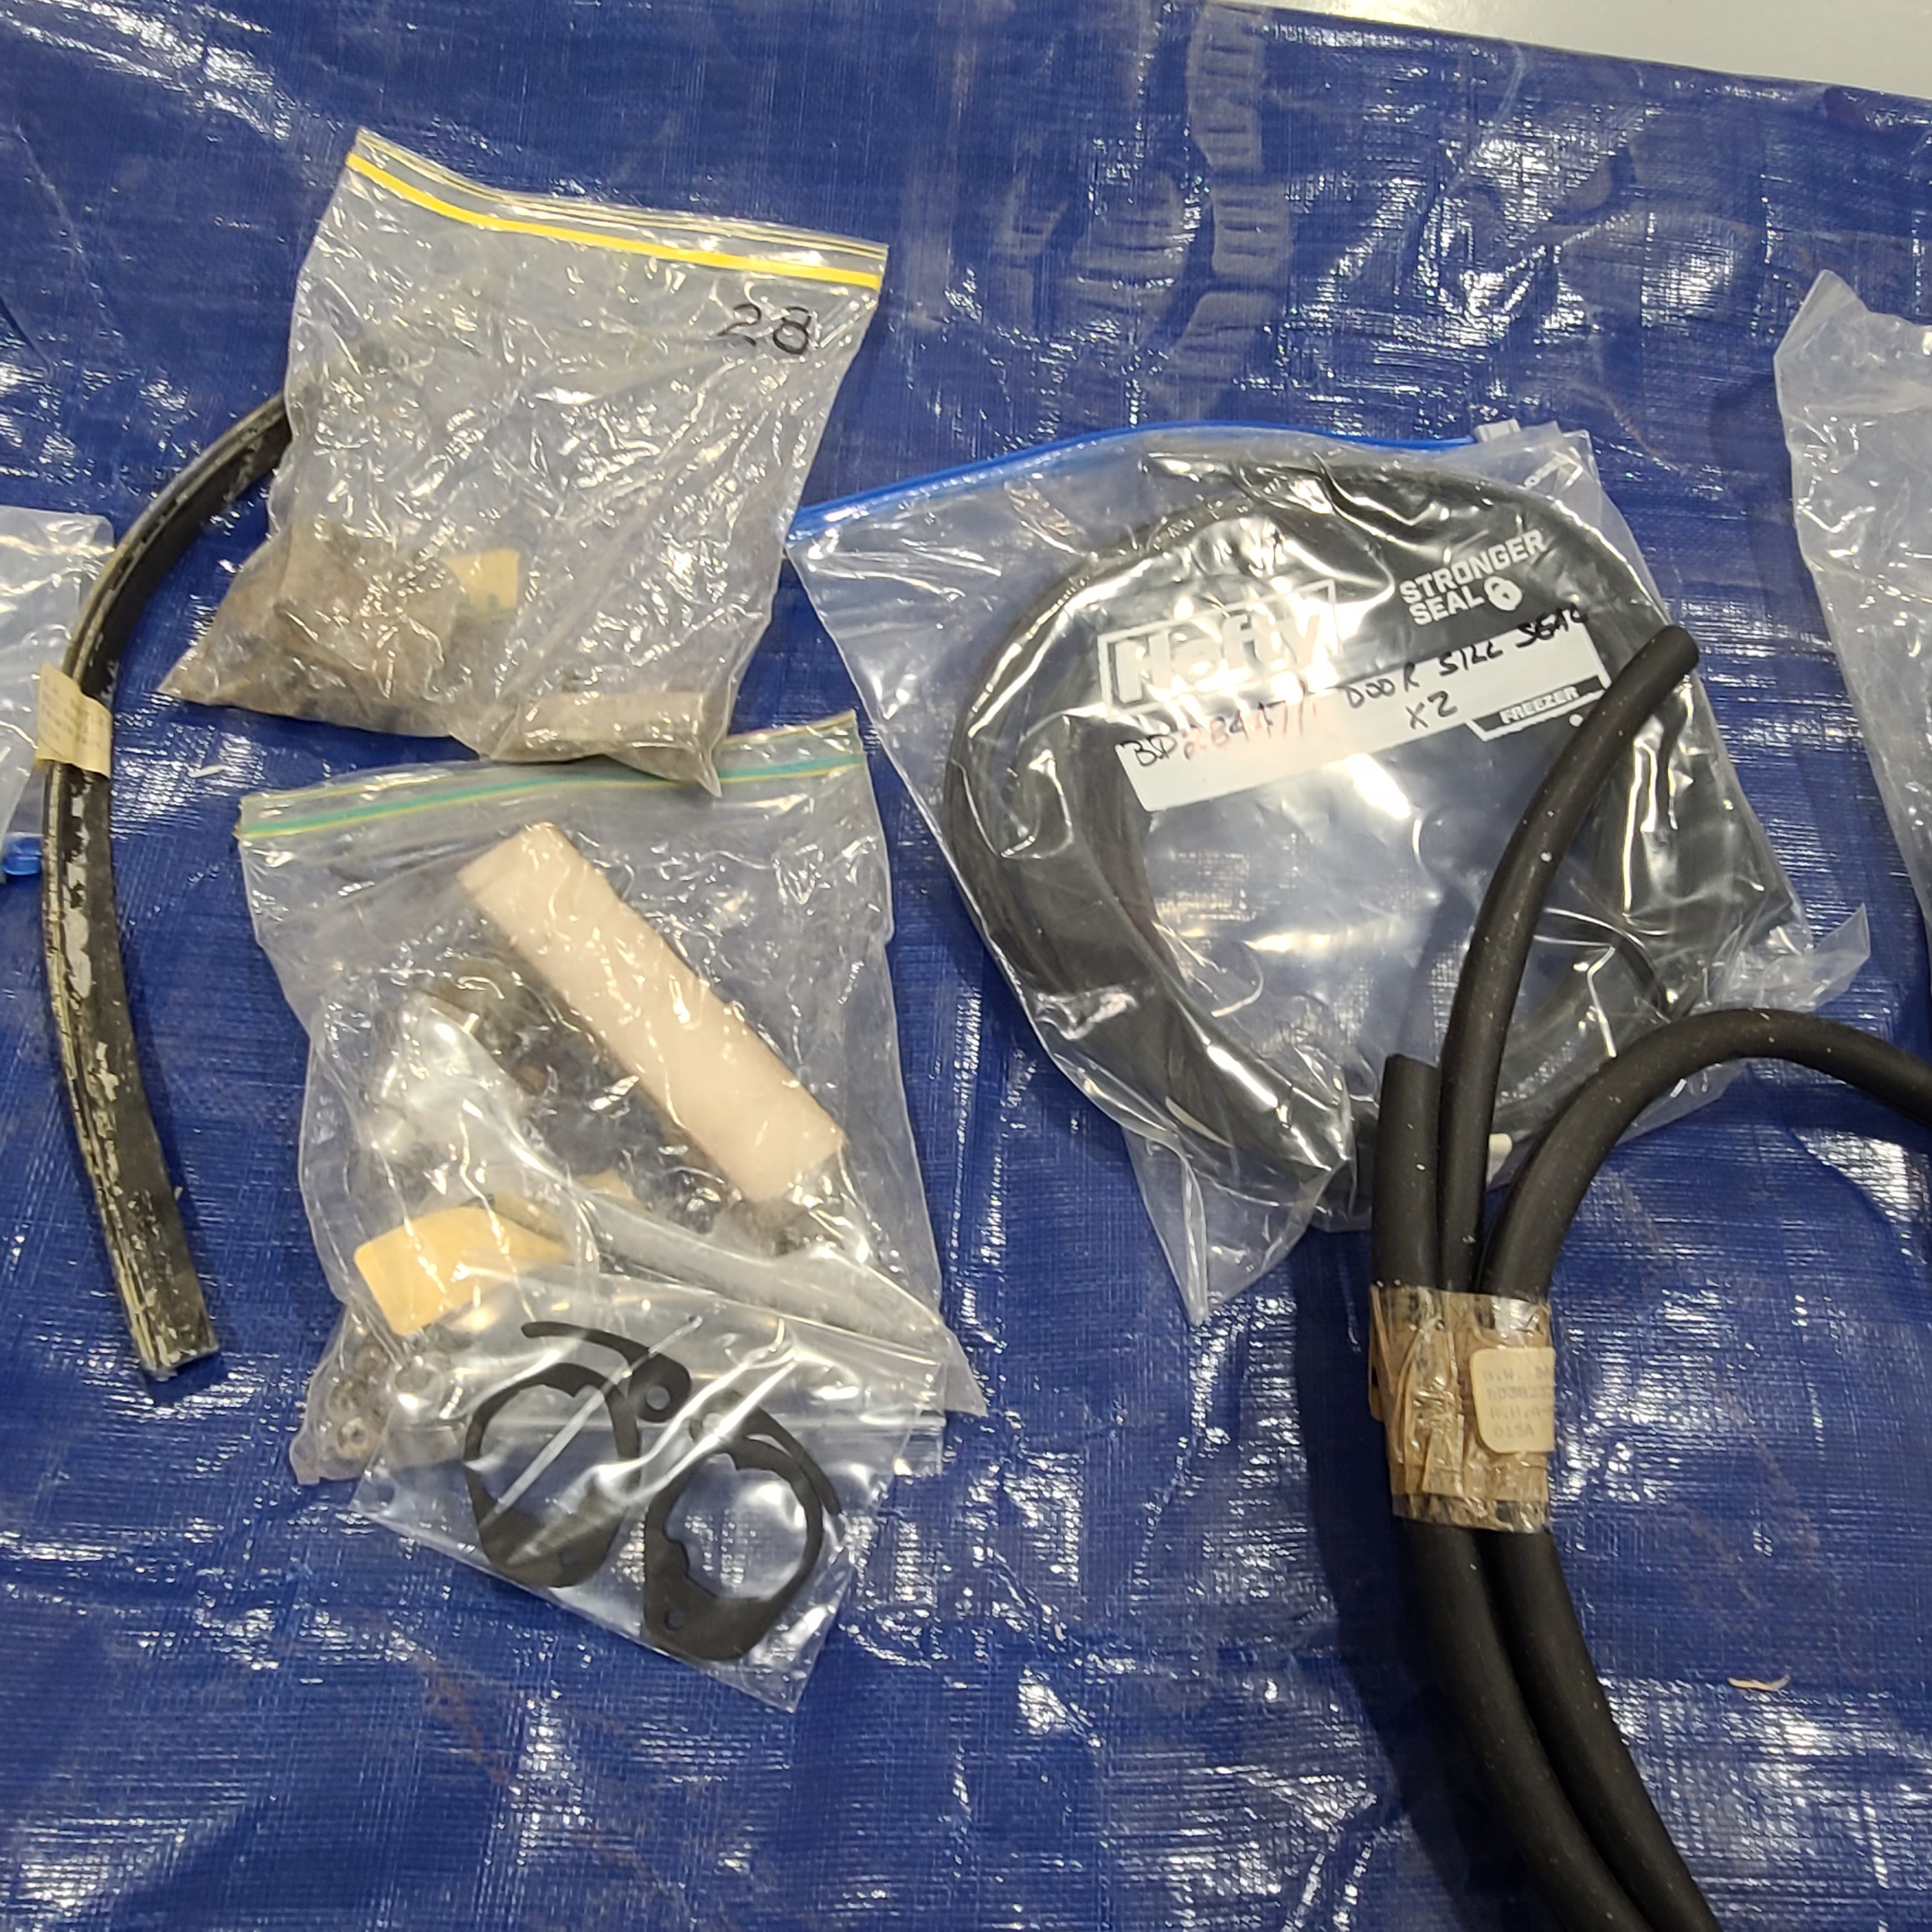
QUESTION: these are years old (30 +/-) plus how-ever-long they sat on the self before I bought them from SNG Barratt in late 80s. Will the white/yellow coating have preserved the rubber for all this time? And how do I remove it when the time comes?
Here’s an example of the coating on the Boot Lid Seal
I compared my holdings to several on-line gasket/seals offerings from the main vendors and made a list of the shortfalls. It is a depressingly long li$t – ahhhh, the joys of Jaguar tinkering
I mentioned in my first posting of this thread about weighing the major components.
Thought I’d post the spreadsheet – which is certainly a work in progress.
I policed up all the gaskets and seals from above – double checking what I have and what I need.
I laid out all the major chrome pieces and scrutinized each with an eye toward re-chroming it or simply buffing it. As I said, I attended the Street Rod Nationals in Pueblo and linked up with the California-based chrome shop I’m gonna use. They attend 3 major car shows in CO: one in Denver each February, this show in CO Springs in June and the Tri-State meet in Longmont in Sept. They’ll accept your pieces at show X and depending upon their condition and the quality of chroming desired, return them at show Y. No shipping charges. No mis-handling by USPS.UPS/FEDEX/other. Took tons of photos.
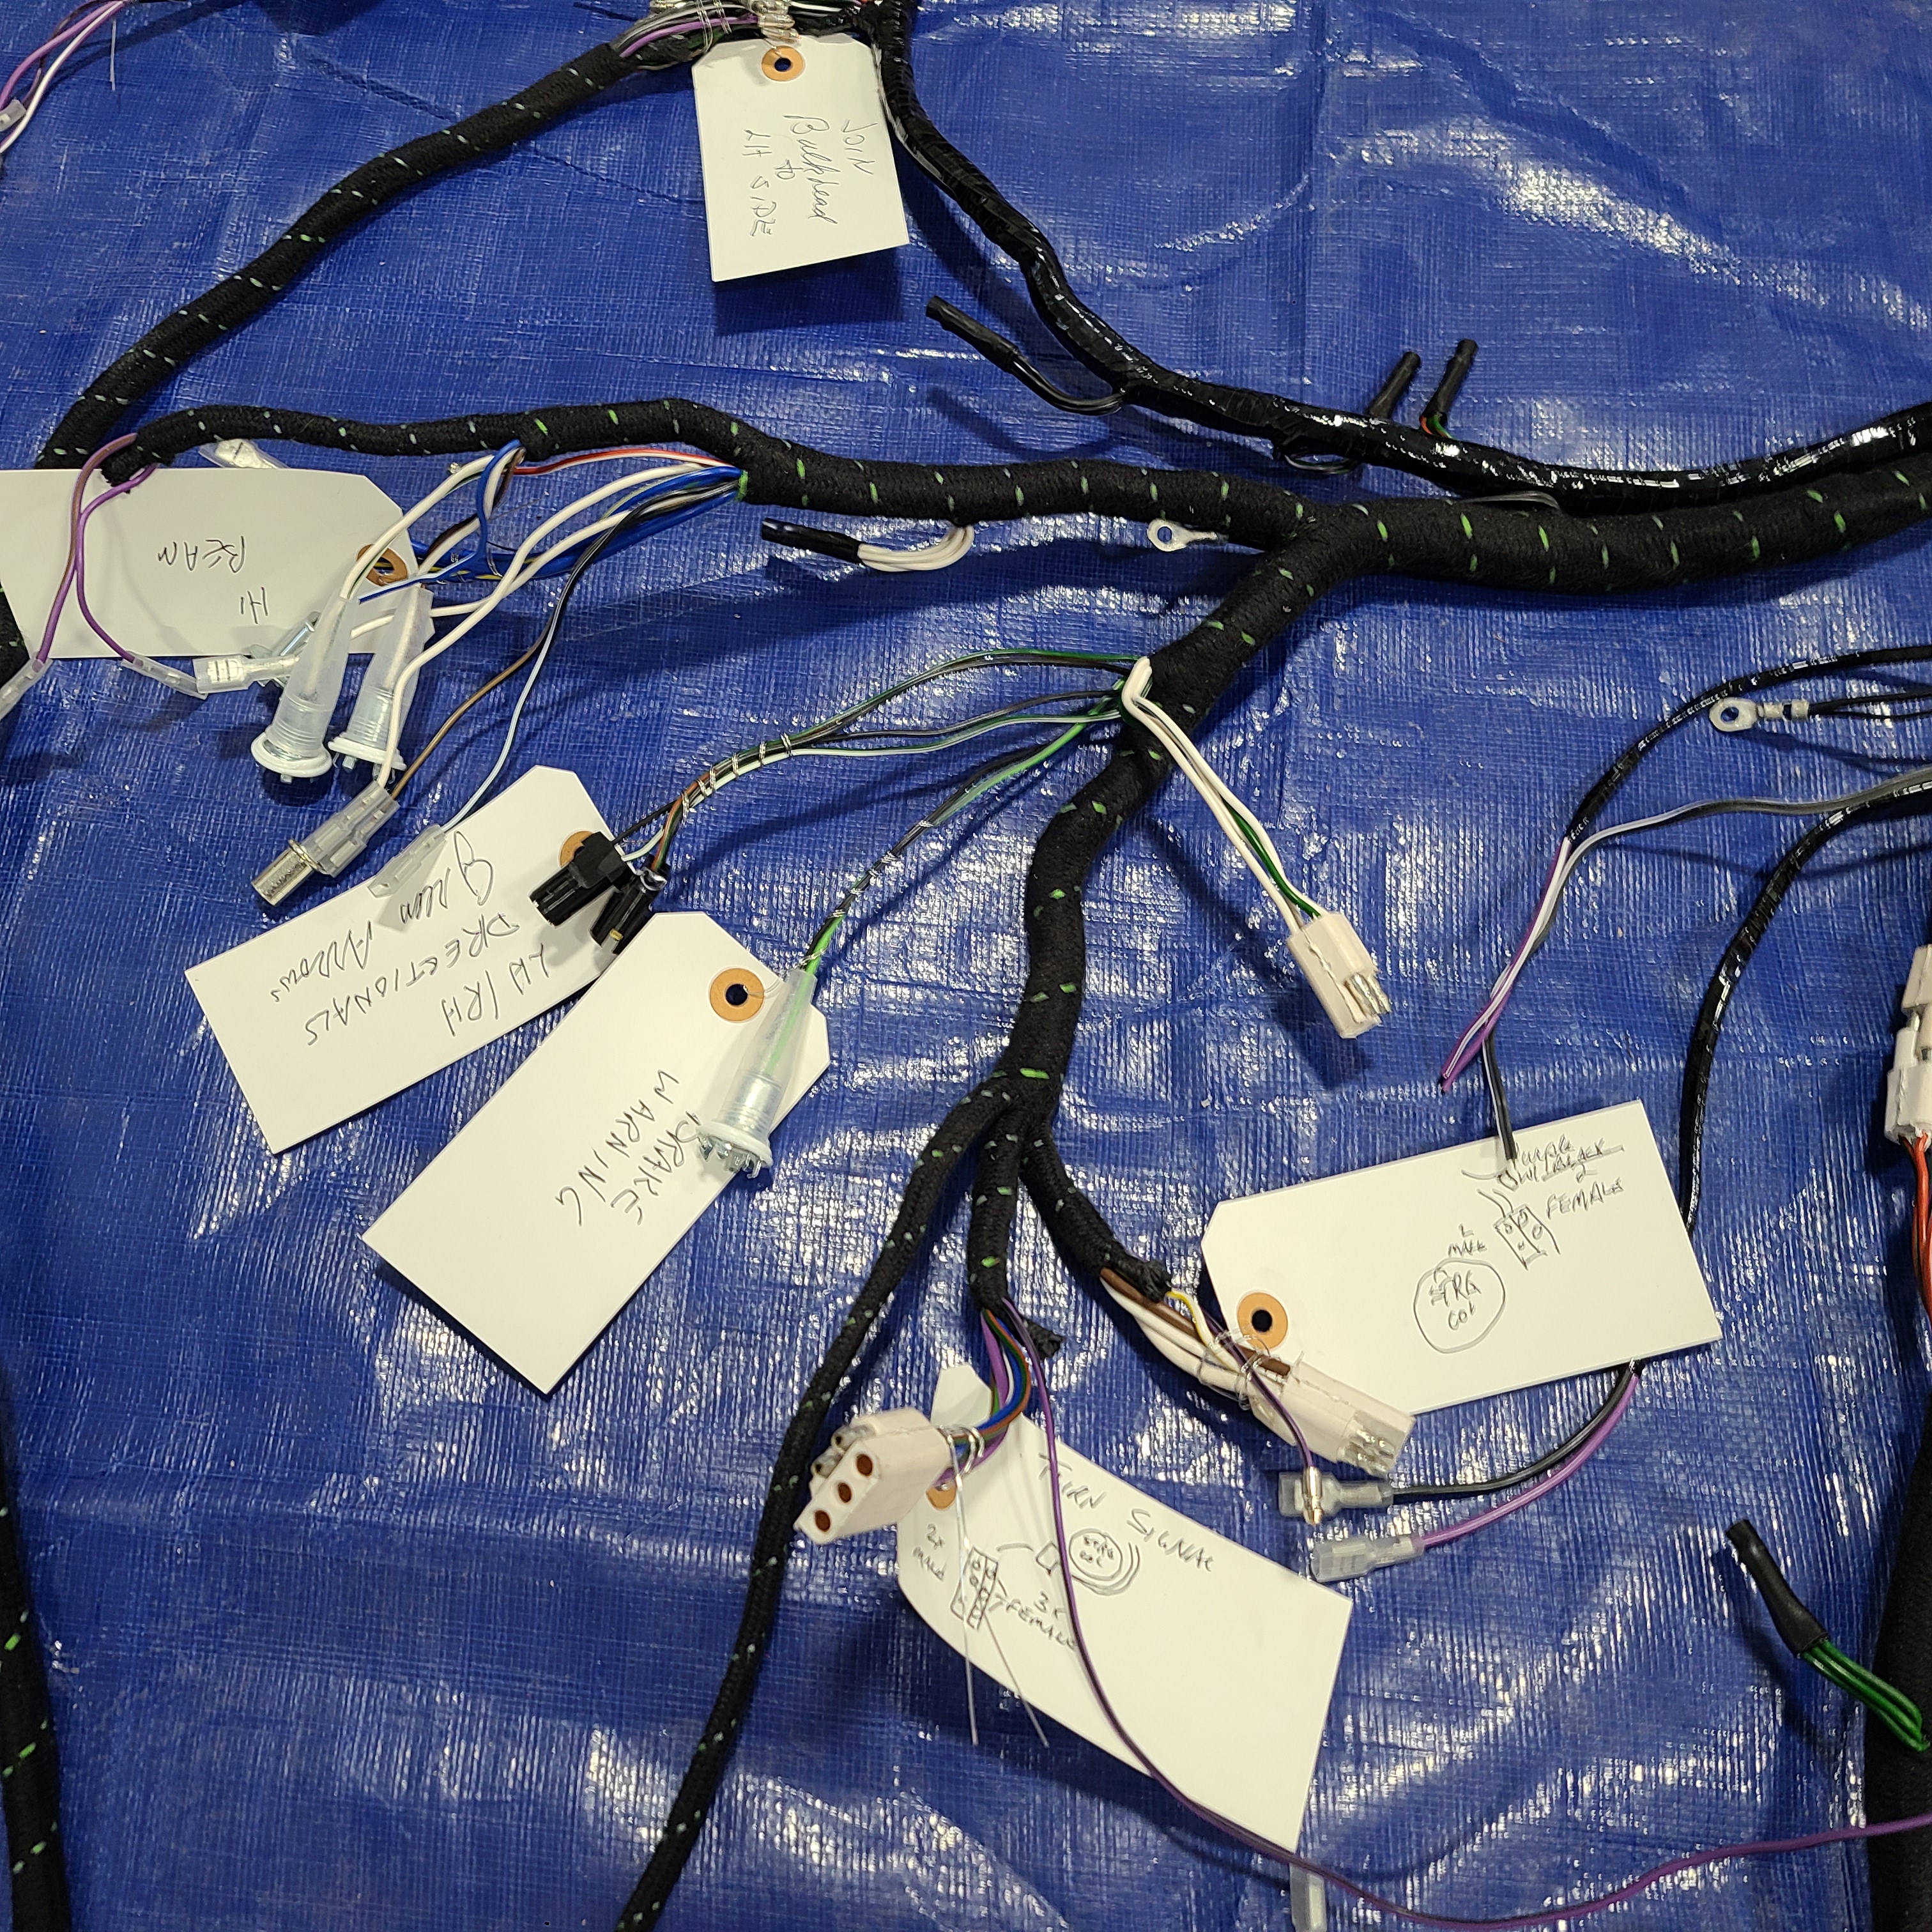
Then I laid out all the wiring harnesses to ensure I got the full monte in my order – it was a surprisingly small box. All accounted for.
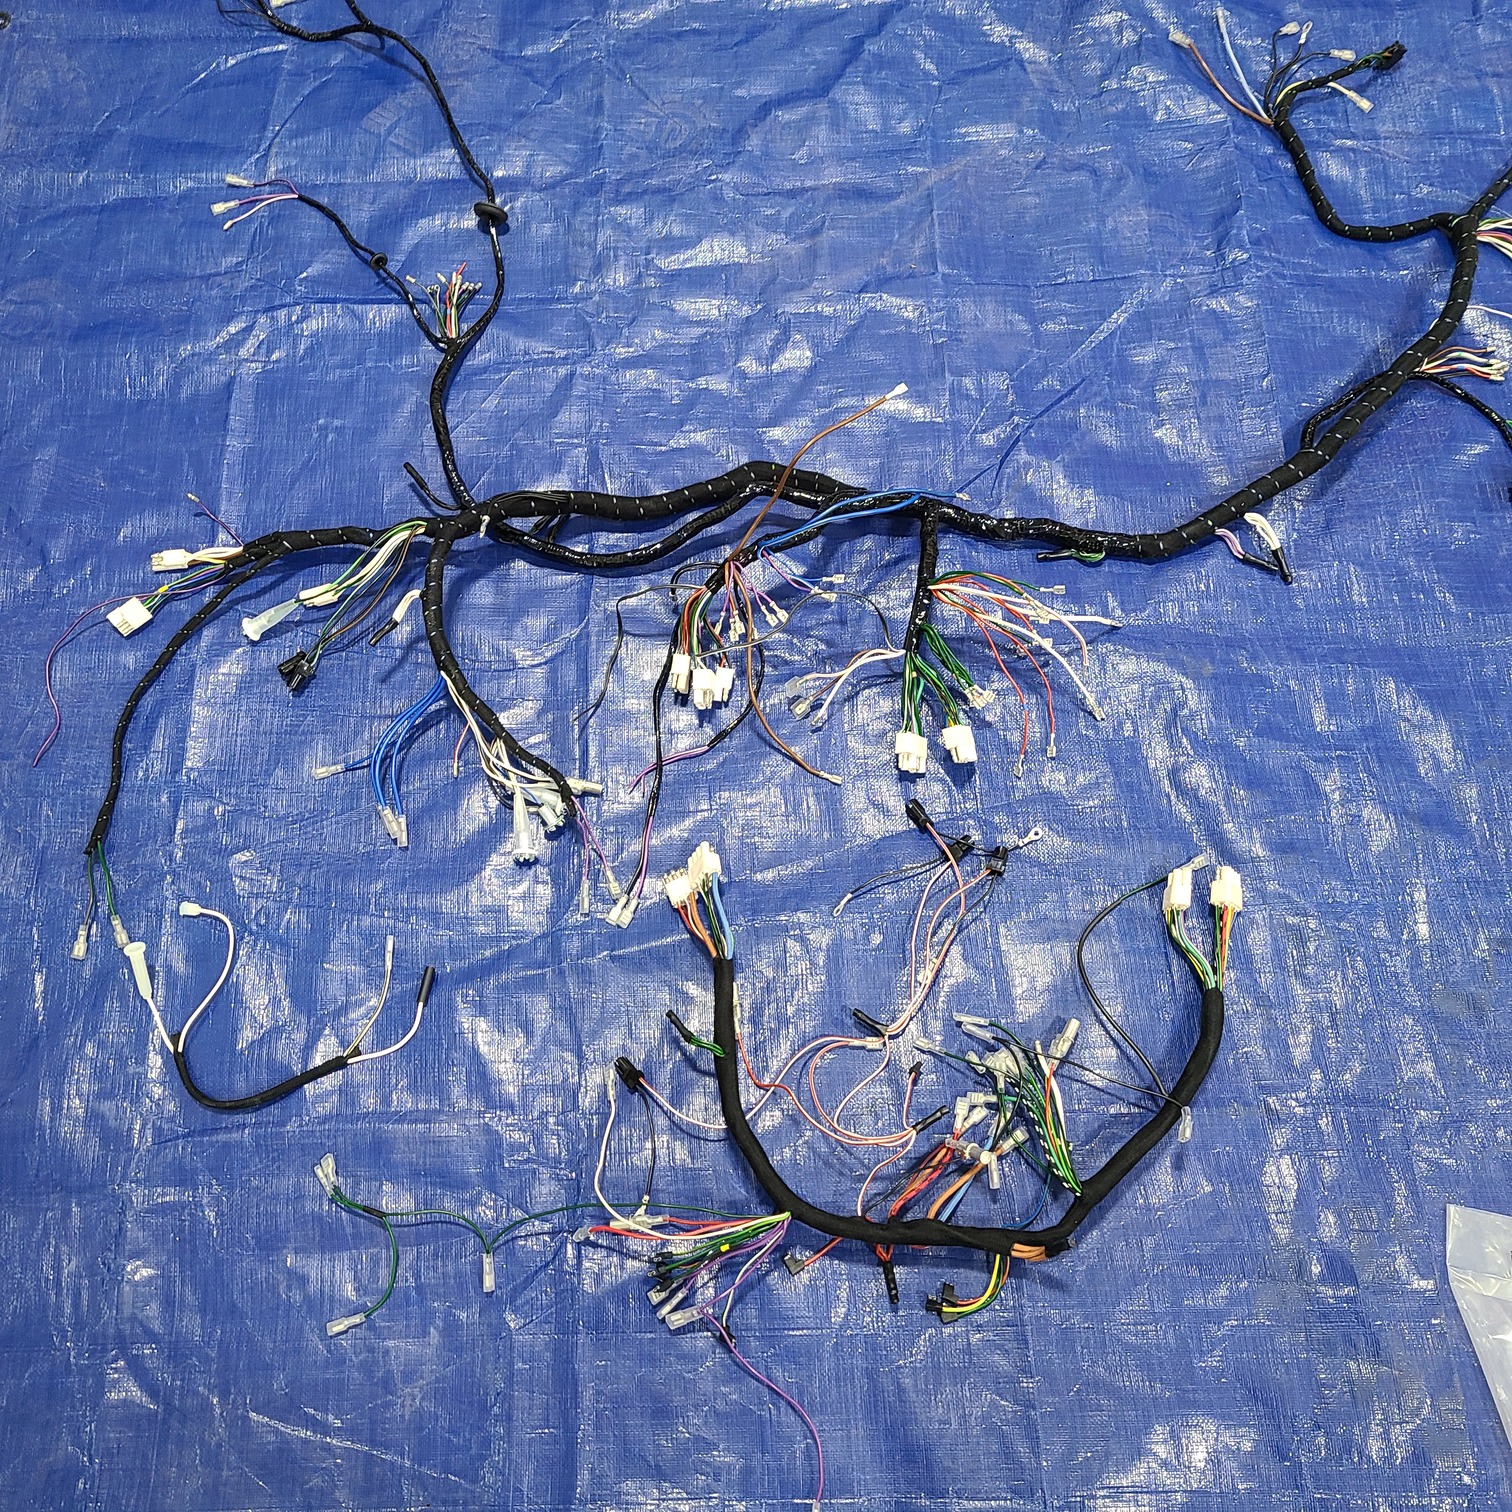
I opened/unraveled the bulkhead and panel harnesses to get a better view of how they lay-out and inter-connect. The light bulbs came on (pun intended) and I now understand where that mystery harness segment goes. The mystery harness run turns out to snake under the dashboard and speedo/tach and pass through the firewall to the left of the pedals and into the left side of engine compartment. Yay me!
The harness segment in the photo that caused all my consternation is in the upper left corner – tape-wrapped – the attached grommet was the give-away. I was hoping the new harnesses would have clues/tips and I was correct. I also didn’t realize the harnesses were plugged together (the white plugs were that major clear – just gotta figure out where those plug-ins are on the car.
Now on to an increased pace in removing the wiring harnesses since I understand better where they go . . .
Craig, That white substance on the boot seal is likely a mold release agent, a wax based coating that has now hardened.
When I replaced our 72 2+2 windshield with a new seal, it had the same waxy film on the rubber. I used hot soapy water and a stiff scrub brush but it was difficult. Iirc I even used a scraper. A pain for sure.
You might want to try 3M Adhesive Remover or experiment with some other rubber/vinyl cleaners.
For some, this would be a minor step in the total clearing of all wiring harnesses in the car.
For me, I stared at the harnesses for 3 days.
And then ordered all the harnesses so I could see how they inter-connected. Today (01JUL21) I took a major step forward in removing the harnesses: I found where those block plugs (not the correct term I am sure but it works for me) resided. They were all clustered down low and centered behind the gauge panel. Once I was able to disconnect them, the gauge panel give way with out complaint
Oh – and I ordered a packet of single wire bullet connecter sleeves. There are 20 in the packet – – I’m gonna need at least one more packet of 20 (I’ll likely ordered 2 just to be safe). The 2 side harnesses have 9 or 10 wires requiring a handful of bullet connectors:
Craig I wonder given the condition of the original wiring on the instrument panel and that it just plugs into the loom…… maybe there is an opportunity to leave that bit of the loom alone and a nod to the originality of the car…. Just a thought
John – I mostly did that.
The boxes of seals and gaskets were stored for years in a non-climate controlled off-site storage garage – so out of sun light but subject the vagaries of Phoenix and then C Springs weather.
In the last several years, they were in my heated garage.
So – – we’ll see.
I assume I’ll be able to tell by the appearance of the rubber pieces; they’ll just simply look like weathered rubber.
I was getting a bit frustrated with my progress on disassembly. I would work for hours making sure I knew the routing of the harness(es) and how they connected; at the end of the day, I know I made progress but it just wasn’t apparent.
I have ID’ed a goodly per centage of the terminals on the new harnesses. I found I did not need to tag every item; by tagging a major component, the others would simply fall in place . . .
So – I turned my attention to another element that needed to be done before I sent the car to the paint shop: stripping carpets and cleaning the floor. After 4-5 hours I had nearly every carpet and under felt out and attacked the coating on the floor – wrong move (tease).
So here’s here debris: I know – I know: don’t throw away anything.
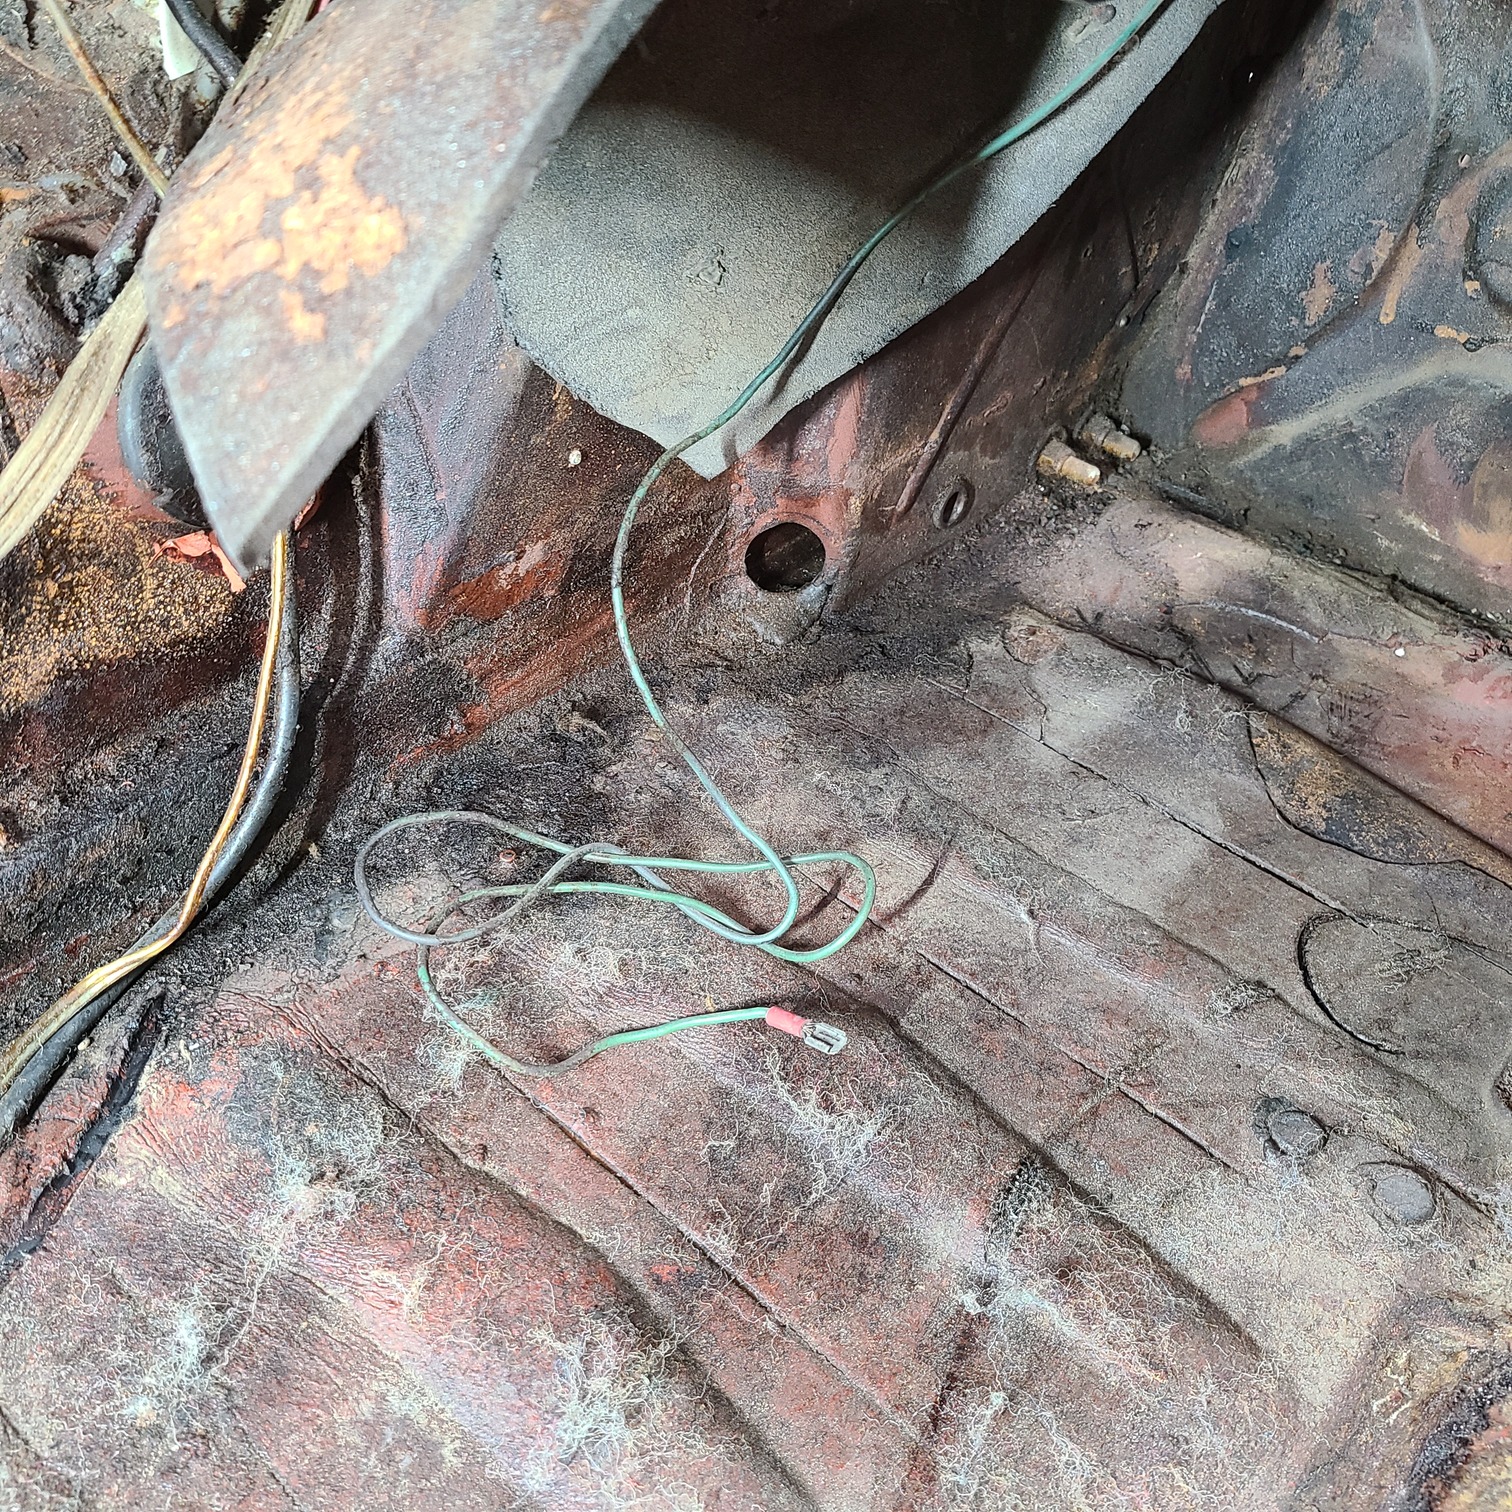
I now know the EX was not just a complainer (well . . . ) It’s possible the plug came out when the body shop stripped out the passenger side carpet / underfelt, but it appears she had a hot-air jet right at her ankles. Poor thing.
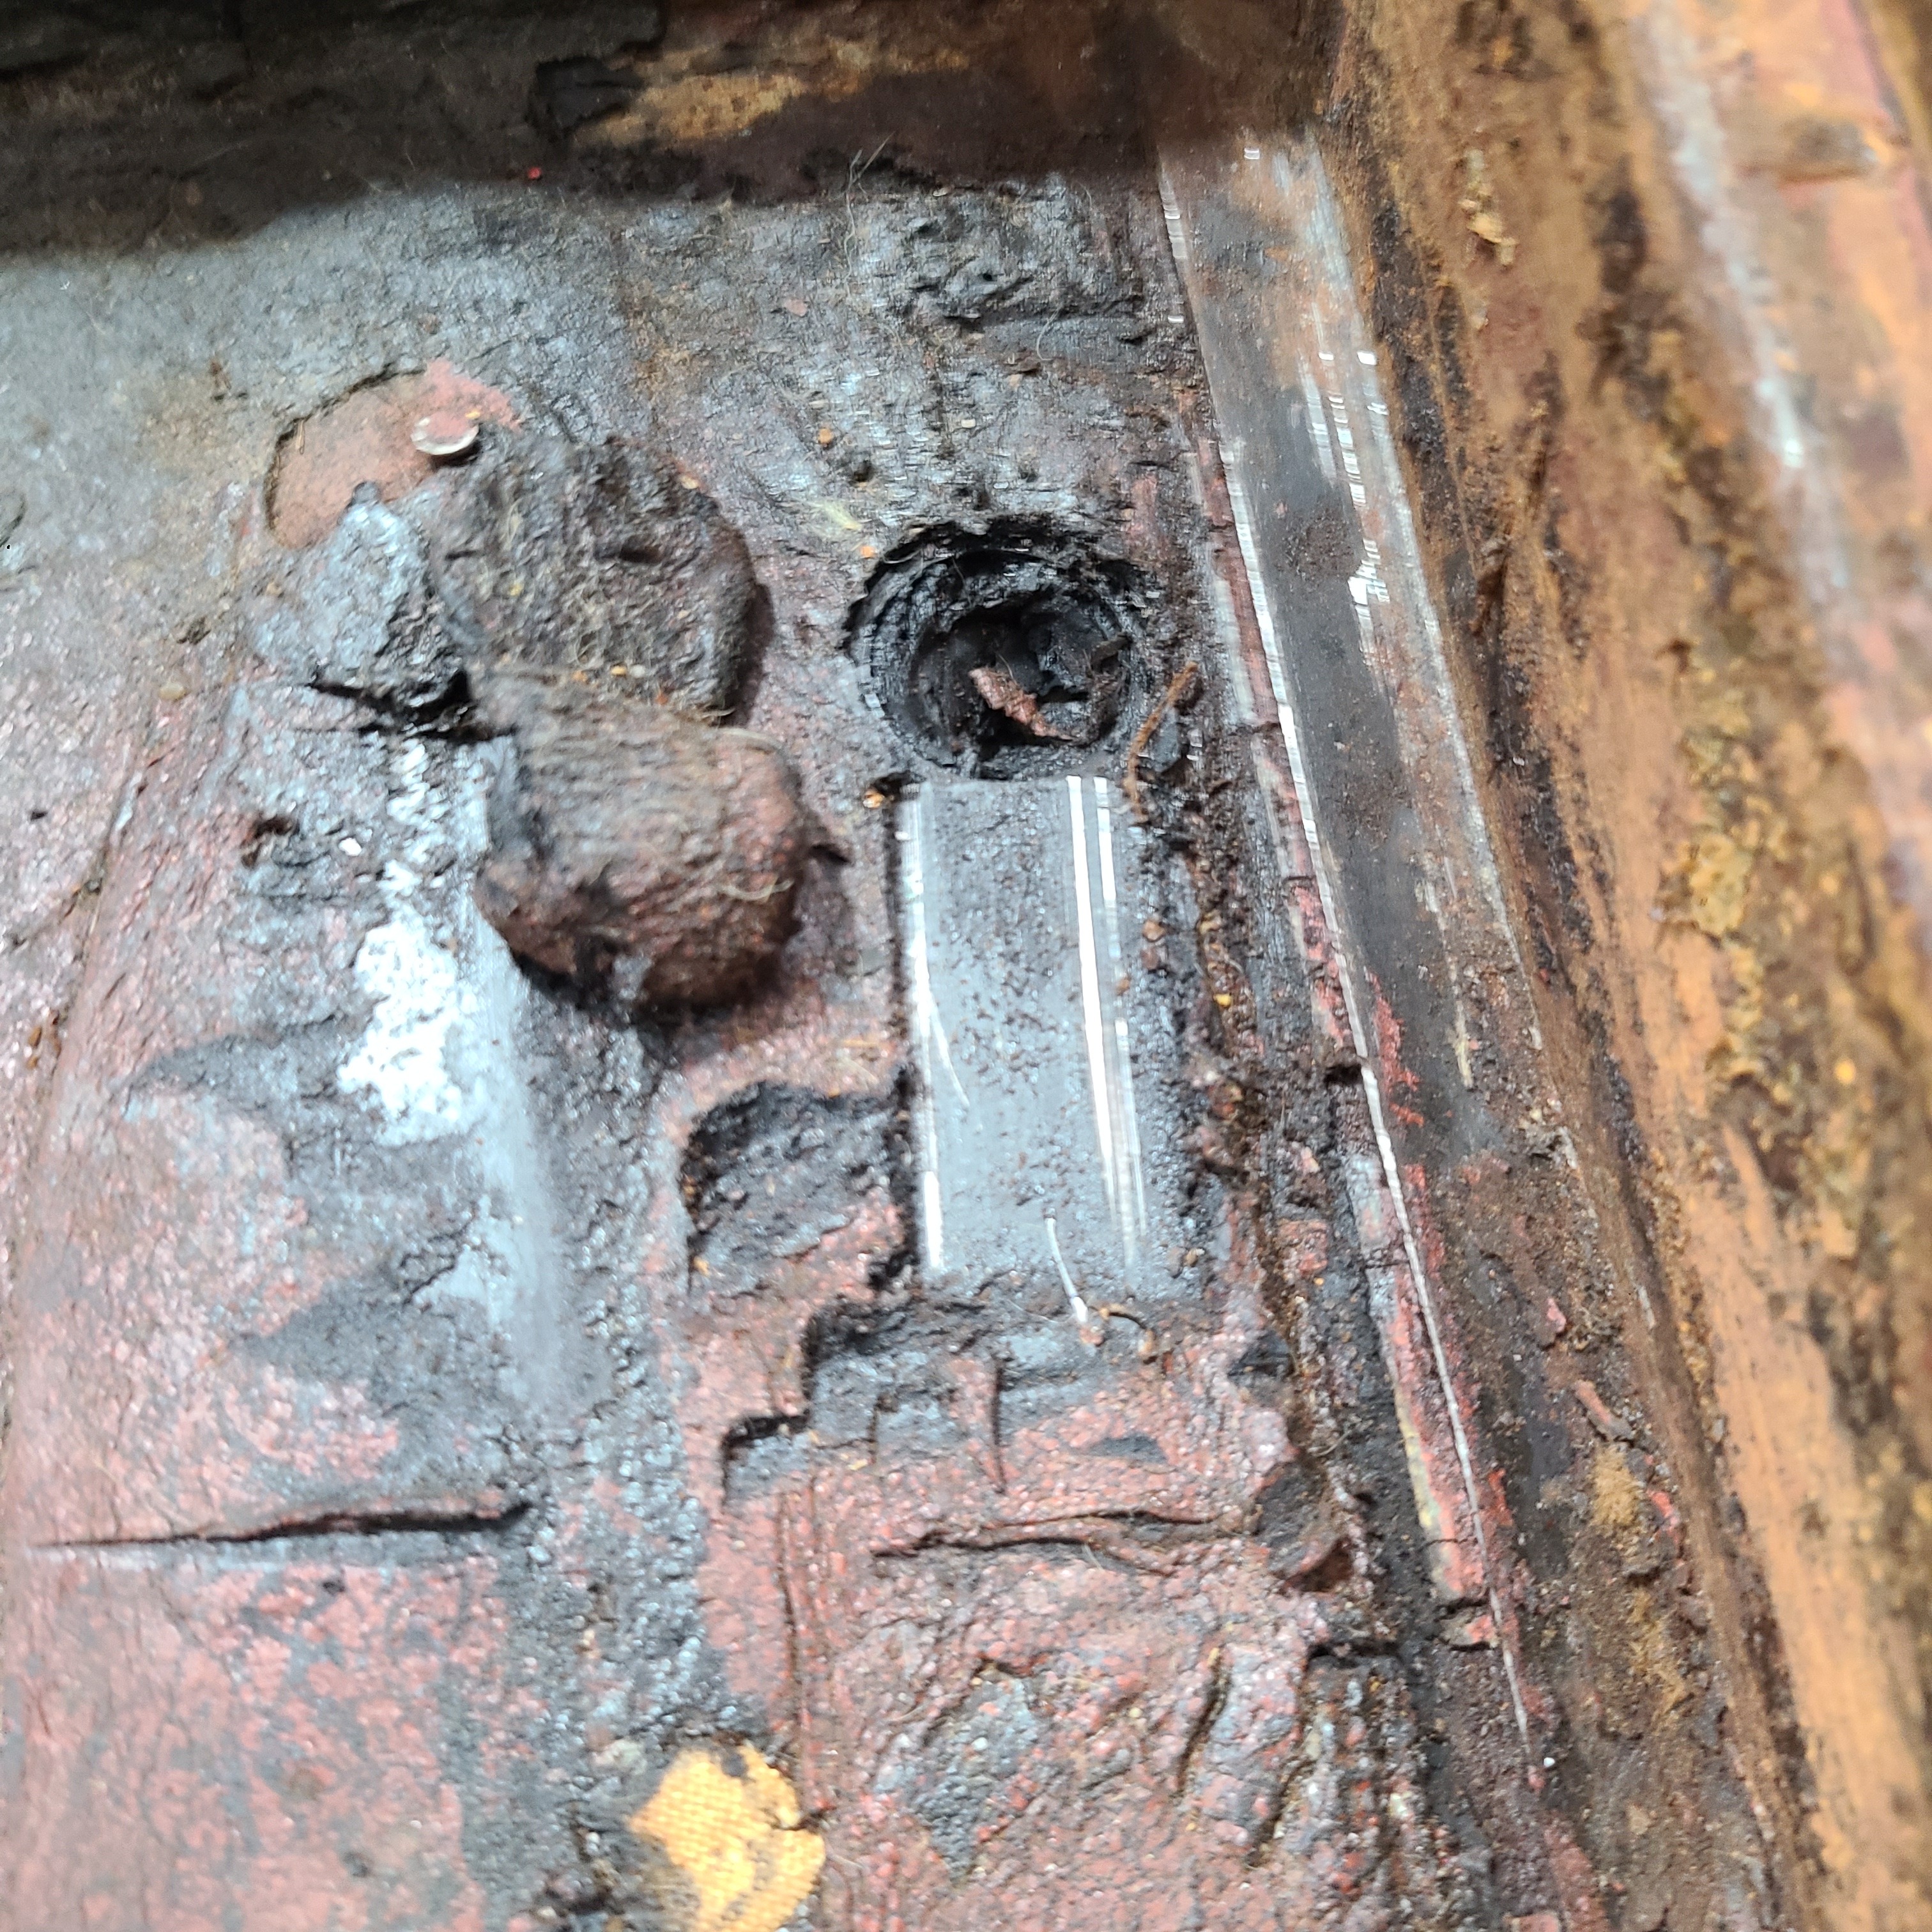
I mentioned in an earlier posting about reinforcing the passenger foot well cuz either the panels were not available, I could not afford them at the time, or they were available but (in pre-interweb days) didn’t know how to find them. Here it is: on the floor you can see the patch where a small rust hole had developed right next to the forward jacking point and on the vertical end cap, the angle iron that was cut and shaped to fit the outboard edge.
I have decided NOT to strip the trans tunnel for several reasons: (1) there are no replacement harnesses available (at least that I can find) for the hand brake light, the cigar lighter, etc; (2) the original coating is surprisingly intact; and (3) the original plugs are intact (with one glaring exception). I was gonna put DynaMat (or similar) on the floor and still will – just not on the tunnel. I should say “not of the “interior side” of the tunnel. I plan to apply DEI self-adhesive heat shields on the exterior side of the tunnel as well as hat thick closed-cell foam pad atop the transmission.
I also plan (right now) NOT to remove the factory original coating of the floors. I started to (in a corner behind the driver’s seat), but when I heated it enough for the gasket scraper to remove it, I discovered absolutely pristine sheet metal. I also discovered there is (apparently) several metal-pronged body floor plugs. I am inclined to leave well enough alone.
QUESTION: once I clean the fuzzies from the underfelt off the floor coating, will the DynaMat (or similar) stick to it? Clean it with alcohol? Clean it with xxxxxxxxx?
I have stripped much the harnesses from the engine bay. Two harnesses loop around the interior curve of the horseshoe frame and I still need to unbolt those fasteners. Still need to attack he wiring on the fuses . . .
Today’s focus was almost same as yesterday’s, except instead of working in the passenger compartment, I removed lots of small items off the fire wall in the engine bay. The biggest pain in my backside (literally) was pulling the cotter pin so I could remove the brake cylinder from the pedal housing and the 5x nuts holding the pedal housing itself. I don’t do well upside-down under the dash. Getting under there is challenge enough – getting back to vertical is the real demanding issue.
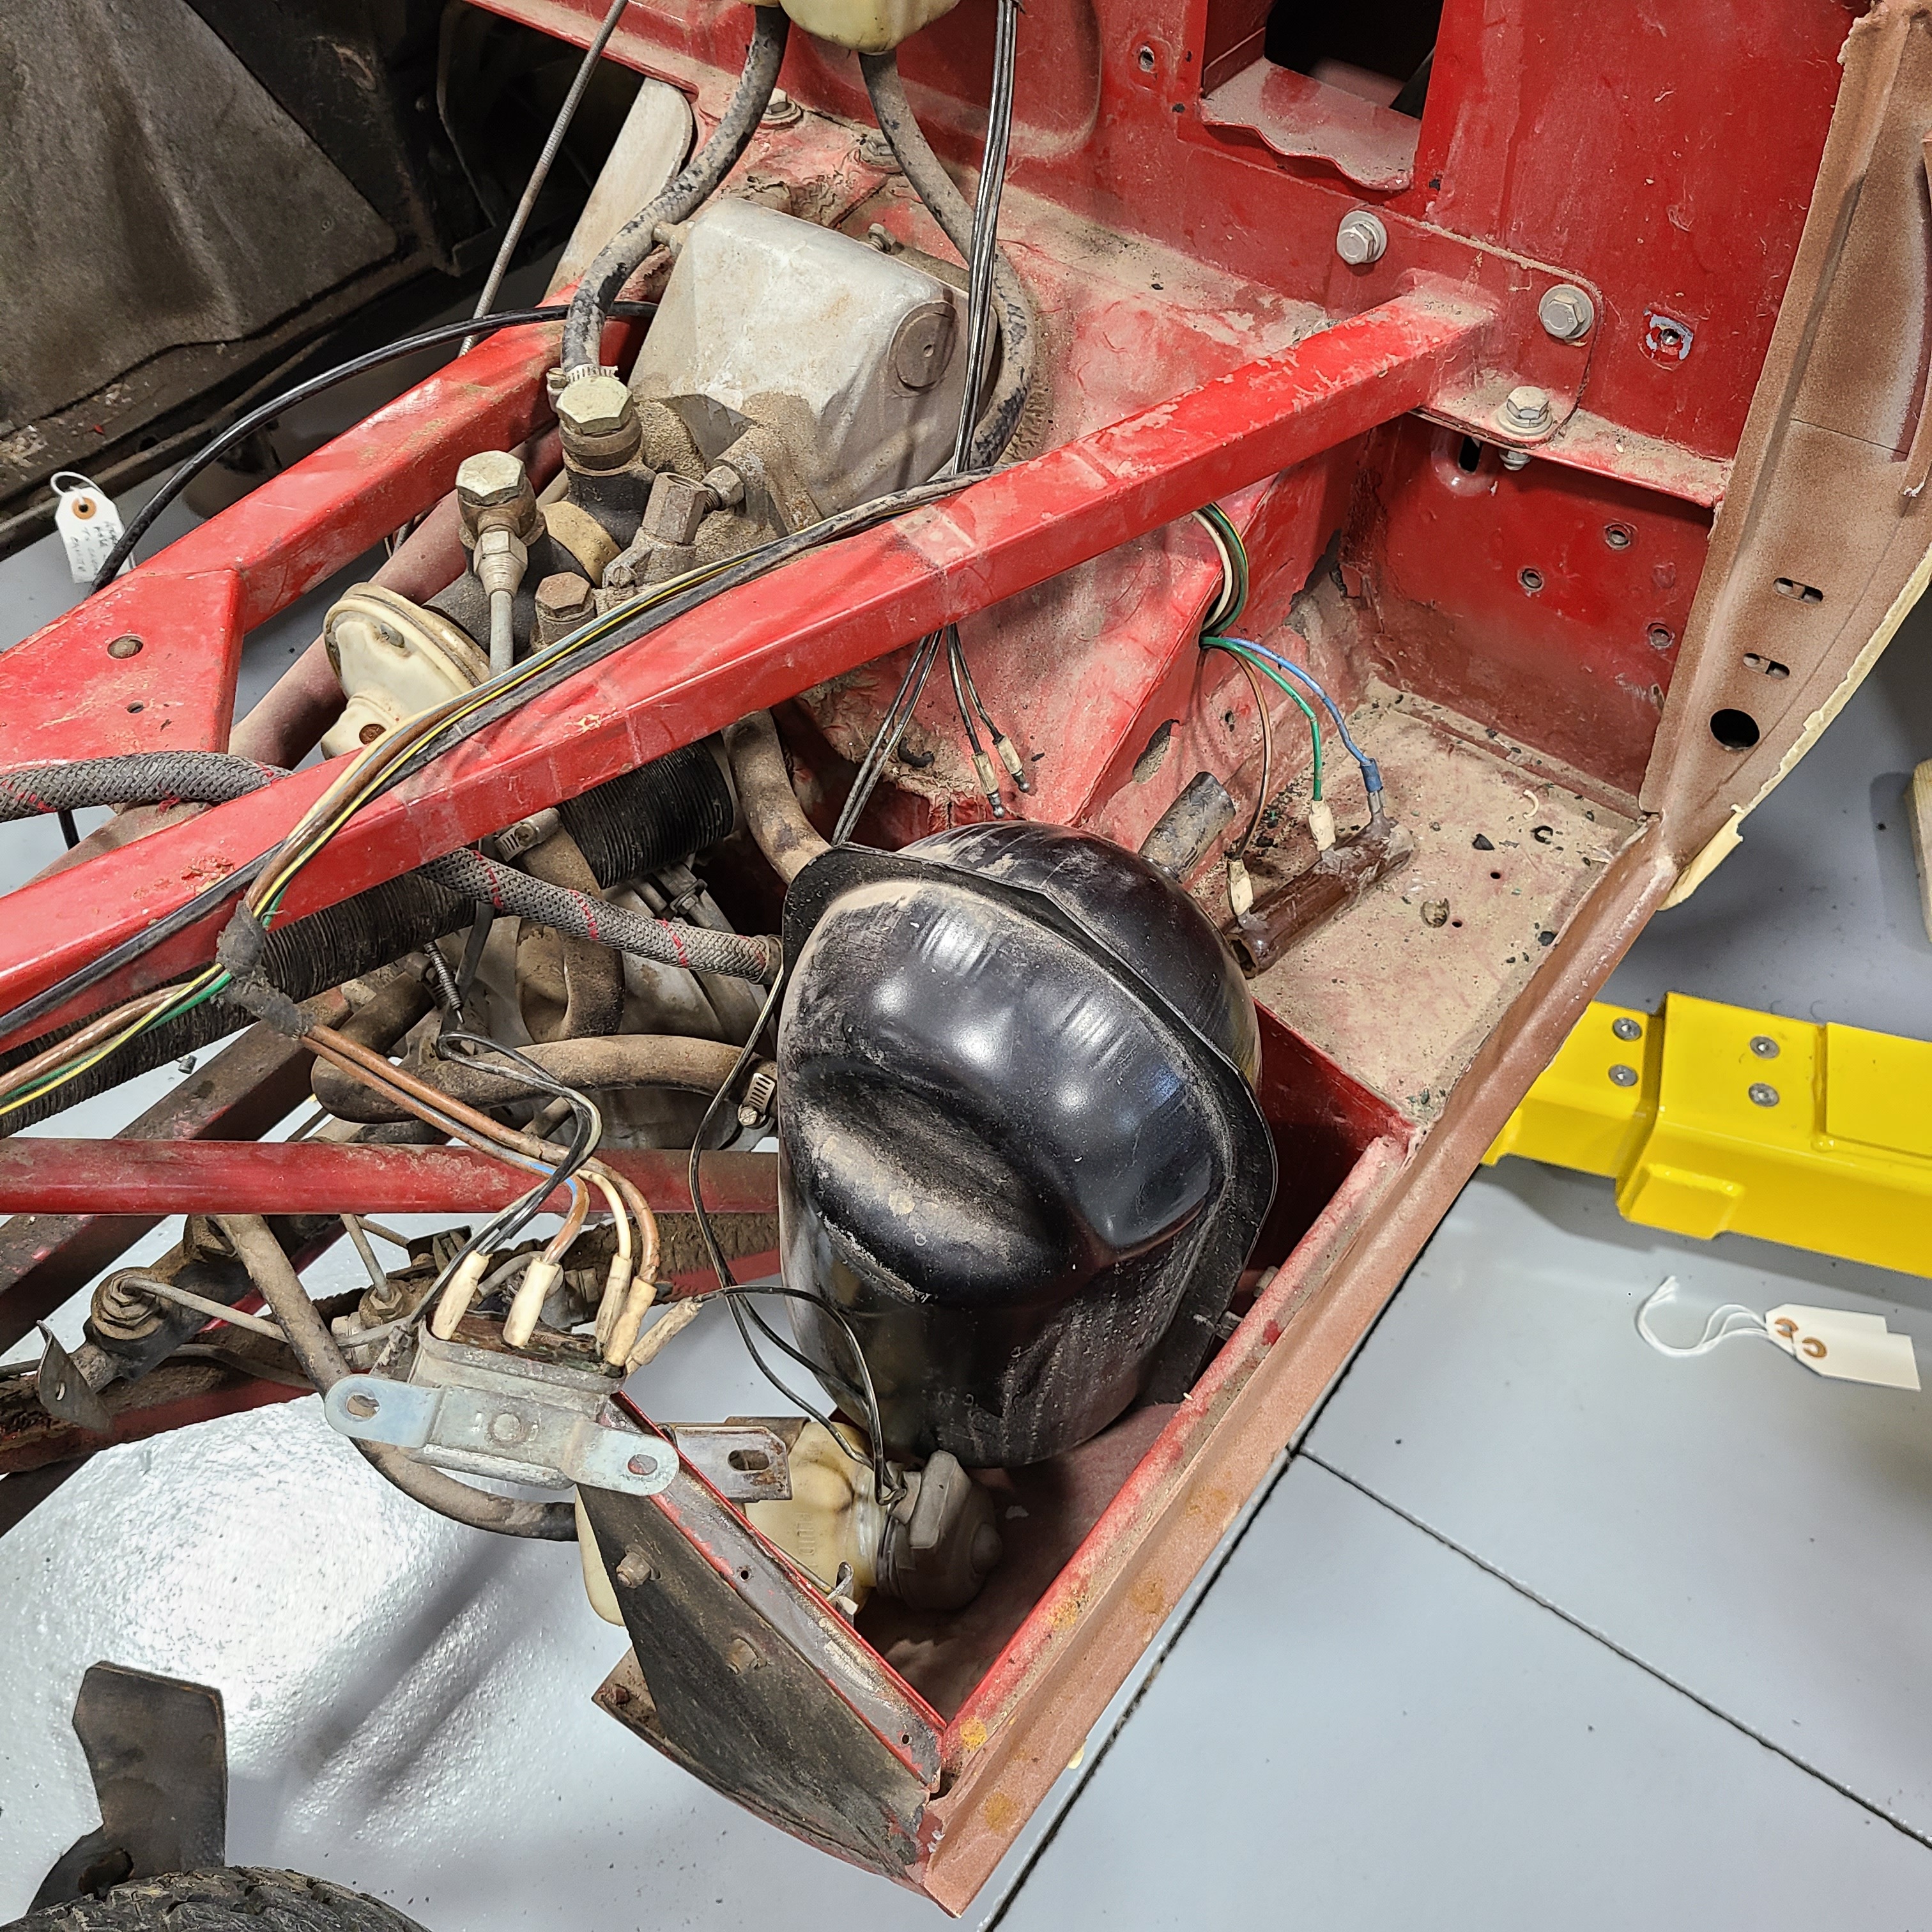
I took a dozen photos mostly to help me plumb the brake, clutch and vacuum lines when I reassemble the Jag.
These two pics capture the conclusion of today’s efforts. I spent 45 minutes trying wrestle that large brake component out from the jungle gym called frame rails. I’ve done it before but misplaced the magic incantation to free it. Tomorrow’s another day.
Meanwhile I continue to get more wind and endurance every day. I worked on the Jag for 7 hours and only quit cuz my frustration level exceeded my patience . .
.
Thanks Danny and I haven’t ignored your comment about simply reusing the gauge panel harness as is – just haven’t made a decision on that option as yet.
Today’s (Tues 06JUL21) focus was to finish up the lingering issues from yesterday (I am 2 for 3).
The biggest success was the removal of last hard line from the brake system plumbing (1) which what was preventing me from removing the brake booster from the jungle gym. I now have extracted the three brake / clutch components that’ll need reconditioning at White Post or Xxxxxxxx (can’t think of the name of its competitor). I’ll get those in the mail later this week – once I figure out which outfit to use.
I cannot speak highly enough of PB Blaster. It took all of 10 seconds to break loose the hard line that runs from the slave cylinder (which was the hang up in extracting the booster) the master cylinder. And yesterday while I was able to extract the driver’s side fresh venting hose, the passenger side hose was well and truly stuck on the metal outlet. I sprayed it with PB Blaster twice yesterday and when I grabbed it today it turned freely and took all of 7 seconds to remove it (2).
I am stymied in removing the glove box panel (the right third of the dashboard). I know I have removed all fasteners. The part that is preventing me from removing that panel is the control cable shown in the below pics. The manual says to turn the cable and essentially unscrew the cable from control knob. Cannot budge it. I hit both ends of the cable with PB Blaster today, so for all I know it will pop right off tomorrow. Nonetheless – still looking for tips / hints.
The control knob is in the middle of this pic – the silver one.
I think the last two major items to remove are the bulkhead harness and fuel tank. The tank was removed in 1992 by the body shop to repair a rust field of pin holes under it. I’m hoping it’ll come out easily for me. And the more I look at the bulkhead harness the more I am convinced I can remove it with all the attachments to the various fuses intact – just like the gauge panel came out. We’ll see. The goal is to have those 2 items removed by week’s end. Ambitious? maybe
I attached a few happy snaps covering two things. (1) I got tried of sneezing and coughing when dirt/dust was disturbed as I pulled parts, so I vacuumed and Simple Green-ed the engine bay and mopped up dirt and debris from under the Jaguar. (2) I thought I plenty of bench top space but the bits and parts are stacking up.