Yep! That will make them visible. ![]()
1 Like
Craig - I really appreciate you sharing the outcome of all your time consuming legwork!! This will come in handy for me at some point!
Rob
1 Like
Well, you and Bill trained him well! 
1 Like
Well – the holidays and (continuing) issues with my 65 Riviera pulled me away from progressing on my Jag restoration. That and, quite frankly, I wasn’t certain of my way ahead: pull some/all of the head studs; how to pull’em without galling more threads of steel bolts with aluminum block material; the step-by-step procedure of extracting a crankshaft without throwing out my back and/or breaking toes.
All these were solved by a patient visit by Prof Wigton on Monday 27DEC21 .
We were all set to pull the first head stud when Paul noticed they were in pretty good shape. An inspection of them (there are a total of 52 studs on the two heads minus the 7 I had to cut to remove the second head) determined they were all fit for continued duty. Paul even had my new arc welder hooked up to assist in their removal. I’ll let him describe the process – I would mess it up.
The classroom focus then shifted to the proper removal of the V12 crankshaft. Since I haven’t yet plumbed my air compressor, Paul and I turned our attention to getting my small pancake compressor up and working. (Paul - I did try using my DeWalt cordless to no avail.) Even after a trip to Home Depot for fittings, we managed to miss one; Paul explained such efforts invariably involve multiple trips to the big box store. Picked up the AWOL coupler today (29DEC21) but the pancake compressor didn’t hold pressure. Har-Rumphhh.
So, I used just hand tools and extracted all 12 pistons/rods and the big lump of aluminum at the rear of the block that holds the rear main oil seal. Those bolts took some ooomphhh to loosen.
The good news is all came out without (very much) fuss.
The bad news is the engine has more miles on it than I was led to believe.
… The cylinders did NOT have ridges where the pistons change direction (but Prof Wiggie explained that is not unusual on short-stroke engines such as my V12).
… We pulled 2 pistons (Paul showed me one; he watched me do the other) – the bearings and journals told a different story vis-a-vis mileage on the engine. If I use this crankshaft, it’ll require some machining. Said Prof Paul: it has lots.
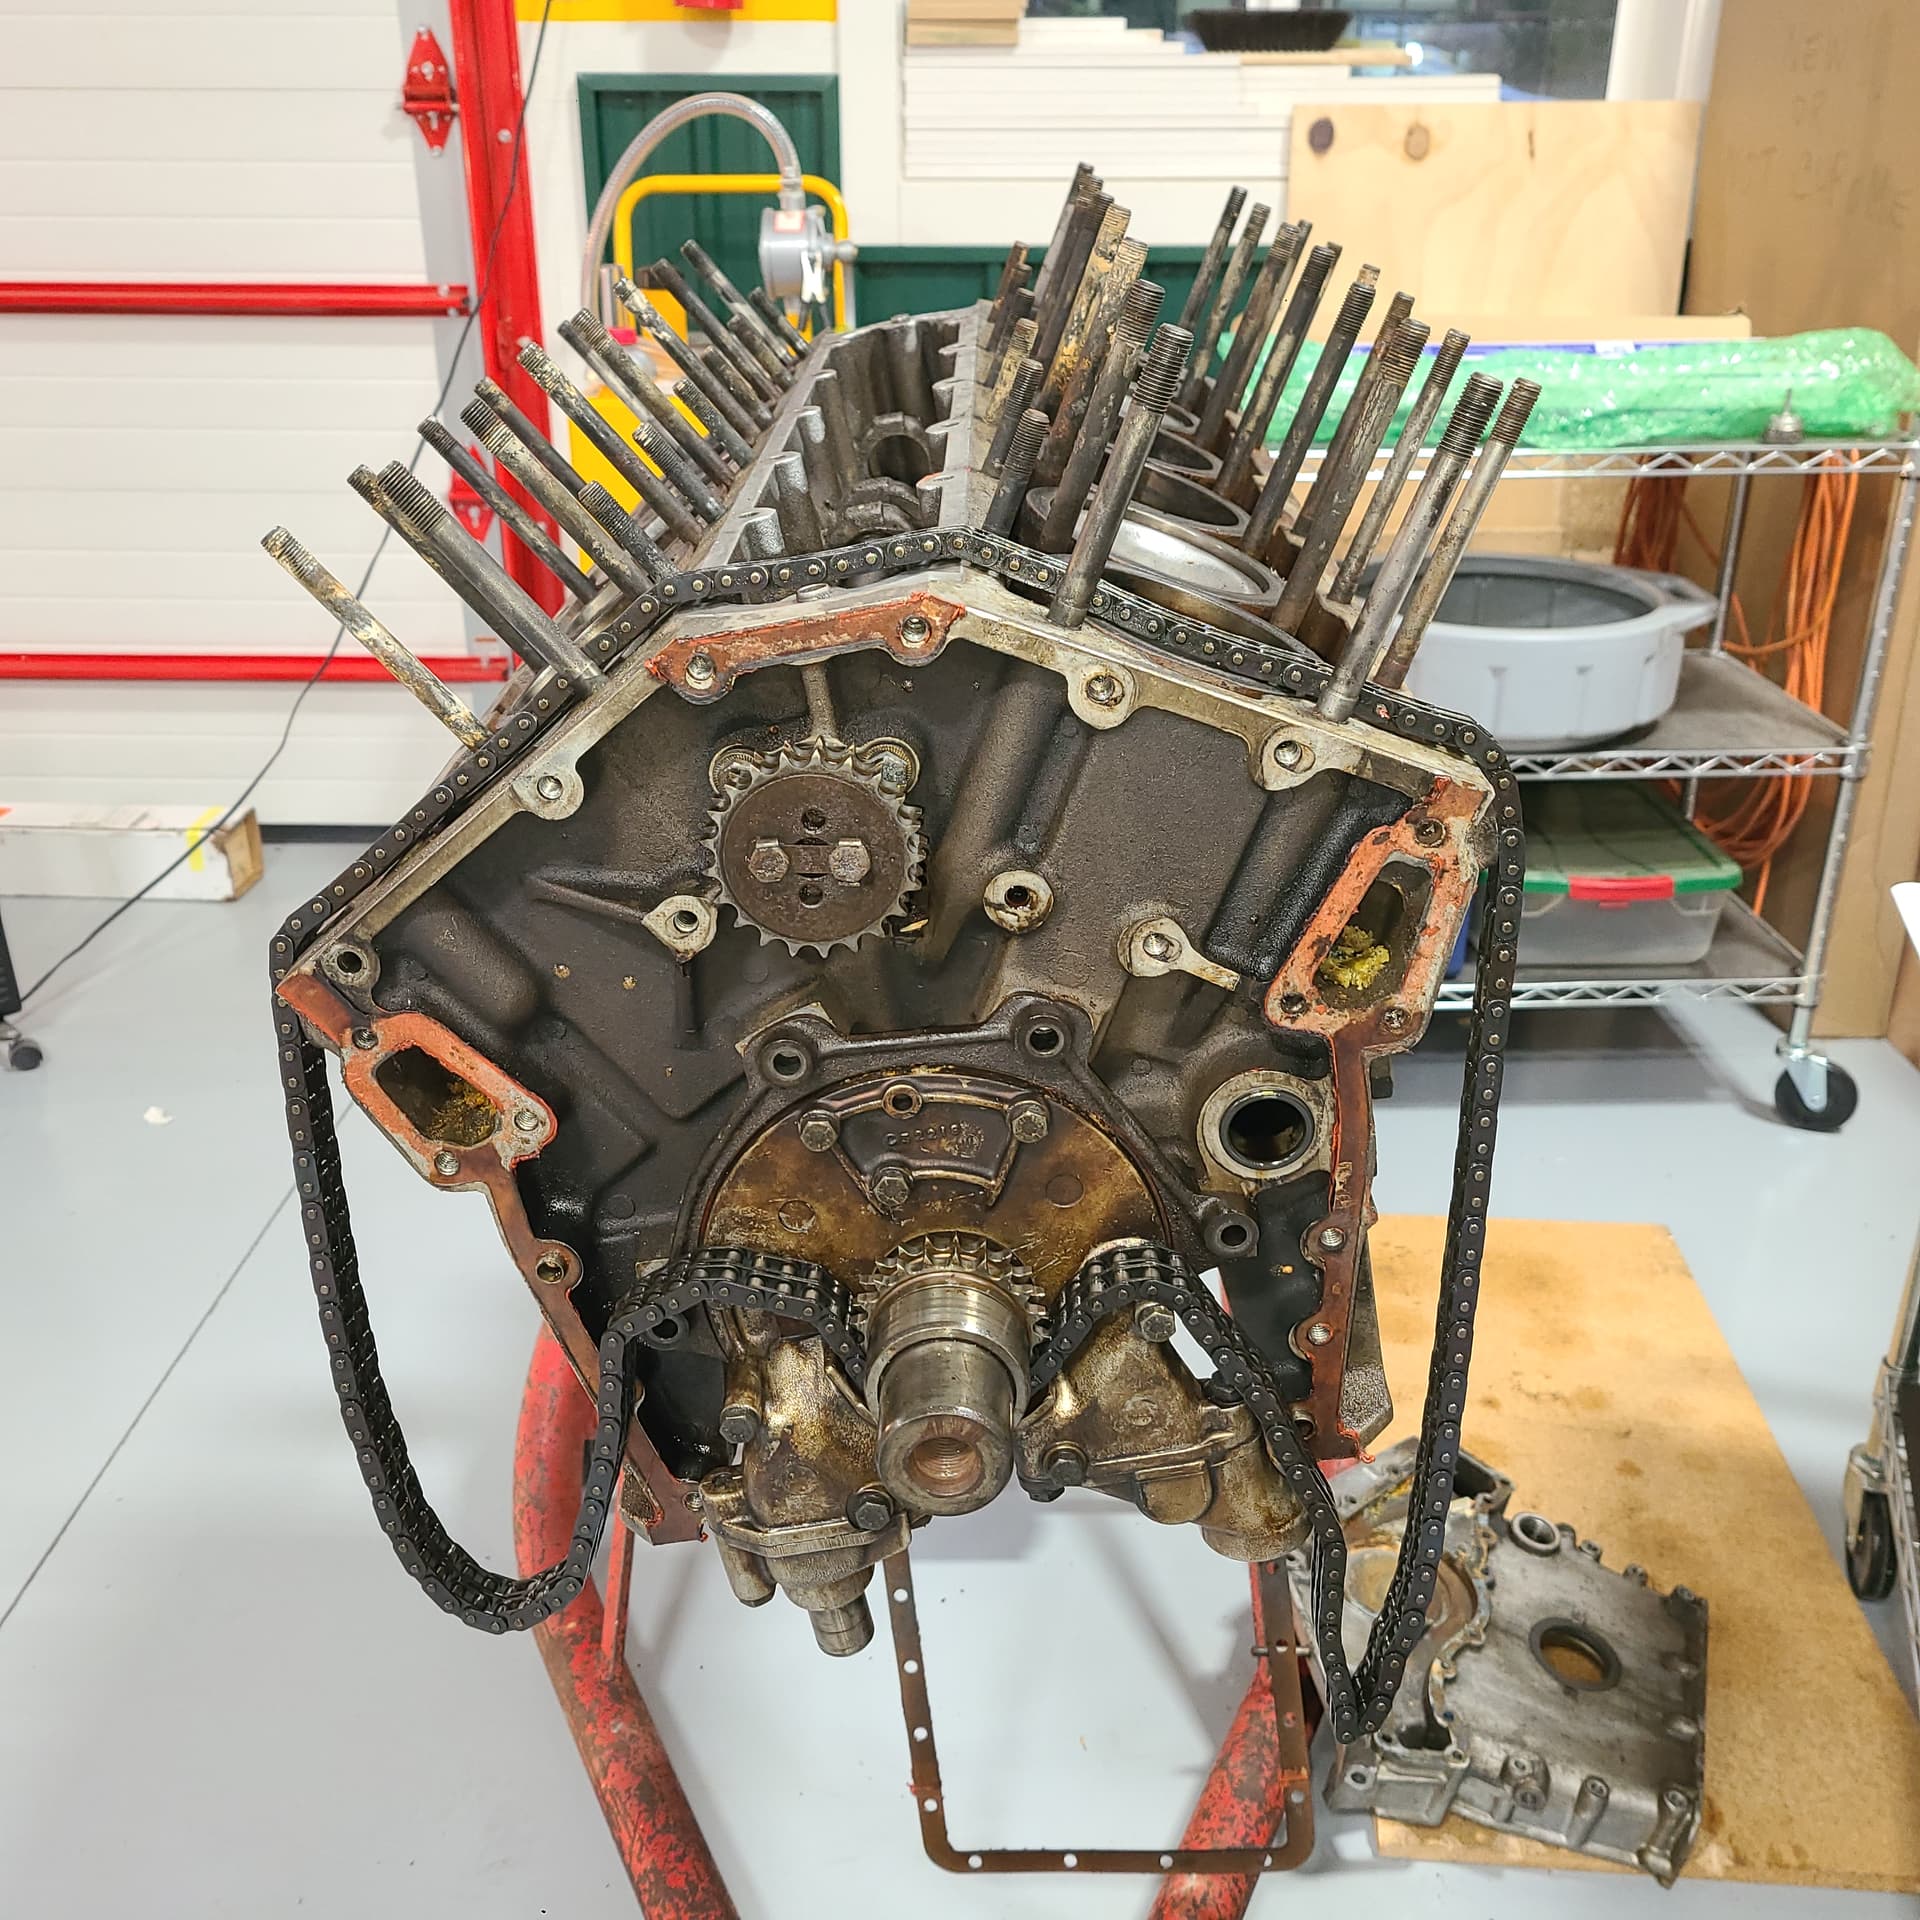
So, in addition to high-mileage bad news, the other bad news was there were 2 cylinder sleeves that came out with the piston firmly attached, and 3 pistons that had rings that were solid in the lands (this engine likely had no compression on three holes). As usual, photos attached with captions


I was surprised at how easily this lump came out. Tap-tap-tap with bronze drift on the slight ridge on the left of the piece was much more effective than expected \/


Tomorrow – my lower back willing – I will remove the nuts securing the 7 saddles. Attacked three of them just before quitting for the day: NO JOY (but I was played out). They are gonna take some physical persuasion without benefit of air. Maybe a cheater bar on the breaker bar will win the day – but that block is getting lighter and lighter. It moved around a bit on the bench when breaking conrod nuts loose – – those saddle nuts have some kind of torque applied on them.
Thanx for everything Paul
Craig
2 Likes
A cheater should do it: I do not recall the torque spec, but something around 80 ft-lbs.
Always my pleasure to come visit the garage I never built!
I surely must have the wrong reference:
Main Bearing Studs - 20 lbft (that must be for stud itself in the block)
FOUND it buried in the details of reassembling the engine:
3/8" nuts - 27.5 lbft
1/2" nuts - 62.5 lbft
I need the prof over here ….I’ve only ever put the head on the block of a Riley motor ……but would love under guidance of a expert in such matters put a jag engine together.
Tis a rare and invaluable asset
62 sounds about correct for the main caps: a cheater should make short work of them.
Hi Craig
Most torque wrench specs are listed in the ROM under General Information - Section 6. Hope this saves you some searching in the future although ISTR some settings can only be found in the relevant sections.
Bob

1 Like
Thanx Bob – that was my first stop although I don’t have a ROM, I have 2 or 3 hard copies of the Repair Operations Manual: 1 in the hobby shop; 1 on my desk and 1 on night stand. (Yes – I am getting professional help).
I managed to buy a new laptop about a year ago (very quick and nice large screen) but without a CD/ROM player so even if I had the ROM disc, I’m relegated to a manual search
The section you pasted is where I found the 20 lbft reference for the Main Bearing Studs.
Thanx again
That specification is not, repeat NOT for the main bearing nuts: that specification is for putting the studs in the block.
Yeah – I kinda figured 20 lbft wouldn’t hold much of anything around the crank very securely.
1 Like
Ah, the danger of using acronyms - when I said ROM I was simply referring to the Repair Operation Manual - not a searchable disc version in particular.
If you want access to the manuals on the laptop as well as your paper versions , there are downloadable, sectionalised pdf versions of both the Repair Operation Manual and the Parts Manual in the “E-Type Knowledge Base” section of the etypeUK forum under the subheading of “Technical Information & Documentation”. You do have to be registered and logged in for it to appear in the Board Index though.
https://forum.etypeuk.com/index.php
Hope this helps.
Well – my back was ready and willing but it needed to be applied to a 3" snow fall on New Year’s Eve. I have a significantly large circle drive in the front of the house and 170’ of drive leading to the hobby shop which widens to 72’ wide across the front of the shop. I also have some neighbors who need assistance so I cleared their drive. That took care of my back and knees for a day or two.
So the other day I did extract the crankshaft but managed NOT to take any photos. So --step by step:
- I cleaned the flats of each saddle with acetone and used a permanent marker to number them front to rear.
- I removed 4 of the 6 main saddles leaving the foremost and rearmost saddles in place – this to hold the crankshaft in place while maneuvering the block onto the floor. My bench is too tall for me to safely lift the crankshaft (if I recall correctly - 74.2 lbs) out of the block and still have a viable and functional lower back.
- Then I used the cherry picker to lift the block off the bench and lower it onto the floor
- Maneuvered the block so the bolts for the remaining two saddles were easily accessible.
- Removed the final nuts on the last two saddles freeing the crankshaft
- Lifting with legs and straight back, extracted the crankshaft and set it vertically in an out-of-the-way corner of my shop
- The cherry picker was then used to set the stripped block (except for the 52 head studs still in it) onto an $19.00 Harbor Freight furniture dolly and pushed it under the corner of one of my work benches
Final step was to box up the piston/rod assemblies, and saddles/rear main black and stash then safely out of the way .
Tomorrow, with this experience, I’ll do the same to the original block which is on an engine stand. Before extracting the crankshaft, I’ll need to remove the harmonic balancer, the front cover, and dissect the timing chain with it’s tensioners/rubbing blocks. Any pit-falls or do-this-first forewarnings before I proceed?
1 Like
Wait: I thought you had a fancy Husqvarna lawn tractor/snowblower/snow blade?
The snow fall was too little to fuss with either the snowblade or the snow blower.
I have one of the ~36" wide push shovels with over sized horseshoe shaped handle.
The snow was light enough to be easy to push – until you’re pushing a load across a 72’ wide shop . . . at 7° F.
Looks sorta like this except my handle attaches to the blade at the corners

Handle appears to be the type crafted for 18 year old hands!!!
While I didn’t take a photo diary of the removal of the crankshaft, I did take the time to weight the short block component’s:
1 Like
The Repair Operation’s Manual is extremely helpful in many respects and provides step-by-step procedures for 99.7% of things . . . right up until you bump into the dreaded verb “withdraw”
I am stripping the front of the block in preparation for extraction of the crankshaft and pistons: I have removed the timing cover, all timing chain dampers, timing chain tensioner, the cam gears/cams.
Next step: “withdraw” spacer and crankshaft sprocket". Yeah – – right.
How the bloody h3ll do you do that?? I even removed the 4x bolts securing the oil pump (see second photo) and gingerly used a dead blow hammer in an effort to use the oil pump to persuade the sprocket off the shaft. No Joy.
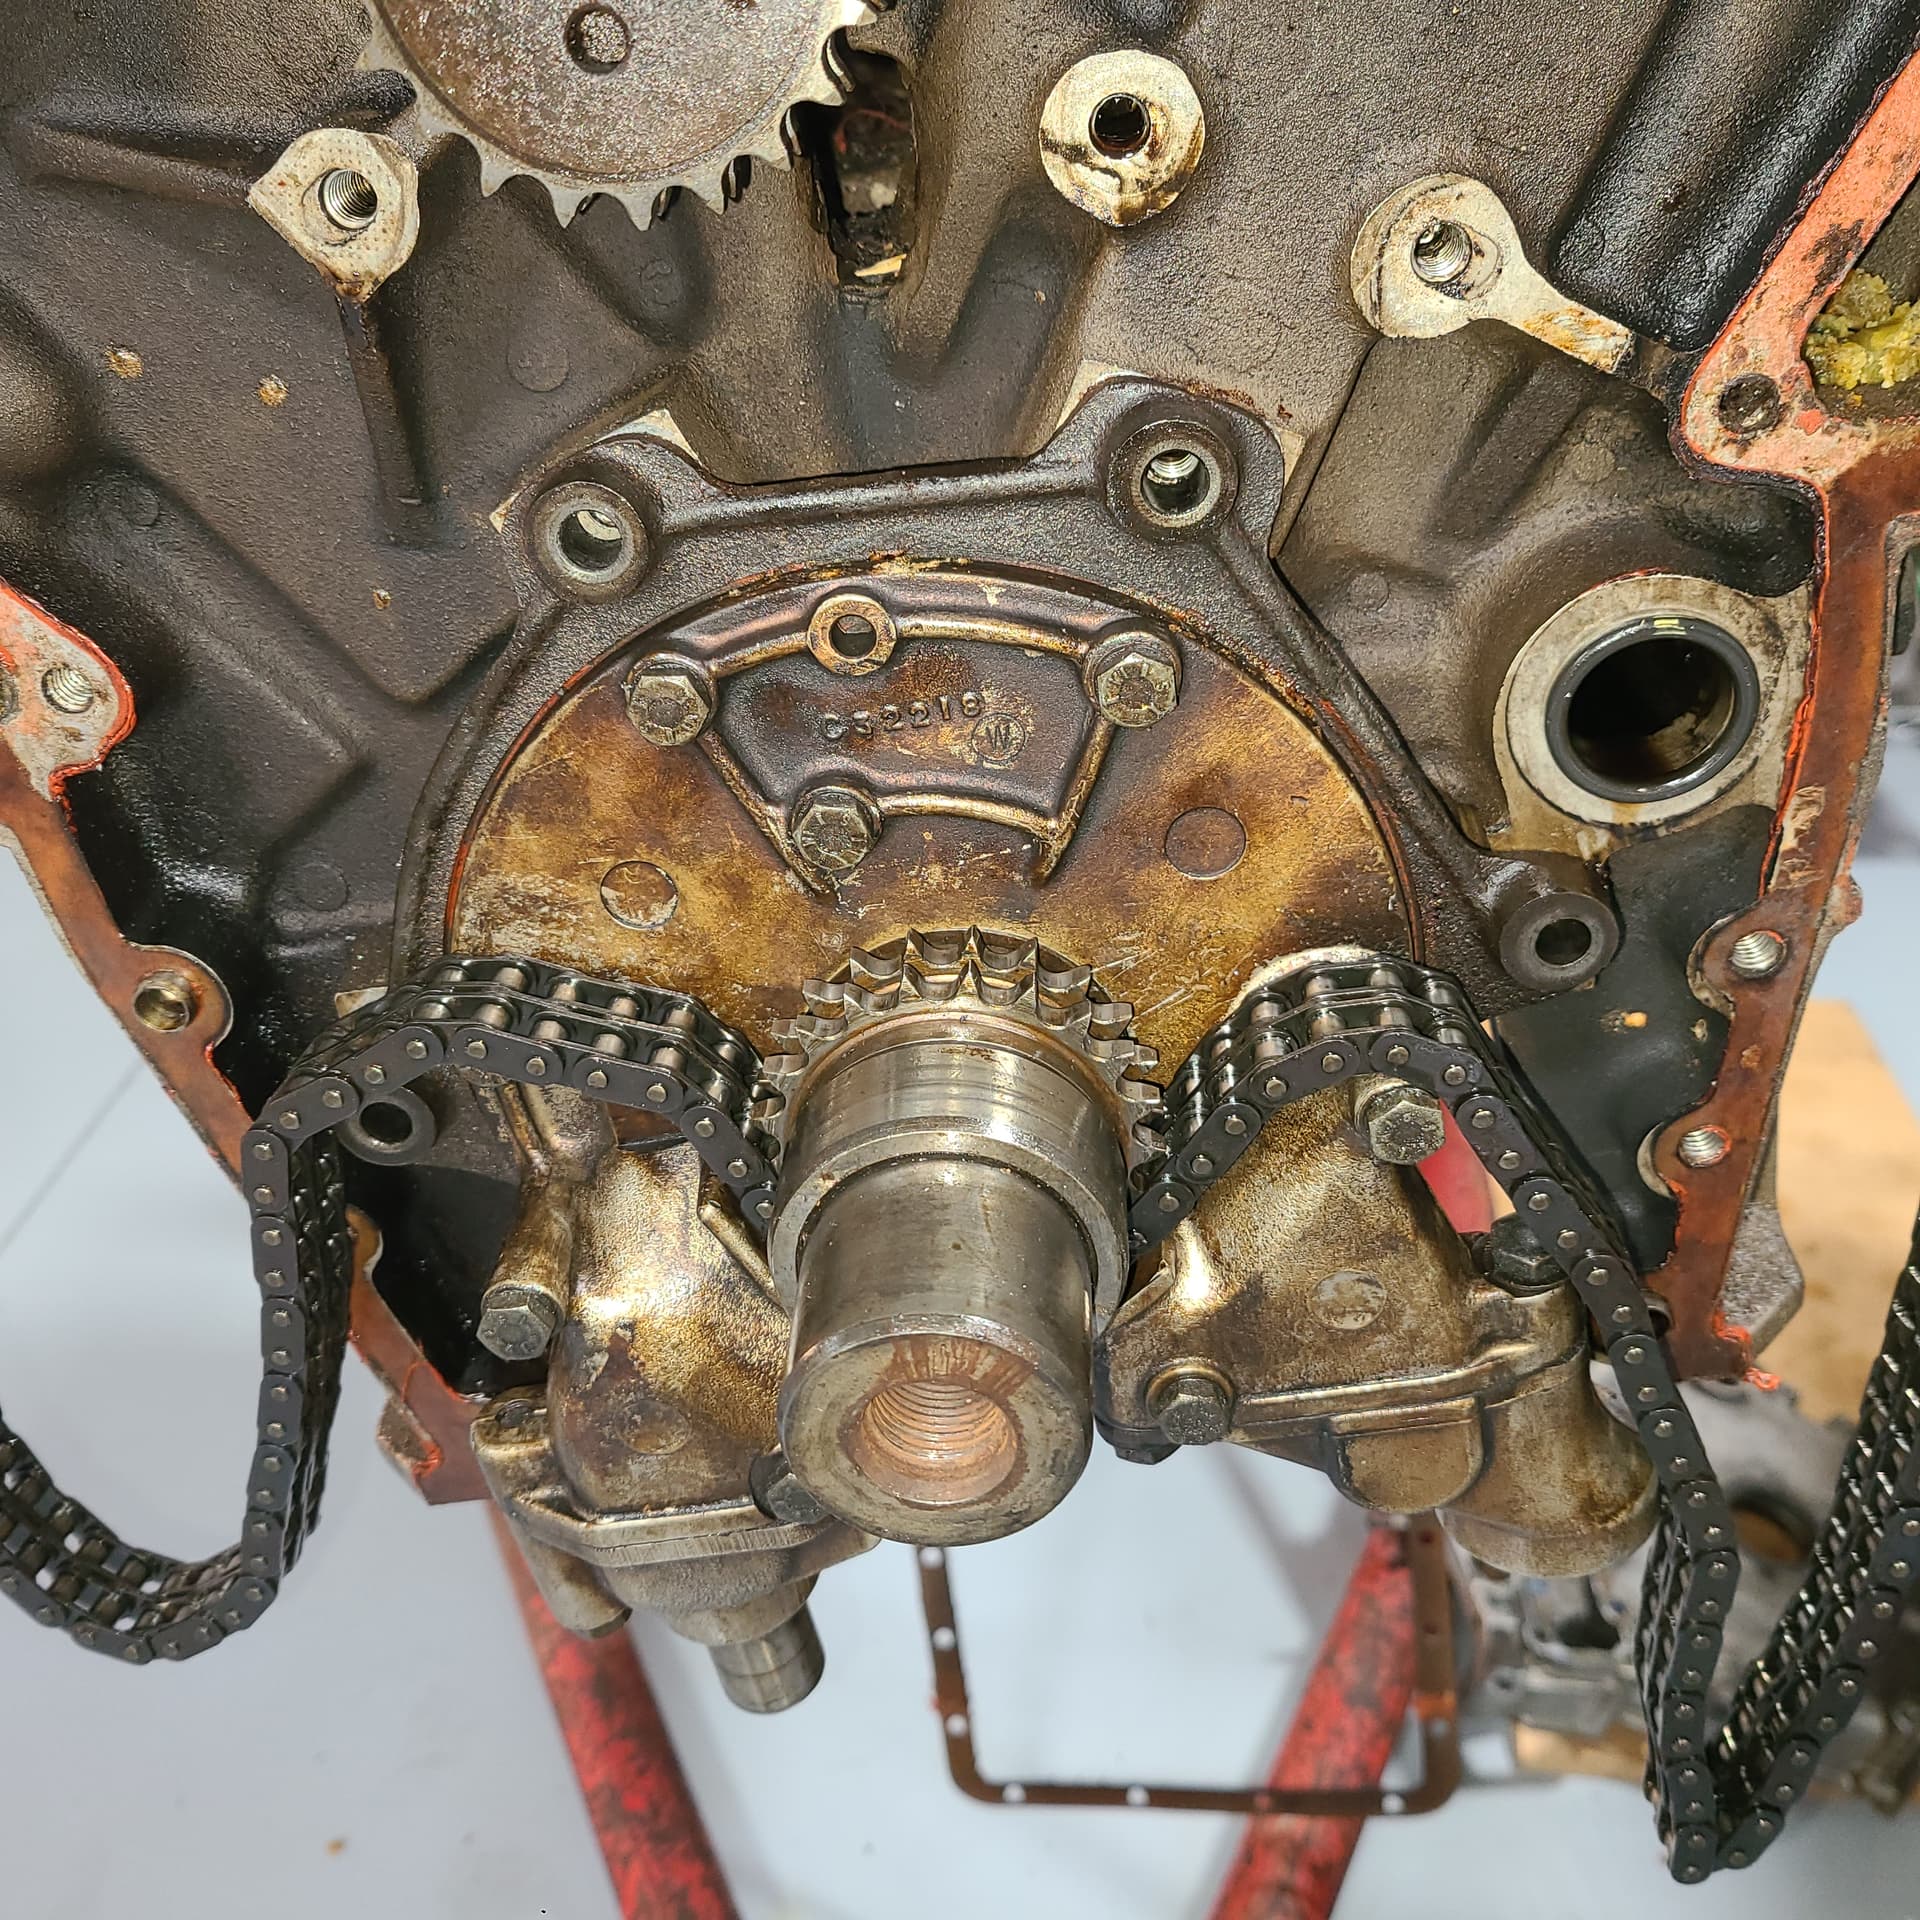

This is a pretty shitty shot – I didn’t realize the camera pulled focus behind the spacer that is bane of my current existence; it was supposed to show the slot for and already-removed Woodruff key. But it does show the bevel on the spacer precluding use of a gear puller – nothing to grab on to.
I believe once the dreaded spacer is removed that the sprocket will follow. Or is that another “withdraw” action??
So – what is the secret to withdraw the spacer and sprocket???
Reminder - the pistons and rings and crankshaft are frozen and I am unable to rotate that assembly
TIA
Craig