I count progress as a day nothing goes wrong. Not necessarily when something gets done ![]()
![]() .
.
Really though, you are moving right along, and a lot quicker than most.
Ahhh – my new mantra. ![]()
Ooommmmmm.
1 Like
Speaking of moving forward and then backward.
The small step forward was reassembling the emergency handbrake handle with newly chromed tube and release button.
FORWARD: after fumbling around for half an hour and squinting at the useless photos I took months ago, I figured out how the assembly went back together
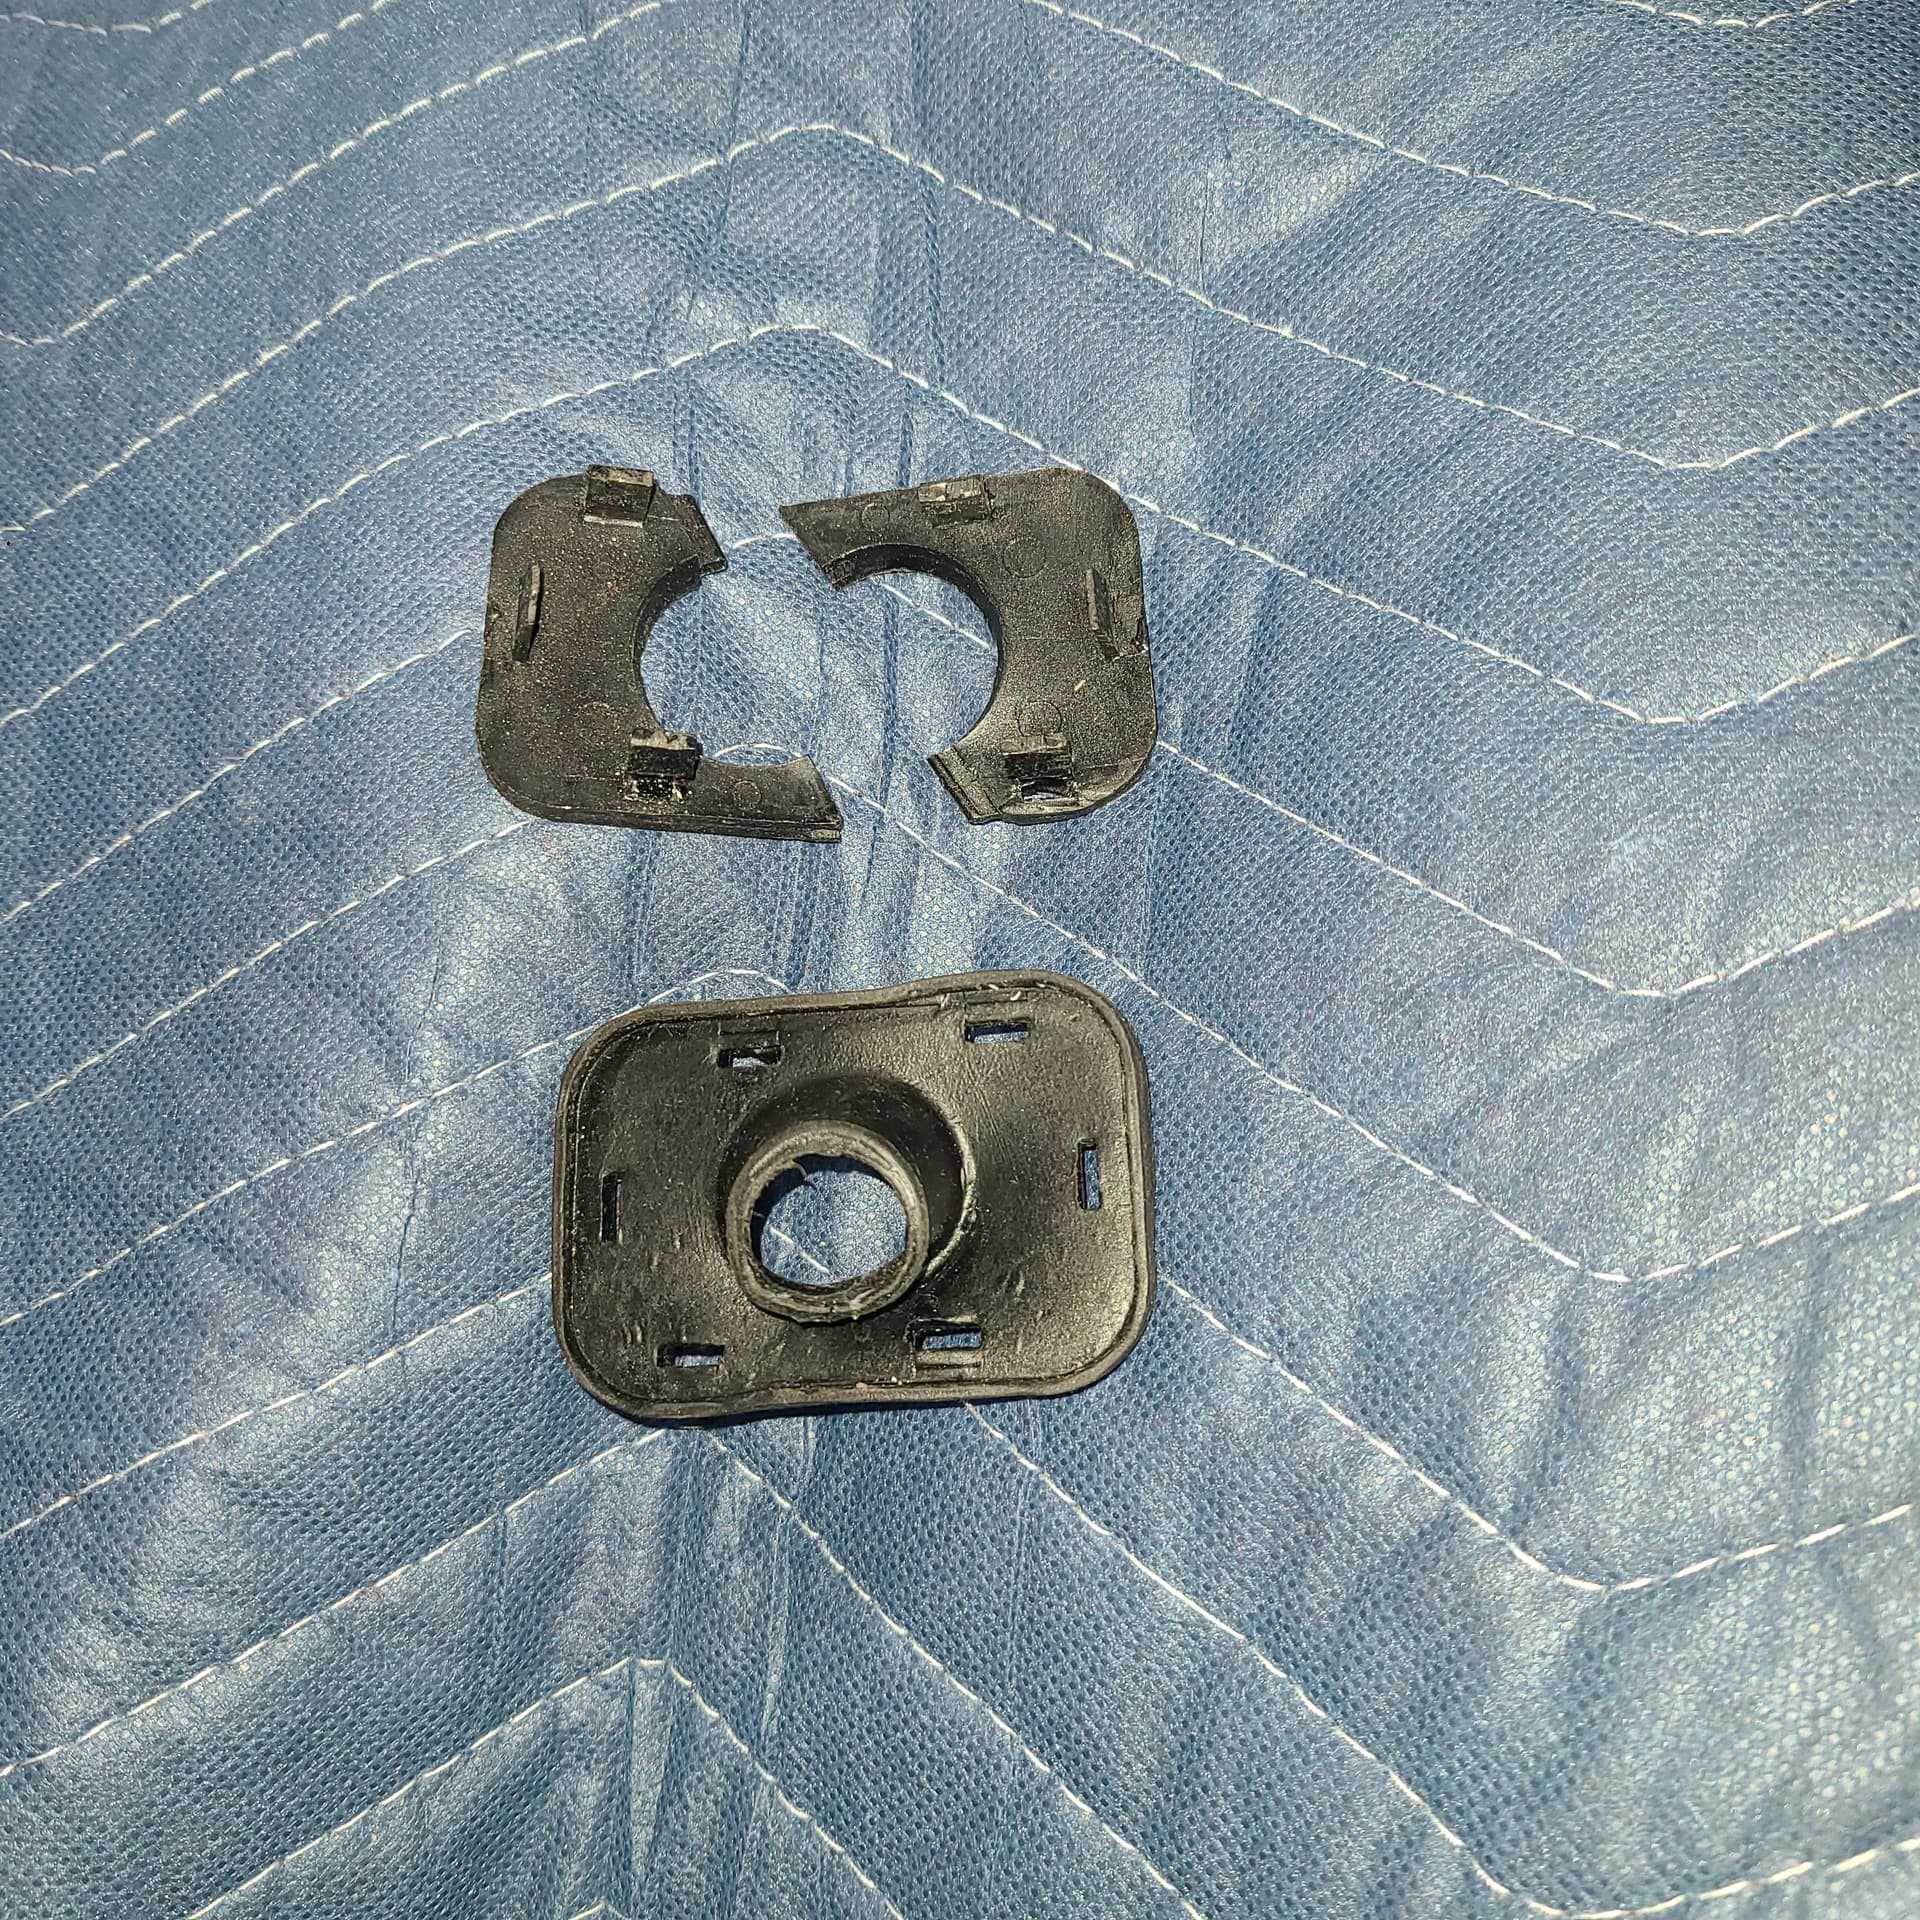
BACKWARD: the small black plastic (or hardened rubber??) grommet-like thing split in half after only 50 years. Pretty sure I need it to have a functioning handbrake – but maybe not???.
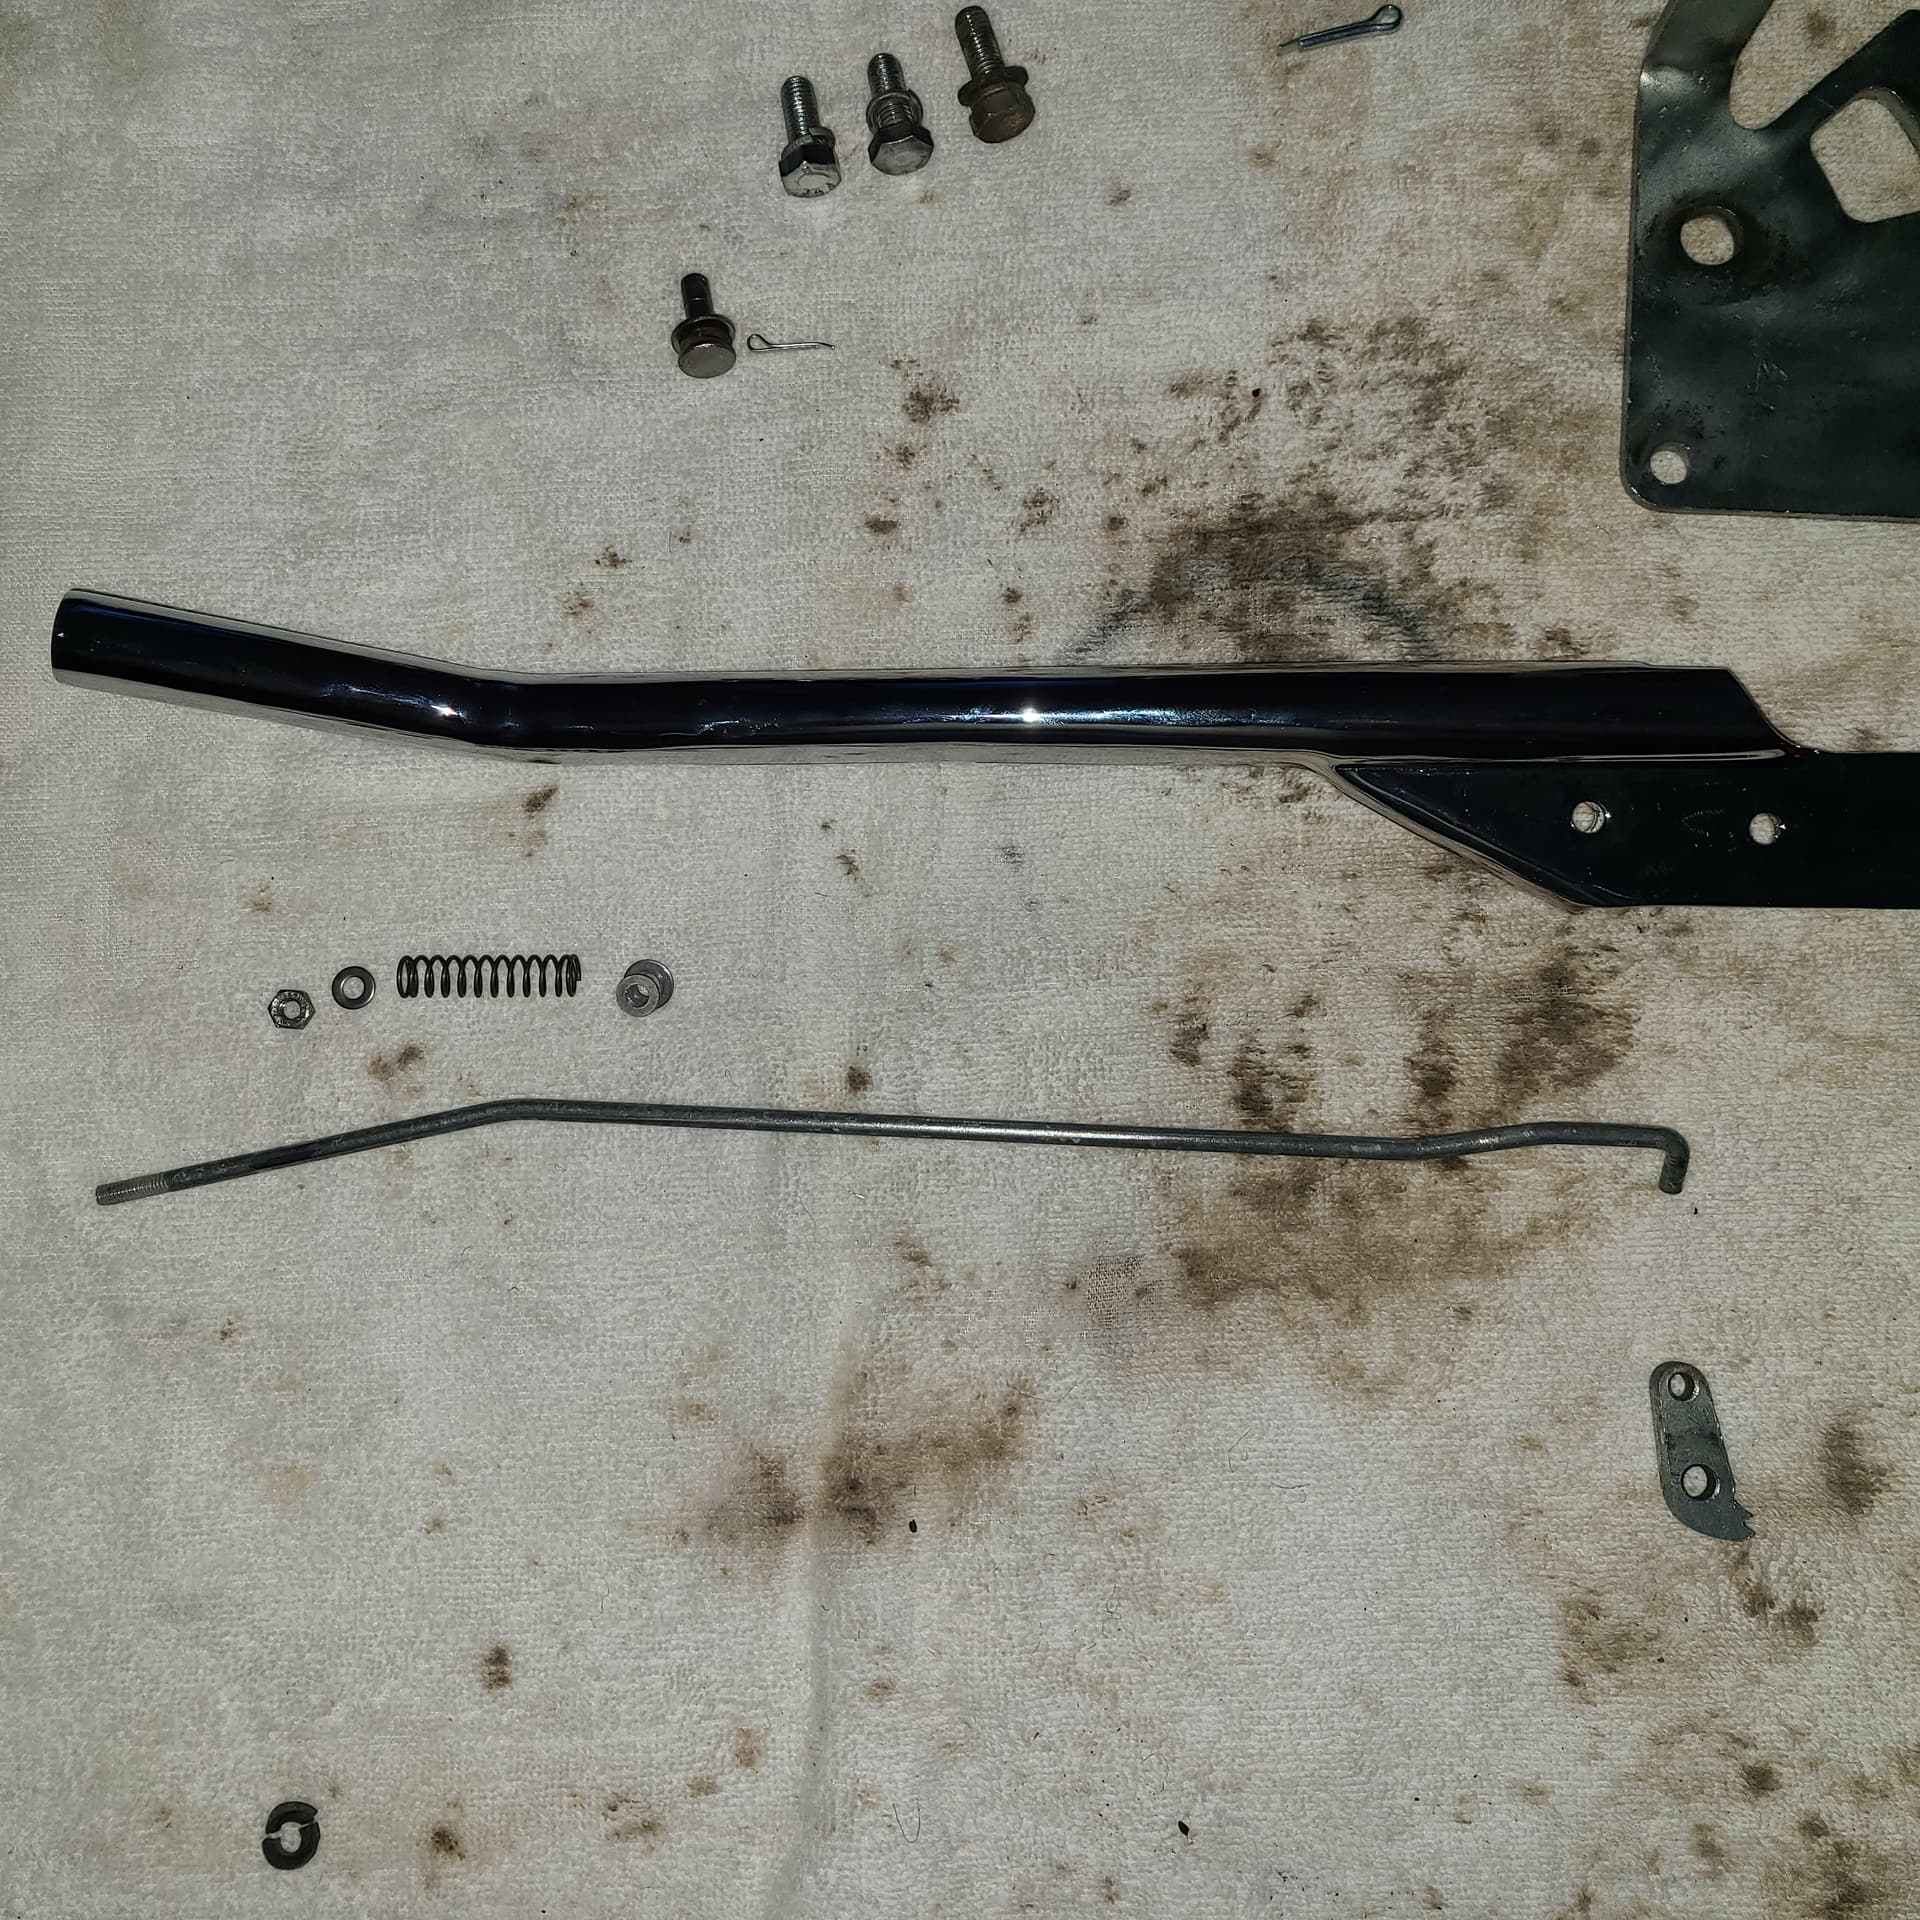
This photo (above) shows the mechanism laid out in assembly order. The broken grommet-like thing is in the lower left corner - in halves. The rod fits inside the chromed tube (see bend). The spring is bracketed by the small washers; the nut adjusts the length of the spring (applying tension).
-o-o-o-o-o-o-
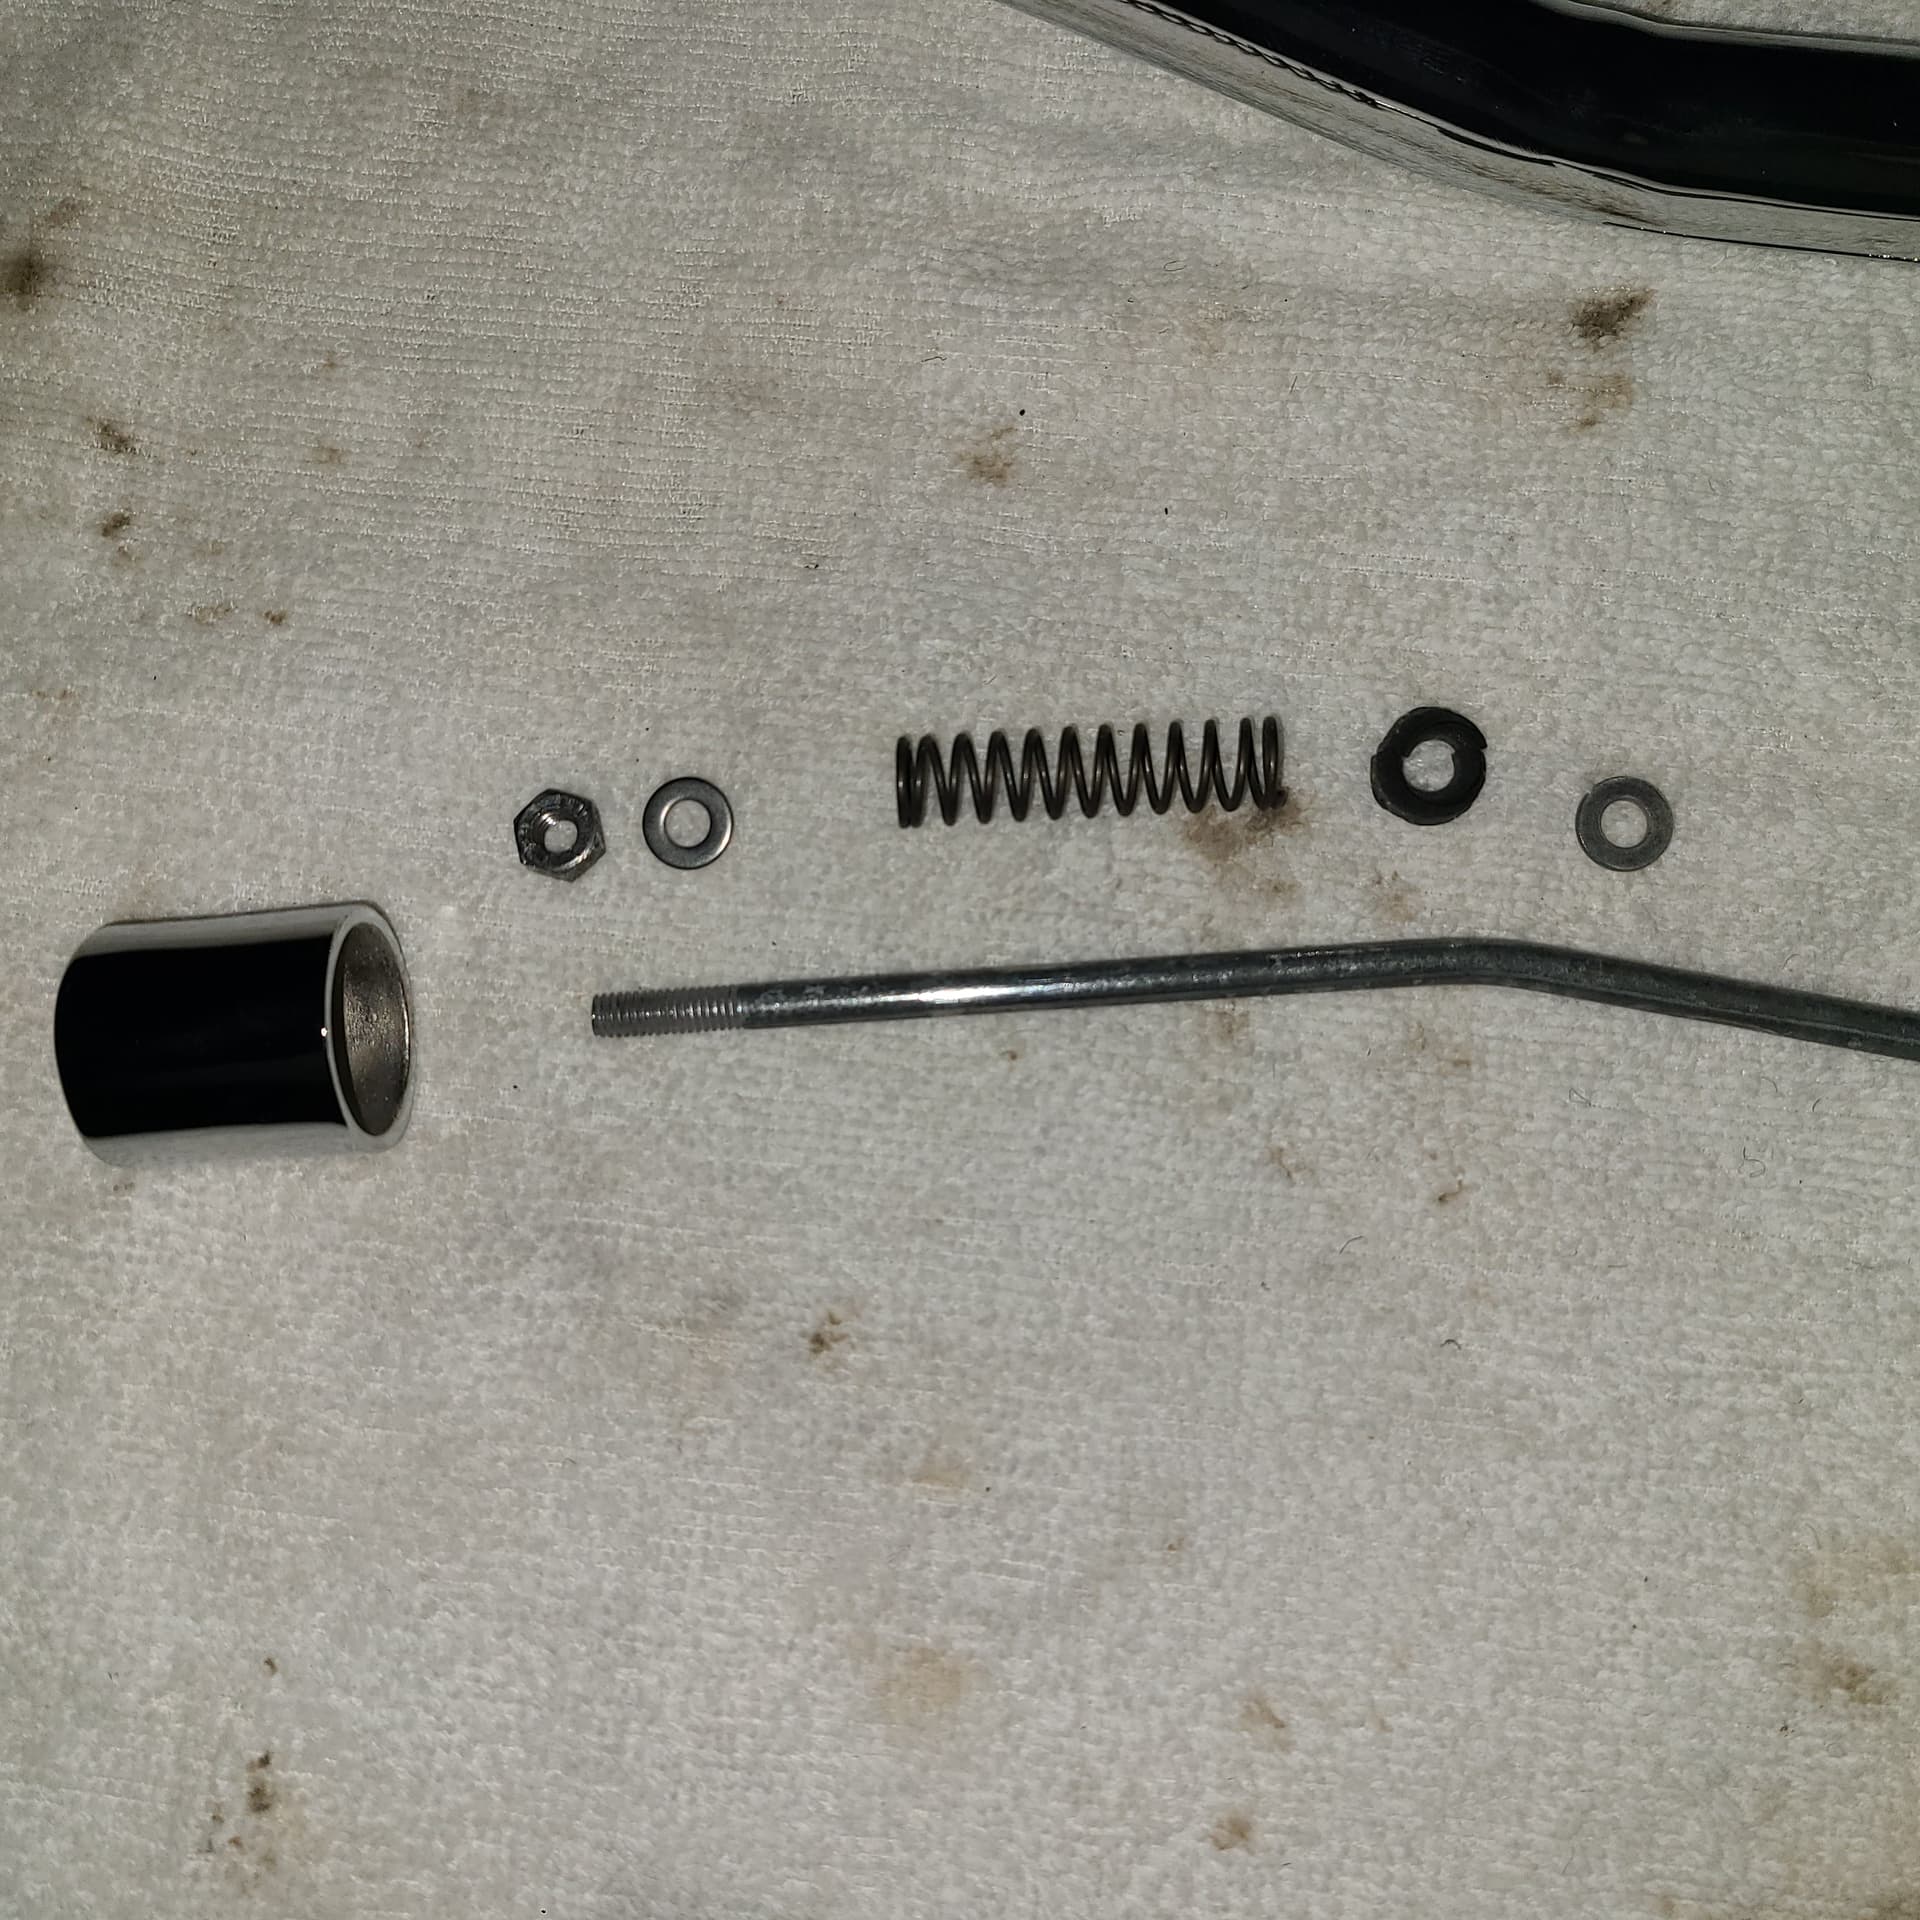
The chromed release button (threaded recess inside of it) presses down the rod (through the spring; the spring simply returns the release button to the starting position) which pivots a small pivoted ratchet at the far end (not pictured) and releases the ratchet on the base of the e-brake handle, thereby releasing the e-brakes. For all this work properly, the spring must be held in place on the rod.
I suspect others have had this problem
-
How/Where do I replace the split grommet-like thing – if I even need it (no one even carries the e-brake mechanism much less the bits and pieces)
-
How do I get the washer (with the replacement grommet??) to grip the rod. There is no groove or indentation for the washer grip. Any tension on the release button simply pushes the spring and washer down along the rod. JUST HAD A THOUGHT: does the grommet go on the other side of washer applying friction to the rod preventing the spring from sliding down the rod??
TIA
Craig
Rossco-J
I’ve done some more research on A/C Compressors and found a direct replacement for $320. This one looks like the compressor in your photo
https://www.stockwiseauto.com/four-seasons-57089-a-c-compressor?Year=1972&Make=Jaguar&Model=XKE
and the same for a bit more $$
https://www.originalair.com/compressors-parts
And this smaller, lighter, better direct replacement for $375/
Having read stuff, I’m inclined to go with these guys as their ad says direct replacement so my new set of A/C hoses ought to be usable.
https://retroair.com/gmjaguara6replacement.html
Now I’m in search of switches, controls, and expansion valves . . . 4 Seasons seems well stocked. The fun continues.
Craig
1 Like
Thanks for the information Craig. I’m having a chat with my A/C guy next week, so I’ll let you know anything useful.
As for the switches, I stripped, cleaned & refurbished mine successfully.
Yes it certainly is a fun game we play….
Regards
Ross
Ross --I assume your black switches were faded to grey even verging on white.
What did you use to restore the black? – or did you replace the black covers a la
https://www.welshent.com/Jaguar-Rocker-Cover-Switch-Kit-P18908.aspx


Wow, that looks great, do you just simply spray it on? Can you do it in place, or did you remove the panel and spray separately?
The entire panel was disassembled and the switch covers removed, cleaned, lightly abraded with 0000 steel wool to smooth them out and then sprayed with the Eastwood product. I had to fix several broken mounting tabs on the surround as well as clean and repaint the silver switch surrounds. My car is an early '68 model and as such does not have the white squares on the top of the switch covers to indicate “On”. If you have the white squares you need to mask those off before spraying. There’s a thread on this restoration somewhere on this site.
Found it: Same part number, different part
1 Like
Always do much value in re-reading old threads: thanks!
Doug – please expound/elaborate/expand
EDIT – Sorry, just read the previous posting you linked to – lots of details and all the answers I sought (and more). BRAVO – well done (in p=both the repair/restoration and documenting same)
Having returned from Oklahoma (@C1Nichole’s Build Party) and been suitably inspired, I have been “trying” to lay the first wiring harness.
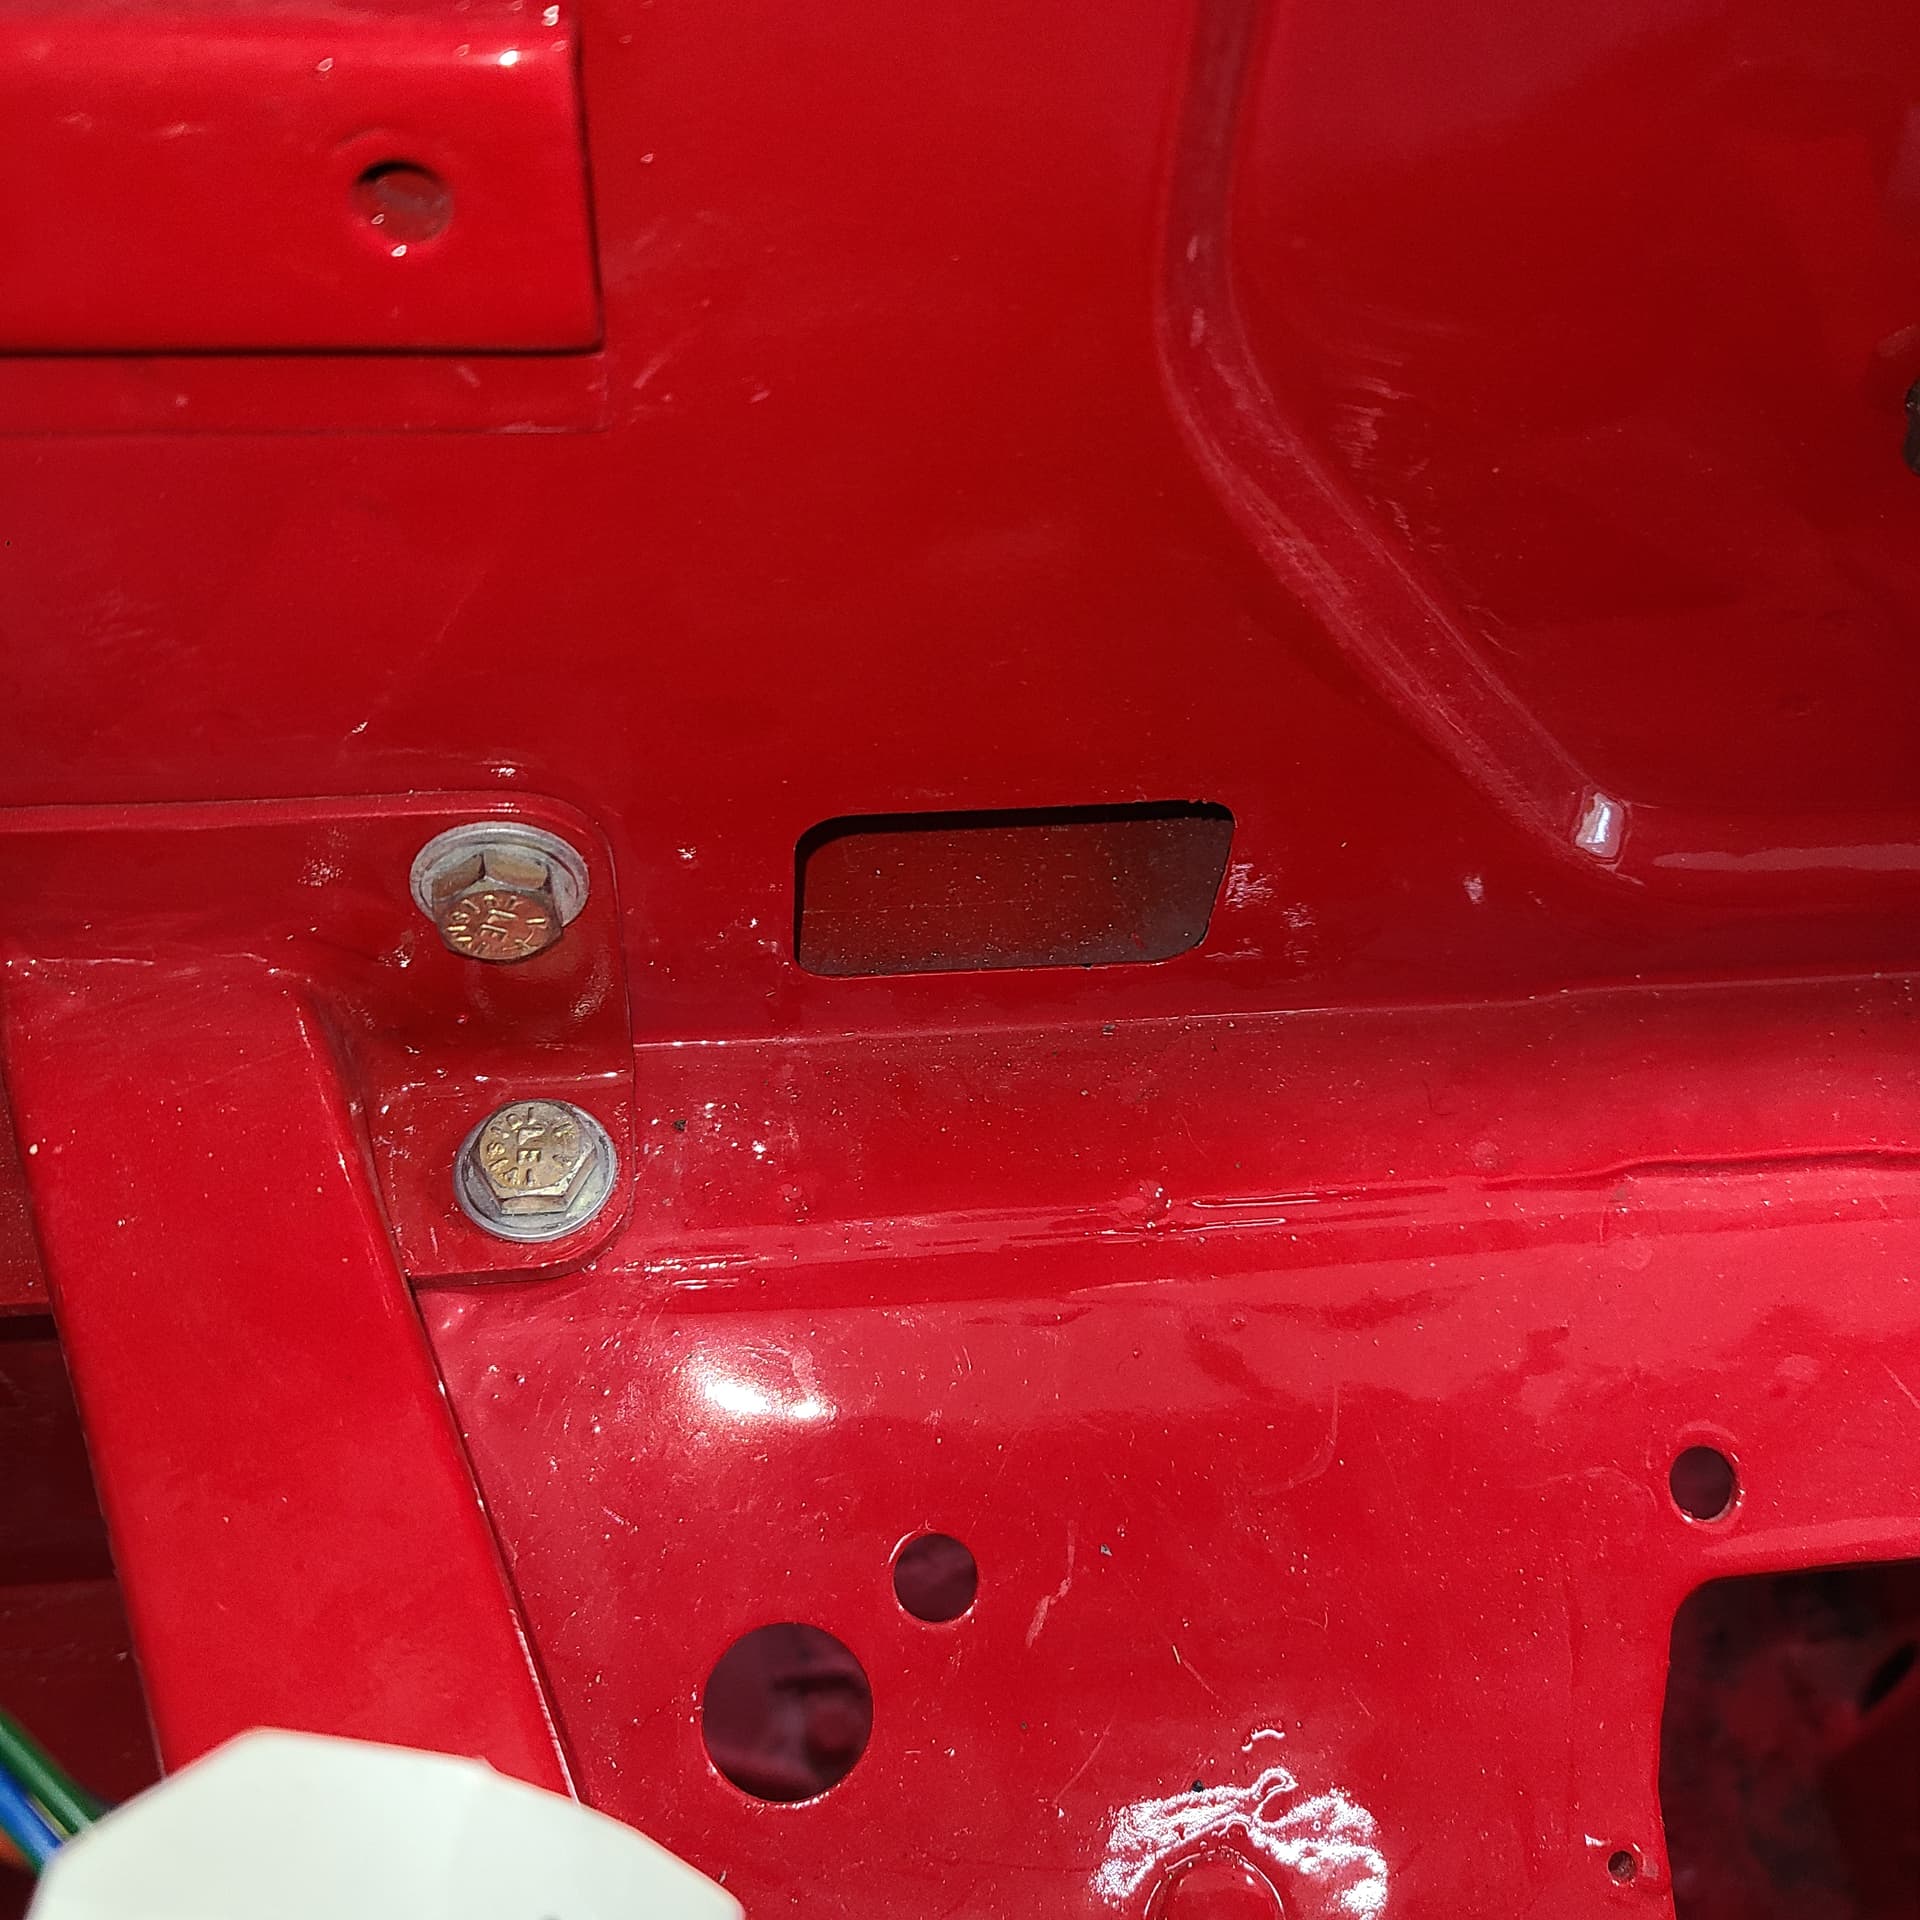
That is when I noticed what I assume are a pair of missing ~6"x8" panels on the outboard sides of the footwells. They are held in place by 2 very small screws at the top corners.
Passenger’s Side

Driver’s Side

I am 95% I certain I do NOT have these panels (the car was dismantled in 1990 by a paint shop in Phoenix). Their only function seems to be to provide access to fuss with the wiring harness/door pin. Ultimately they are covered by a vinyl covered A-Post cardboard thing.
Are the panels metal?
No vendor seems to carry them (at least on-line).
Can I fabricate them?
Help/
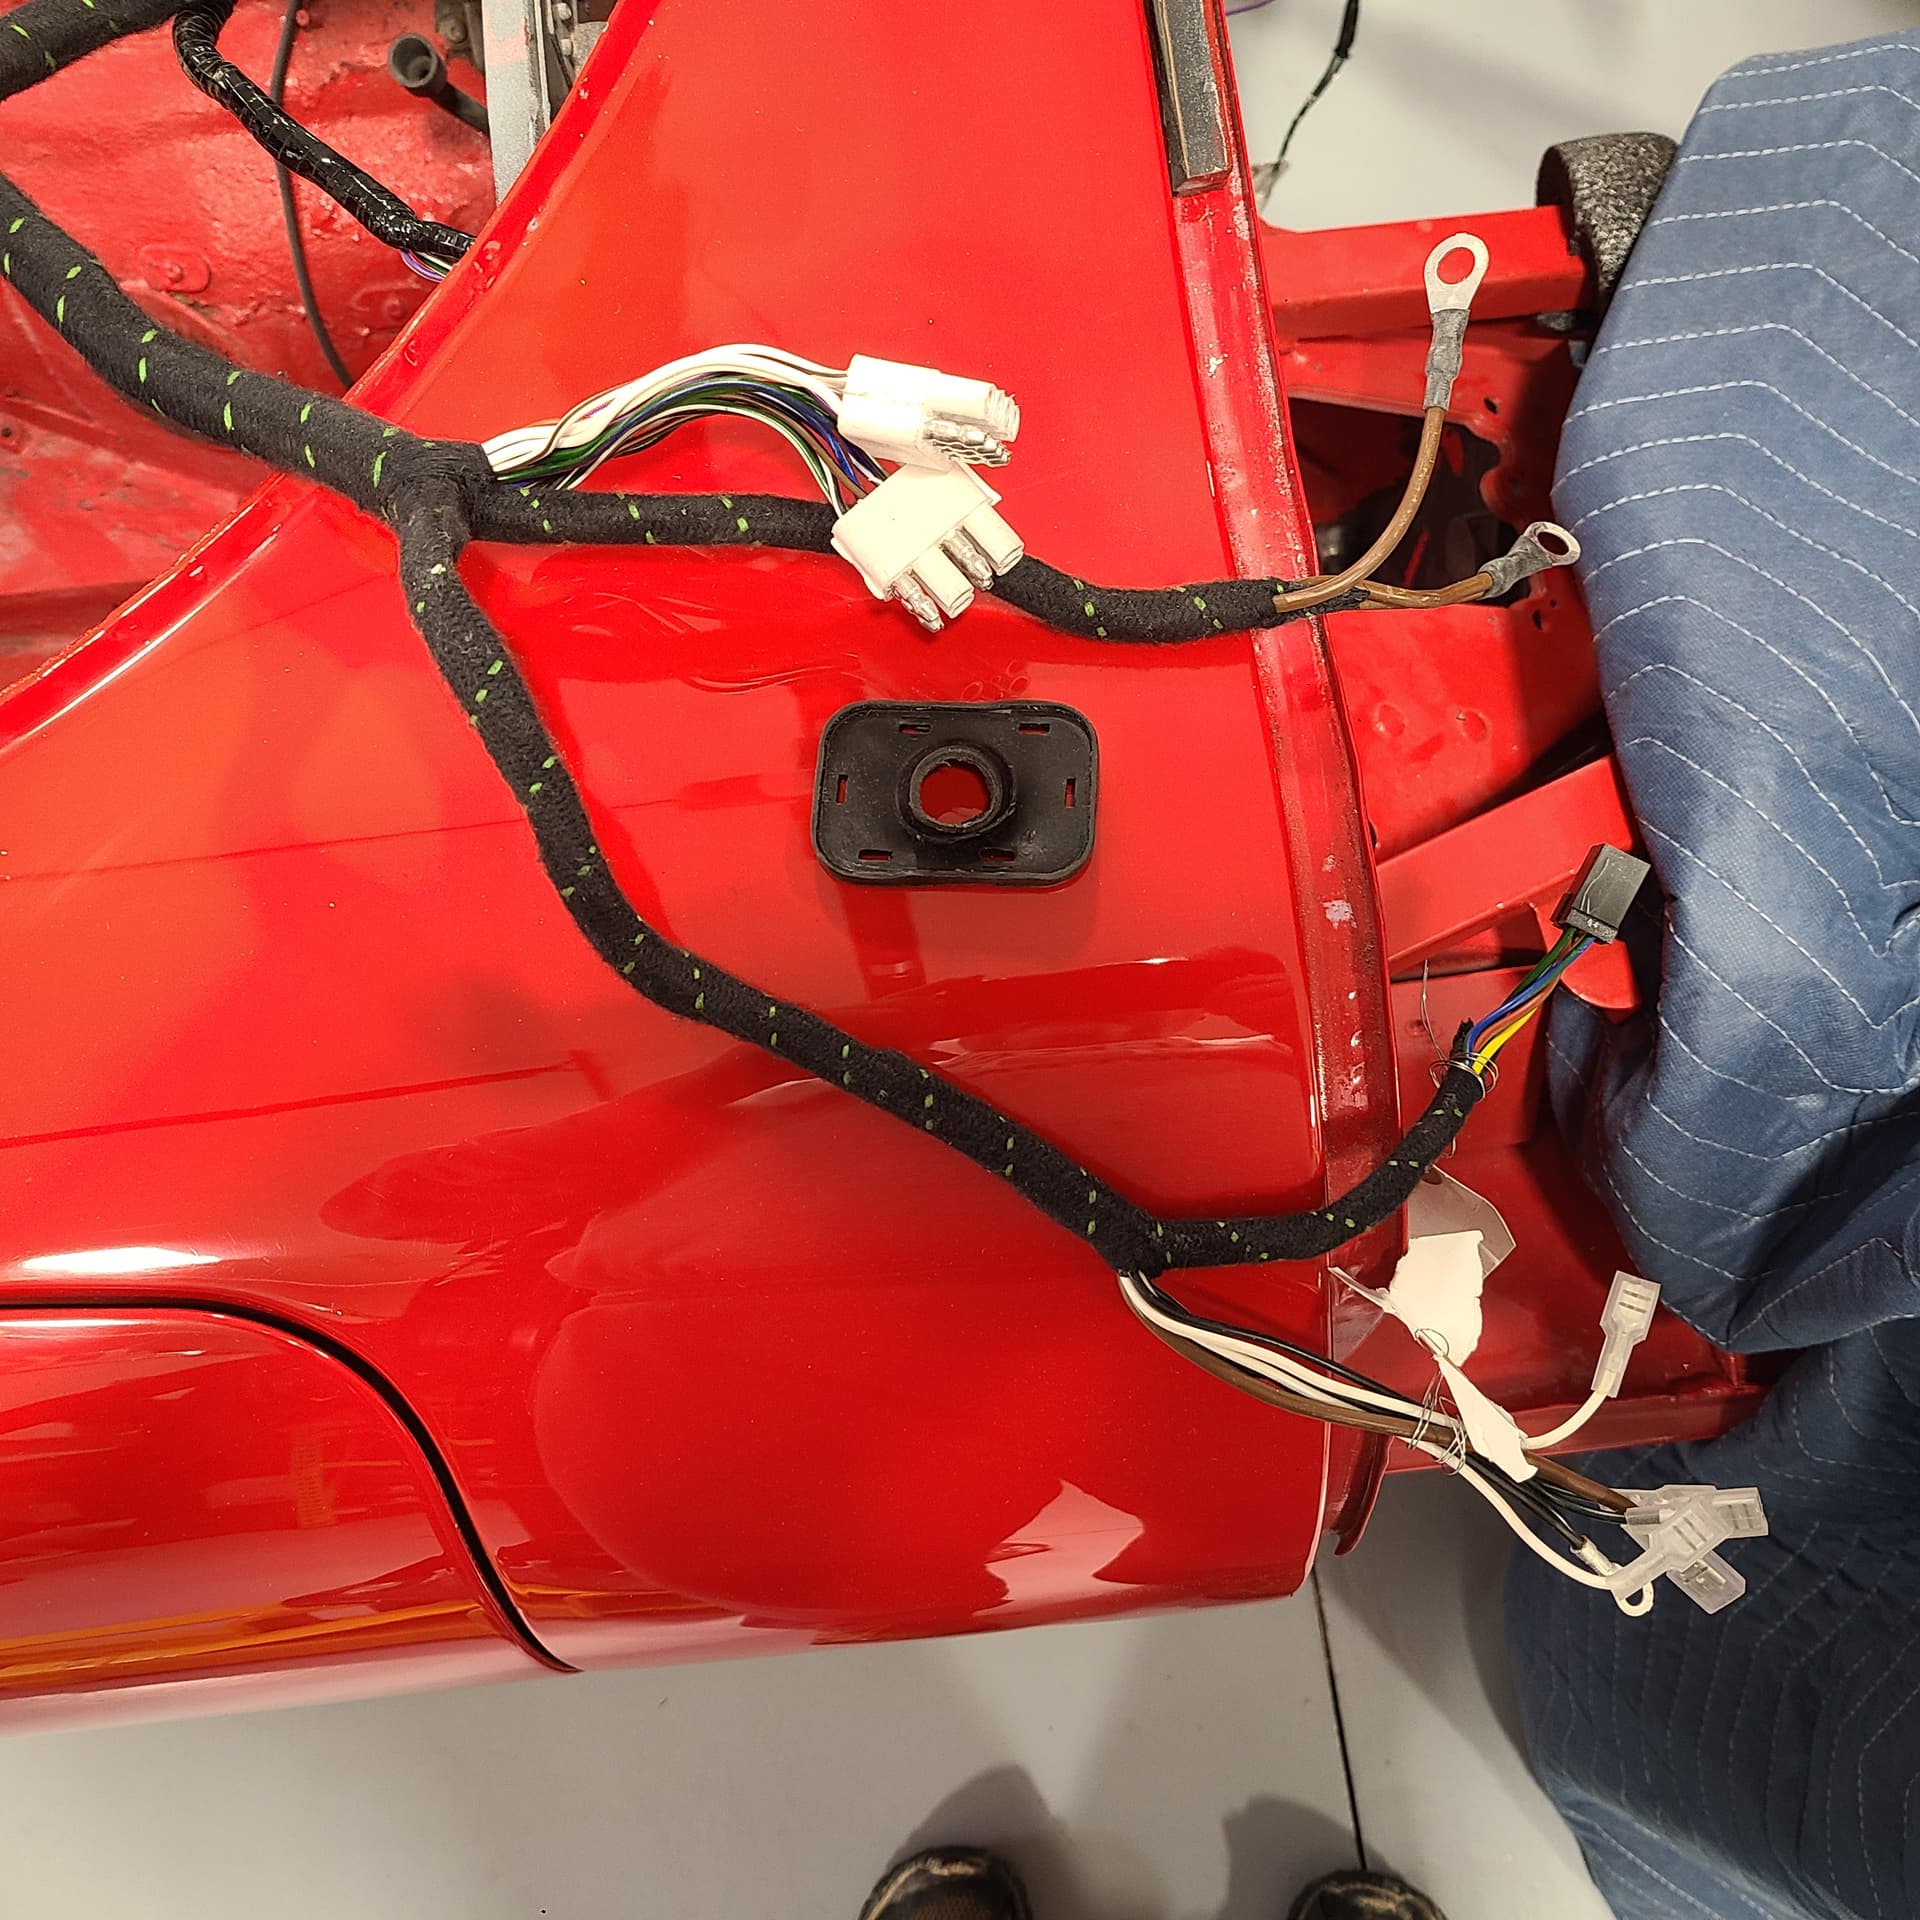
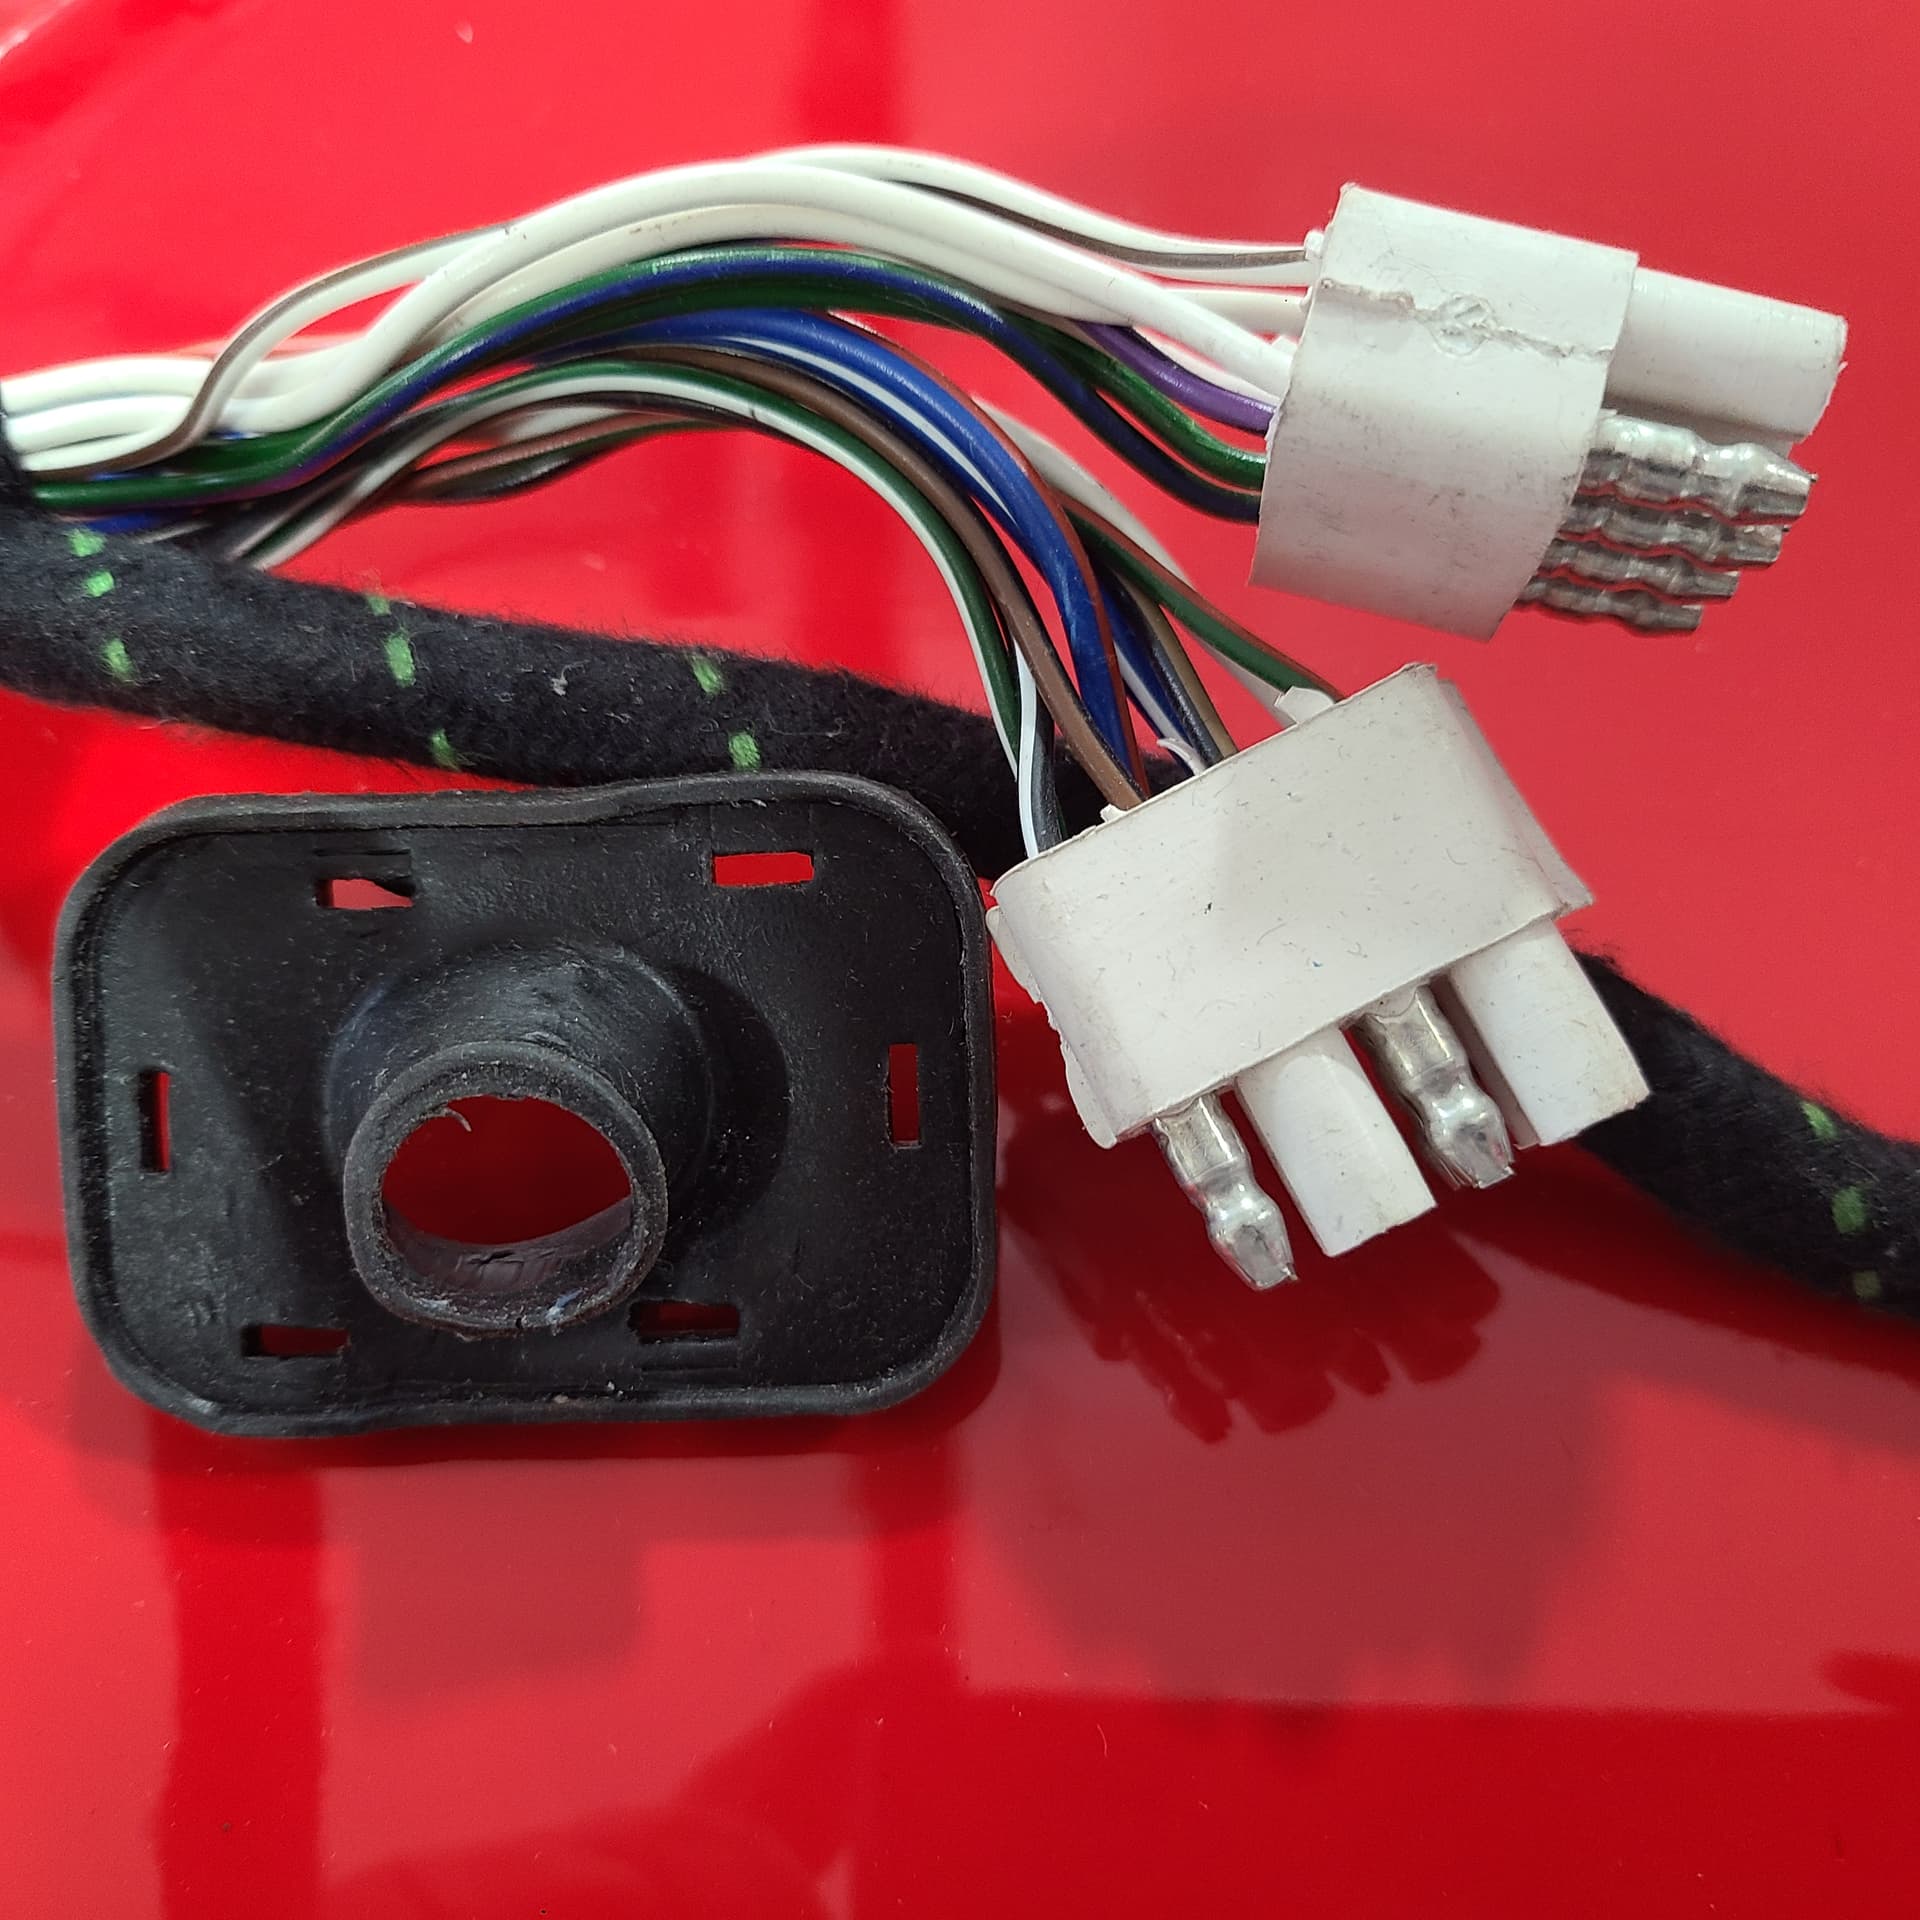
The second issue I’m facing is my futile efforts to determine how to install a 3-piece grommet/gasket thing on the passenger side of the firewall.
The following 5 photos describe my issue. About the only solution I can see is to cut the rubber piece at 6 o’clock to fit it over the wiring harness and then clamp the 2 plastic lock pieces in place.
Captions tell the tale

Are you sure the OTHER end of the harness isn’t the end to fit through the round hole? What does that end look like?
Doug – I shoulda mentioned that aspect.
What you see in my photos is THE smallest part of this particular harness - I assure you. The other end is thicker with thick branches .
Bummer… Start with getting the large white connectors through then work your way through to the smallest connector. If you can’t get the connectors through then cutting the rubber at either the 10 o-clock or 2 o-clock positions would work. I wouldn’t cut it in a spot that isn’t held together by one of the 3-pronged snap in connectors. For example:

There are(were) no panels for those square forward holes.
The grommet was probably more flexible 30 years ago
kind regards
Marek
Marek
Well – that’s good news. I guess I didn’t misplace those (nonexistent) panels. Thanx for that.
The bad news is that the firewall grommet is new – a replacement from SNG Barratt. The original broke/crumbled when I removed it to extract that length of the Bulkhead Harness.
The rubber element of the replacement is supple as it ever will be. I am truly stumped as to how to get the multiple-branched harness through the hole in the rubber piece – without cutting it as Doug suggests. However i am inclined to make the cut – if need be – at 6 o’clock
Before cutting it I would try setting the grommet out in the hot sun for a few hours to see if you can get it flexible enough to work it over the clips. Hot air gun could be used too but a bit more risk of melting it!
Craig, sorry if you already looked at this:. With patience and the right tools many connectors can be disassembled. Basically finding the the little latch that holds the pin in the plastic part, pushing it back and then pushing out the pin. There are always exceptions in this may be one of those. Tom