Hi all, my new problem is getting the inlet manifold off the cylinder head it was put in the hot tank 2 times already . any ideas or new ways of getting this off with out ruining the the parts.
Kevin


The worst one I ever had, after trying everything, I got off by using an Oxy?Acet torch to heat all the studs. It almost fell off.
Rob
I have been known to resort to hammering in plastic wedges.
How many studs are remaining? Are some broke off?
I once did a C head. One stud would not come out with the double nut method. I think I broke it. I rigged up the manifold on a crane with the weight of the head suspended under it. Then a couple weeks of penetrating oil every day. Then the oxy/acetylene torch, and it finally dropped off.
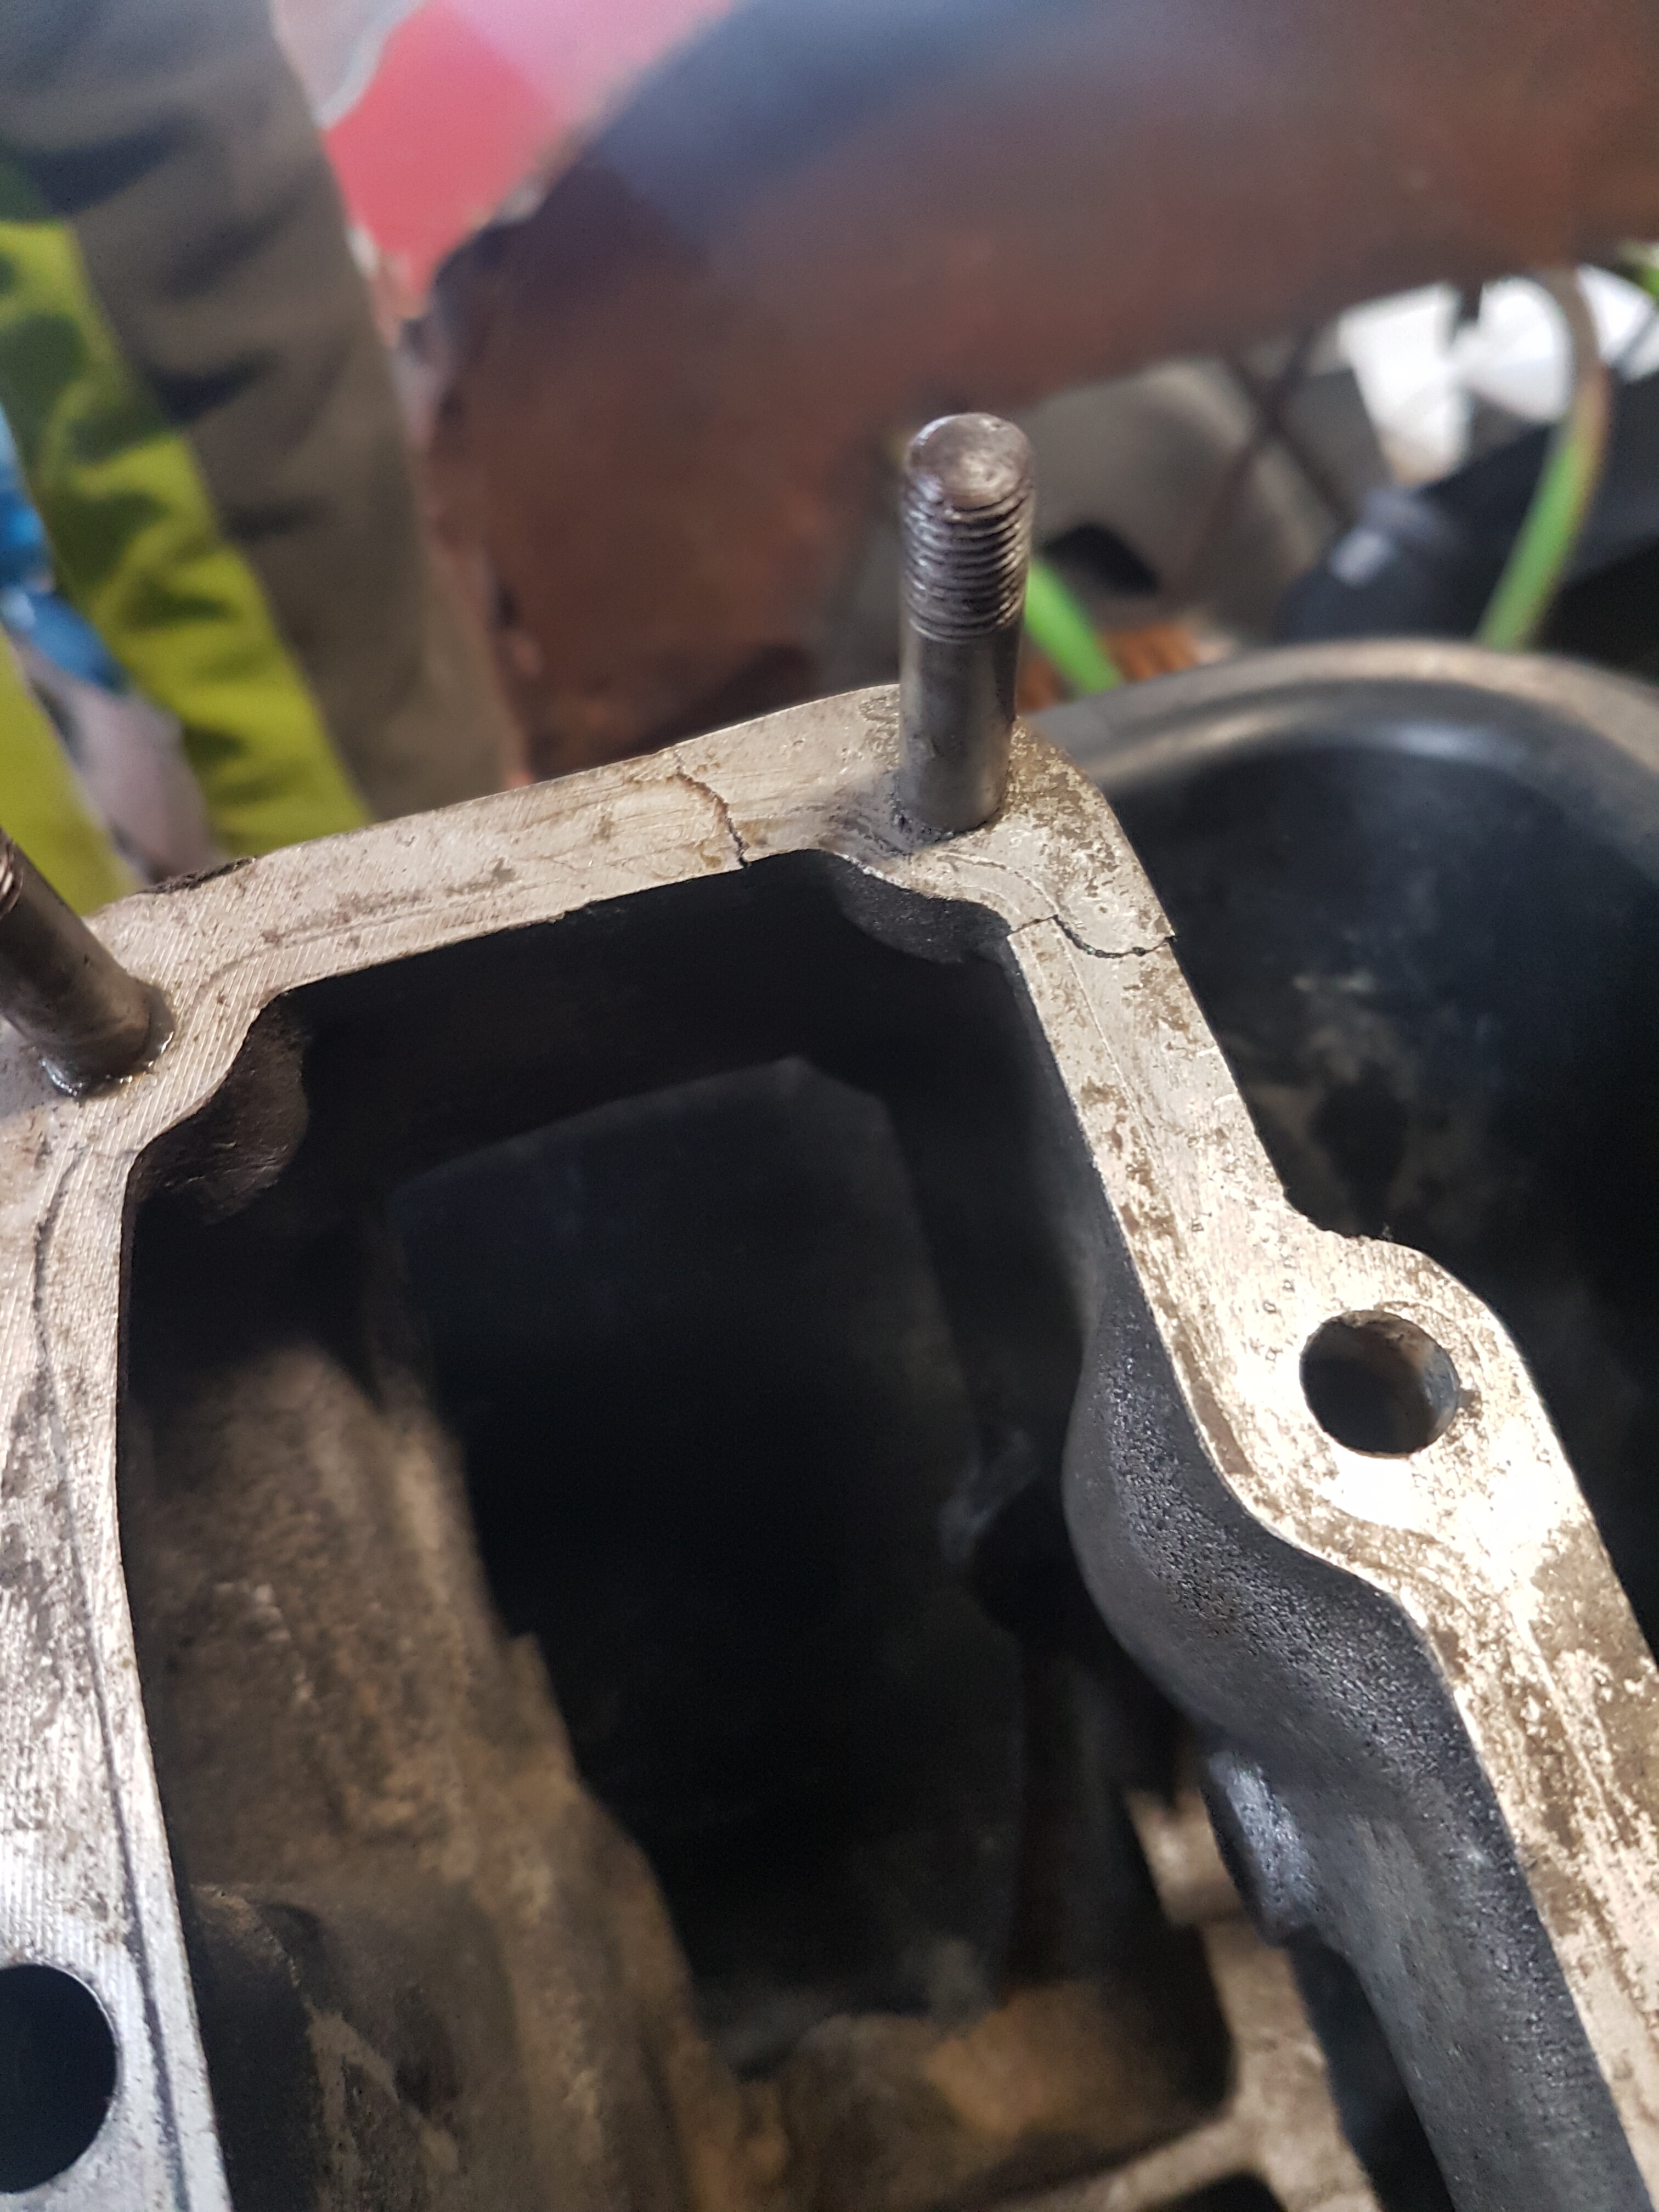
Unfortunately there are a few broken bolts Rob , Thanks gentlemen it’s great to hear that it is possible to heat it off and that others have achieved doing so. I am thinking this job is worth doing a video , Just one more challenge and I am sure it’s not going to be the last . Thanks again for the inperation.
Kevin
I think the heat breaks the rust bond on the studs, and softens sealants used on the face.
Rob
Good morning all its got 4 broken bolts on the inlet and 3 on the water elbow. the fun starts . Kevin


I recently had an intake manifold that had 8 broken studs. The engine was on a stand and I rotated it so the intake manifold was on the bottom. Then I hung weights from the manifold and heated it up.I did this for days with no results.As a last resort I successfully drilled them out. I started out with a small bit of about 3/32 inch and then went larger in small increments. I believe it was a total of 5 progressively larger sizes. The final bit was just under 5/16. I drilled down to about 1/2 inch above the head, which left room to unscrew the stud from the head after the manifold was off. The key was to start the first bit at the exact center of the stud so the larger bits would hopefully remain on center. I did have a few that were off center and with the largest size bit actually cut through the wall of the stud. Fortunately the holes in the manifold are larger than the studs so the drill bits in the off center drilled studs did not damage the manifold. Even when I was done drilling I had to soak the studs in penetrating oil and hang weights on the manifold for a couple of days before I had enough movement that I could get the manifold off.
Today’s update I got the studs for the water outlet out. And heated the rest of the bolts 6 times each , I did a Video of the prosess. going to need my son to edit before sharing , a few words out of sort .
Kevin
2 Likes
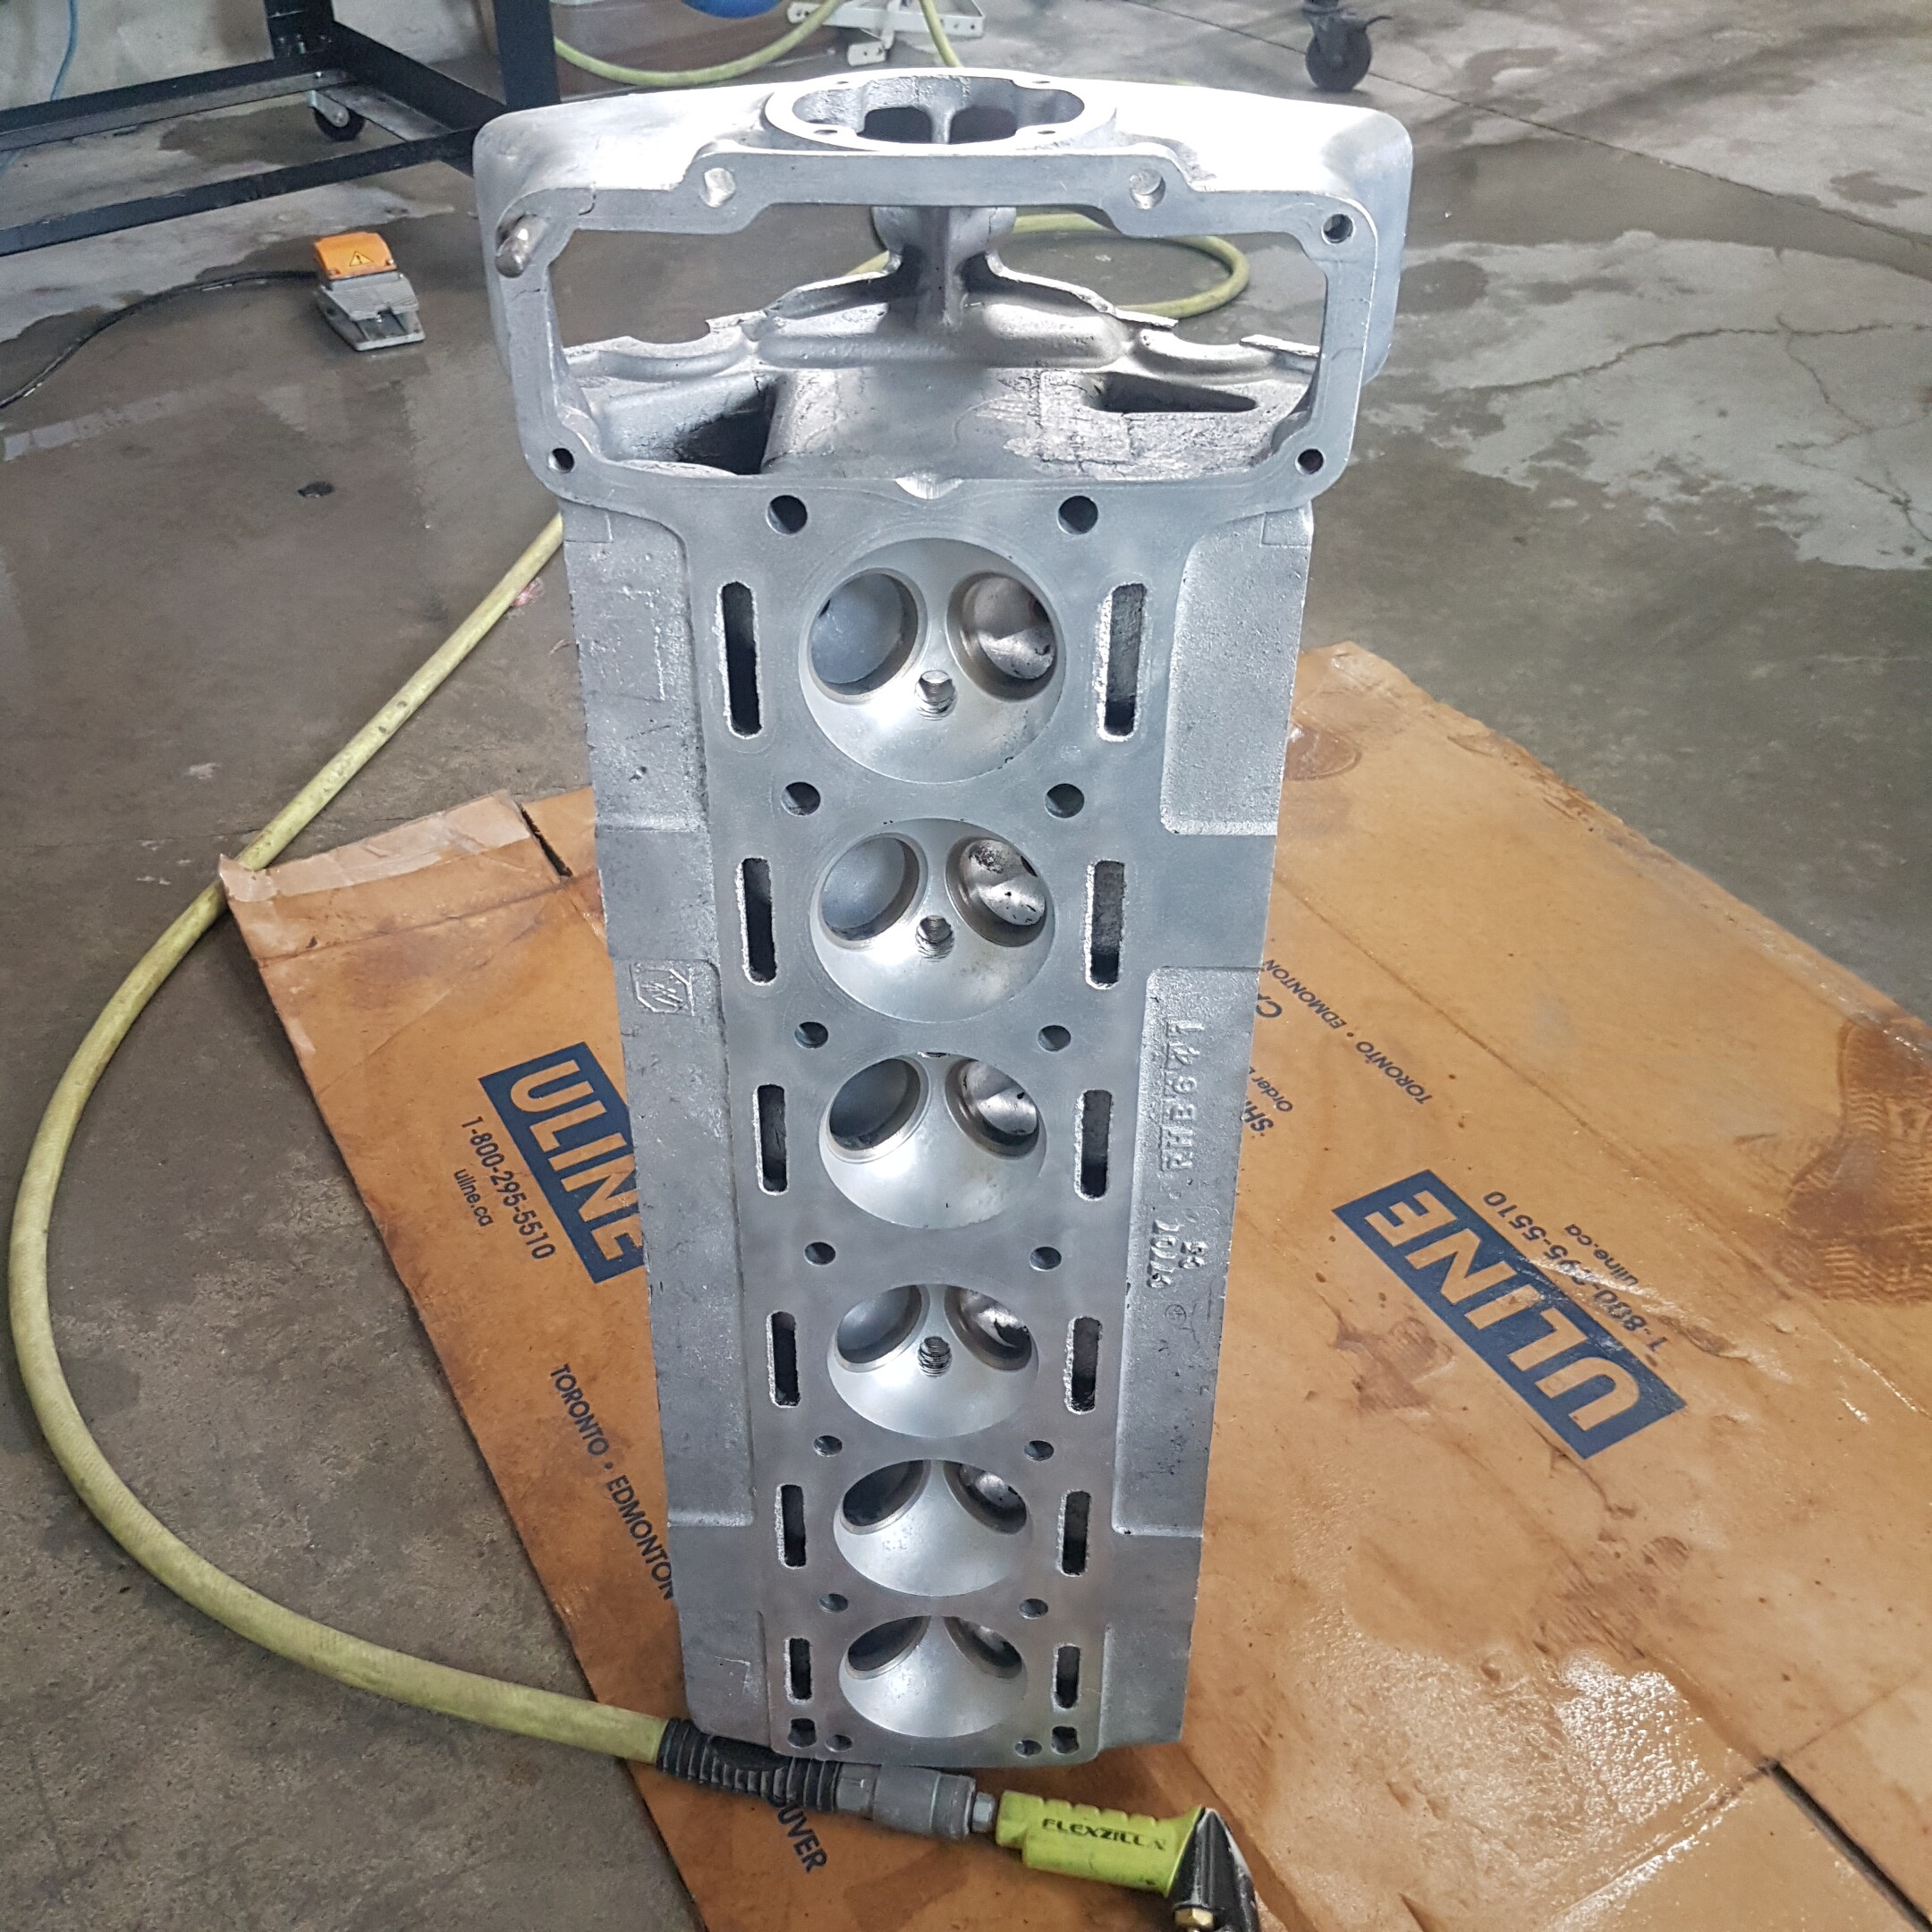
Update the inlet manifold is off just like everyone said we hung the intake with a little pressure on the inlet manifold and socking with penetrating fluid after about a week it came off with no trouble at all , so why I have taken so long to update, well here it is , when we took it off the engine lift it slipped out of our hands and hit the floor . anyone welded anything like this before please advise . on a good note I purchased a Vapor blaster see photo below first photos show vapor blasted parts and the cracked parts.
Kevin


Aluminum welding is tricky, not for the beginner. It can be done with a good MIG welder like my Vulcan with Argon, but you can’t feed the wire through the normal MIG gun because the wire is so soft it won’t feed through and kinks up, so you need a spool gun.
I bought one, also Vulcan, to do some AL welding on an MG gearbox and a Chevy truck front axle. Very happy with it.
You need to make a weld prep, which is grinding a bevel on both sides of the crack, outside and inside, so you can get good full penetration on both sides. Then you need to find a way to hold the broken part in place.
Do a couple of small tacks to hold the part.
Then take away your holder and do more small tacks.
Outside and in, small spots, and let it cool off between shots.
Take your time, don’t try to fill the gaps all at once or it will warp.
Then you can grind it off smooth with a die grinder and a thin cutting wheel. Finish off the gasket face with a hand file.
I see you have a 140 starting carb pipe there…won’t fit that intake mani…unless you have some type of adaptor?
However, that should be a rather easy welding job fix.
Also, make sure you clean out the oil passages which reside within those cam plates…they are channels running from the pin retainers out to the edge of the plates on the backside of the plates.
while those cams are on the bench, can you find the tiny C part #s, and also measure heel of cam to lobe tip with a caliper…thanks, Nick
Hi Nick here are some photos of the cams and the head they came out ofI will look later when I get home tonight for the tiny numbers and measurements your asking about.
Kevin


nice sharp pics…the SE and 3 are common, casting and foundry marks…the C part number will be very small, usually near the round sprocket end on the rough cam shaft, and sometimes on the outer flat of the round sprocket end. Thanks, Nick
Hi Nick, here are photos of the measurements and the numbers you requested , jag 33 on the ends and it look like the other numbers are 5718 / 5717
Kevin


Those are 3/8 lift cams. The intake manifold is the interesting part… It looks like you might have a real C-Type intake manifold, as in (race car). Can you take a measurement of the freeze plug at the rear? There are some other tell-tail details, but let’s start there.
Thank you!
hope this helps it is 1/1/4"
Kevin
The C4953 intake is used on the later XK120 and the C-type, the difference between the garden variety XK120 and the C-type manifold is all the modifications that were done. I see those modifications on your intake!
I have a NOS C-type intake manifold and it looks the same. You have 2" tapered intakes, no air cleaner bosses on the top, plugged starting carburetor port, and larger freeze plug at the rear. 1 1/4".
You will also have larger water-jacket holes and larger intake to head ports. The balance hole inside the manifold between the two banks will also be larger, that is why the freeze plug is larger at the back. They needed the extra room to get a long auger bit down in there to open it up.
This is a very rare part! Be carful with it.