While my engine build is in hiatus awaiting conrod bolts I thought I’d use my idle time to post this interesting learning experience. Some of us got into an earlier discussion about doing upgrades to the 3.4 engine while it’s being rebuilt, extended to the minimum that should be done. Like desludging the crankshaft.
I’m no experienced XK engine rebuilder. This is my second one. The first was my 4.2 E-type engine and it took many hours over a couple of days to get the sludge plugs out. I wasn’t looking forward to the process again but you gotta do it.
First thing I noticed is the plugs in the 3.4 crank are a lot smaller than the 4.2.

which means a couple of things. They should be easier to get out and the sludge traps in the 3.4 are a lot smaller too.
This is what I used to get them out.

My impact wrench is 1/2 inch but 1/2 inch impact sockets fitted with 1/4" hex bits are either rare or non-existent so this is a standard 3/8" hex socket mated to a 1/2" to 3/8" impact adaptor. The extension is needed to get square access to the #3 and #4 sludge plugs.
I broke off the hex bit on the very first plug I tackled, #6. The one that’s easiest to access. Get that bit just a little off square and say goodbye. I went out and bought two more hex sockets at ten bucks each. Then went through a socket when it spun around on its bit. Then put its intact bit into the socket whose bit had broken and promptly snapped it off. Running out of bits I reversed the broken bit and pressed it into the socket which, of course, made the bit too short, so I spun the bit in the plug and that was all she wrote. Three hours later and very careful drilling and heating and lubing so as not to damage the threads in the crank and out she came. Not a good start. Five to go.
I broke another two bits taking out the five others but they all took a lot less time.
This is #1 big end sludge plug. It was the only one of the six staked only three times, the others four.

I used a narrow, sharp cold chisel to break the stakes then heated the area with a propane torch, covering up the main journal with a piece of sheet metal to protect it during the process - that white stuff you see on the journals is a smear of grease to keep them from flash rusting.

and this is what it looks like with the plug freshly extracted:

and this is the crap that came out of the trap:
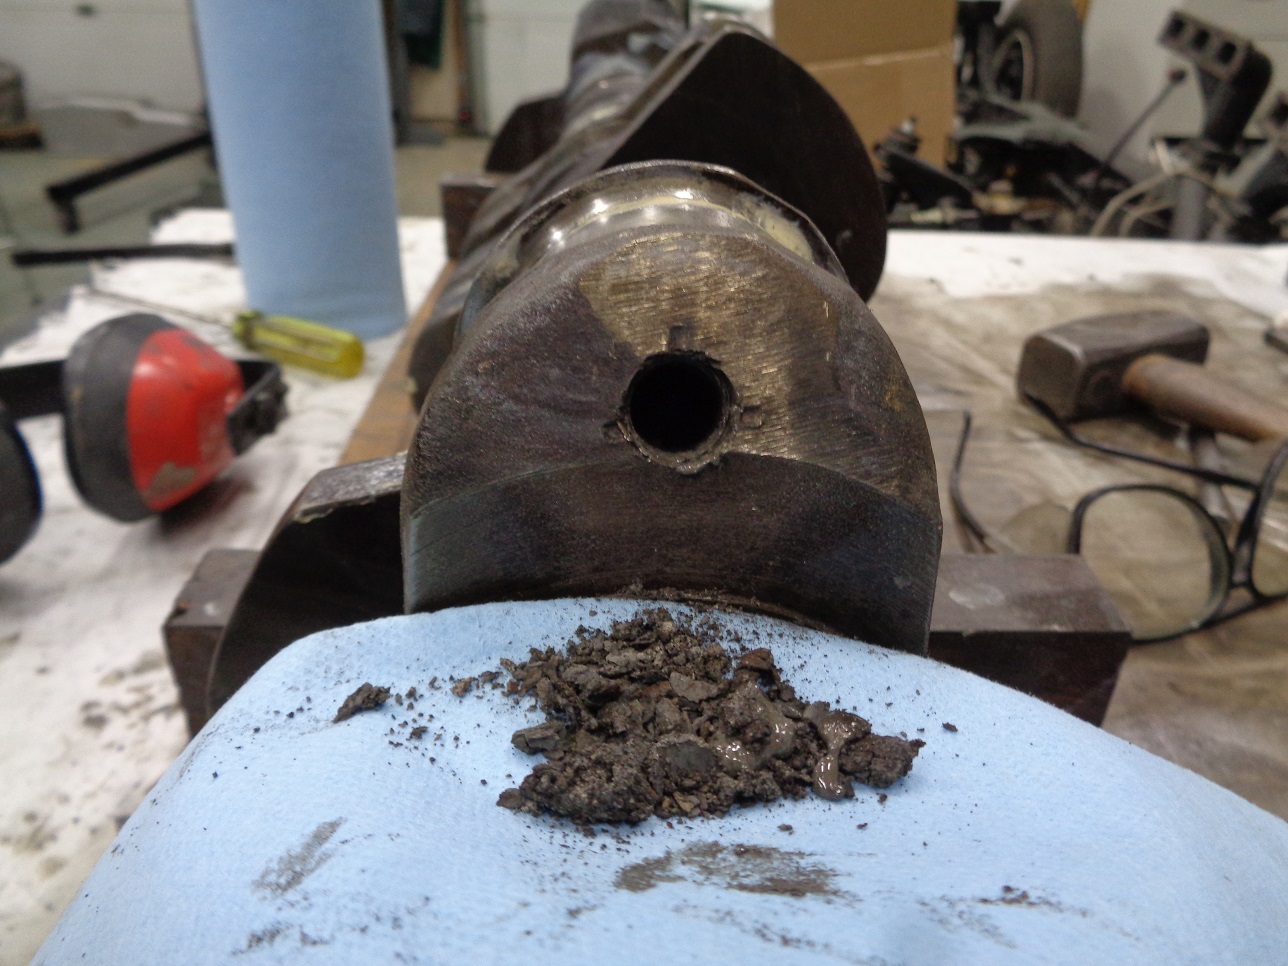
pretty much representative of all. A lot of solvent flushing and compressed air followed to get things pristine.
You really gotta desludge your crank for either a refresh like this one or a total rebuild, but I’m looking forward to never having to do this job again. 
Lessons learned: A quarter inch hardened hex bit is not exceptionally strong. Keep the impact wrench perfectly square to the plug or you will snap off bits. You’re likely to snap a couple off anyway, or maybe spin a bit in its socket, so buy a few. Use propane heat ahead of hitting the area with PB Blaster before applying the impact wrench.