I am about to reinstall new door cards with the waterproof sheeting attached to the doors. I have bought some thin butyl double sided tape and thin vapour barrier plastic sheeting. The cards are new from Aldridge and I will varnish the board to seal it.
Question is how to attach the plastic to the doors as there are indents in the inner skin so the plastic must be pressed in to seal these “pockets” or any water with pool behind the plastic film. I do not remember seeing the plastic installed but think it was flat across the door. When I tested the leakage with a hose pipe there was a fair amount of water splashing into the car so it will happen.
Any advice please?
I used the thick but stretchy plastic film used for wrapping pallets. Sprayed aerosol glue around the edges and indents at bottom Stretched the plastic across the door. I pressed the bottom edge into the indents since the plastic stretched enough. Possible that i get some water trapped further up but best I could do. Been a couple of years since I did it and had the cards off recently and all looked OK.
Dave
Can’t the door cards be made of something completely waterproof, like fiberglass or … ?
I mean DIY, not just a purchase.
My cards were completely unrestorable so I bought complete new cards with vinyl fitted as that is not a DIY job in my opinion. I will seal the hardboard in case any damp gets through. The clips are still steel so they will rust also causing early failure. Plastic would be better but they are not available AFAIK. The steel one will be painted but as soon as you fit them paint will get removed!
My “restored” doors did not have any of the original seal applied between frame and door so the water just poured in at various entry points. All sealed up now and the deluge is much reduced. Ideally I need a “hatch” in the plastic liner so I can remove the cards and give the doors some treatment at regular intervals without removing all the plastic…
Hello Steve,
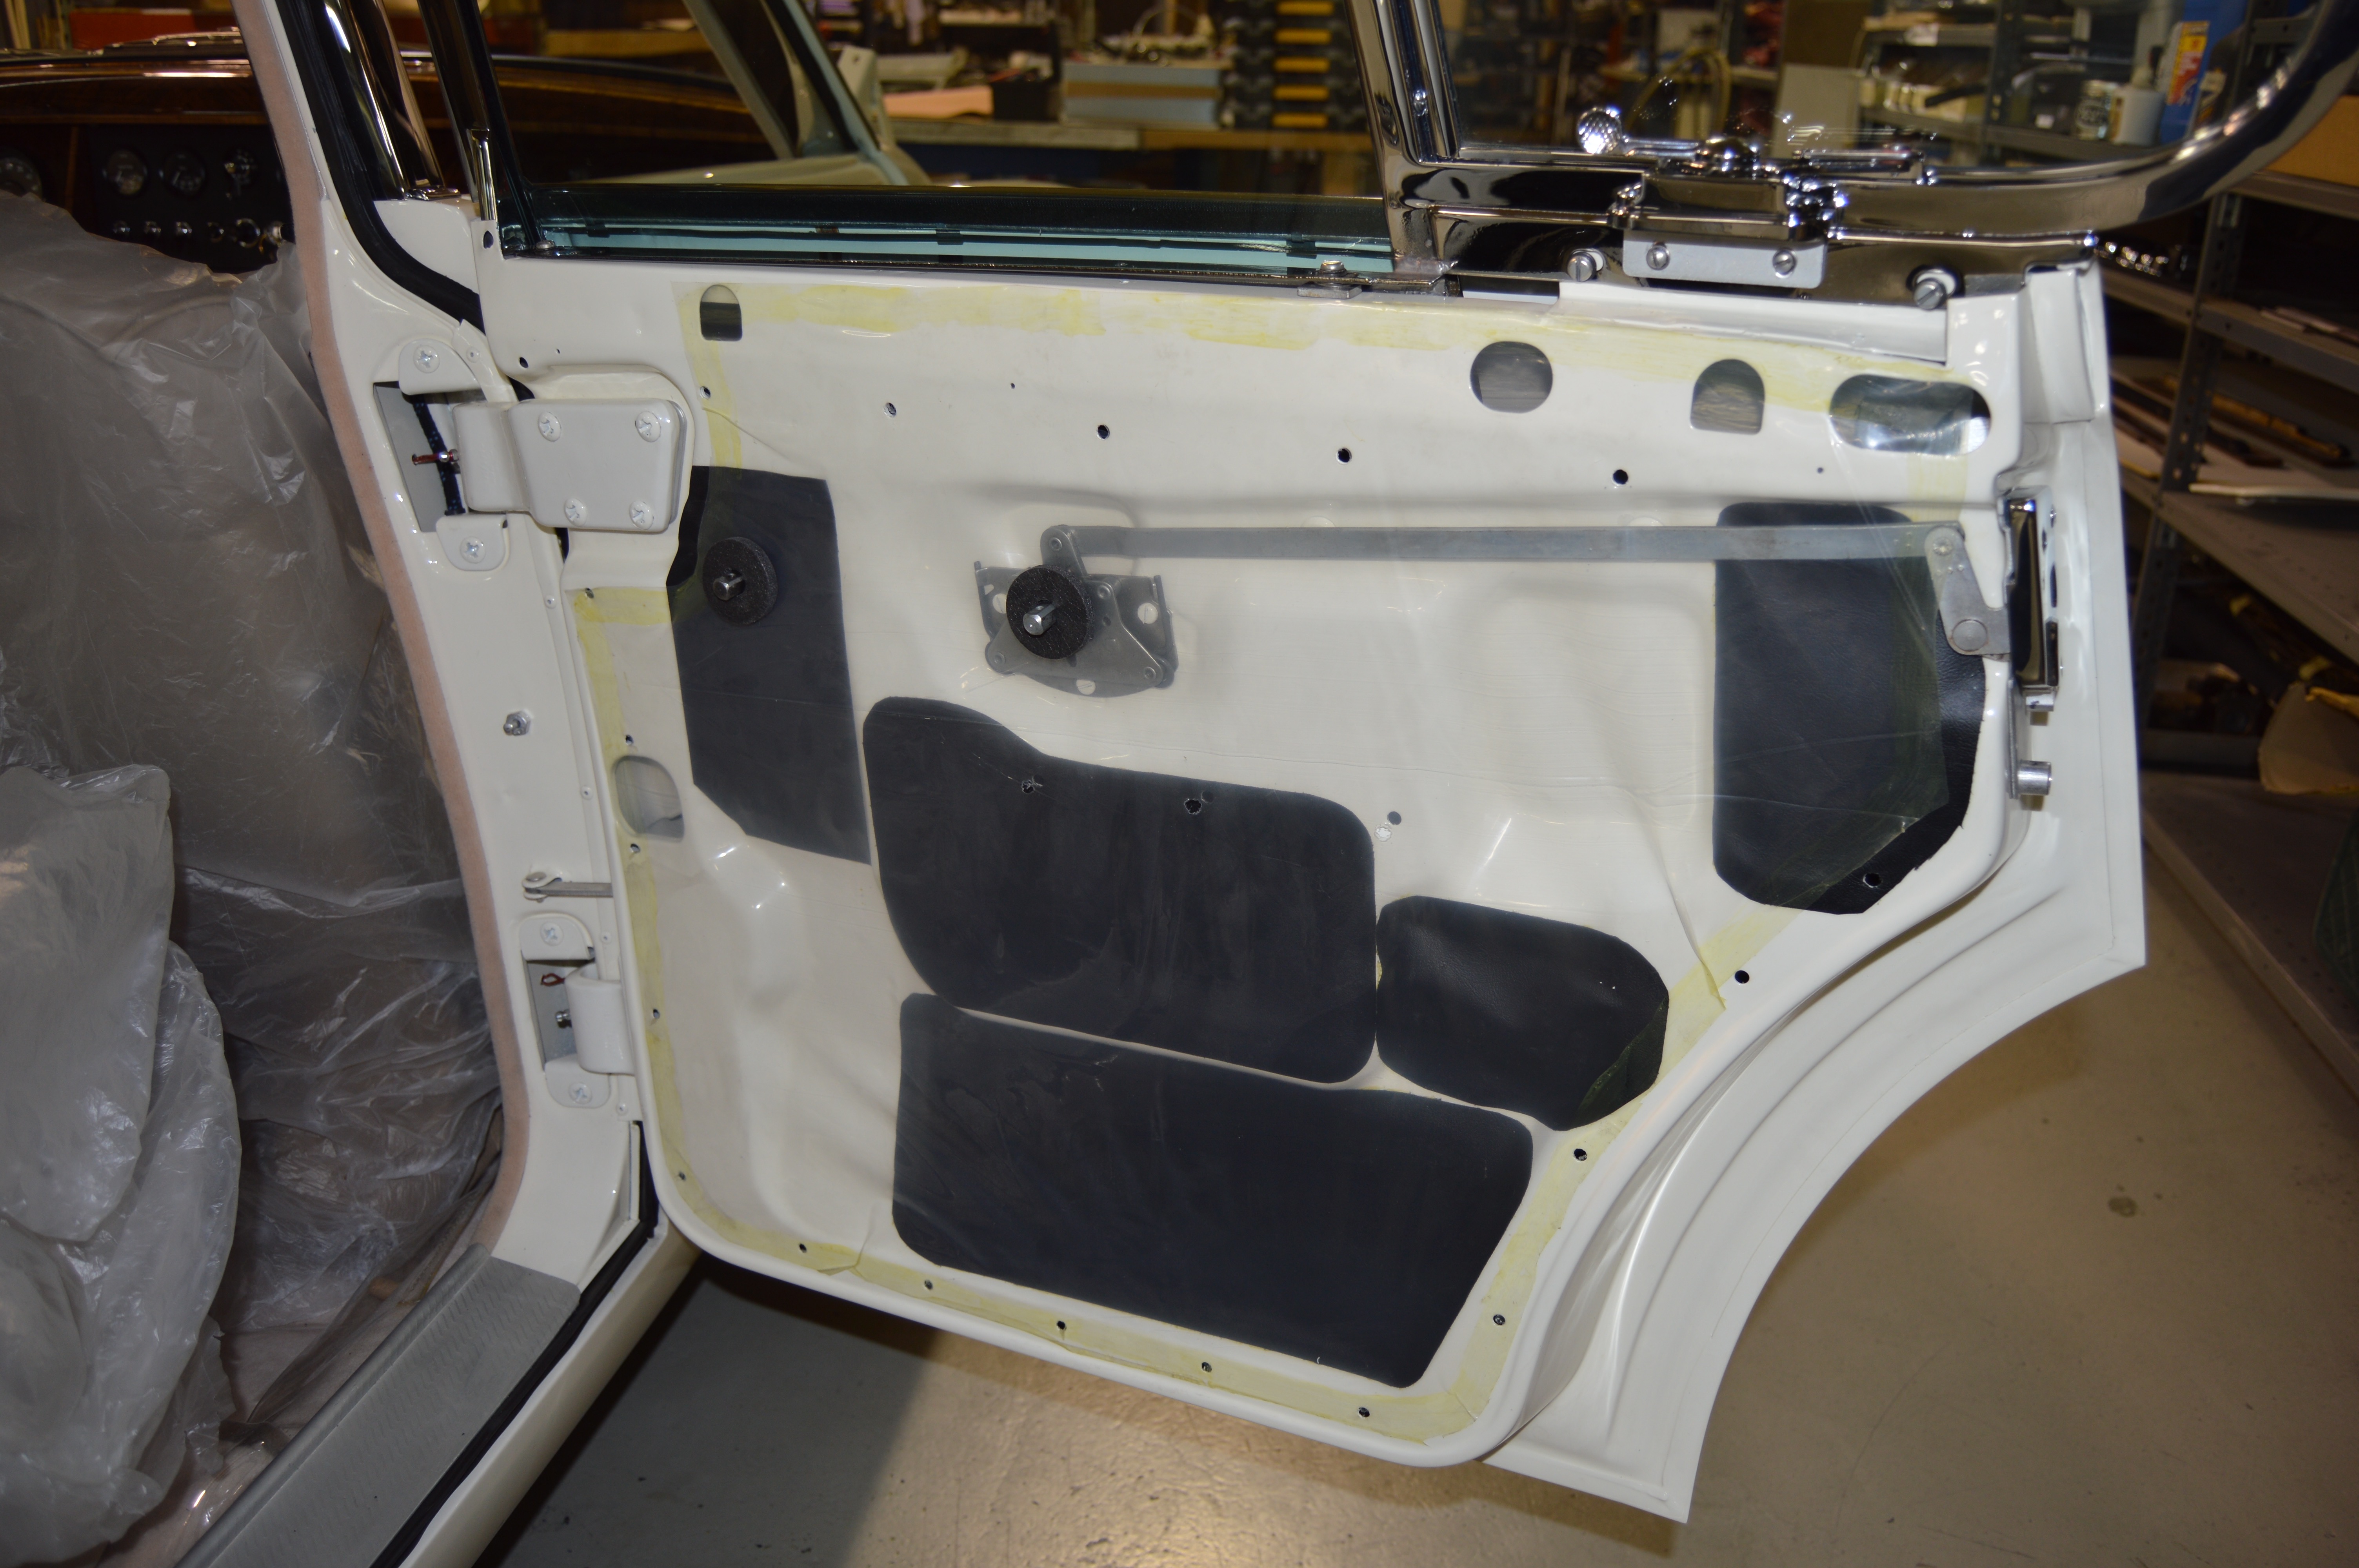
I recovered the door inner panels the way I found them when I removed the original door panel cards. The openings in the door inner panel had vinyl ‘patches’ glued over them to effectively enclosed the door inner panel. On top of the glued in vinyl patches, was a sheet of clear vapor barrier. it was glued around the entire periphery of the door inner panel. I used brush-able contact cement to glue both the vinyl ‘patches’ and the vapor barrier to the door inner panel. The following photo depicts this arrangement.
It’s interesting to note that our car originally had red and gray colored vinyl patches glued to the door…I suspect Jaguar used scrap pieces of vinyl to cover the opening in the door inner panel to eliminate waste and cost.
I hope this helps.
Brian
1 Like
Thanks this is exactly what I was thinking but very few cars have original doors to check. So I have started to cut my plastic sheeting to fit these holes and using double sided tape to seal them off. I was wondering if vapour would condense between the inner and outer plastic but stopping the ingress would be more beneficial. As this is my daily driver I am not using the butyl tape as I want to be able to remove the plastic to fully restore the doors at a later date.

Nice door by the way! I aspire to get my 1964 originals into the same condition.
Since you have your door’s all apart have you thought about installing sound deadener like Noico from Amazon? It takes the tympanic drumming away from the outside door panels. Use gloves (sharp!) and press the material in fully to get a good seating.
Gerard
If you are going to make your own panels, which is what I did for my Mk2, try to find abs plastic sheet. It’s easy to work with, cuts on a band saw or sabre saw, drills well, and will never degrade. If your original vinyls are in good shape, you could even remount them. I personally find the Jaguar door cards pretty cheesy, and I like my custom leather and vinyl pattern better, but they are not original, obviously.
1 Like
I think this is a good idea
(my) original had a thin clear sheet of plastic stuck on the door with butyl mastic
making a new door card is not easy as the holes have offset pins, and cutting a perfect template is critical
In any case, its very important to have the horizontal rubber “seal against glass” in good condition, as that is what primarily excludes outside water from this area
I also painted the unsealed board
That’s exactly what came to my mind - customizing the door cards leather pattern.
Especially Mk1 vinyl plains look … cheap. Can You share a photo of Your creation ?
I’m thinking of vertical stripes on upper half of cards, all-around the interior, to mimic the seat pattern.
Mk1 lacks these seals, so it will need to be adpoted.
Great idea ! What thickness would You recommend ?
With ABS - we have a choice !
I would recommend the same thickness as original, to avoid potentially nasty problems getting everything back together…its bad enough anyhow
on my (420G) using thicker material would mean the door card pins may not fit well enough
( just as a for instance)
My Mk1 measurements show 3.5mm card thickness, while ABS comes in 3 or 4mm, so I’m on the fence … but love the idea.
Did You find source for cards metal clips ? Mk1 has unique ones I think. Those are 2-part items.

No, but I have salvaged sufficient used ones
You may wish to consider “universal” plastic push in trim clips (as they will be hidden)
check the hole diameter in the door
on my vehicle, the hole in the door card is offset to to hole in the door, as the trim pin has a dogleg
making a new door card was a seriously time consuming and annoying task
The silver material inside the door is “Silent Coat” a butyl sound deadening material with foil outside to replace the old black material usually found lying in the bottom of the doors! I have used it on all panels especially behind the rear seat and wheel arches.
I would use the thinner material - 4mm seems too much to me. You will want to pad the abs with thin closed cell foam (available from trimmer supply), and this gives the opportunity for some profiling as a design feature. Be careful about overall size. If you look closely at my drivers door, you will see that it is slightly damaged by being a bit oversize on the back edge. Account for the thickness of your covering when you are sizing the panel. If you use a different style of fastener, you may have to rearrange the hole location. On a Morris pickup, I drilled the holes larger and used the pop-in style plastic fasteners. They work well but are hard to get loose.
Tony is right - this is a time consuming project, but satisfying as well as saving some money. My panels have held up well in the 15 years since I did them, but they don’t get subjected to the abuses of a daily driver.

1 Like