Not to hijack Roger Los’ thread I’ll start a new one. (Beautiful
car, Roger!)
It’s best to trial fit the bonnet unpainted but I finished the
underside and belly pan before bolting up to the primed monocoque.
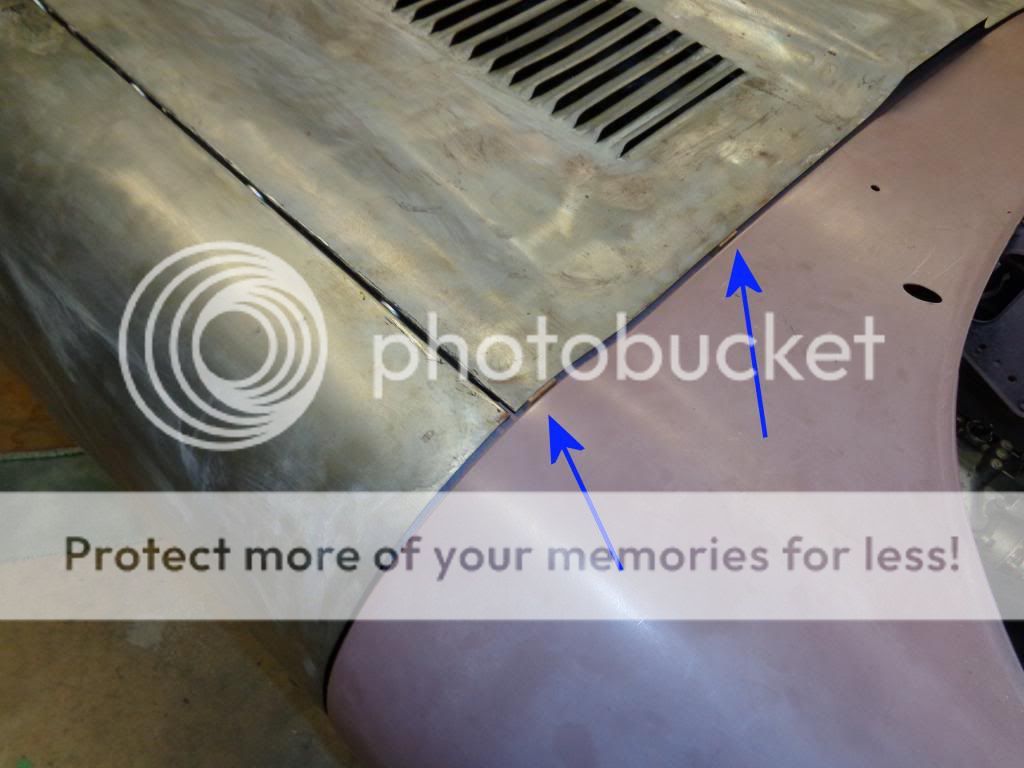
As it is I had to cut a thin strip off the bottom of the wings and
reweld the rolled edges to achieve the target 4mm gap vs the new MR
sill so now need to fix some paintwork.
Started by measuring bonnet support tube length X’’ then bolted the
two hinges to the bonnet X+1/16’’ apart. I didn’t add any shims but
would next time, 1/4’’ packing all around. I laid a large foam pad
on top of the engine and a buddy and I lifted the bonnet onto it.
It was then a simple matter of inserting the pivot sleeves through
the hinge bushings and into the ends of the support tube before
screwing in the pivot bolts tight. Took no more than ten minutes.
I cut four small hardwood spacers measuring 9/16’’ thick x 5/8’’ wide
x 1’’ long and placed them in the bonnet landing seal channel on the
skuttle. The spacers hold the leading edge of the bonnet centre
section level with the skuttle:
The rear angle of the front wings and the angle of the sill/A-post
are both exactly 90�.

This is important. If the angles aren’t bang on to start with it
will not be possible to achieve a precision fit - critical to
verify just before welding in new outer sills.
From here on it’s playing with hinge shims. Loosen/tighten all
eight hinge bolts with each adjustment. With the top/rear edge of
the bonnet and the skuttle held consistently level by the wooden
spacers, the vertical shims will lift or lower the nose of the
bonnet such that the 90� angles can be matched. Whatever gap you
end up with between the bottom of the wings and top of the sill can
be adjusted only with additional bodywork, as in my case. Playing
next with the horizontal shims will provide the target gap between
bonnet and bulkhead. It may be necessary to match the forward end
of the sill with the inner arch of the wing with a triangle of body
solder.
Final job is to adjust the wings to match the contour of the A-post
by loosening and tightening the bolts at the bonded flange and at
the bracket where the top/rear wing and centre section meet.
If the bonnet needs to be moved to one side then back off that
side’s pivot bolt the desired distance. Loosen, reposition then
retighten the hinge snug against the pivot bolt. Slacken the four
hinge bolts on the opposite side then back to tighten the pivot
bolt, drawing the bonnet sideways. Then back to the opposite side
to retighten its hinge bolts.
Longwinded post. Apologies. But this is what worked well for me.
Two day process done solo except the initial lift. Before the next
steps - cleanup, phosphating, epoxy, high solids primer and
levelling with finishing putty - I’ll fit the bonnet locating
brackets and hold downs and do any final fiddling adjustment.
As usual YMMV. Work safely.–
Nick Saltarelli '68 Cdn mkt E-type S1� OTS, '54 XK120SE OTS
Niagara, Ontario, Canada
–Posted using Jag-lovers JagFORUM [forums.jag-lovers.org]–
Search the archives & forums - http://search.jag-lovers.org/
Subscription changes - http://www.jag-lovers.com/cgi-bin/majordomo
Support Jag-lovers - Donate at http://www.jag-lovers.org/donate04.php