I started my second engine transplant this week, this time removing the sick and tired engine in my 1984 XJ6 Vanden Plas with a nicely running engine from the crash damaged 1987 XJ6 parts car that I purchased last year. The first time I did this kind of Jaguar 4.2L XK engine transplant was about 5 years ago when the #6 rings failed in the engine in my 1987 XJ6 Vanden Plas and I replaced it with a nicely running engine from a 1986 XJ6 parts car that I purchased. My former 1987 XJ6 Vanden Plas is still running great for it’s new owner.
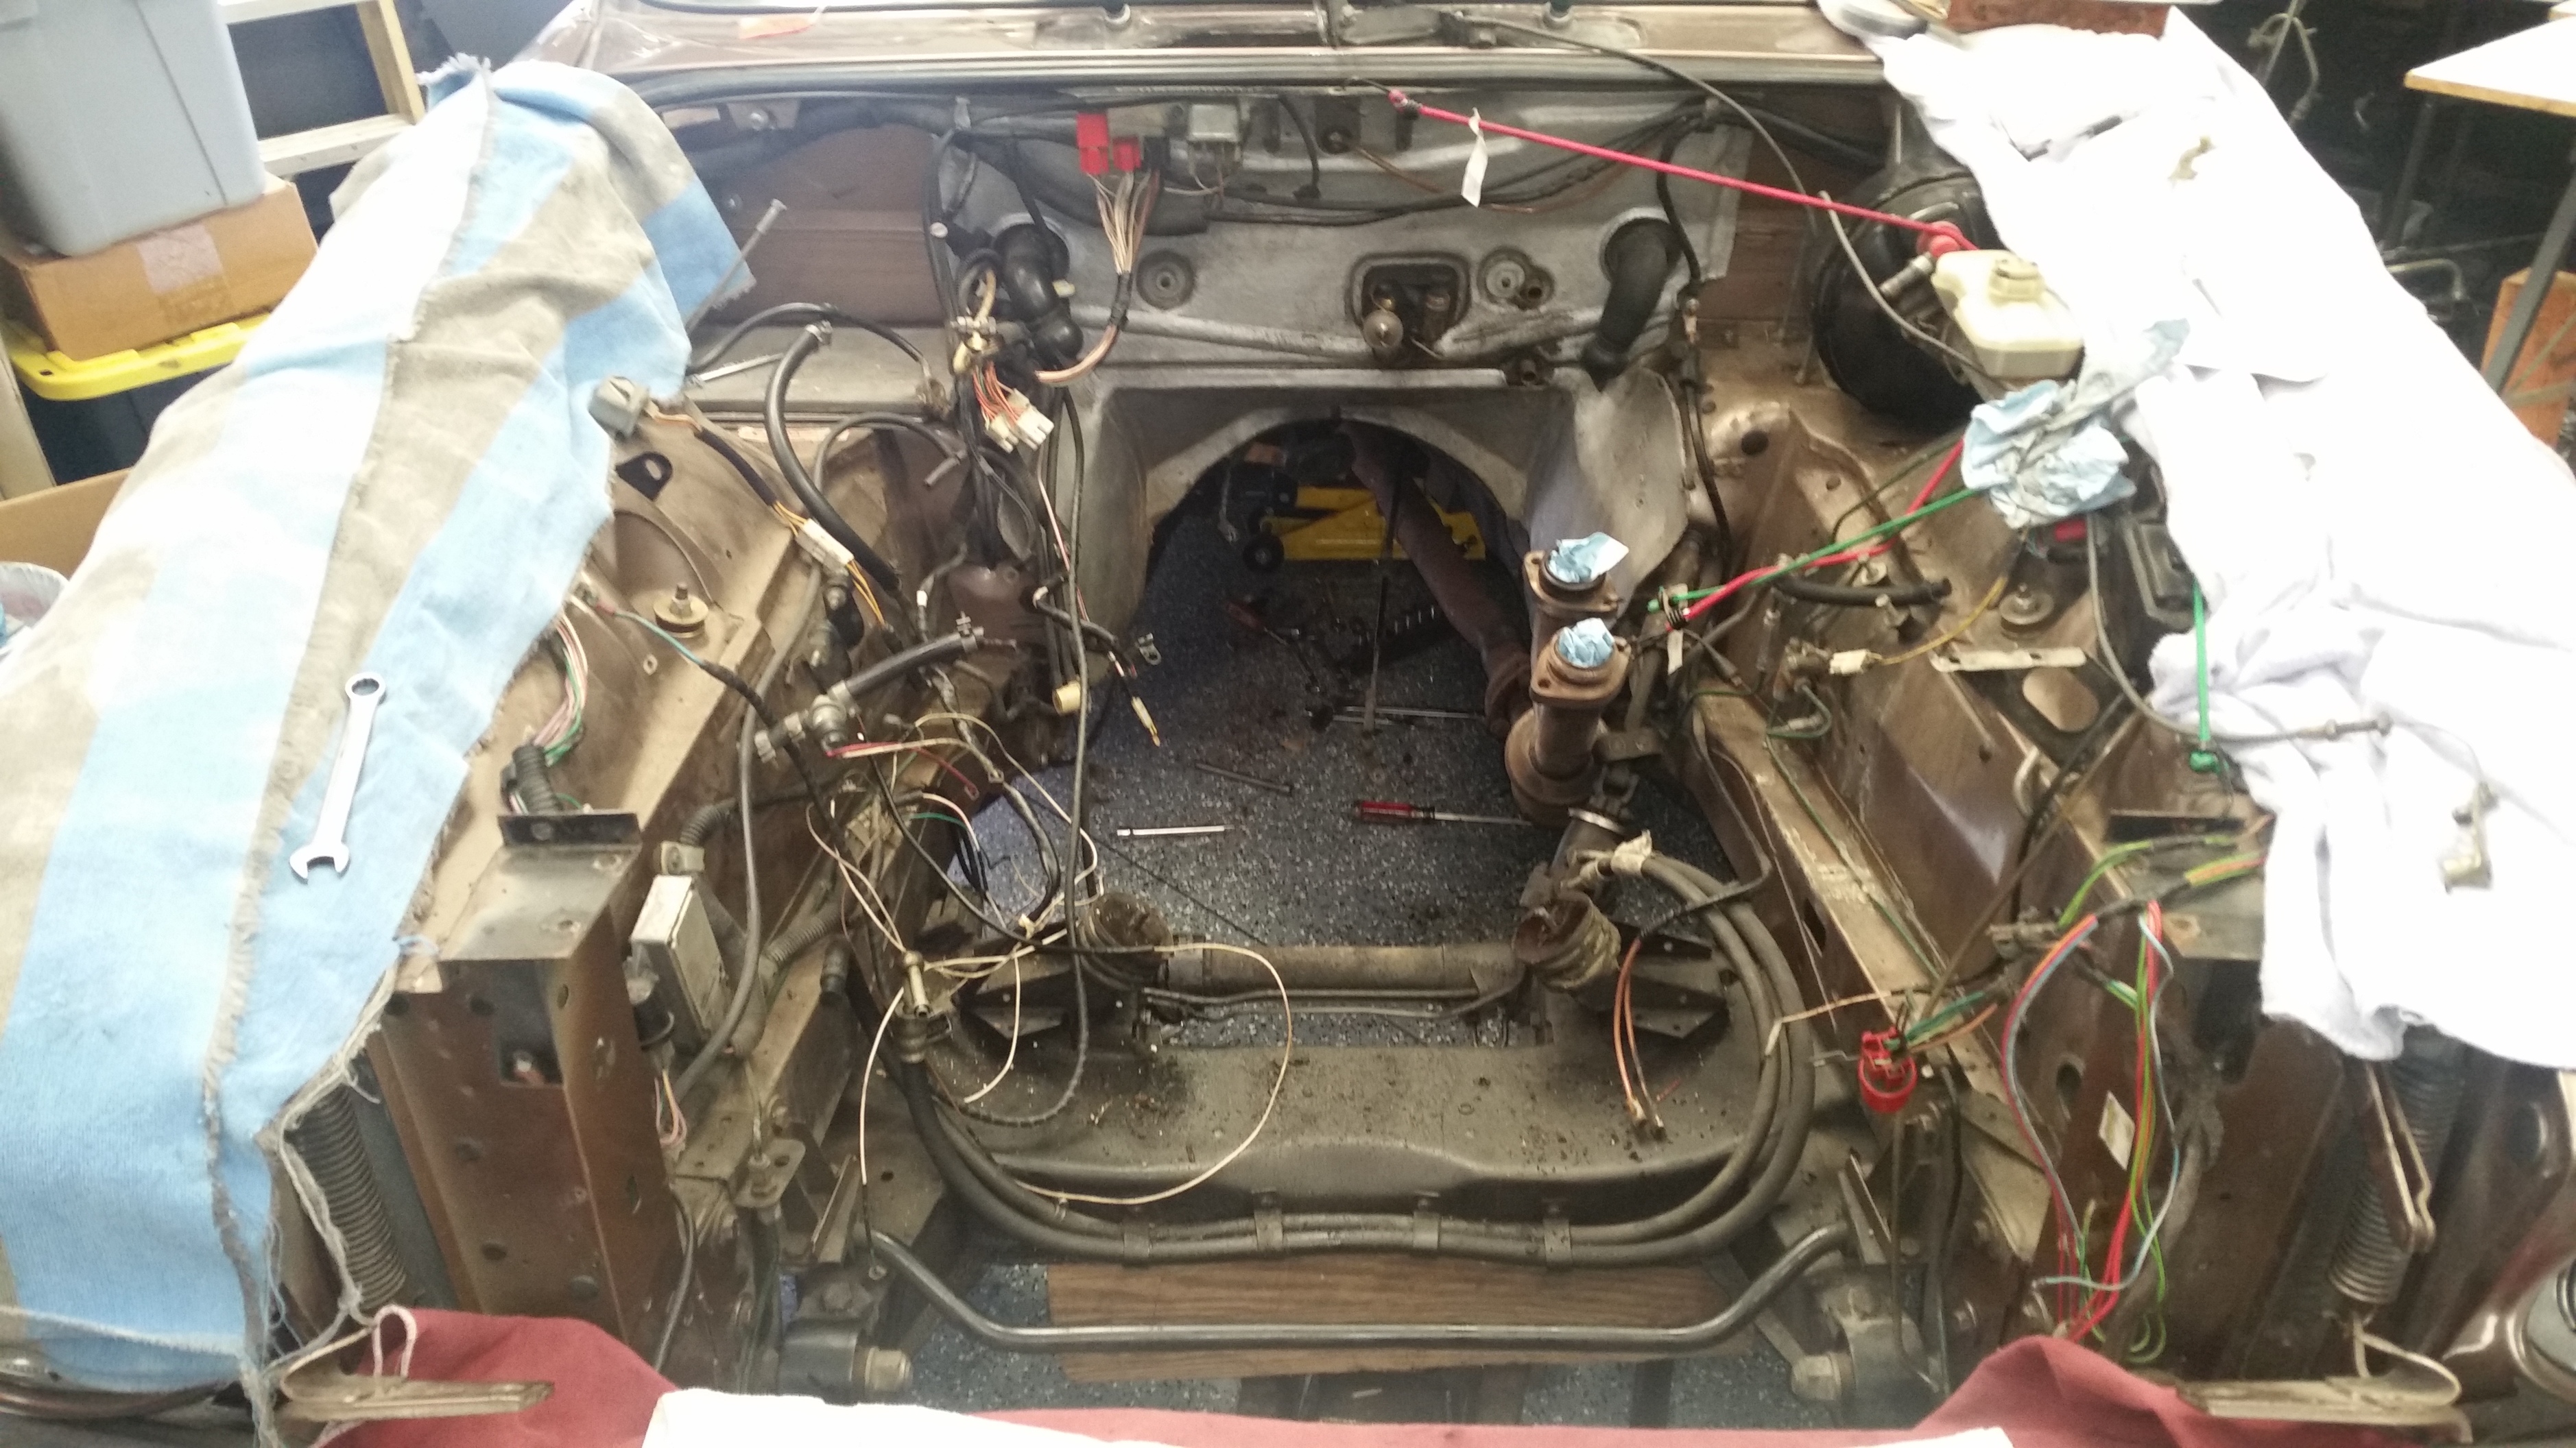
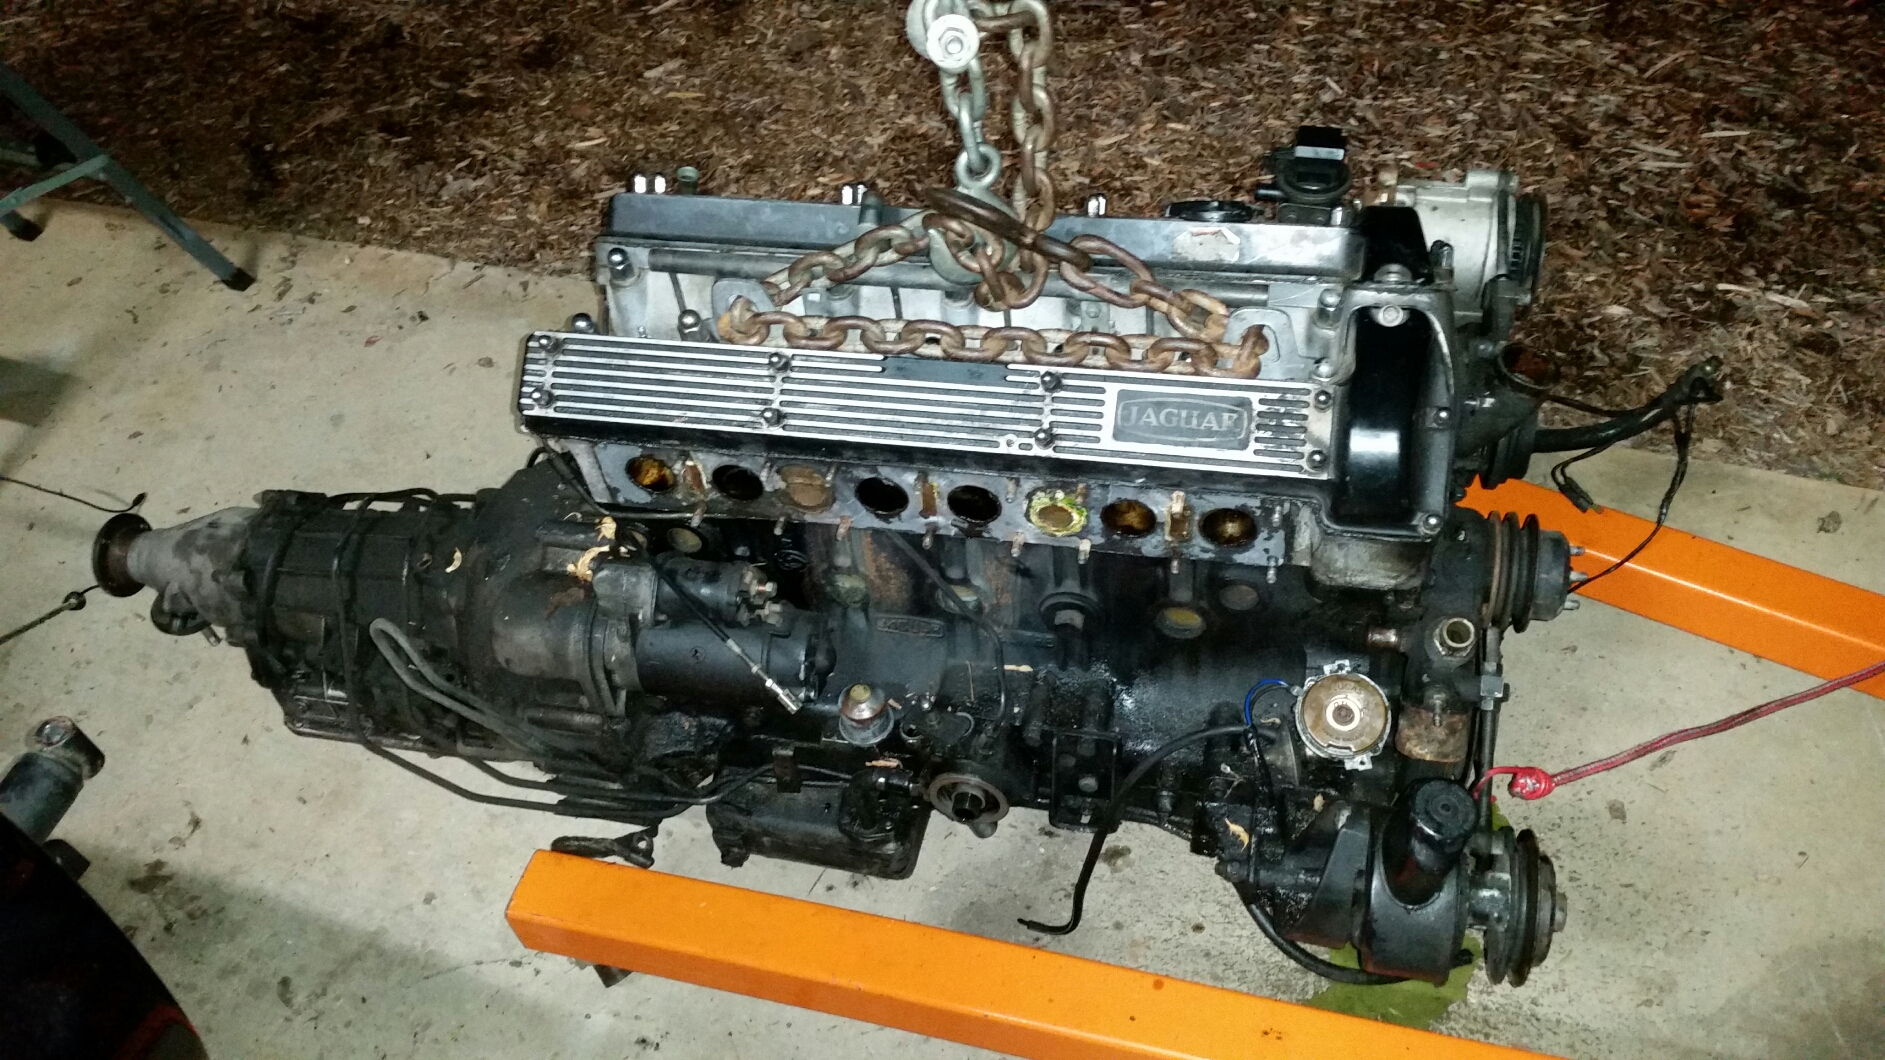
The three attached pictures show the engine and transmission just at the point when it cleared everything and was minutes away from removal, the engine on the floor of my garage, and the empty engine bay ready for cleanup.
I have removed four Jaguar engines and successfully installed one of them all single handedly. Each time it has been a challenge and thrill to get the engine out safely, and of course even a greater thrill to get the transplanted engine installed and the car running and back on the road again.
I still have to remove the engine from the donor car, replace all the belts and hoses, clean, polish, or replace lots of engine and engine bay components, install the replacement engine, and get the car running again. I will post about my progress from time to time and ask for advice when needed. However I thought you might like to see these pictures of my work so far.
I have only used the chains, my HF engine hoist and a transmission jack down below to support the transmission as I unbolted the support brackets. With the transmission attached the engine hangs nose high which works out nicely for pulling the engine out.
Yep, I removed the accessories and other components to lighten the load and eliminate possible hang up points. I had to remove them anyway so why not make it easier for myself and the hoist/chain.
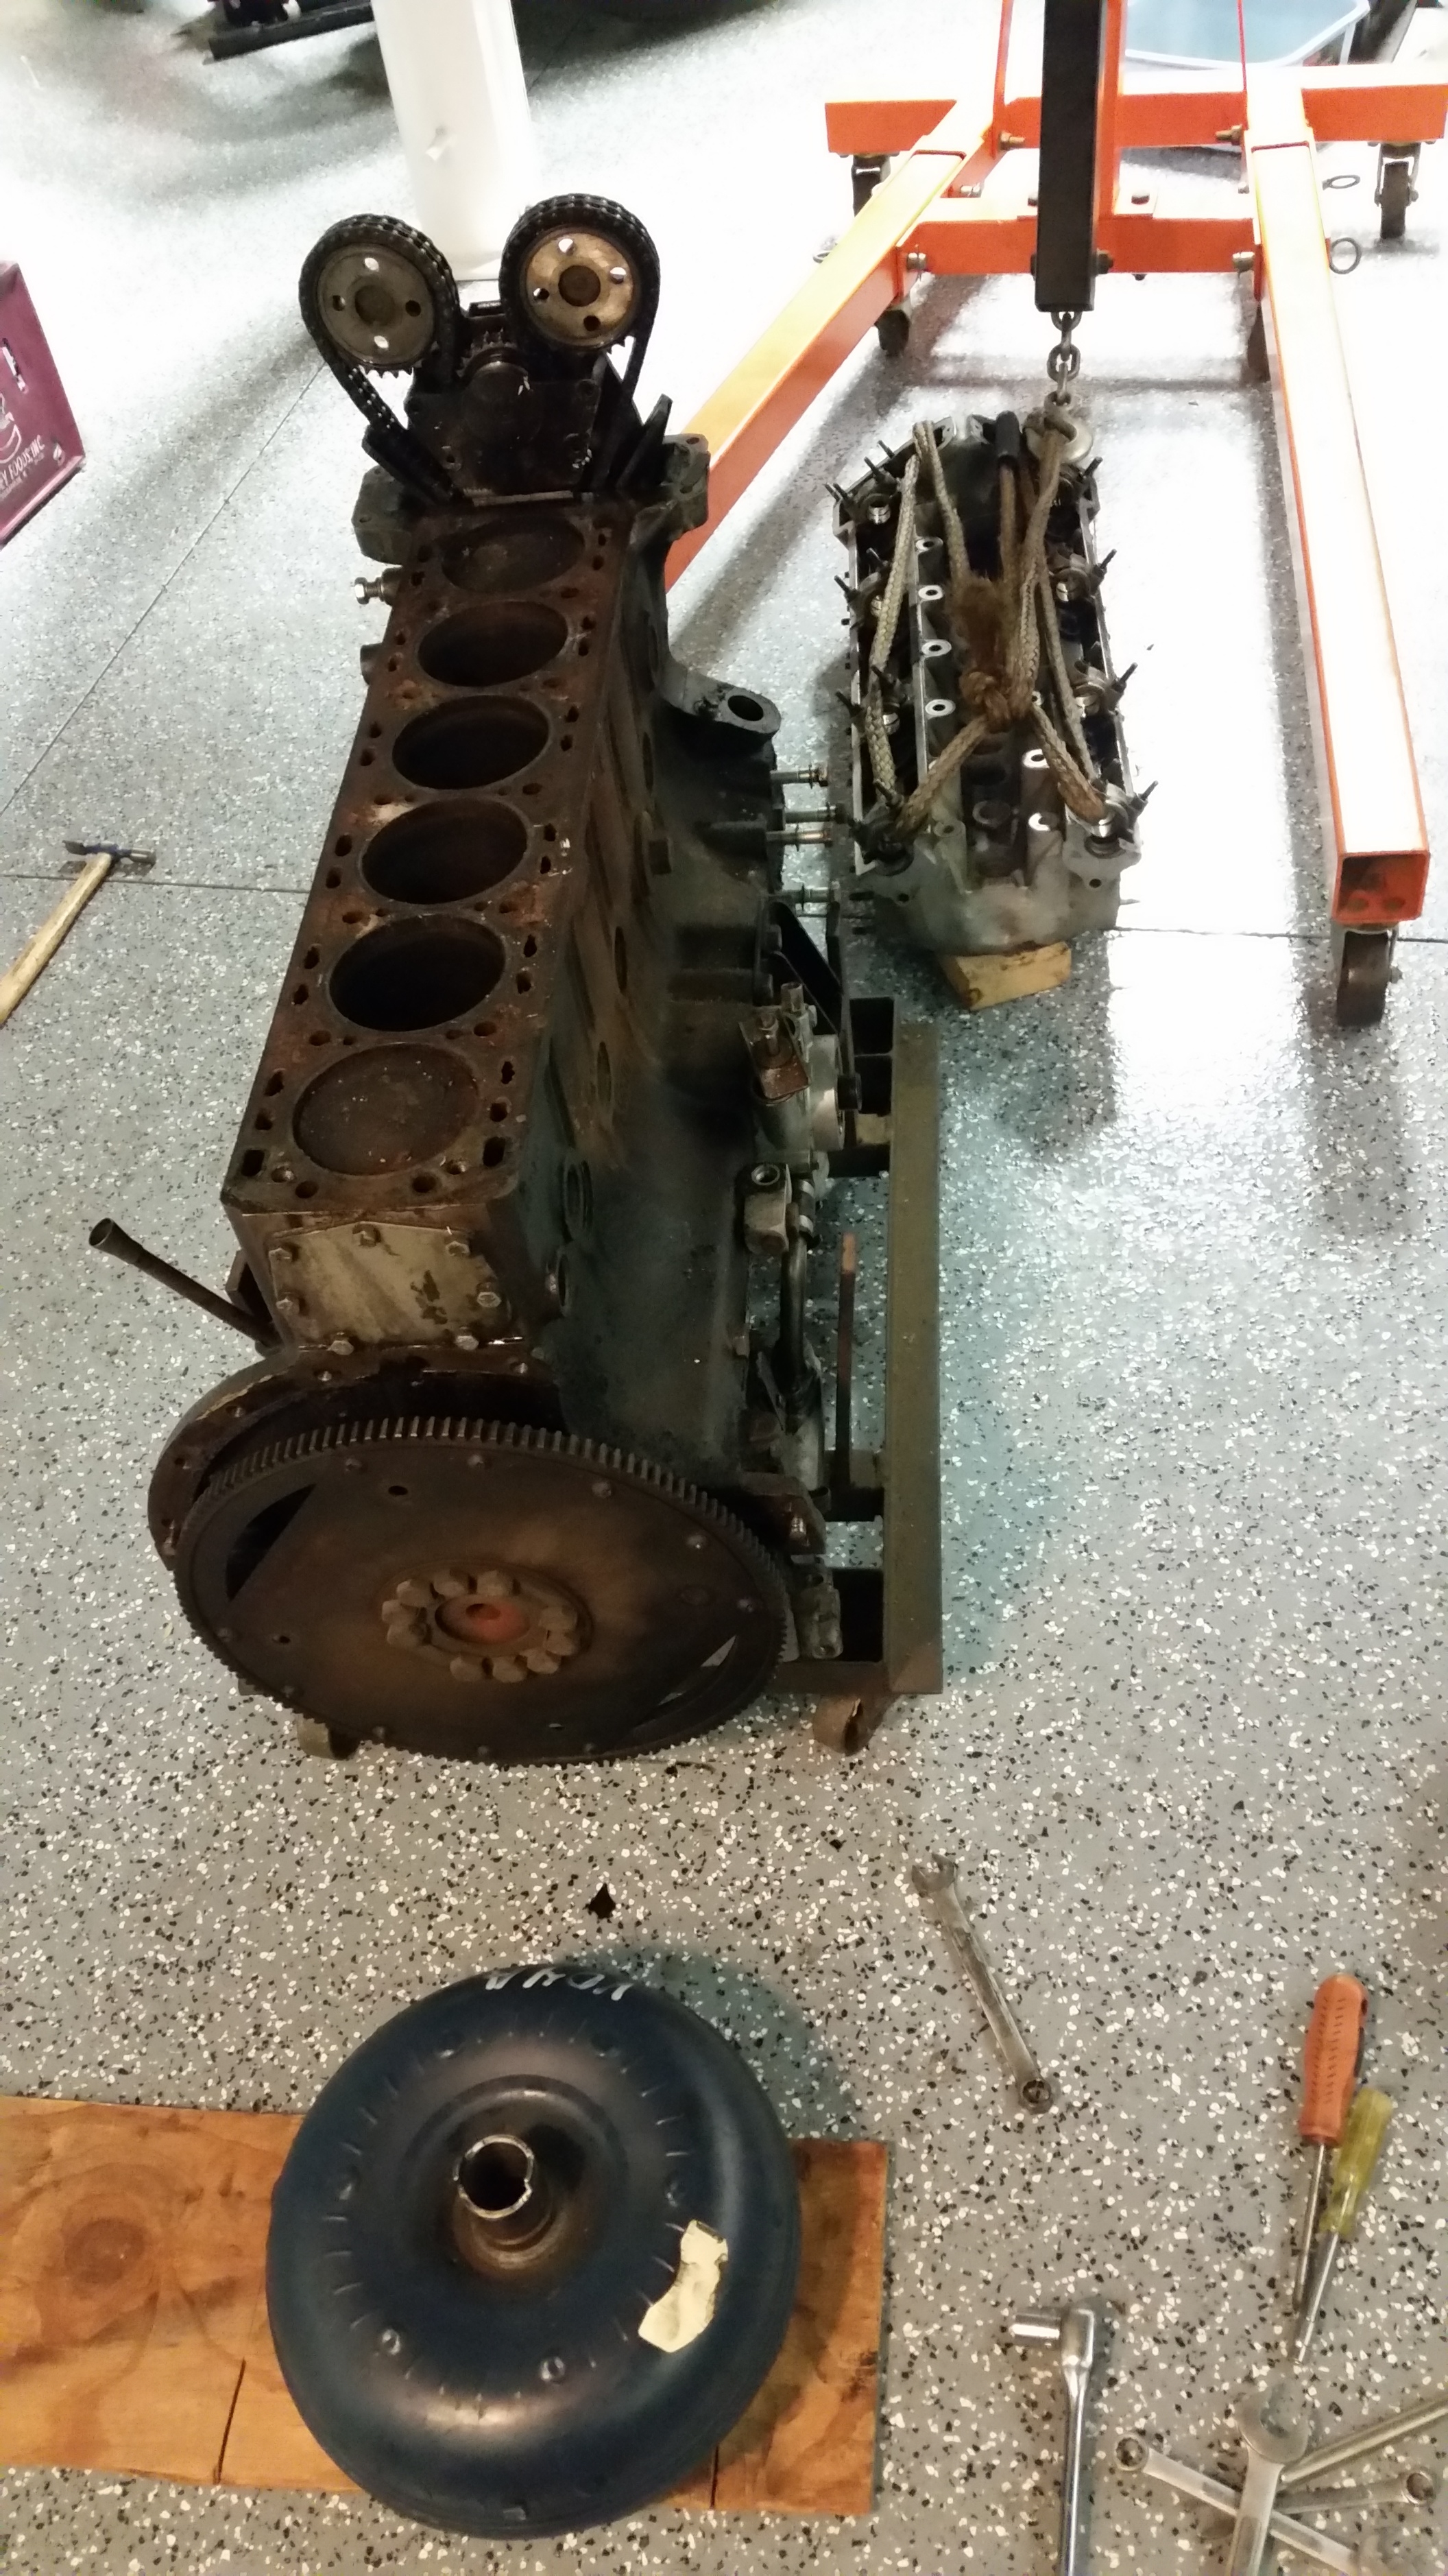
I had a busy day out in my garage today. As shown in the attached pictures I removed the cylinder head and all the studs from the failed 4.2L XK engine that I removed from my 1984 XJ6 Vanden Plas. I separated the BW66 bell housing from the block and removed the torque converter from the flex plate. My next steps are to thoroughly clean the engine bay, repair the wire harnesses, remove any rust or damaged paint and then repaint portions of the engine bay as needed in preparation for the nicely running replacement engine from my 1987 XJ6 parts car. My goal is to make the engine bay look like it did 34 years ago when the car was new before it gets the replacement engine.
Very sovereign job, Paul! Taking that kind of weight out alone is something I’d only expect from someone who really learned this job … and I’m fairly sure I’ll never make it to this point.
Congratulations and thank you for your efforts to provide documentation for the users of this site!
Jochen,
Thank you for the kind words. My engine hoist is rated at 2 tons, so although the XK engine and transmission are heavy they are not any where close to the lifting capacity of my hoist. I also reduced the weight by removing the starter, cam shaft covers and cam shafts, power steering pump, air pump, alternator, and A/C compressor. I also drained the engine oil and transmission fluid before removing them to further reduce the weight and avoid spills. I never calculated the actual weight lifted but I suspect it was about 1,000-1,200 lbs. I also removed the front wheels to lower the front of the car to reduce the height that I had to raise the engine and transmission to clear the front bumper.
This was the fifth time I have lifted one of my Jaguar XK engines with it’s transmission attached. Each time it was a thrill to successfully accomplish the task. The first was the removal of the engine and transmission from my 1957 MK VIII, then the three times when I did the engine transplant in my former 1987 XJ6 Vanden Plas with an engine from a 1986 XJ6 parts car, and now this time. Of course I have two more to accomplish in the near future, the removal of the nicely running engine from my crash damaged 1987 XJ6 parts car and then the installation of that engine in my 1984 XJ6 Vanden Plas.
I plan to post more pictures as I achieve major milestones along the journey to get my 1984 XJ6 Vanden Plas back on the road again.
Certainly well planned, executed and described. A “hat trick”!!!
!. Decades back, while till in residence here, my son acquired a 52 Chevrolet 1 ton pickup. Nicely restred with a later Chev 235 CI engine. Alas, wrong toilet tissue in it’s after market filter. Disintegrated, clogged oil passages. Spun bearings !!! Cheaper harder paper and all would have been fine!!!
Rounded up an original but worn 215 CI. Refreshed it. ready to swap out one ands insert the other. Son and pal doing it, in my driveway. The truck was too tall for the “cherry picker”. As did Paul, I counseled to drop it by removing the front wheels and letting it rest on the brake drums. Surprise, late teen kids listened to the “old” guy!! It worked, ran quite well. I was temoted whe he decided to put it up for sale and make a buck off the “flip”.
Sold to a guy in SOCAL. He sent his young son and his GF to get it, Nice kids. got them at the airport in nearby Oakland, Checked them out on driving a 4 speed granny geared stick. Stay at 55, No more, It will not take the RPM’s on it’s Babbitt bearing splash lubricated engine…
Teh buyer reported a successful tripo and pleased with the big pickup…
Great job Paul. I’ve found it helps to remove the front bumper to allow the hoist to move farther aft. I can’t tell if you did that. I know it’s tricky getting the big engine up and out. You’re probably getting the job done pretty quickly now after doing it four times.
John,
Even though I have done these XK engine removals and replacements before it is still quite a challenge for me, especially since I do them all by myself.
I did not remove the front bumper from my 1984 XJ6 Vanden Plas before I removed it’s failed engine and I was still able to easily clear the front bumper with the engine and transmission with my engine hoist. I have already removed the front bumper from my crash damaged 1987 XJ6 donor parts car because the bumper, bonnet, and left front fender were badly damaged in the crash so I removed them shortly after buying that car primarily for safety reasons because I didn’t want to hurt myself on the sharp damaged metal parts. Remarkably the engine and radiator were not damaged in the crash and so I have been fine tuning the nicely running engine in the donor car while it has been up on jack stands in my barn in preparation for the engine removal.
I plan to revisit the idea of removing the front bumper of my 1984 XJ6 Vanden Plas as I prepare it for the replacement engine. I will see how it goes with the engine removal from the 1987 XJ6 without the bumper and see if I should go that way or not when it comes time to install that engine in my 1884 XJ6 Vanden Plas.
I am making progress on this engine transplant but I don’t think I will will get it done quickly. After I remove the donor engine/transmission I will spend a considerable amount of time cleaning, removing, replacing, replating, painting, polishing, adjusting pretty much everything I can before I install it in my 1984 XJ6 Vanden Plas. My goal is to make it look like it did when it left the factory 34 years ago. I have already performed that kind of engine bay restoration work in my 1990 V12 Vanden Plas and in my wife’s 1990 XJ-S convertible, although neither one of those efforts required me to remove and replace the engines. Once I get the engine bay ready for the donor engine pretty much everything that I put in will either look like new or be new. And that takes a lot of time. I know that I won’t be happy unless it runs correctly and looks like new. Otherwise why bother to do it.
Frank,
I have an engine test stand, made of welded steel, that rolls on large wheels that I will place the donor engine in after I remove it. This is what I used to help me clean up, and build up the 4.2L XK engine with a lot of the accessories that I transplanted into my former 1987 XJ6 Vanden Plas 5 years. So I plan to pretty much do the installation the way that Jaguar did except I have found it easier to leave the intake and exhaust manifolds off until I get the engine and transmission bolted into place. Not only will the engine be lighter to lift, but it will be easier for me to work around the engine bay connecting wires and hoses without the manifolds getting in the way.
The instructions I got from Johnscars with my “lump kit” addressed that issue. A mat at the threshold to protect the bumper from the sump of the DOHC. We did that. I had help. But the DOHC cleared at about an inch.
I did clean the bay. Not to perfection but nice.
I found a Mopar metallic that was close to the brown in my car’s bay. sanded and spotted a few rough spots. Most under the MC. Classic brake fluid vs paint issue.
The front cross member was caked in calcified Jaguar juice. Stove cleaner worked great., The old caustic type. A blast f black and it looks OK.
The insulation panels on the fire wall responded to a blast of aluminum spray can paint.
Carl,
Yep, the empty engine bay in my 1984 XJ6 Vanden Plas has the same issues: paint damage beneath the brake master cylinder, worn/dirty paint on the heat shield insulation panels, and a grimy front subframe. I plan to resolve most of that this week. The repairs to the wiring harnesses and the other work will follow.
I have been setting aside parts from my three parts cars and will be sorting through them today so that only the best ones will go into this engine bay after cleanup and polish/plating/painting.
For those following the progress of my engine transplant project, tomorrow I will start the removal of the nicely running 4.2L EFI engine from the crash damaged 1987 XJ6 parts car that I purchased last year. Here are some “before” pictures that I took earlier today after some last minute adjustments of the engine.
good work there…I was glad afterwards to take the needed time to properly paint the 50yr old engine bay, although I did have to control shipwrights syndrome a bit
I successfully removed the donor engine for my 1984 XJ6 Vanden Plas from my crash damaged 1987 XJ6 parts car today. Here are some pictures of the engine as I started to lift it out of the engine bay with my engine hoist, the engine as it reached the front of the car, the engine safely on the ground, and the empty engine bay.
I continue to order parts and prepare the engine bay of my 1984 XJ6 Vanden Plas for the replacement engine. Tomorrow I will place the donor engine in my engine test stand for cleanup, parts replacement, and a variety of inspections and adjustments prior to installation.
Learning curve is pretty powerful. This time the engine removal only took me two days. Of course that doesn’t count all the time that I spent removing parts from this crash damaged car in order to make it safe to work around.
Two questions - what is up with your exhaust in tge last picture? One black, one white?
Also, I wondered whether it wouldn’t be easier to leave the intake manifold casting in place until the engine is out, for better access - the exhaust might be doable, but the intake must be hard?
Thank you for the pictures.