

Trying to fit the right hand portion of the dash in, but this tab is fowling up seating it correctly. Trying to get a good dry fit before I cover it. Any ideas?
I have the same car but cannot for the life of me see what you are trying to get me to see.
Maybe a shot slightly further away would give a better perspective?


There looks to be some kind of strange shadowing in the area in question. Could it be that there’s been some kind of repair or it’s been taken from another car?
I’ll take a closer look at my car tomorrow to see if I can find the same thing.
It was probably the guys fitting it at the factory with a BFH. Bash it till it fits… it’s not covered at the moment with anything delicate, bash it back.
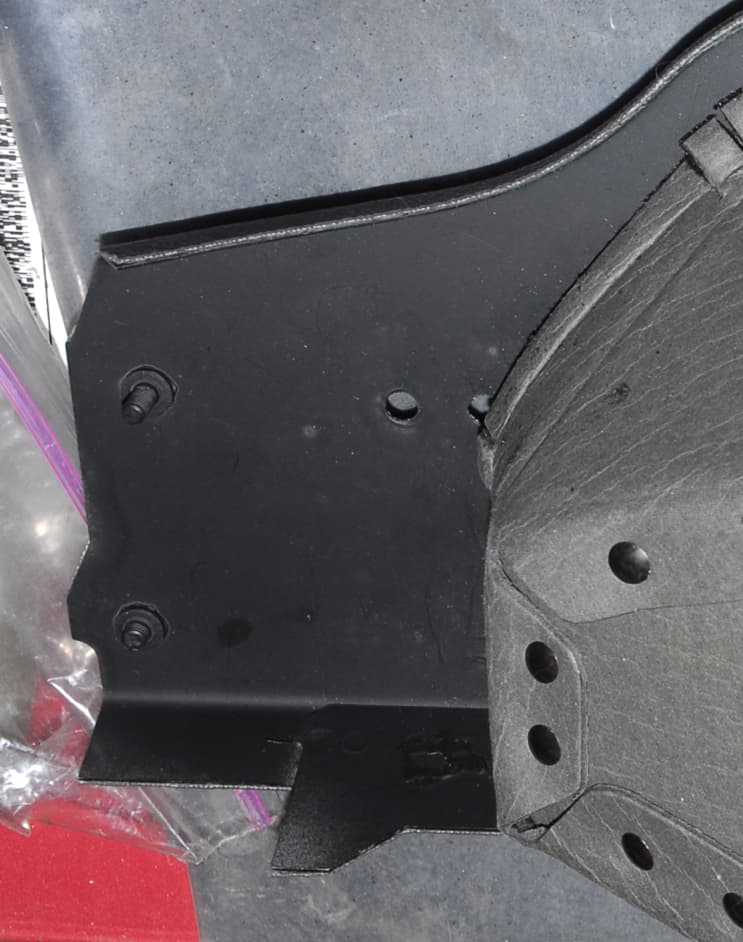
It did have some damage that I straightened. That little tab / protrusion I have marked is keeping the dash from fitting. Wasn’t sure if it was original. The damage was as if the “oh shit” grab handle got torqued / pulled really hard. Maybe some spirited driving? I didn’t want to grind it off until I heard from the forum, but I don’t see how that fits without removing it.
Well I checked on my car. Of course it’s got its covering on but I can’t see or feel any indication of such a tab on my car.
Sorry I can’t be of more assistance.
Steven;
As far as I remember the area is flat. the grab handle fastens to the two screw holes to the left inthe photo and to the rear below the windshield pillar. Don’t know why the 'bump ’ is there and I don’t think it is because a mere mortal torqued it. I will add a few photos that may help.

Being not too computer smart I can’t put an arrow on the photo as you did or take an enlargement of a photo. Anyway, the first photo shows on the right the tan area is ‘glue’. If you look at the enlargement there is a small hump that ‘I think’ is covered by the right dash piece and is behind it normally.
The second photo shows the area before the vinyl has been removed but ‘I think’ the bump is behind the Rt front dash piece. If you remove the Rt font dash piece I think you will find that to be the case. My opinion only and I have not seen the area since 2015.
Hope this helps, Joel…
Love the tagging …makes agreat photo
Danny Lee;
By way of tagging I assume you mean the paper tags. Most used tape and /or cut the wires from the instruments and went on with their business. I am color blind and the old wires were old and the colors, if I could have seen them, were faded. As I took stuff apart I tagged each wire with the color from wiring diagram and from which it came. Wires from a separate loom that butted together I used a code so I knew where they originated. I was able to pull all wires through holes in bulkhead and no tags came off.
I then laid the removed looms on a table and ID’ed each end of every wire so I knew where it started and where it ended. Then I took the new looms I had bought and did the same, all ends tagged as the old stuff. i found some extra wires and concluded they were there for a RHD car and capped them.
Then put them in the car and got everything hooked up ‘properly’ looked it over some more and put a battery in it, rolled it out of the garage (under the house) and started the car…no problems!!!
You want to see more tags just ask.
Thanks for your comments, Joel…
Great stuff…… there is always a way to do stuff if you think about the task which you clearly did…. I nearly always get one thing that I need to fix when putting in a loom…. If nothings wrong I worry 