I have a 71 Series 3 2+2 and needed new front floors for it. I ordered a left and right from one of the usual suspects and received them Friday.
The left side pan (right one in the picture) had a Martin Robey label on it and is an exact match. It extends beyond the seat cross member which will make it a much neater install.
The right side pan (left on in the picture) had a different looking label on it and doesn’t have the reaction bracket mounting holes.
Not having ever torn down an older E-Type, IO don’t know for sure but I suspect that it is for a series 1 or 2 car.
Hello Johnny,
The Floor Section in the Left of your Picture is for an S1, or S2 2+2 (its the same for both cars)
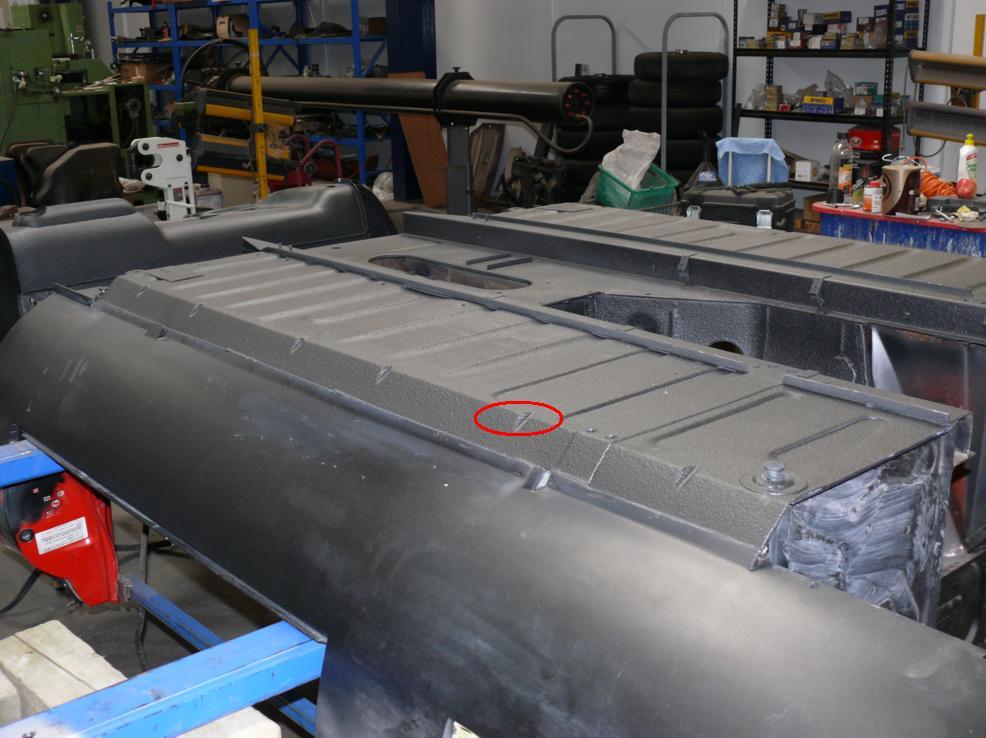
Neither Floor are exactly correct. The cross section of the pressed form is not correct (but passable) and the pressed gussets between the main part of the floor panel and the angled side section have been omitted completely. See the detail shown in the following picture. This picture is of the Floor of an S3 where the front half of the floor has been replaced and the front two Gussets formed to match the rest.
A good restoration is one where its difficult to tell the repair from the pristine original. This missing feature is a dead give away that the floor has been replaced.
So, on to floor installation… I’m looking at one of 2 ways of blending in the replacement floor with what is already in the car. The sills are solid and I don’t want to separate them.
I am leaning toward option “A”
This is how they originally did the floor from the factory after I have trimmed the metal back to 1/2".
Option “A”
I plan on running a flange tool down the length of the replacement pan I think that this will give the cleanest line after welding. Fitting it into place might be a bit of a bear though.
Hello Johnny,
They, would be me. I’ve machined up a Punch and Die set. The Die (the Female) is held on the inside corner of the floor , where it angles up to the Sill, and the Punch (Male shape matching the outside shape and size of the Gusset) is applied from the outside.
We position the Die on the inside a measured distance from the Foot Well Closing Panel and do the same for the Punch from the outside. Prior to the Pinch and Die, I had a folded sheet metal template that sat over the area, on the outside, where the Gusset had to go and scribed the shape to be cut out. A small piece of metal was then formed to shape and TIG welded in place.
Before becoming too complacent with regards to the Sills and everything inside being OK, drill an access hole in the Sill Rear Closing panel and use an endoscope to inspect the inside sill braces. There is one at the Rear and Front of the Sill.