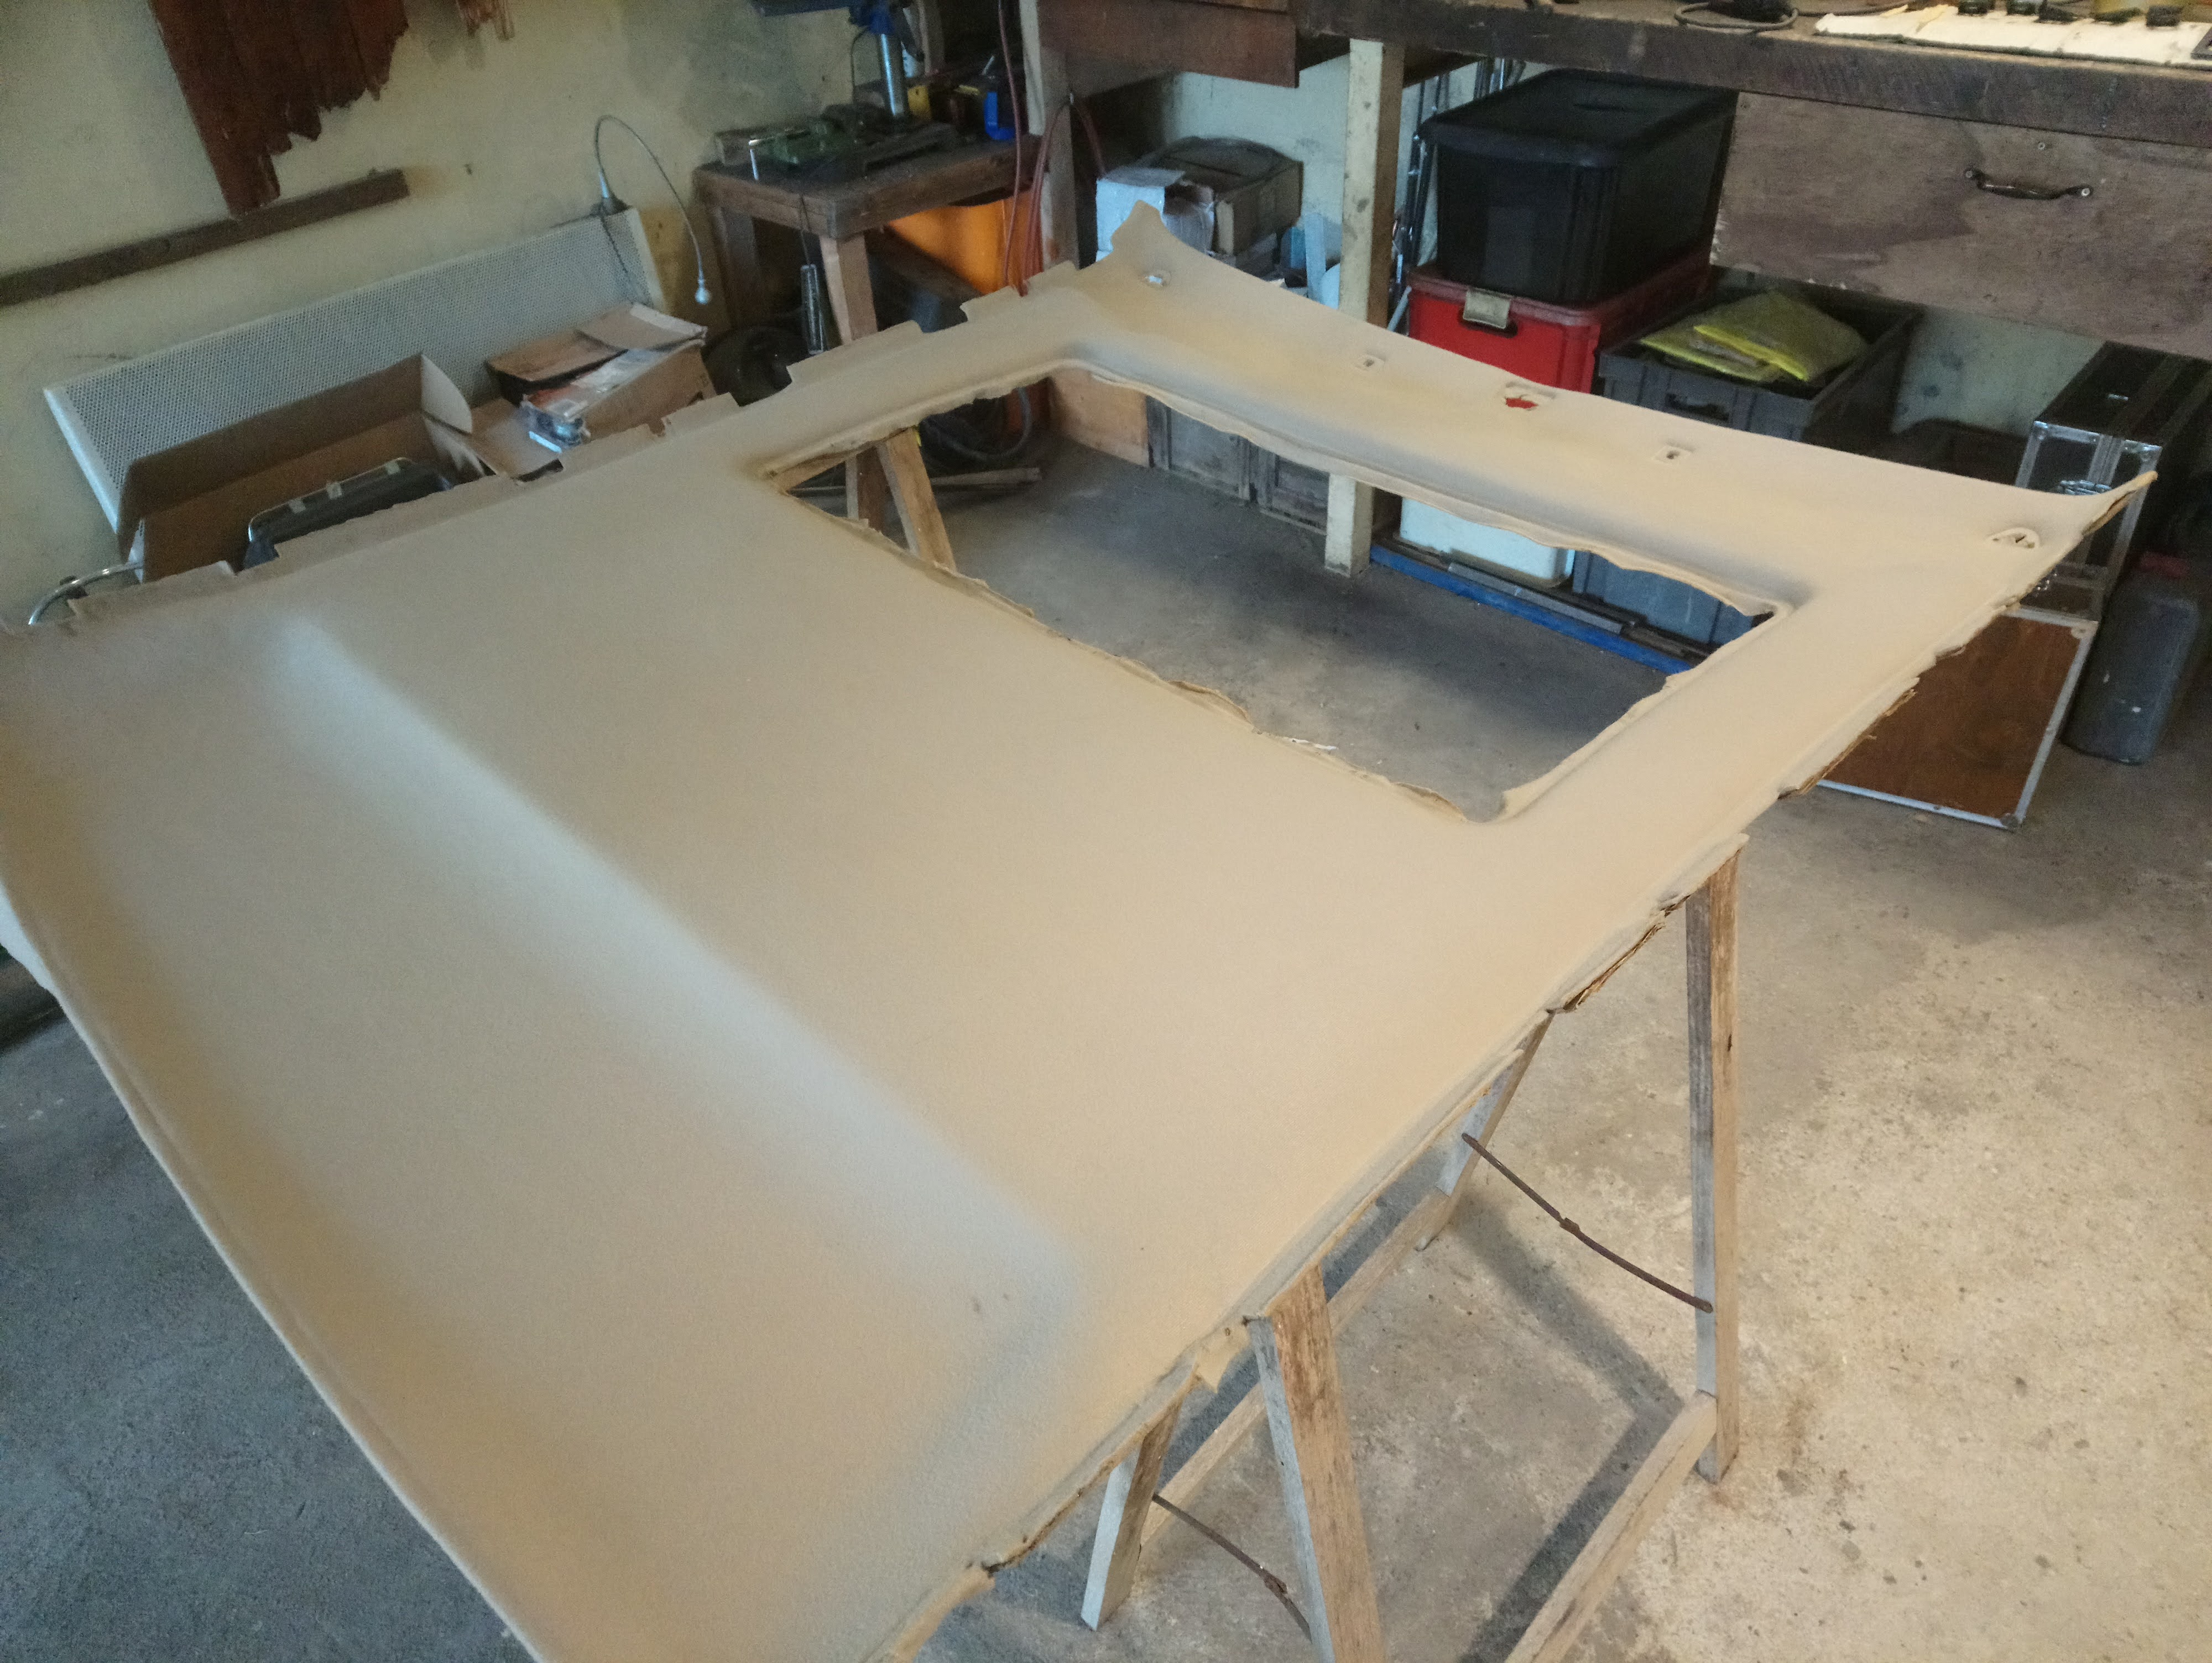
Old headliner was still good, I had redone it some 15 years ago, but it was slightly dirty, the inner curves at the back had lifted and had some nicks here and there.
Since the screens ware out I reckoned it was a good time to redo it.
It was also delaminated in some places, the rear was wavy and sagged, so I decided to reinforce it.
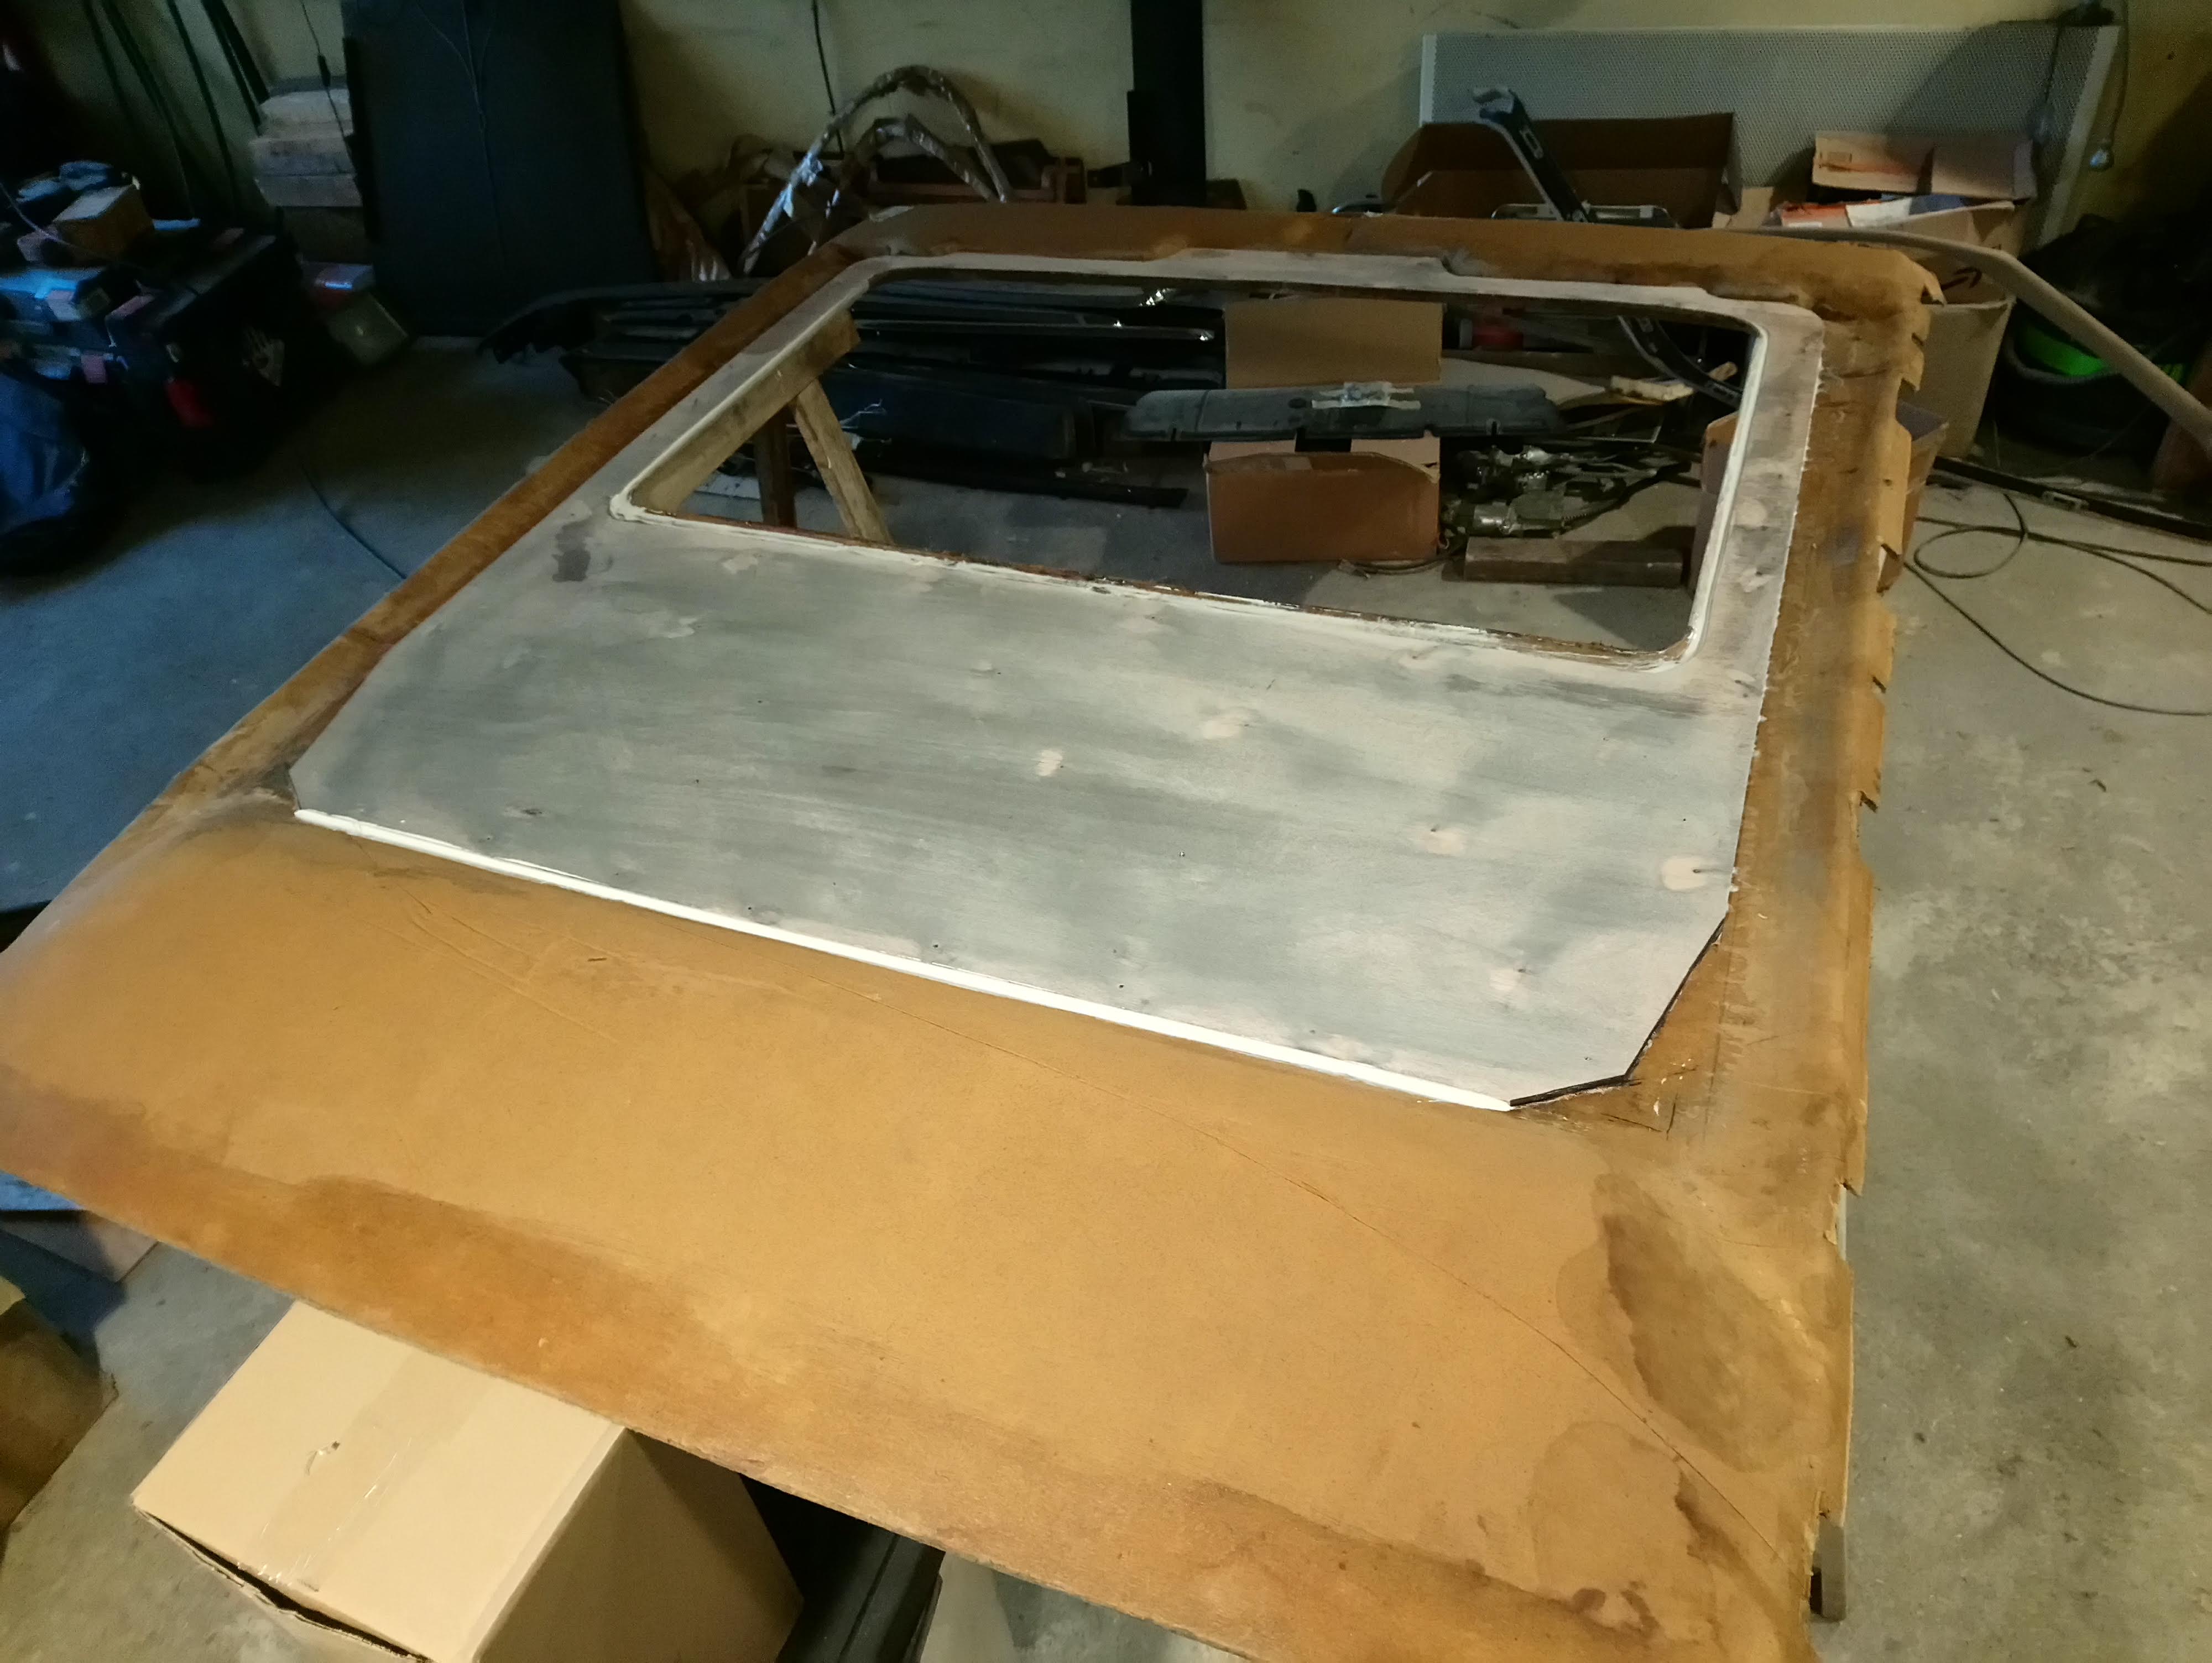
I cut a piece of 5mm plywood in shape and glued it to the top. Used also screws for good measure.
what is your headliner board made of? my spare from a '86 XJ is cardboard. This one looks like fiberglass.
I figured I’d cover the spare then pull one out and swap the good one for the other, then repeat. with my other XJ6. I’m assuming you had to take it out either the front or rear windscreen.
Hi Mark,
It’s cardboard alright, and was not in very good shape.
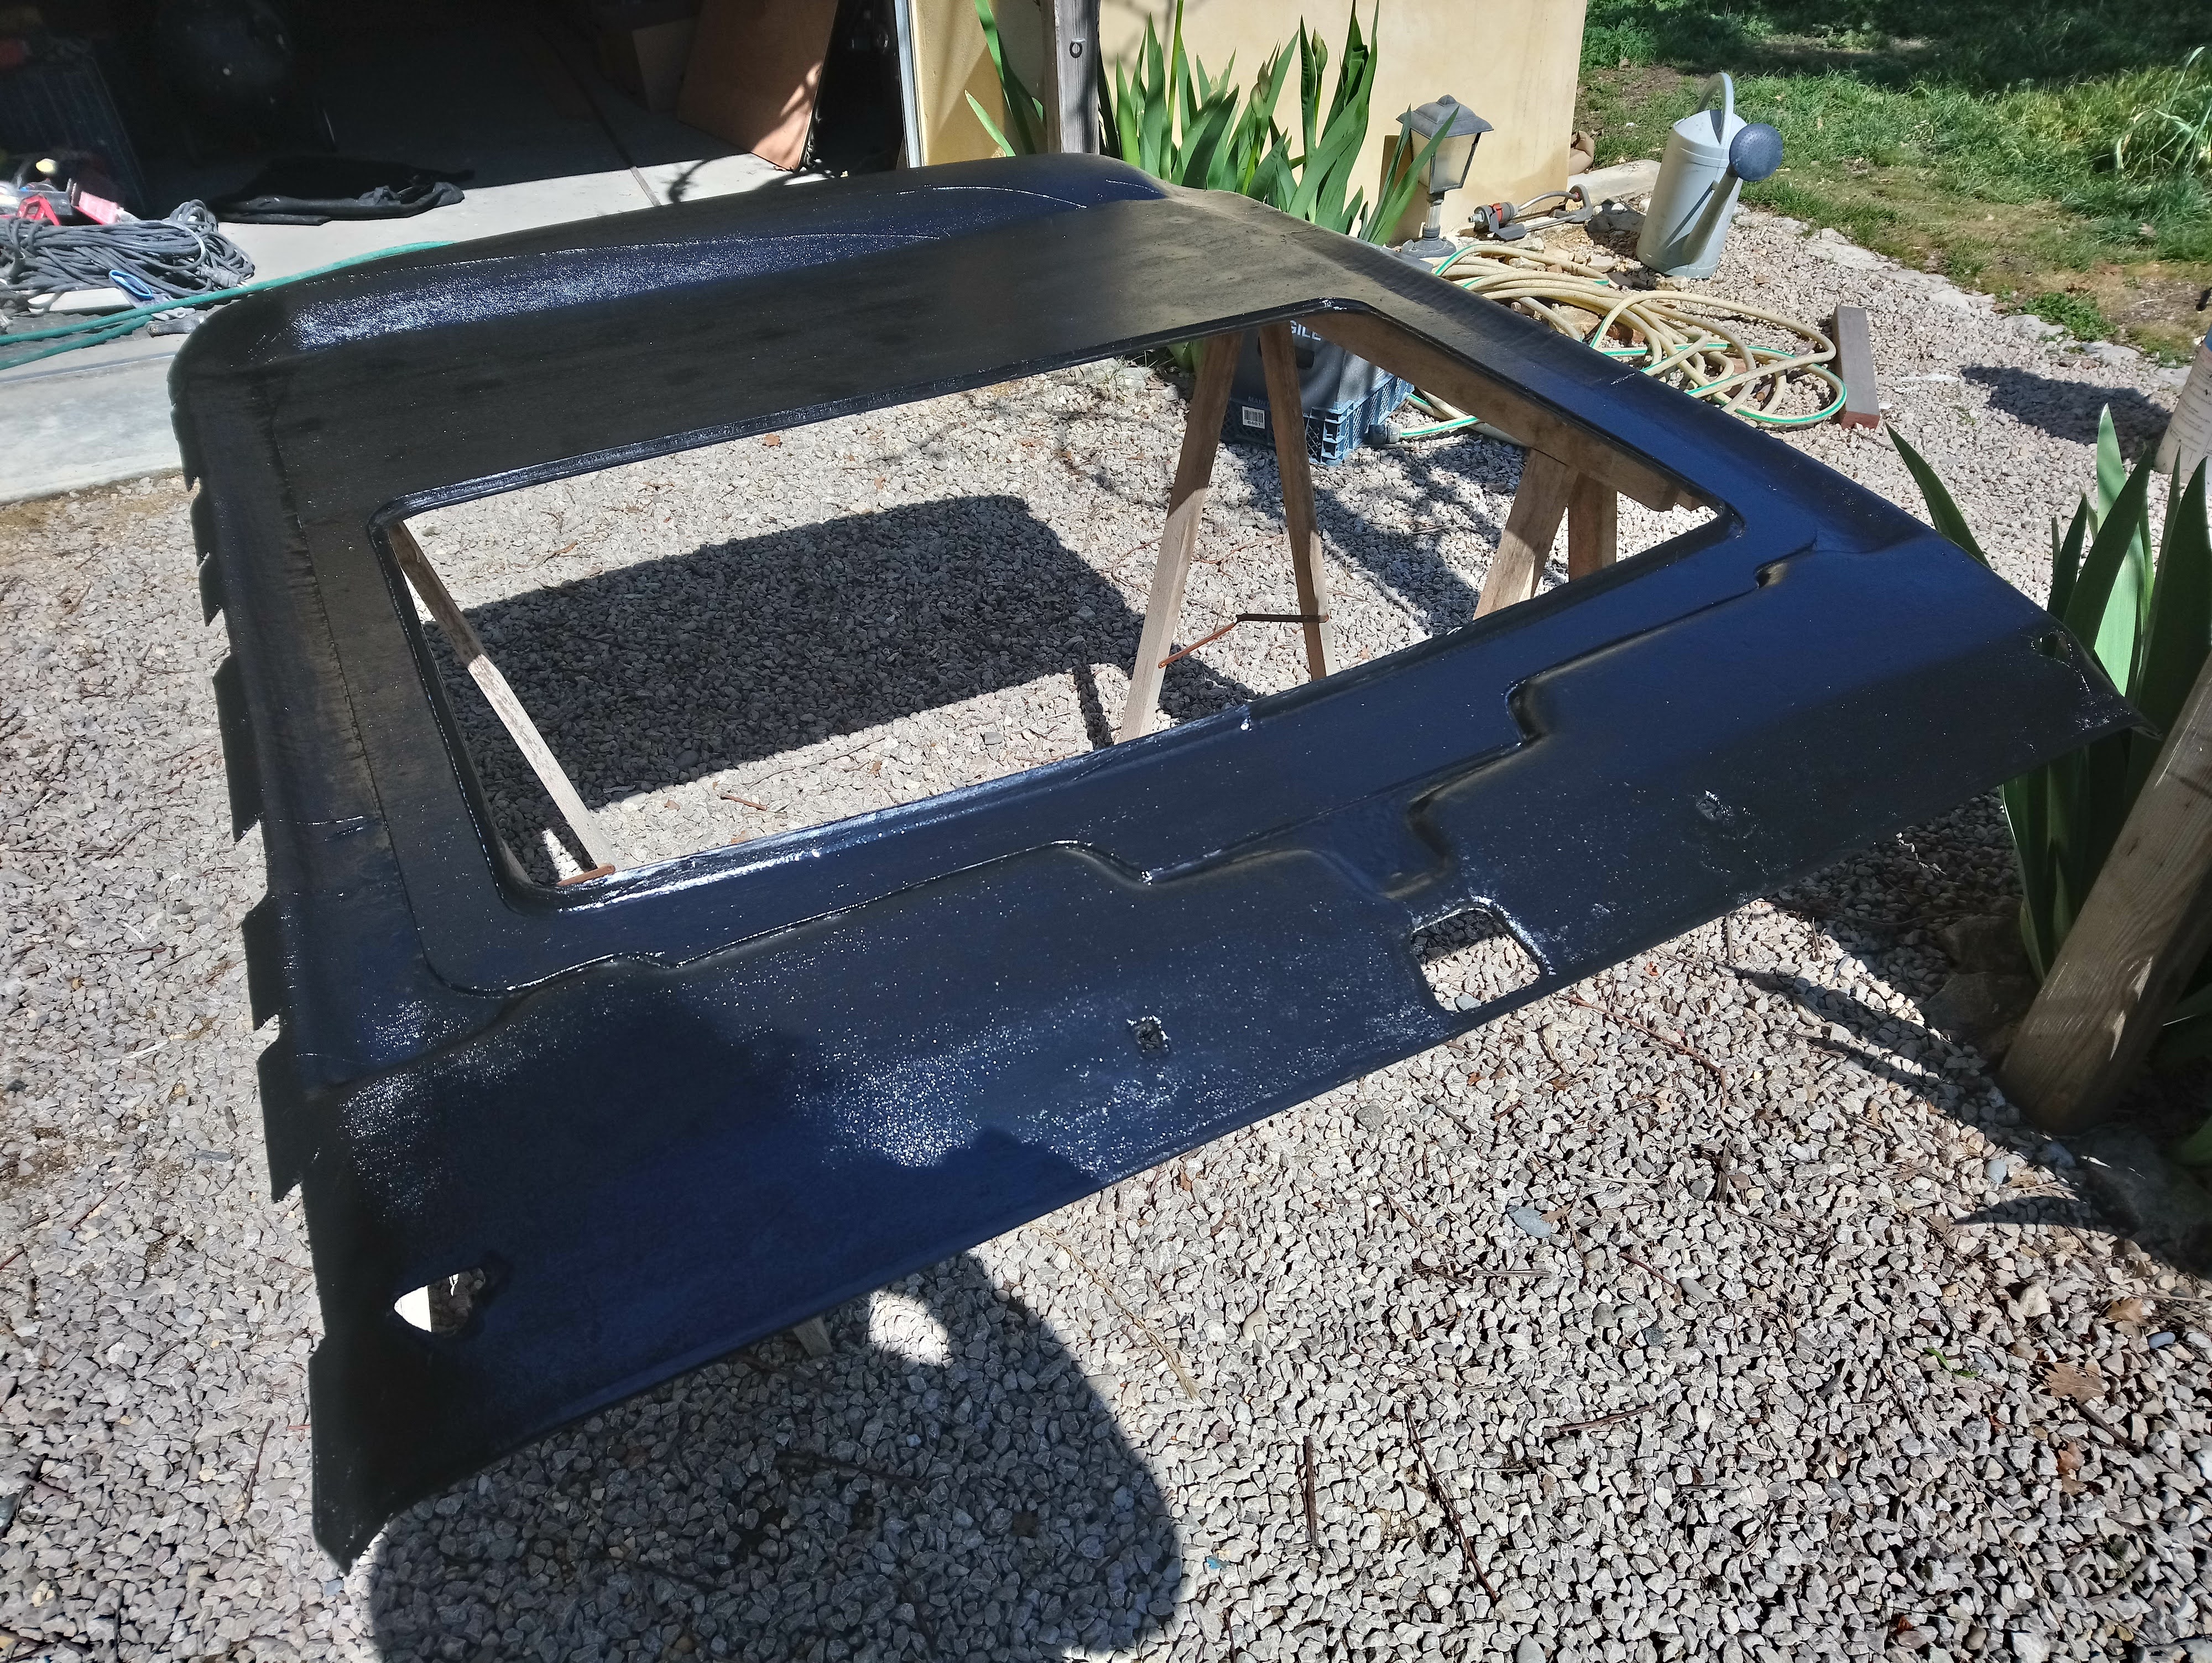
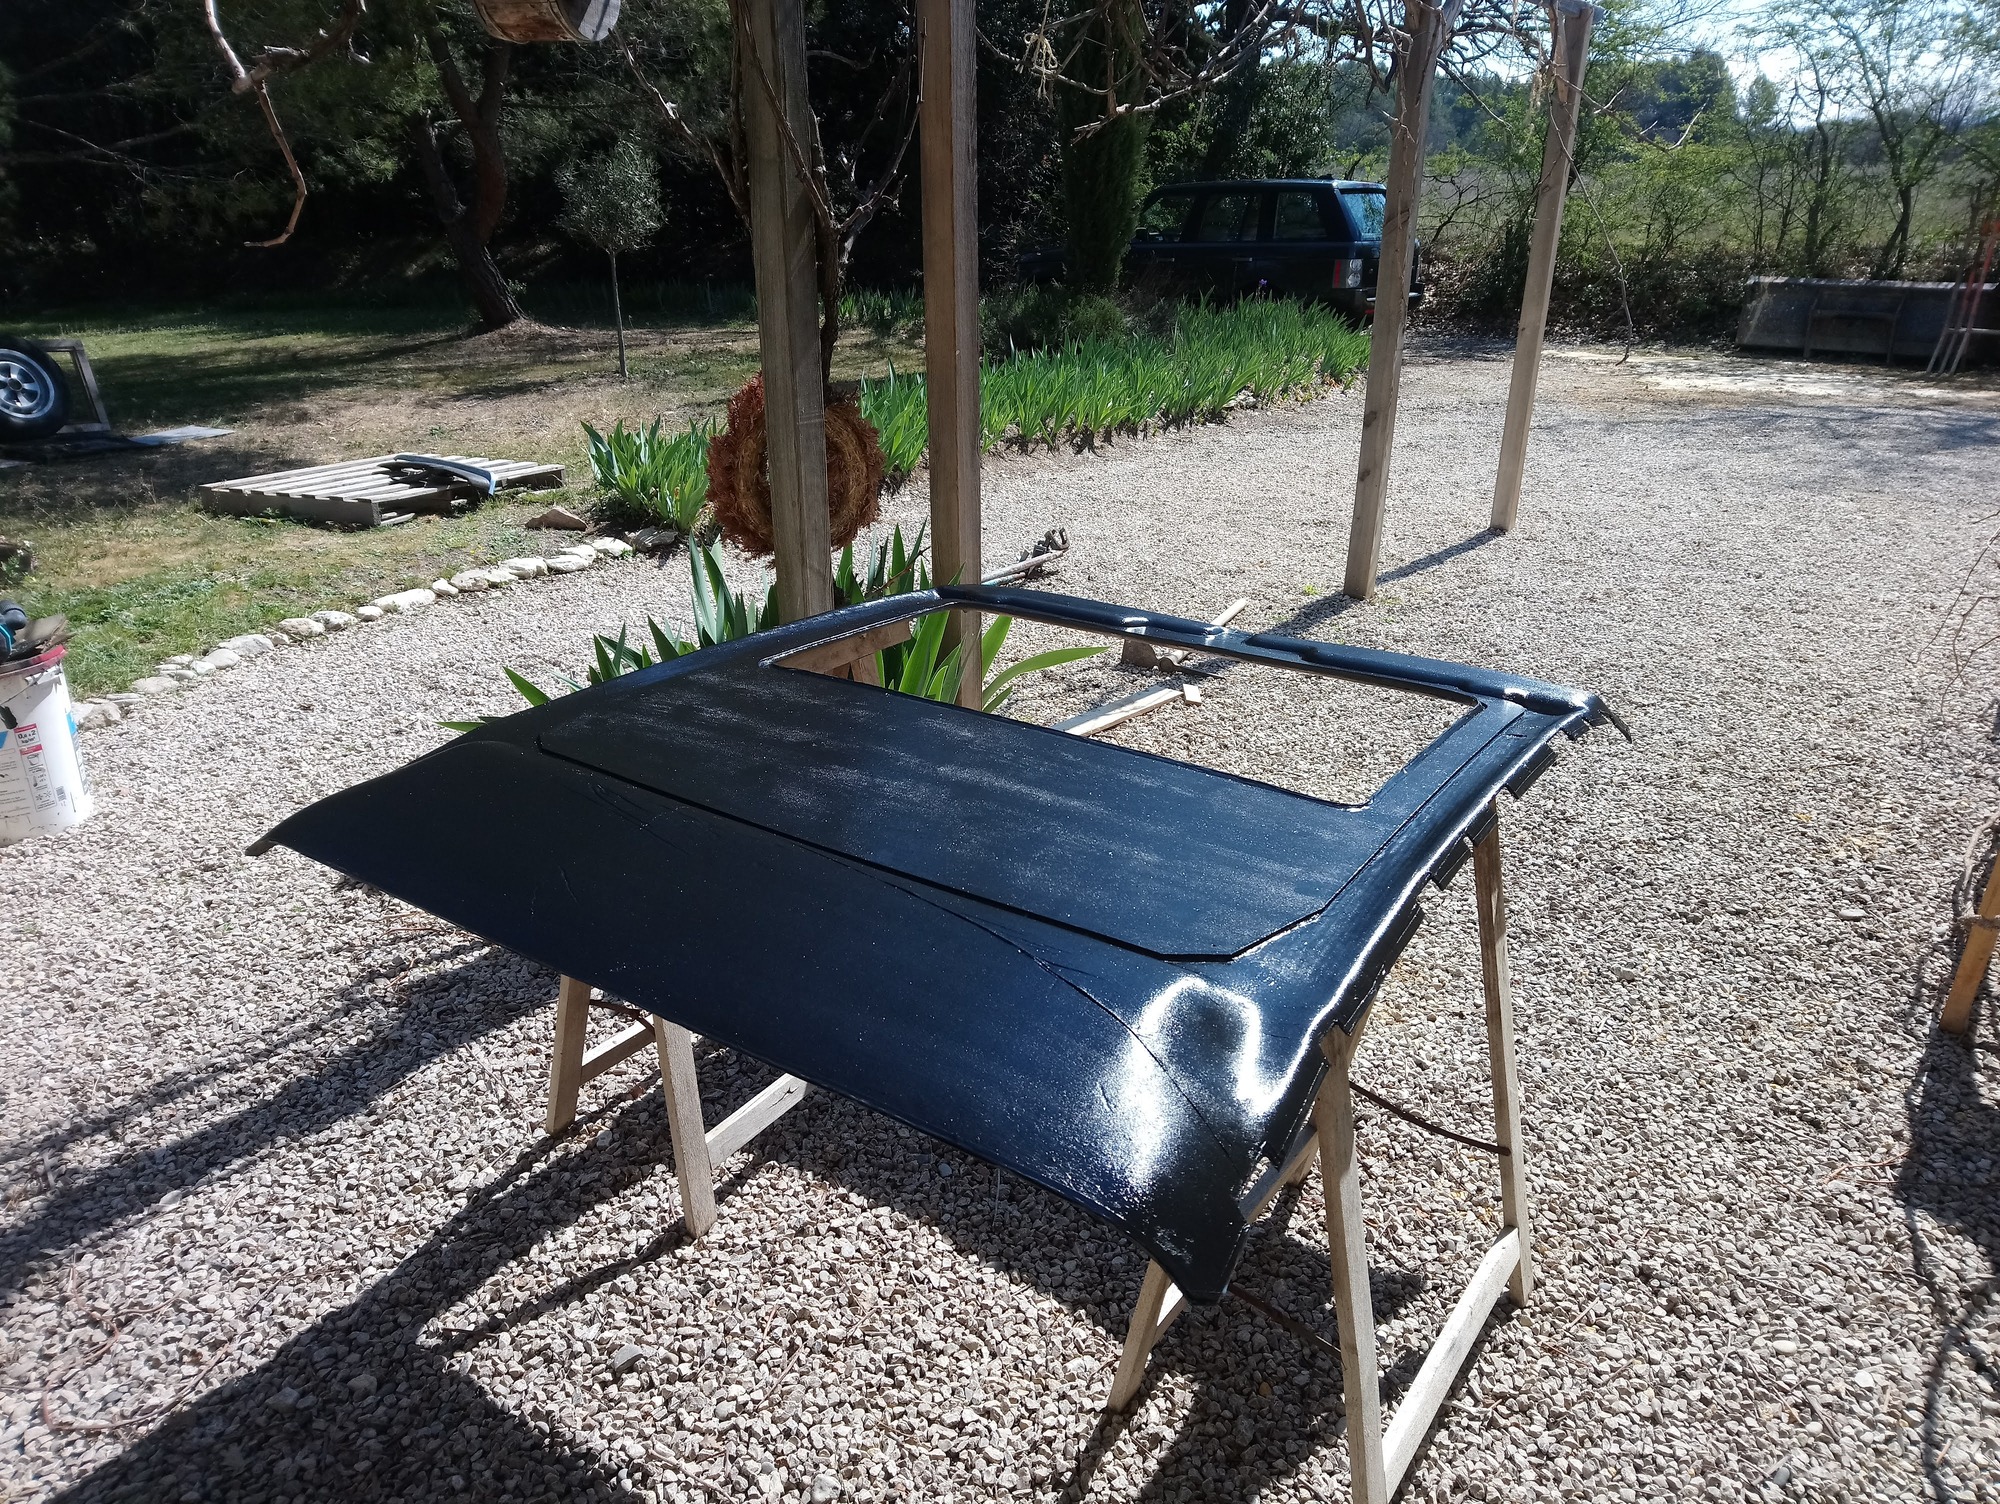
My screens where out already as I am painting the car, very easy to remove it this way.
The previous time it went out from the front door, it works but the board needs serious manipulation to go through.
Out the passenger door with the seats out, steering wheel off is how I got the headliner out on my XJ-S. It was made of pressed fiberglass which was very fragile. I did like you put some reinforcement on the back to keep it all together. I used what the upholstery fabric salesman call a squim or squib… some Squi… word Anyway it was a non-streatchy open weave cotton material. Glued it on the back. Like a girdle, held everything in place.
Great pictures; I appreciate you sharing the process. What about the sunroof middle. Please share (with me at least) the process.
Nice meticulous work.
The lining (meaning shell if that’s the term) in my 86 XJ6 III is coming loose (down) at the rear. Apart from this the cloth is in really good condition. So I was thinking of trying to glue it up.
Any Ideas ?
I guess you mean the cardboard is broken Derek?
To fix it properly it should come out.
On the other hand, if you remove the side trim you can lower it from the roof and rest it on the seats and see what you can do.
If you see traces of water damage your sunroof drains are blocked.
Cardboard and material in good condition. Has just sagged at the rear window. Thinking of gluing but just checking to see if anybody else has had this problem!
Nicely done.
Any particular reason why you chose black paint? Is it a special type of paint?
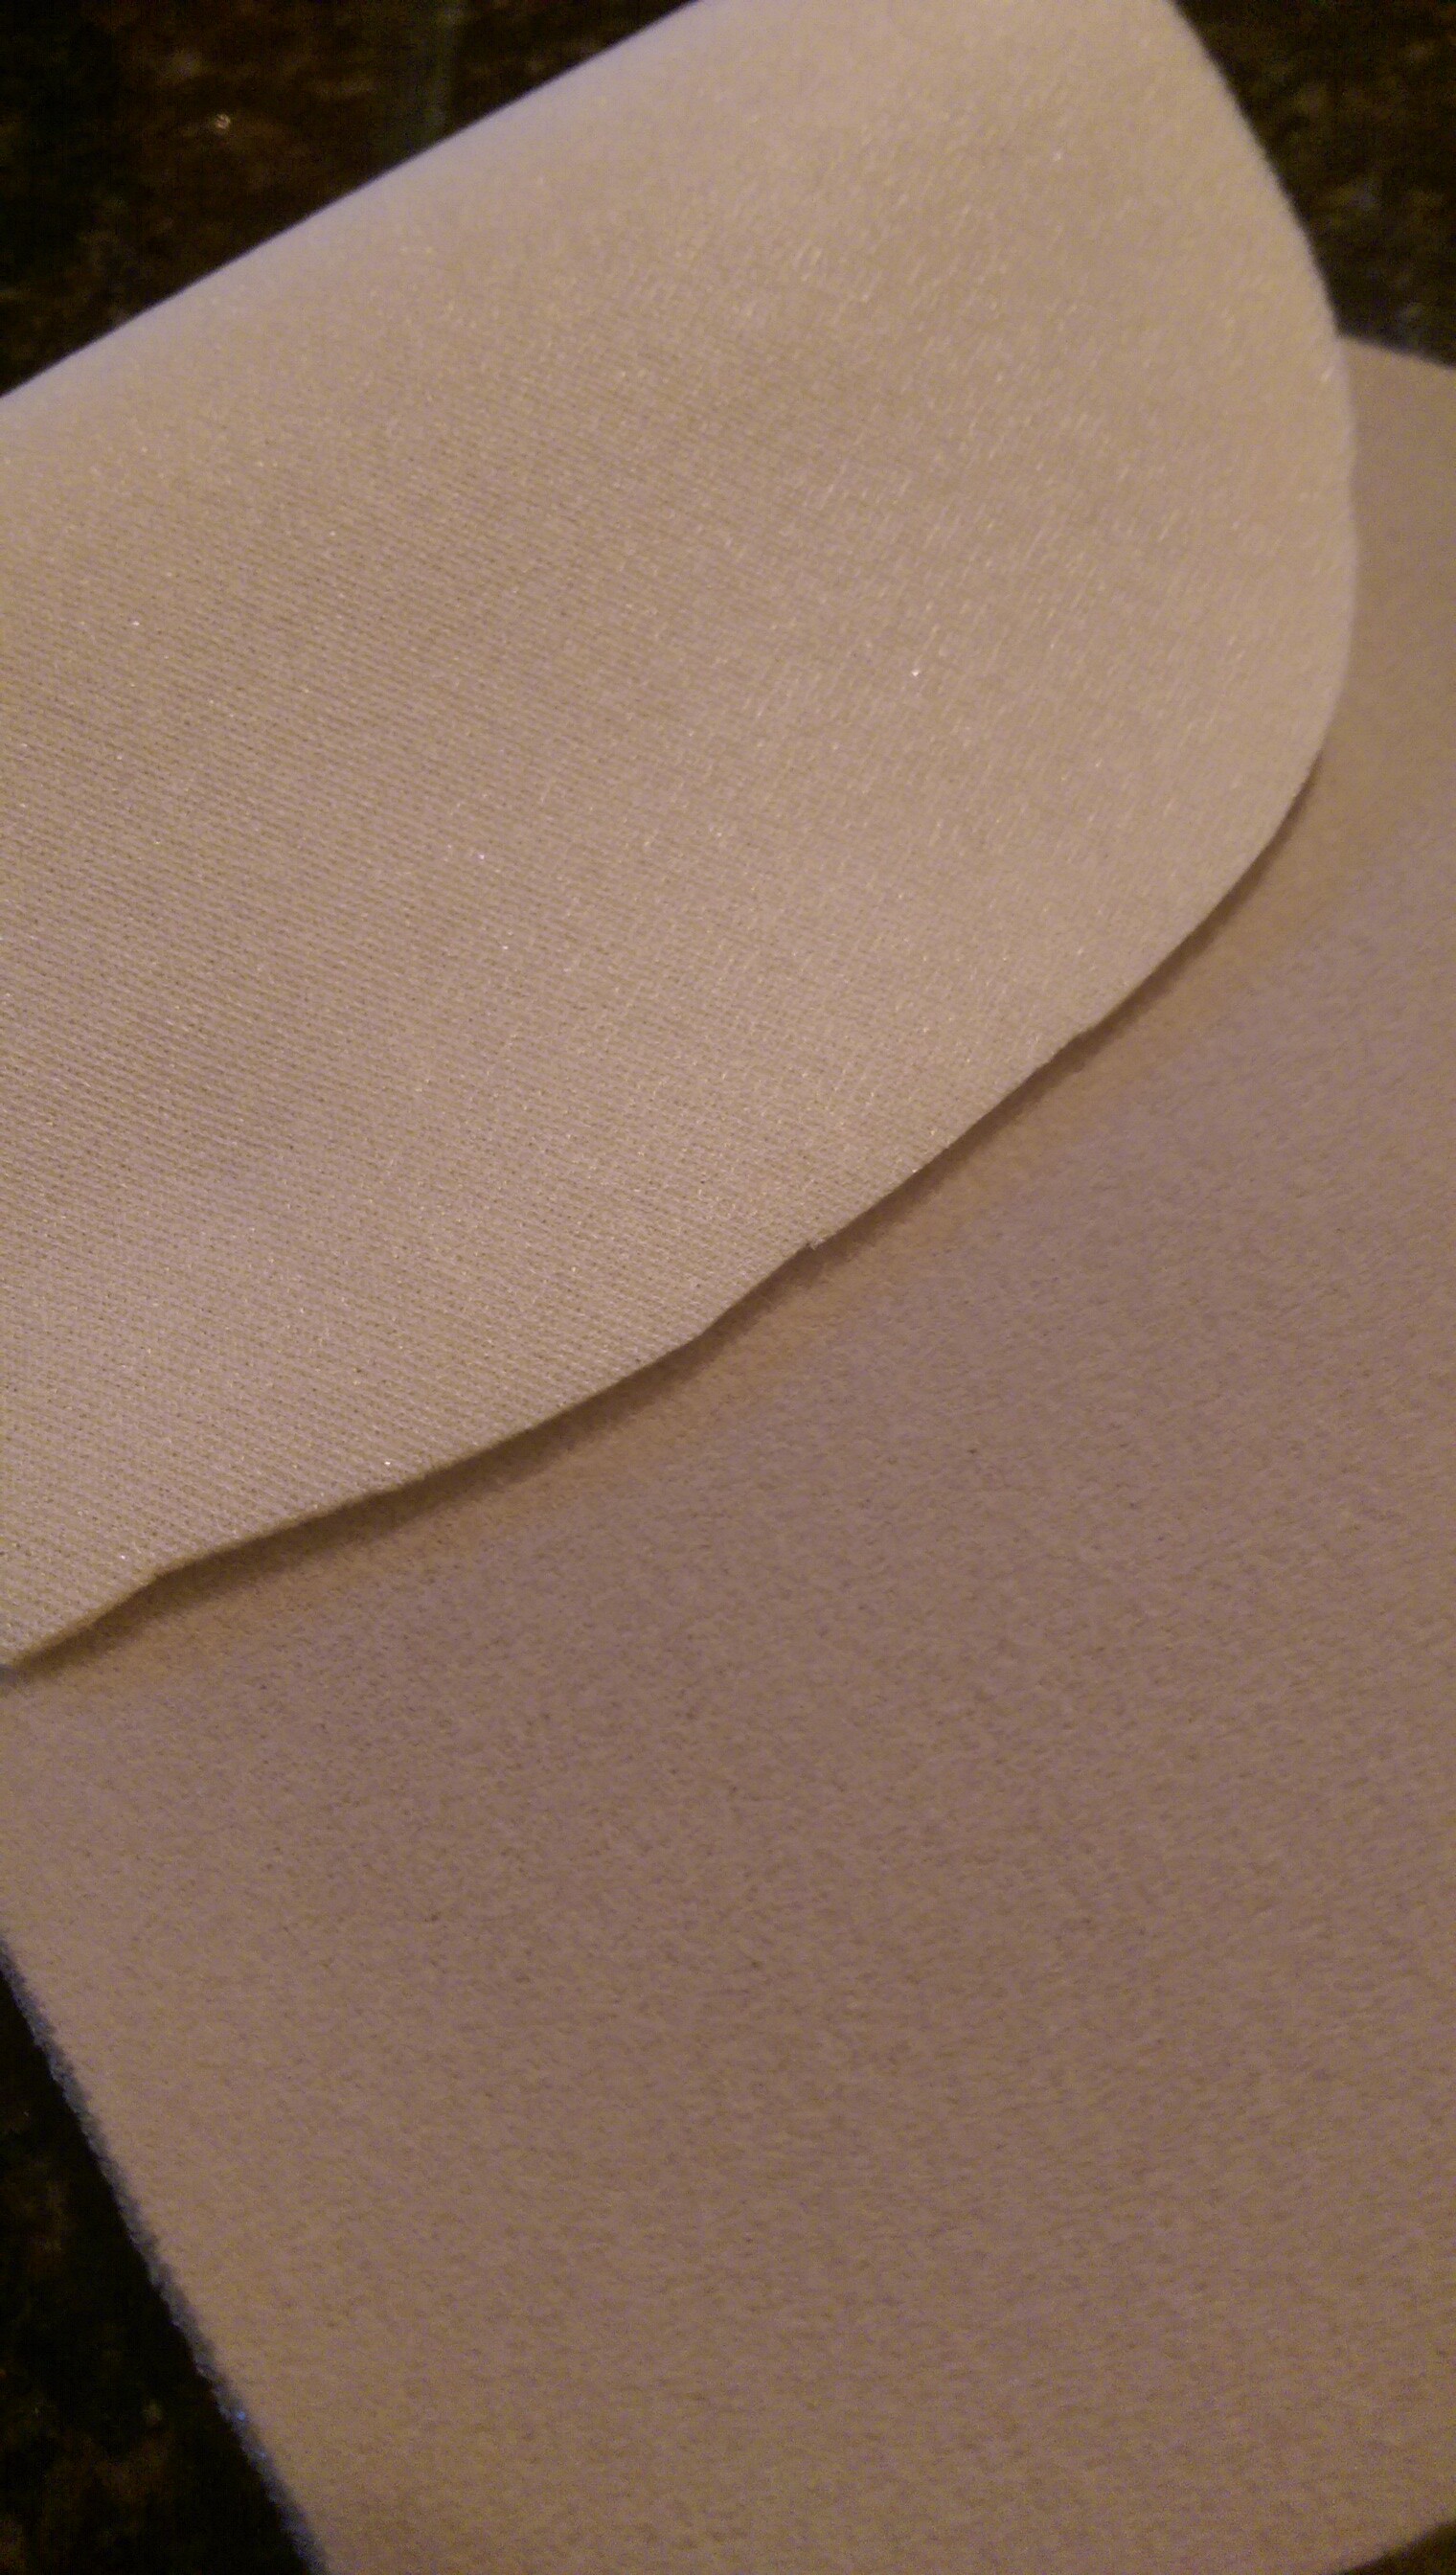
When I did the XJ-S I located the OE fabric. I’m not sure what color your XJ has, but as I understand it there were only two color choices for headlining fabric grey, and tan. I’ve included a picture of a piece of tan fabric I have left. What I really like about this fabric is that the foam isn’t exposed. There is a fabric backing. In the photo, the backing is the lighter color. The foam is about 1/8 inches thick and the backing keeps the fabric from stretching while it’s being applied.
the backing protected the adhesive from being sucked up by the foam and creating clumps preventing the fabric from laying smooth and flat (no dimples) once applied. I got this fabric from PaulsJag in Florida USA There website needs some help - their phone number is listed so you can call. They do have an ebay store; but the fabric isn’t listed. It requires a phone call to get a price on fabric; and it is expensive. If memory serves, the fabric was about $275.00. this was enough fabric to do a saloon or 1 and a half XJ-S’s. I’ve used some of the extra fabric to reline the door pockets where the foam has turned to dust.
Kirbert
(Author of the Book, former owner of an '83 XJ-S H.E.)
11
So you’re saying this material is a sandwich, a layer of foam with fabric on both sides? The backing is obviously a backing, different than the stuff you’re supposed to see inside the car?
That is correct. the foam is sandwiched between two layers of fabric. The backing is some sort of Polyester or Rayon that doesn’t stretch, much. Obviously with enough tension it will stretch a little. I think I’ve have found the OE wholesale source of the fabric (among other bits hard to locate such as colored furflex) in the UK. The downside, is it appears automobile trim only sells this stuff by the whole roll or bolt. So if you want 50m roll of the fabric, Automobile trim in the UK is your source.
Anybody got a suggestion for the type/brand of glue that I should use to hold up the rear of the panel ? Again, the panel is in good condition and doesn’t need replacing !
A picture of the roof sheet metal at the rear window would really be helpful so that I know what I’m gluing to.
Thanks guys.
Assuming you mean the cloth at the back of the panel, some sort of HIGH temperature spray glue (3m do one but plenty of others around) for headlining or fabric.
You will be very very lucky not to get a lumpy finish as the foam backing will be crumbly. Furthermore the rest of the headlining wont be far behind in sagging, but it may do temporarily.
Get a couple of pairs of vinyl gloves, some white spirit, some cloth, some dry smooth/satin cloth to gently smooth the headlining after gluing it up.
Good luck.
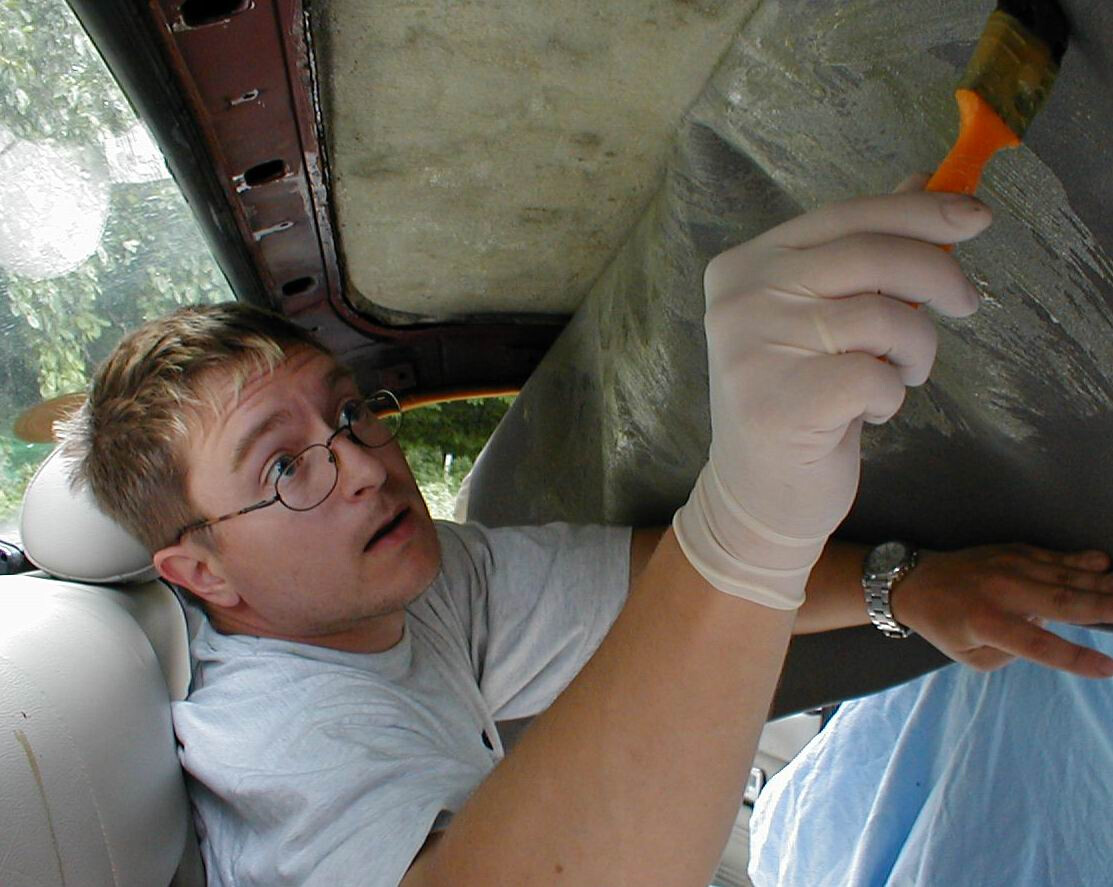
In a series we might call “Kids, don’t do this at home!”, here are a couple of photos from when I did the headlining in my 1970 SWB XJ6. Note: This car did not have the removable biscuit the headlining was glued to, it was something more like vinyl flooring glued inside the roof. Hence, everything had to be done in situ.
I’m about to do the same thing, and I was just wondering. Naturally I’ve got the a whole spare sunroof assembly leaning up against the wall. I’m waiting for it to take itself apart. Hasn’t happened yet. How did you get the inner assembly apart?
Undo the four nuts at the front and remove the guides.
Unclip the semicircle tubes from the cable attachment and undo the middle brackets . The brackets will have to tilt upwards to clear the sunroof as you slide it out, be very careful so they don’t damage the roof, put some masking tape or something in between, it’s a very tight fit. Take note of the copper plates and spacers.
Undo the rear screws behind the rubber strip where the spring is. You don’t have to remove the screws completely just loosen them and slide the rear guides outwards to free them from the rail. The guides are under the panel and between the headliner.
Slide the panel out.
I will take pictures when refitting it, but it might be a while…
Hope that helps .
All the best.