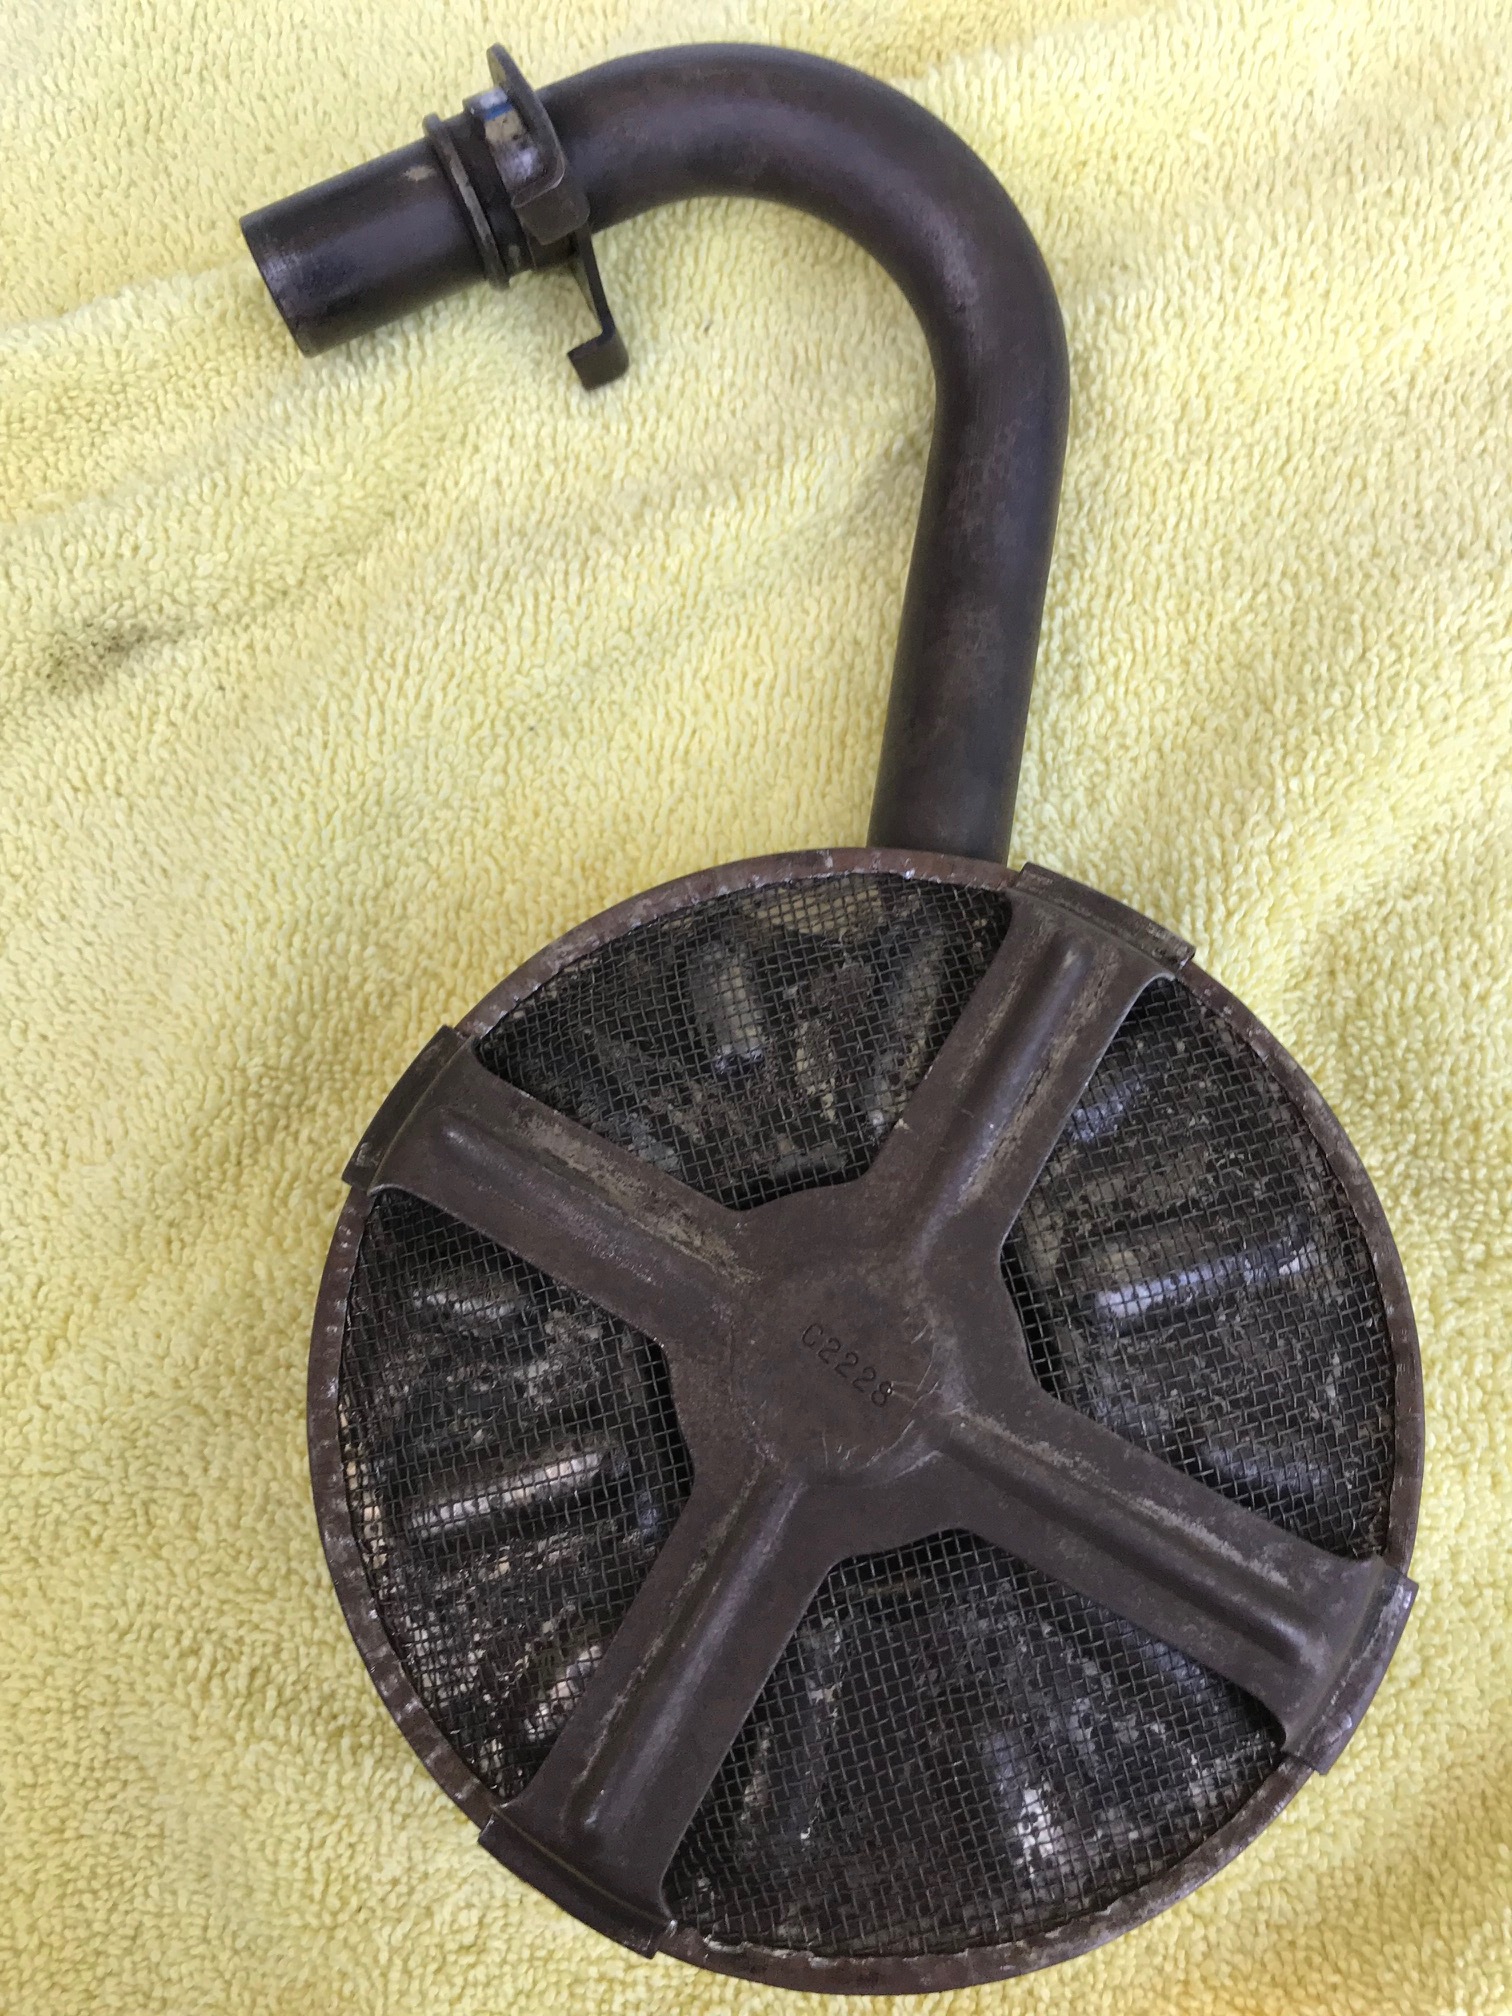
This is one of the few parts that remain to be cleaned for my '120 rebuild. Part# C2228. Can someone tell me the best way to open it up in order to give it a good cleaning? I gave it a preliminary cleaning months back but I see there’s still a sort of dried scum of oil here and there under the mesh screen – which is crimped in place. Also, reproductions don’t seem to be readily offered through the usual suppliers. Even if they were I still prefer to keep the original. Advice please? Thanks.

If you have an outdoor grill or oven, put it on an old cake sheet, and after cleaning as thoroughly as you can with something like a soak in acetone, dry it in the sun, and if it needs further cleaning, put it in the oven or grille at 220F.
After a few hours, any remains ‘scum’ should burn off.
You could also try fine glass beading it.
Okay, I’ll also admit I’m dying to know what’s inside! What sort of British engineering secrets does it hold? Alas, undoing/ redoing the crimped screen and such could be problematic so if baking it on the grill is the way to go, then so be it. Thanks for that tip, Paul.
Ultrasonic. Caustic or oven cleaner also works well.
I would throw it in a bucket of warm water with a couple of dishwasher tablets and leave soaking for a few days…
Can you get some toluene…very strong solvent.
I tried Paul’s method of cleaning followed by Lee’s recommendation to use a strong solvent – in my case carb cleaner. Still didn’t clean it up much more. I was then tempted to just burn off what remained but then I thought some on Paul’s comment to keep the temperature low and also how lightly torching it might turn what’s left into carbon. Thus, something abrasive. Not good. Plus, I could have also blown open the chamber. Yikes. So I took it apart. Here are pictures in case you’ve never seen one apart:

Here’s the back side. That silvery dot is not what I first assumed was some sort of rivet. It’s a blob of solder covering a weep hole to seal the air chamber. Just like brass carb floats. Definitely don’t want to melt/ heat that area.

The four legged spider just pops off. I removed the screen by carefully prying up the crimp with a flat bladed screw driver followed by a small pair of channel locks (slip joint pliers?) going around the circumference. Just enough to free the screen. Once I had it out I could see what most of the foreign stuff was: largely organic. The remains of tiny beetles and weed matter. How it/ they got in – who knows? Maybe through the breather as it did once sit in some high grass. Anyway, I was also able to chase both sides of the intake pipe with a pipe cleaner ensuring it’s now thoroughly clean. When re-crimping it’s important to simultaneously press down on the screen as it has a tendency to spring away before crimping due to its parabolic shape. As a side note, there are shiny traces still of when it must have originally been tin plated – like a tomato can. Here it is re-crimped.

The spider went back on easily enough and has the same fit and profile as before. All told, it took me at most about two hours of my time. Finished…
1 Like
Nicely done…
I cleaned my filter with 20% hydrochloric acid, flusch it atfer your are happy the result with water.
The result is like new.
Suc6.
Regards, Teun
Great job! Sump still on my fhc but will follow your procedure. Dont forget small locating clamp to secure pipe. A Le Mans failure cause.
Locating clamp? I’m at work so I don’t have my books in front of me. Please enlighten me – unless this refers to the split pin in the oil pump inlet. I’m covered in that regard.