Write-up for replacing LUCAS Alternator with a LAND ROVER Alternator, for I ‘think’ HE V12s from 81-88. The original Lucas is 75-80 amps. Decent alternator (mine lasted 34 years!), but I wanted more amps and something better. The Land Rover alternator puts out 100amps, and is manufactured by Marelli. (So us Lucas-folk can now say we have a Marelli car? )
In the USA, if you search for Land Rover YLE10100 you’ll find the alternator. Cooling fans are inside. For a 96 Land Rover Defender. I ended up buying a Bosch rebuilt (as I trust Bosch, comes with 2 year warranty) labelled as AL9346X. About $170 plus core. You can find rebuilds much cheaper, but…
It pretty much fits exactly as the old Lucas alternator. The ONLY tweaks I had to do are as follows:
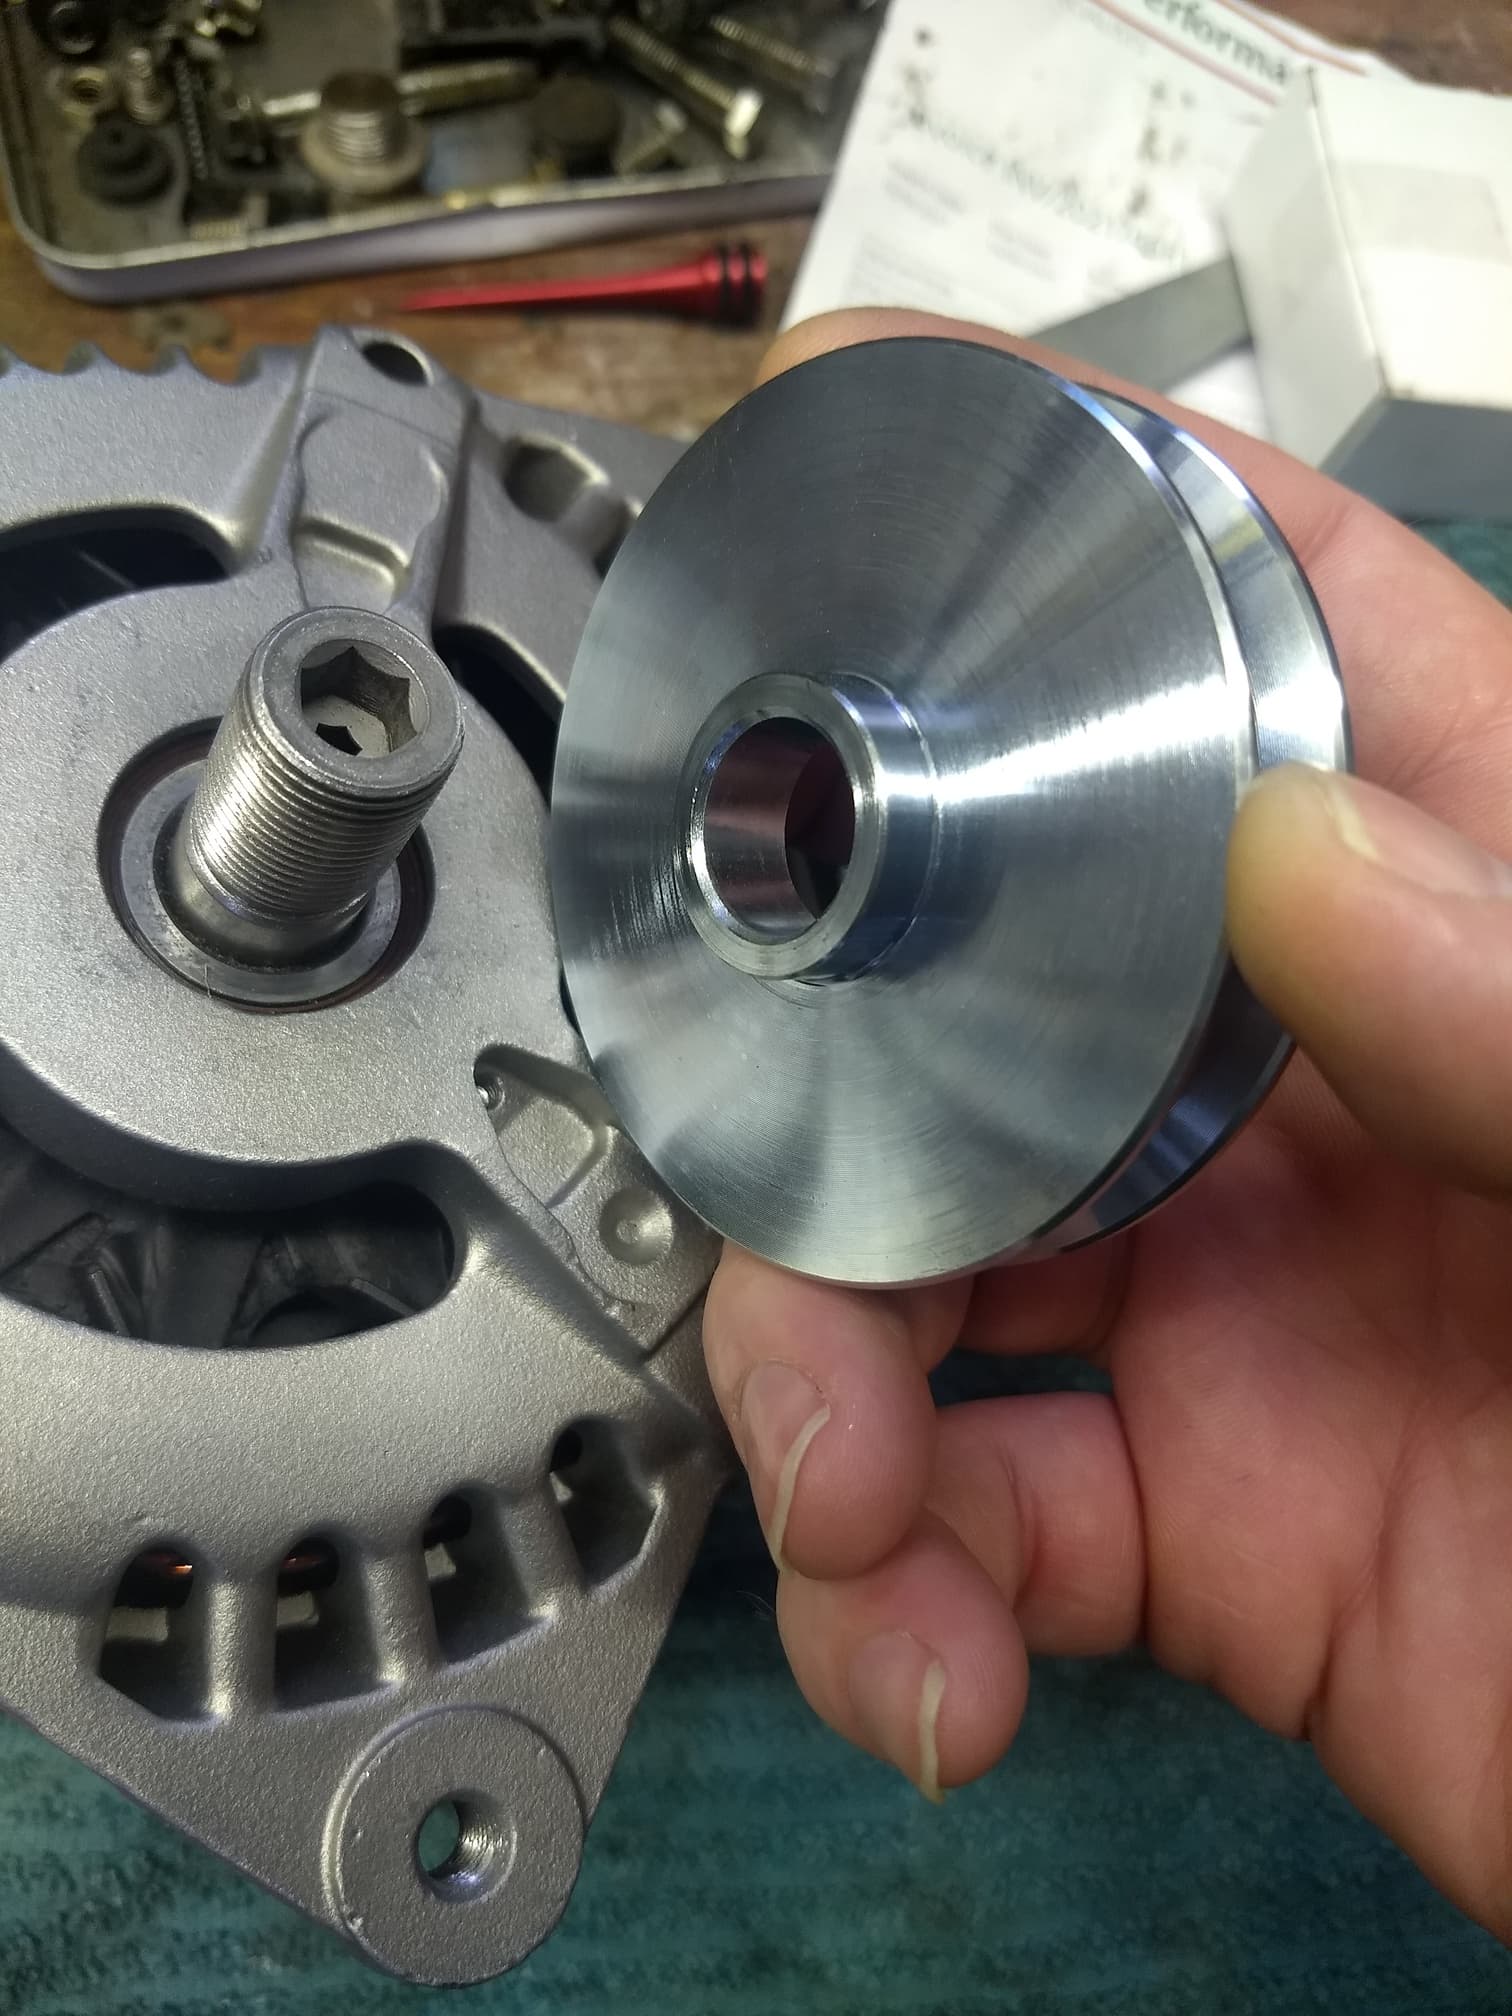
The alternator here in the USA either comes with a serpentine pulley, or none. I actually found a pulley that fits perfectly! 2481103, for Hitachi Alternators (on Isuzu, Nissan, etc). Original Lucas is 70mm, this one is 74mm. Looking up the Land Rover Defender, torque for pulley is 70 ftlbs.
The tensioner bar that adjusts tightness of belt needs to move backwards a bit to match up with the alternator lower ear. Simply add a couple washers. Aristides used three washers, but I opted to use two. With three, the bolt/nut was way too close to the alternator belt on mine than I wanted. With 2 washers, my tension bar is not 100% straight, but it slides back/forth OK for adjusting, and bolts up fine.
(Stole photo from Aristides!)
The upper pivot - the distance between the ears on the Land Rover alternator is a tad wider. There is an insert on the rear ear that will press in once tightening to fill that gap. But I opted to add a thick washer in there just to make sure. I did experiment with the washer up front, pushing the alternator a bit forward. But this put the pulley too far forward for the belt.
One little brown wire to hook up, and the main + cable. The + cable on my XJS has quite a large eyelet that would not fit within the confines of the Land Rover. You could redo your cable, but I chose instead to simply cut off the two plastic tabs that are in the way. Simple hacksaw. Then the cable fits no problem. Also, my original cable had no rubber boot to protect from grounding! Good time to put one in.
The alternator has B+ (Positive Cable), D+ and W (tachometer, which we don’t use) The little brown/black wire goes to middle connector, D+. A little male spade is on W, but do not use it because there is a resistor built in. So splice on an eyelet to your wire so you can hook up to D+ connection.
Because of the bigger pulley, a different size belt is needed. OE is 10mmx850mm. I purchased a 10mmx875mm and it fits perfectly. Not sure what that is in inches, but I usually buy Continental/Contitech, which come in metric and are a VERY trusted make.
That may explain my odd behavior with battery warning light while driving. I had little brown wire (which i assume is our warning light) hooked up to W which i thought stood for “warning”. The little male spade connection was on the W. I’ve now moved it to the D+ connector as well as the wire. Will test drive today. Thanks! I’ll update photo above.
Another issue I’m having is overcharging. But ONLY during the first five minutes of driving with cold engine. Intermittently the battery light flickers with voltage hitting 15-17 Volts. After about five minutes of driving, its rock steady between 13.9-14.1V. I’ve tried this with an added alternator grounding strap and without, same result. Could this be bad battery? It’s three years old.
Or are these Land Rover alternators just not 100% compatible. Or did i get a rebuilt with a faulty regulator?
Kirbert
(Author of the Book, former owner of an '83 XJ-S H.E.)
10
This 3-minute video seems to confirm the wiring connections:
Offhand, I think you may have gotten a bad rebuild.
I have not put a lot of thought into this, but…
On many old-school US alternators, the “excitation” wire/current passes thru the warning bulb. It is necessary to get the alternator to begin charging. The bulb is used to limit the current.
Not sure about the XJS, but it could be that if the bulb is missing or bad the alternator can’t start.
So i turned ignition on and pulled/tested little brown wire at alternator, it was putting out 12.1V.
When i plug wire in correctly to D+, i get no charging. 12.1 V at battery. Yet if i hook it up wrong to W, i get 14.1V charging with initial intermittent overcharging.
Does this all point to a bad regulator? Anything else to check before i return this rebuilt?
Don’t use the terminal lug that was on the “W” terminal; it contains a resistor. You need to either install an eyelet terminal on the wire or install a right angle male spade terminal to install the wire on the “D” terminal.
You probably need to rev the engine for it to start charging due to your larger pulley. Wire must be on “D”.
Ha. OK, I will when I get home tonight. I took it off and left it off, as I’ll never use the W connector. I sometimes keep these parts together to remind me of the things I’ve learned the hard way.
Apologies for noob question, but what’s wrong with bullet-proof Bosch 115A alternator usually mounted in XJS with AJ6 engine version? (also in Porsche)
You’ll need to change the bracker or the pulley, still less fuss than with LandRover Chinese crap…
Kirbert
(Author of the Book, former owner of an '83 XJ-S H.E.)
21
Yes, it does- 800 ohms. Definitely enough to inhibit the warning light and prevent excitation at idle. Most alternators will self-excite at higher rpm due to residual magnetism of the rotor.
 )
)