Last week went to start the convertible - dead battery. It was over 10 years old, although no sign up to that point of any potential failure.
Swapped battery out of coupe to convertible, but had other things to do so did not drive it. Bought new battery for coupe.
Yesterday went to drive the convertible on a nice sunny day - dead battery. Very surprised since the battery out of coupe was 4 years old and fully charged.
Put the battery charger onto the battery, but after 24 hours when current should be down to maybe 0.5A battery was drawing over 2A. Remove battery clamp and with multimeter find battery is discharging 2.5A into car. No idea why, but switch on ignition without starting car and cycle it a few times. Still have 2.5A problem.
Don’t have the boot light switch that drains batteries, although not at 2.5A.
The other common problem mentioned on forum is the aerial. Notice that switching on ignition did not raise aerial, although battery is at 13.8V.
Remove inline fuse for aerial. Still have 2.5A draw. Mess around a bit with wiring around aerial, nothing conclusive. Put fuse back and now have no 2.5A draw.
Does not make sense, but took fuse out anyway just in case. Will check current draw again in a day or so, put fuse back and see if aerial deploys. A bit worried have not found a definite answer to the 2.5A draw.
2,5A at 13.8V is about 35W, and in the aerial motor that would be pretty hot.
Does not seem likely, did not feel hot.
Anybody had a similar situation ?
When I bought my 1984 car, in about 2000 the battery would occasionally
go flat. Finally traced it down to the speed sensor module, though I
also changed the computer.
I live in a cold area…do not drive my xjs in winter…however, batteries that have a six year rating are really only good for about four years
Timeisrelative
(Jason Miller 1993 XJS 4.0 convertible, 1997 XK8 coupe )
4
My 93 had a parasitic draw. It turned out to be my right side ac blower circuit. Unplugged the fuse and the draw went away
Kirbert
(Author of the Book, former owner of an '83 XJ-S H.E.)
5
Draws that come and go like that have sometimes been traced to the trunk light switch. Closing the trunk is just barely turning off the lights, close enough that sometimes they’re on, sometimes they’re off, sometimes it only takes a little bump or even a change in temperature to go from on to off.
Checked the battery charger tonight, the problem is back since battery charger showing 2.5A again but should be down to 0.5A. Disconnected the battery and next step will be to start pulling fuses at the weekend. Not the aerial, not the boot light ( does not have boot light ) and this is 30W of heat energy going somewhere. Do not smell anything getting hot.
Still have 2.5A disappearing into the car, no time last weekend to fix.
Will try this weekend and at same time like to tackle the slow top and reluctant rear quarter window.
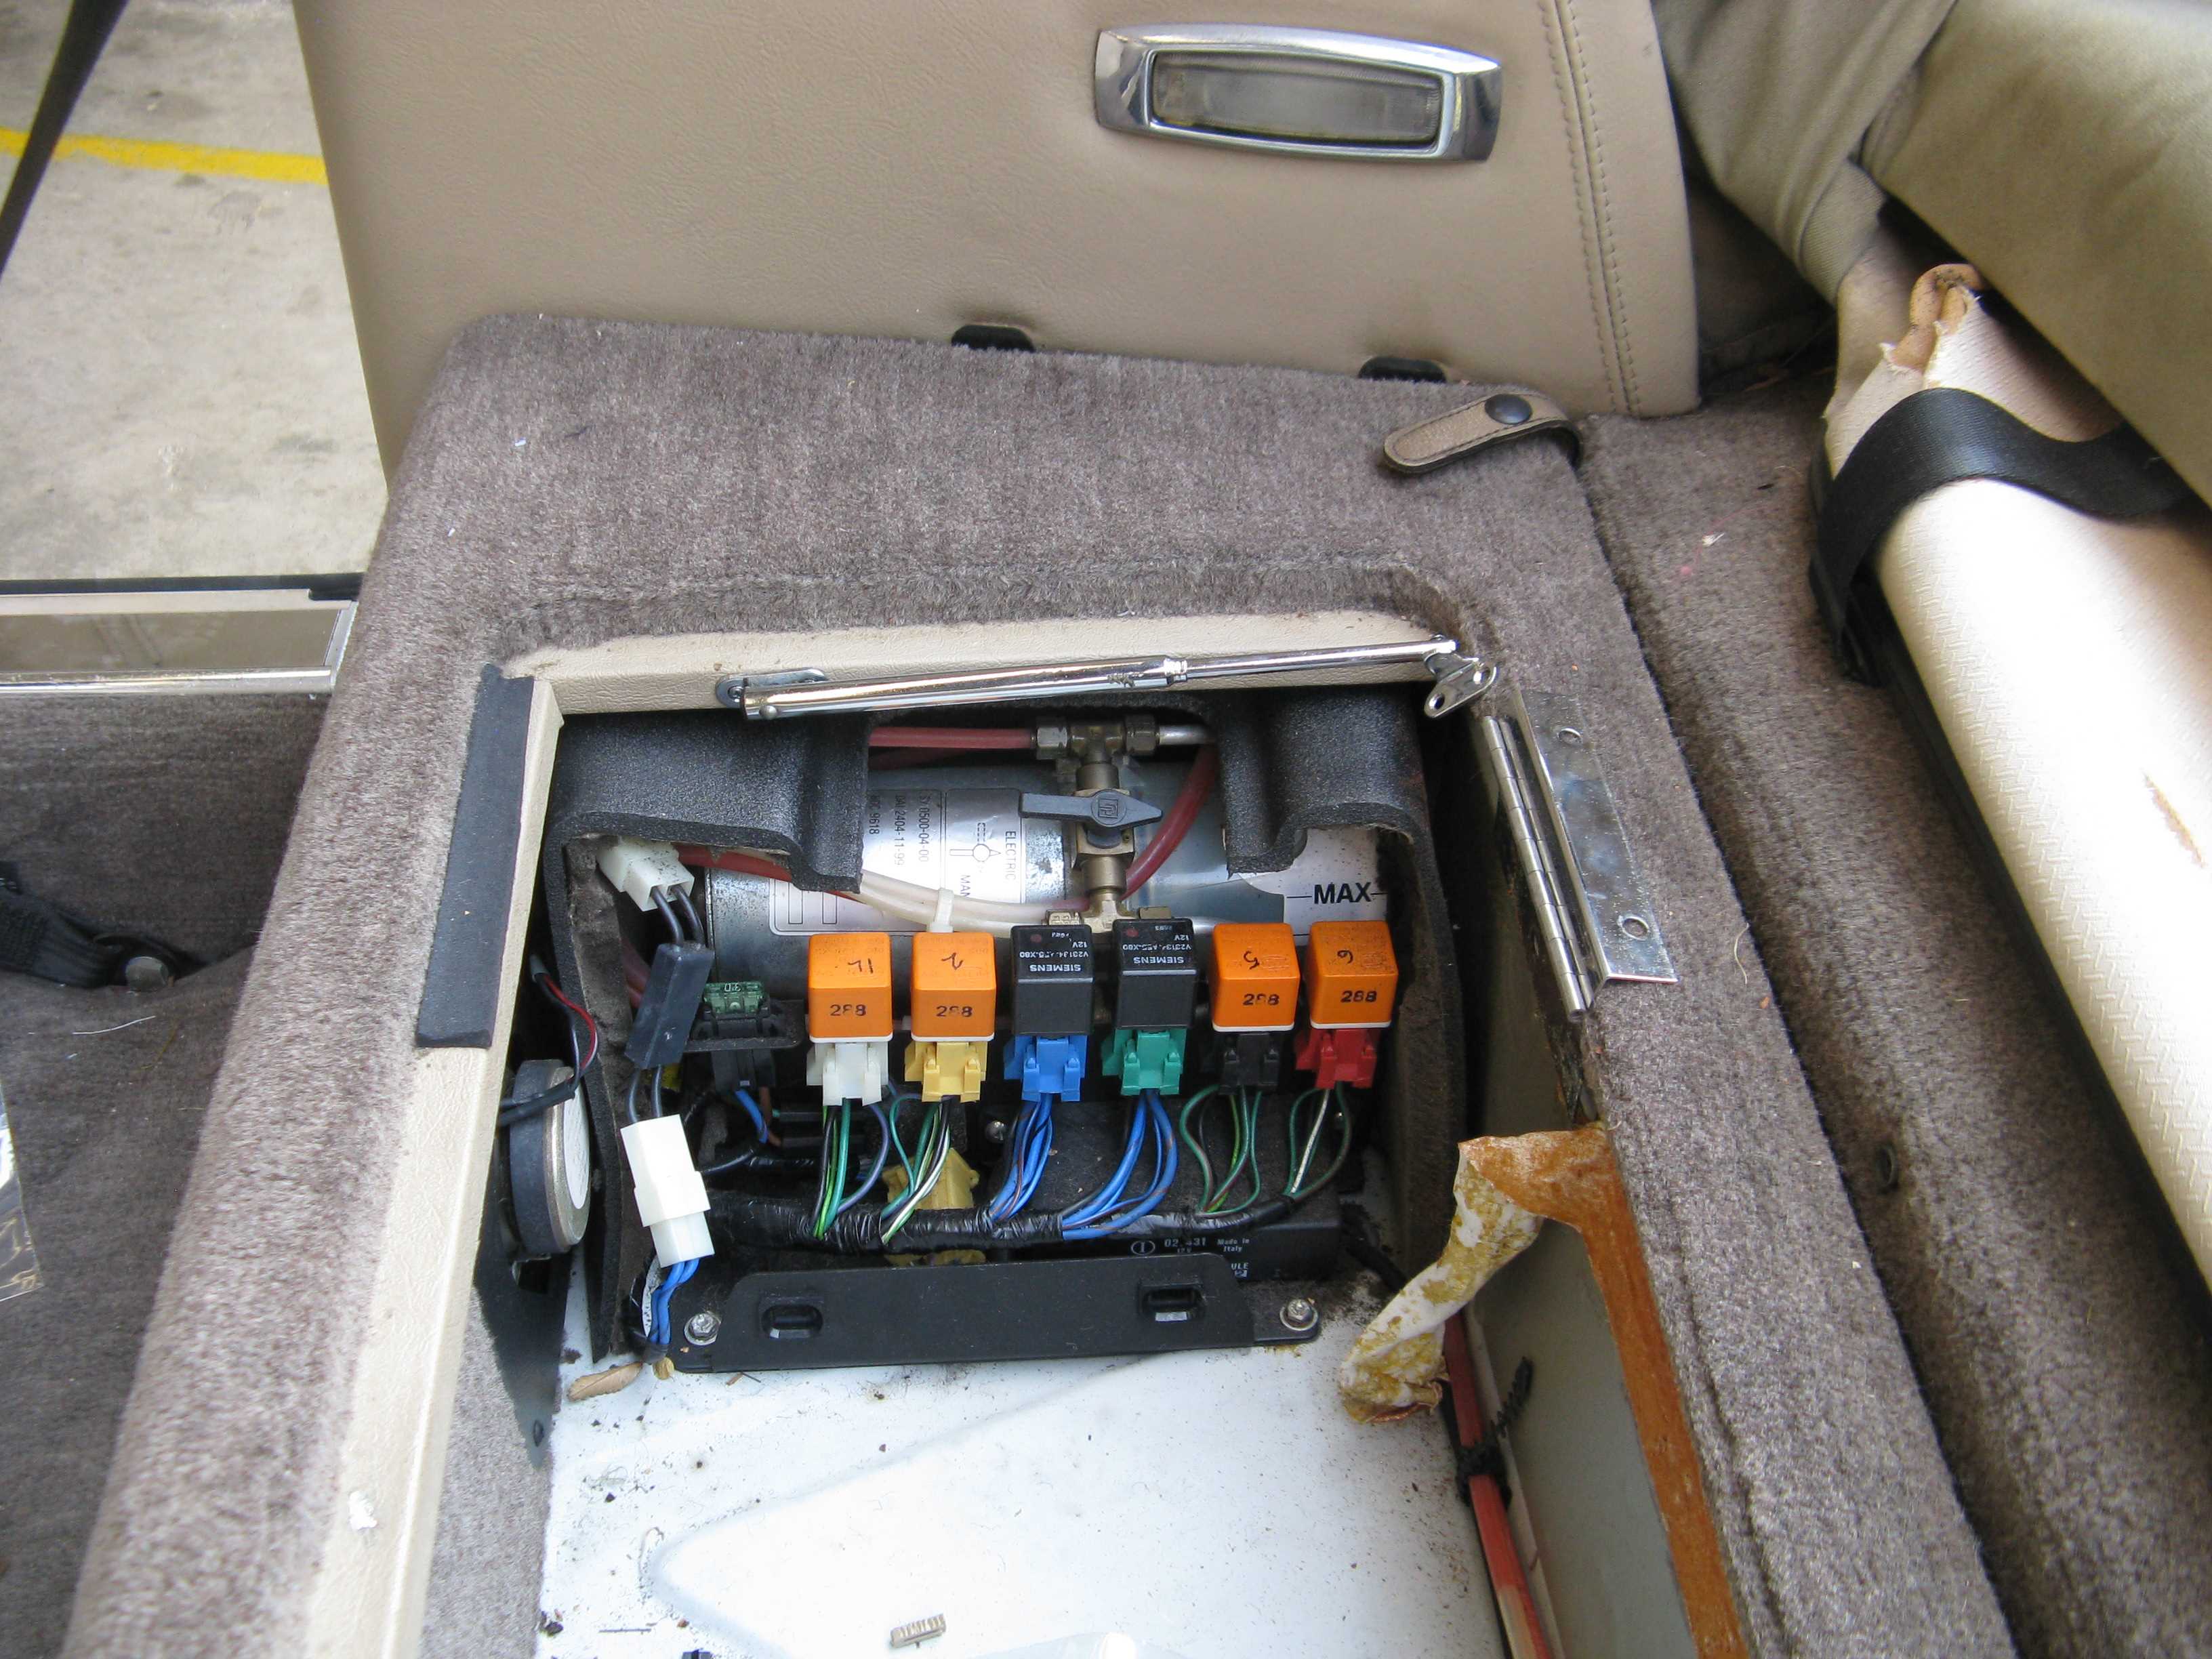
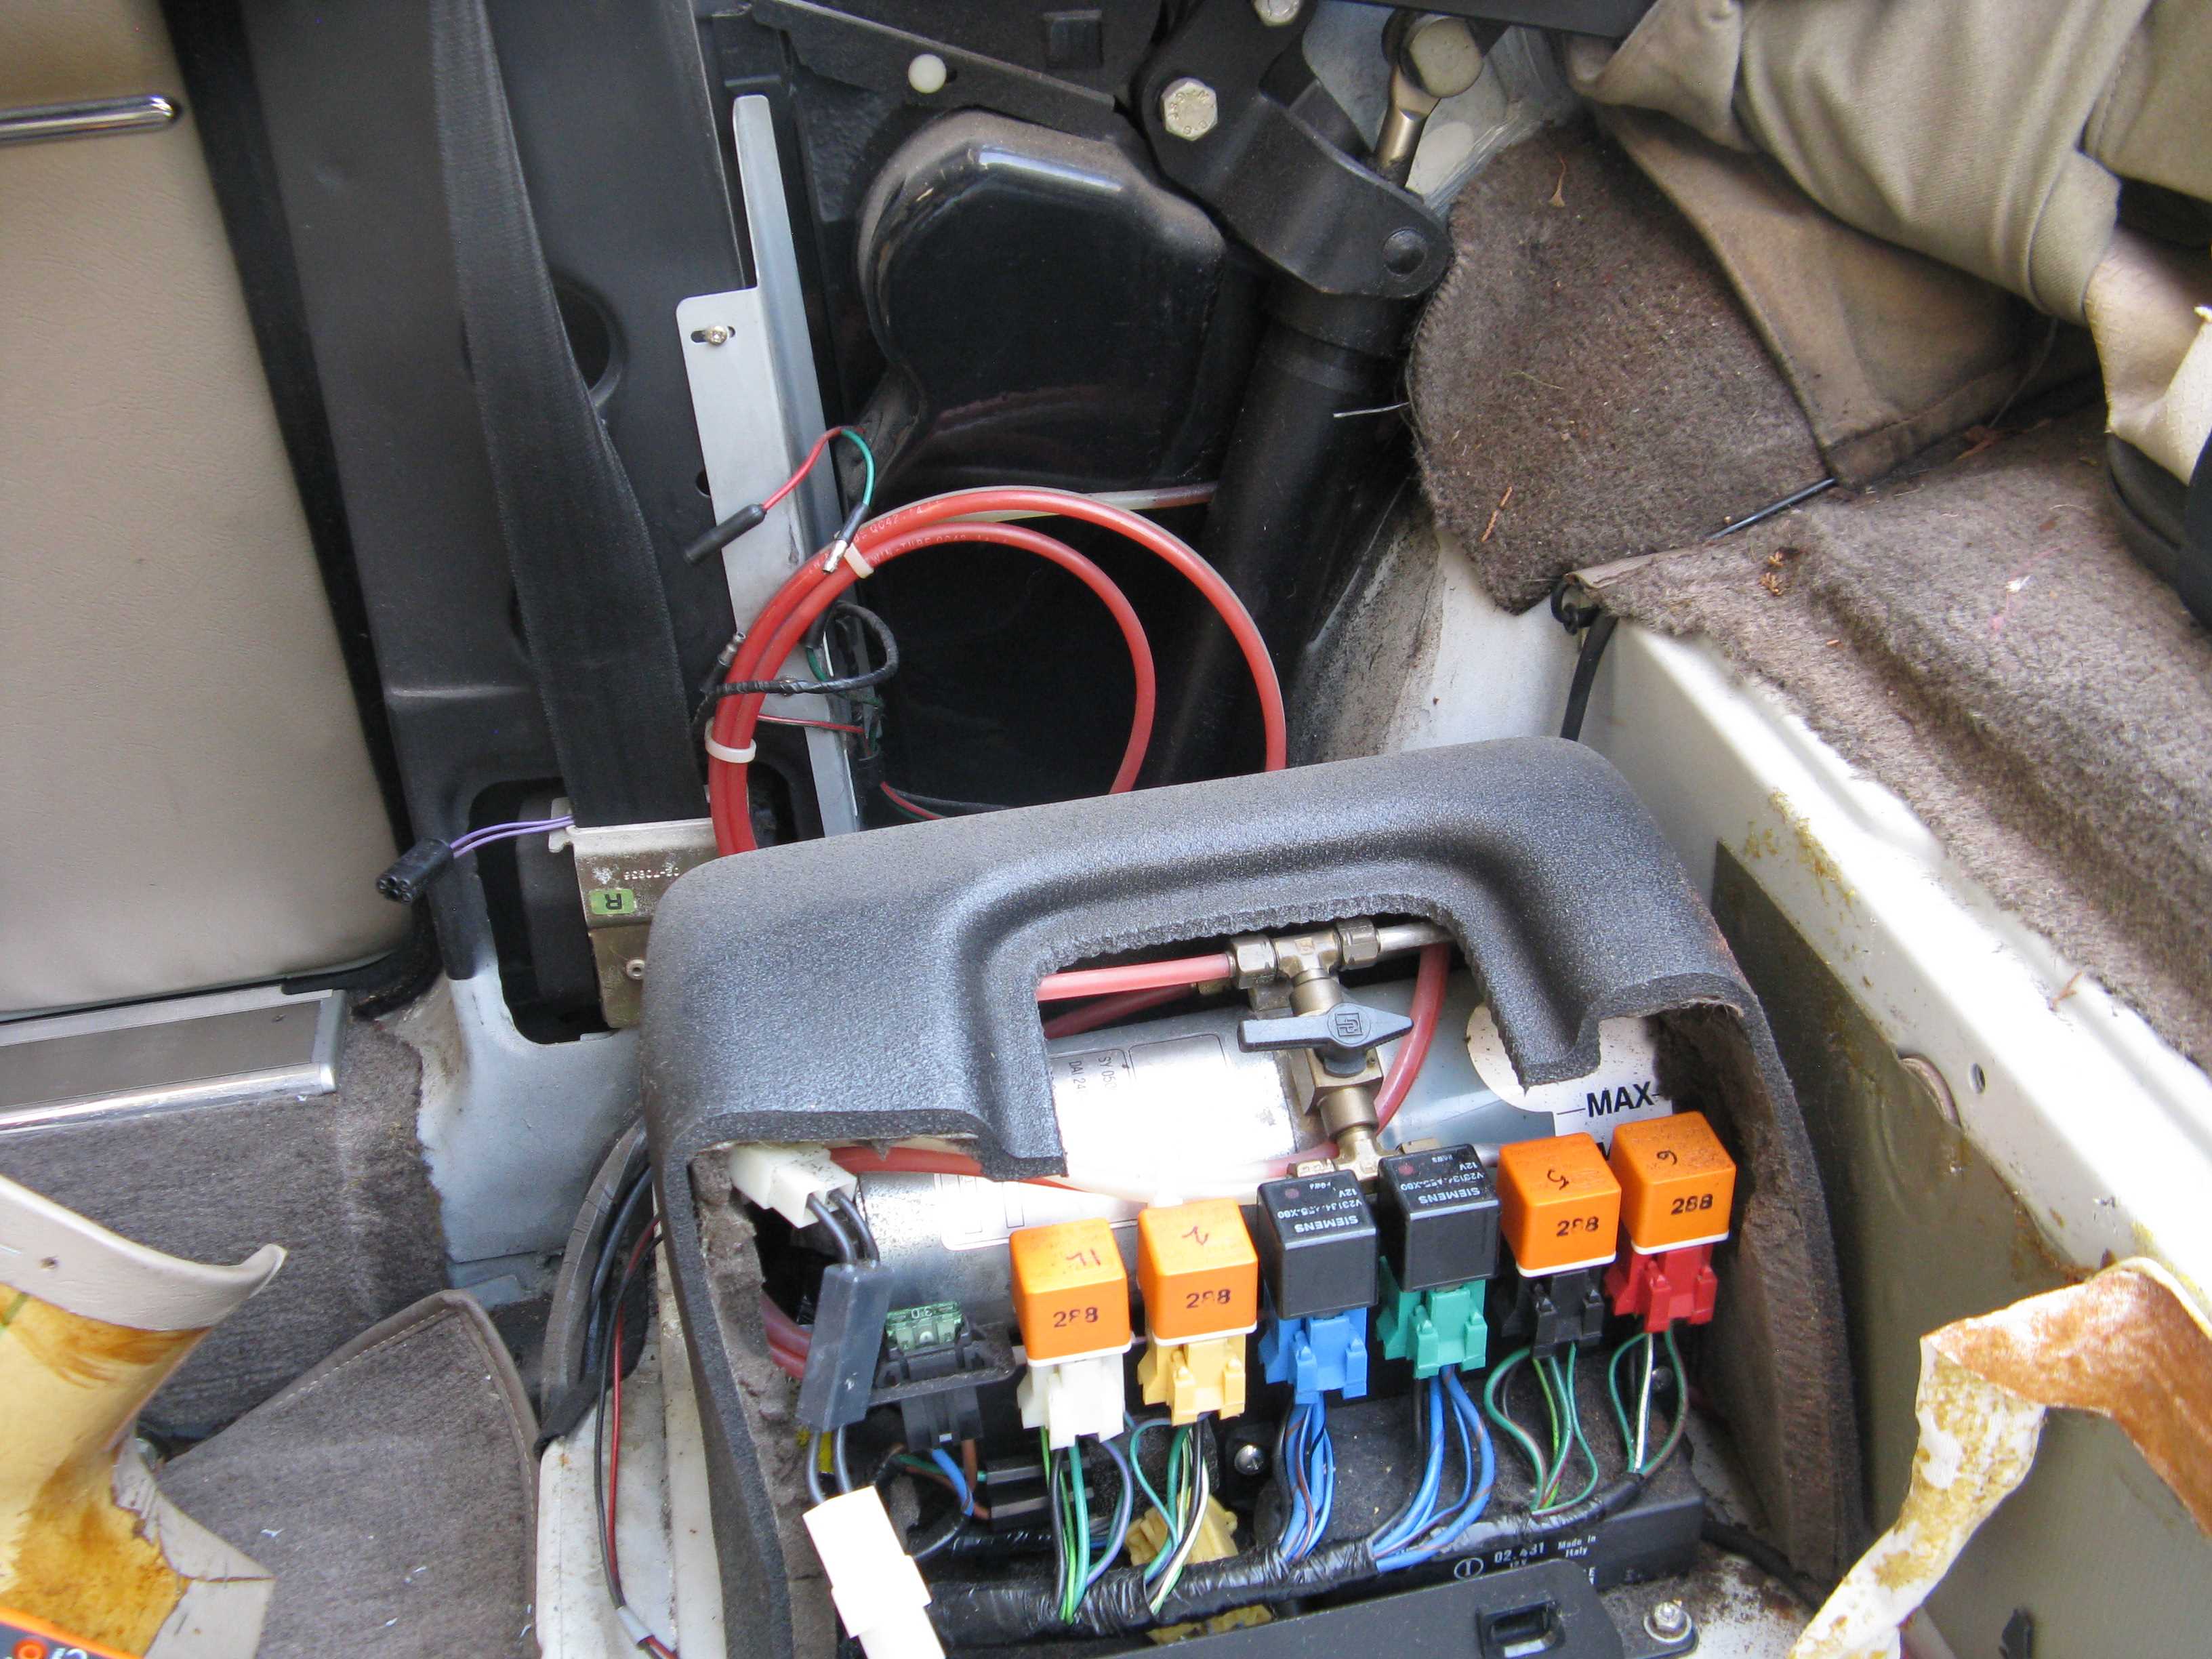
Have all the usual Jag CDs and have found wiring diagrams for the electrics.
This is an early convertible with the storage locker behind the front seats. So far have not found info to get at the top motor, window motor and hydraulics thru the locker. Or is the locker removable ?
Like to know if anybody has the info before finding out the hard way.
The battery was the culprit, that was drawing 2.5A when on charge well past the time it should be 100% and drawing less than 1A. I wrote on battery date bought, Sep 2015. It was getting quite warm, must have a partial short in it somewhere. Might get a partial warranty on it.
So nothing wrong in the car and everything is working - well not quite.
The top hydraulics need a top up, and RH side quarter window not working.
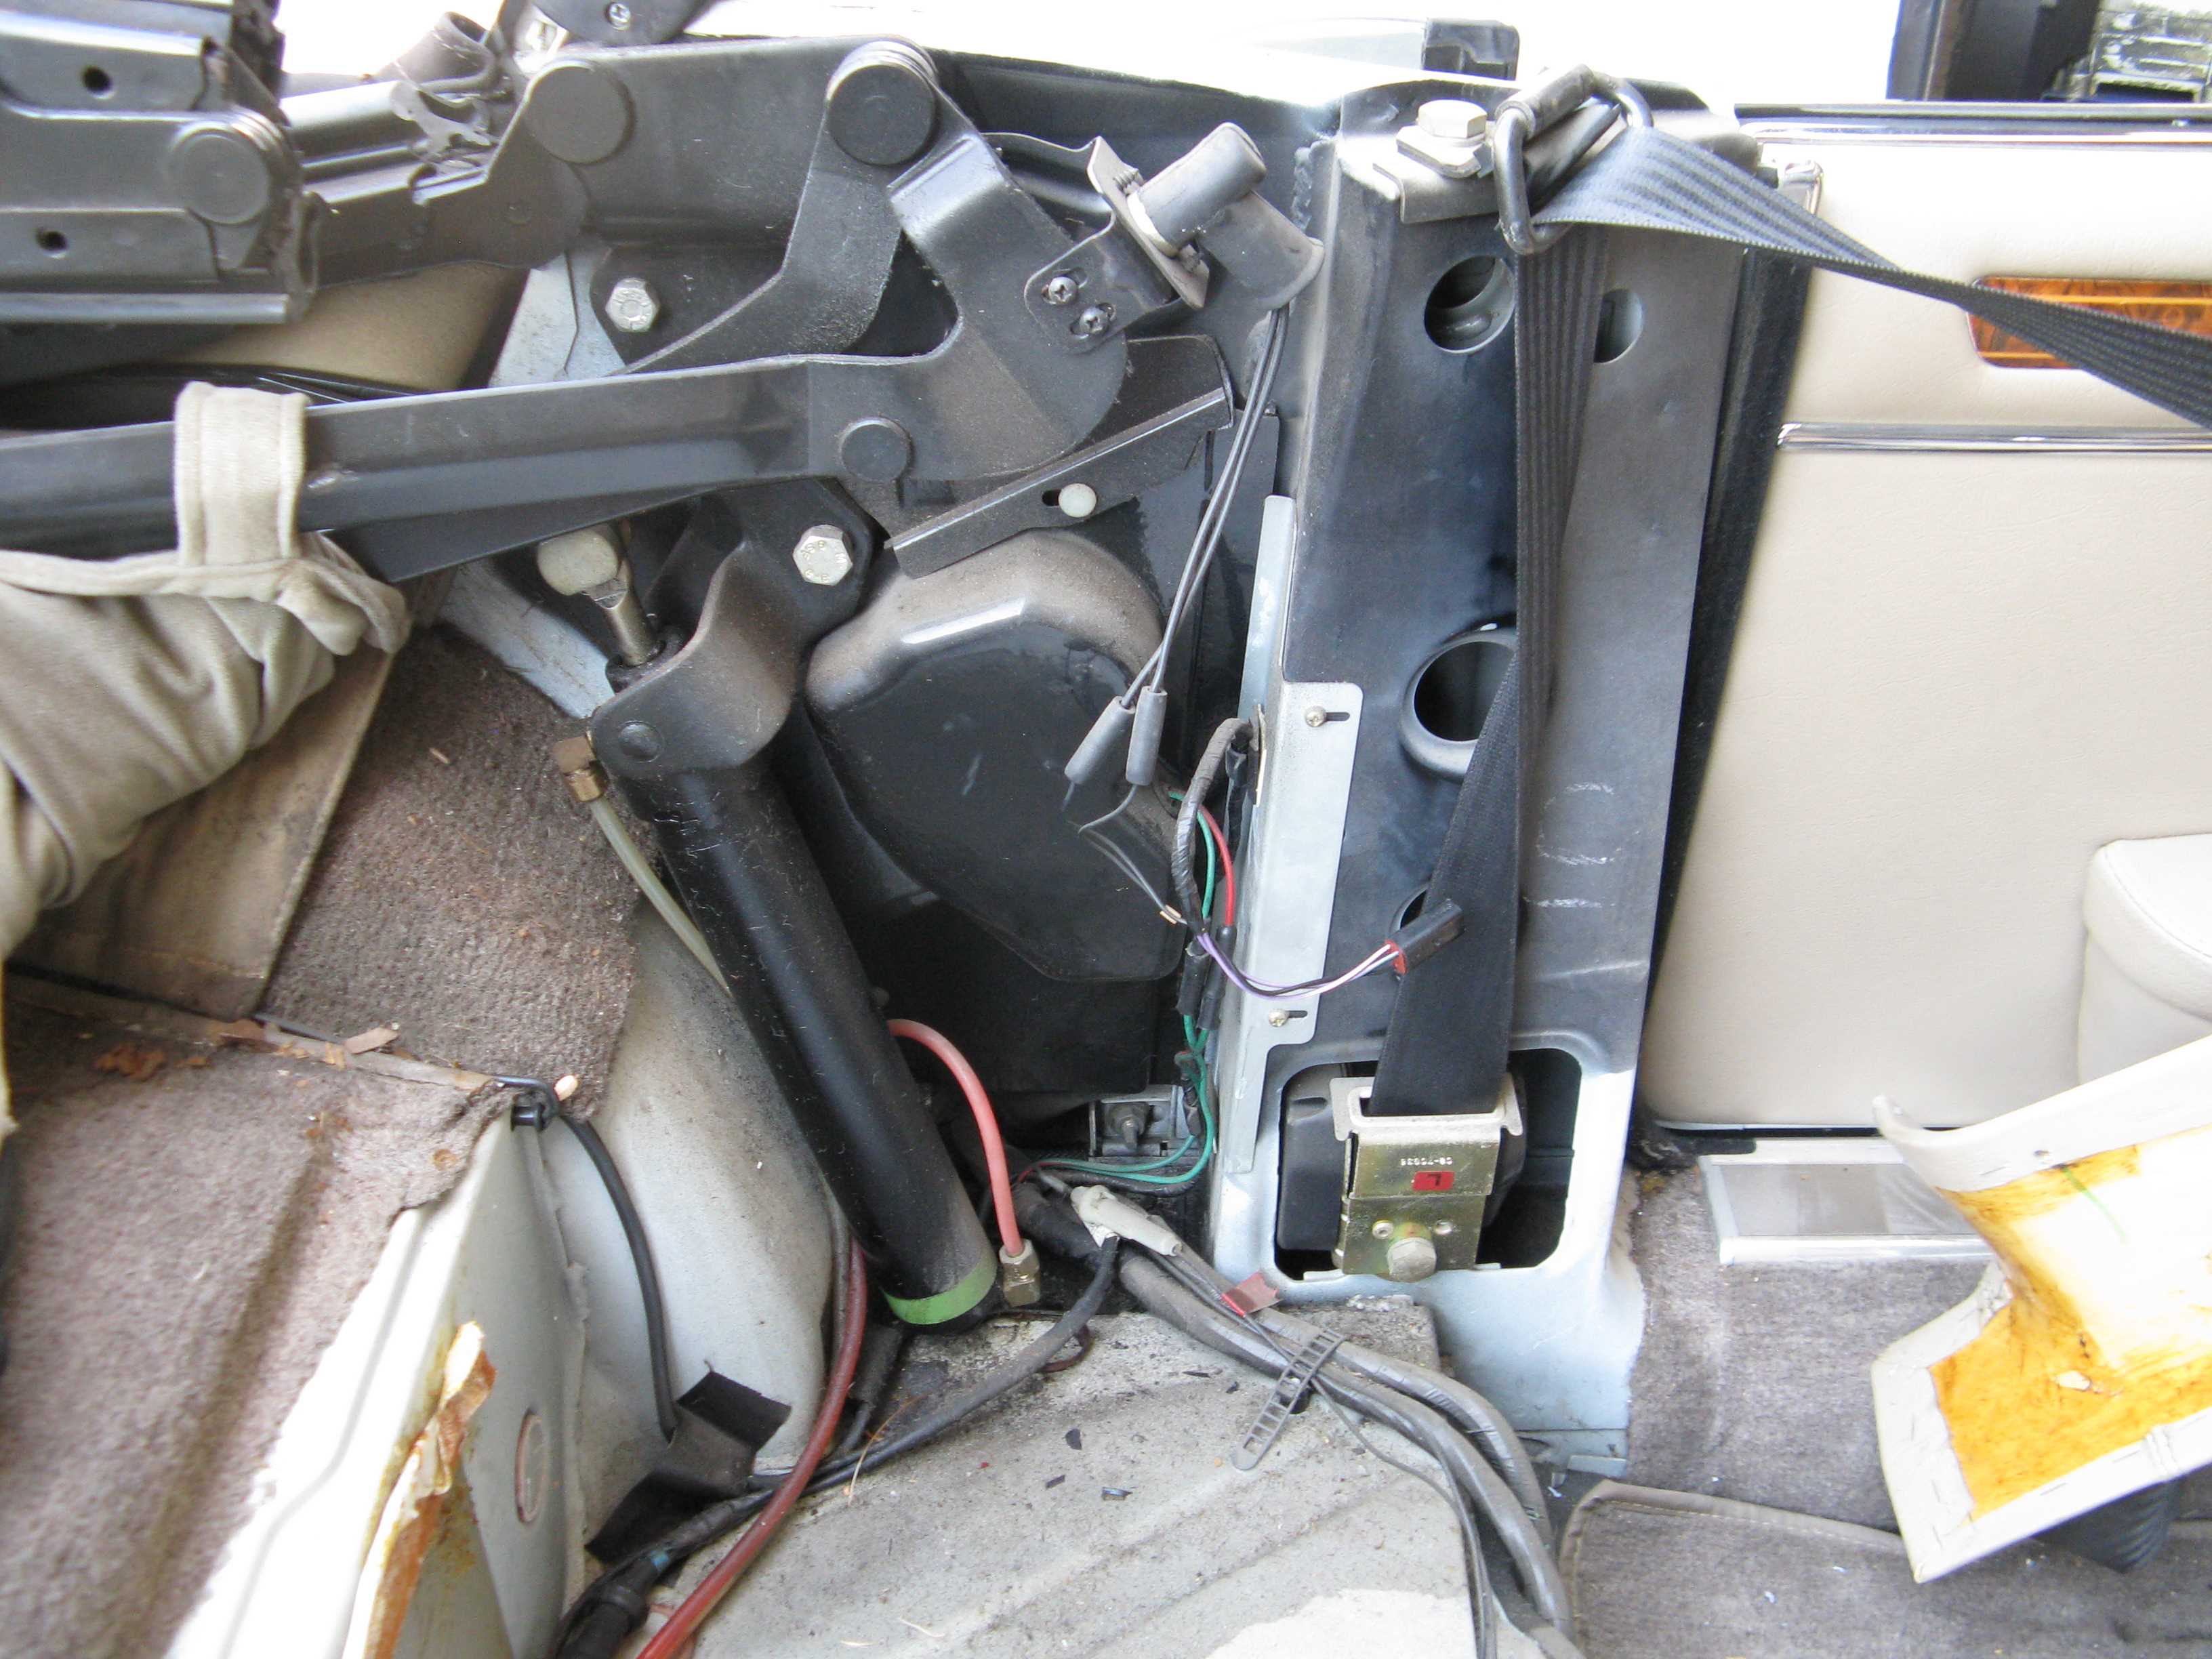
Found a drawing of the storage locker on a CD ( called cubby in one Jag CD ) which helped to show where the retaining screws are located. Did not mention you need take the trims off that surround the quarter windows. They only have 3 screws and easy to remove. They engage clips on the locker, although on one side they were not engaged showing signs of PO attention in this area.
Luckily somebody posted here recently procedure to deal with hydraulics.
Found info to take out window motor plus wiring schematic on a CD. Connected window wires to battery thru 50W 0.2ohm resistor to limit current. See spark so drawing current but does not move. Same attempt on other motor made window move. Will remove dud motor in next 7 days. Now everything is exposed might take out motor on other side and overhaul it too. Could be motor is O.K. but a mechanical problem locks the window.
Questions:
Is it easy, is it worth it, to replace ram seals ?
Is it wise to apply spray grease on mechanism joints, meaning does it tend to leak onto lining ?
Looks like there are joints that will not contact lining, but
The CD extract telling how to get at the quarter window motors was frugal with information.
It outlined a procedure next to a line drawing showing the area of interest.
Unlike other ROM procedures which have numbered instructions, and relevant numbers on the drawing, this had no numbers and was not easy to understand.
Not a good idea to be too hasty. Part of the procedure for removing the RH window motor is raising the top halfway, supporting it ( how ? ) and then detaching the cylinder that usually does support it. Any mistake might have the top linkage mechanism collapse and you do not want any fingers in there if it does.
One puzzle is the procedure for the LH side motor did not require the top moved or the LH cylinder removed, but it looked exactly the same setup. Later it proved obvious that was wishful thinking.
Photo 1 shows you can prop up the top in its halfway position. A piece of wood, notched at the bottom to fit the chassis, and at the top fitted under a link with duct tape to keep it there.
Photo 2 shows the motor cover removed, and 3 bolts holding the motor mount removed.
Jaguar - you’ve done it again.
Photo 3 shows why you have to unhitch the cylinder. There is a bolt hidden behind the pivot for the cylinder trunnion mount. You can see a spanner that is on the head of the bolt. If the Delco window mount had been modified for the bolt to be an inch away from that location the cylinder could be left intact.
You can leave the bracket with that pivot in place, just slacken the retaining bolts and prise it away from the car so you can get a spanner on the hidden bolt.
Photo 4 shows the window mount and motor all cleaned up.
The problem ? Too much grease loaded into the gearbox during assembly, and a fair bit of it got onto the brushes so no electrical contact. Otherwise motor is perfect.
Once you know how to do it the whole thing is fairly easy.
Next step is to top up the fluid, not much left in the system. Lots of old fluid around the car where it is not usually seen.
Might see about replacing cylinder seals.
Timeisrelative
(Jason Miller 1993 XJS 4.0 convertible, 1997 XK8 coupe )
10
Awesome this is exactly what I was looking for! I thought my old Rams may have been aftermarket since they were plastic,but they look exactly like yours so maybe not lol! I know what I’m doing today!


 this is exactly what I was looking for! I thought my old Rams may have been aftermarket since they were plastic,but they look exactly like yours so maybe not lol! I know what I’m doing today!