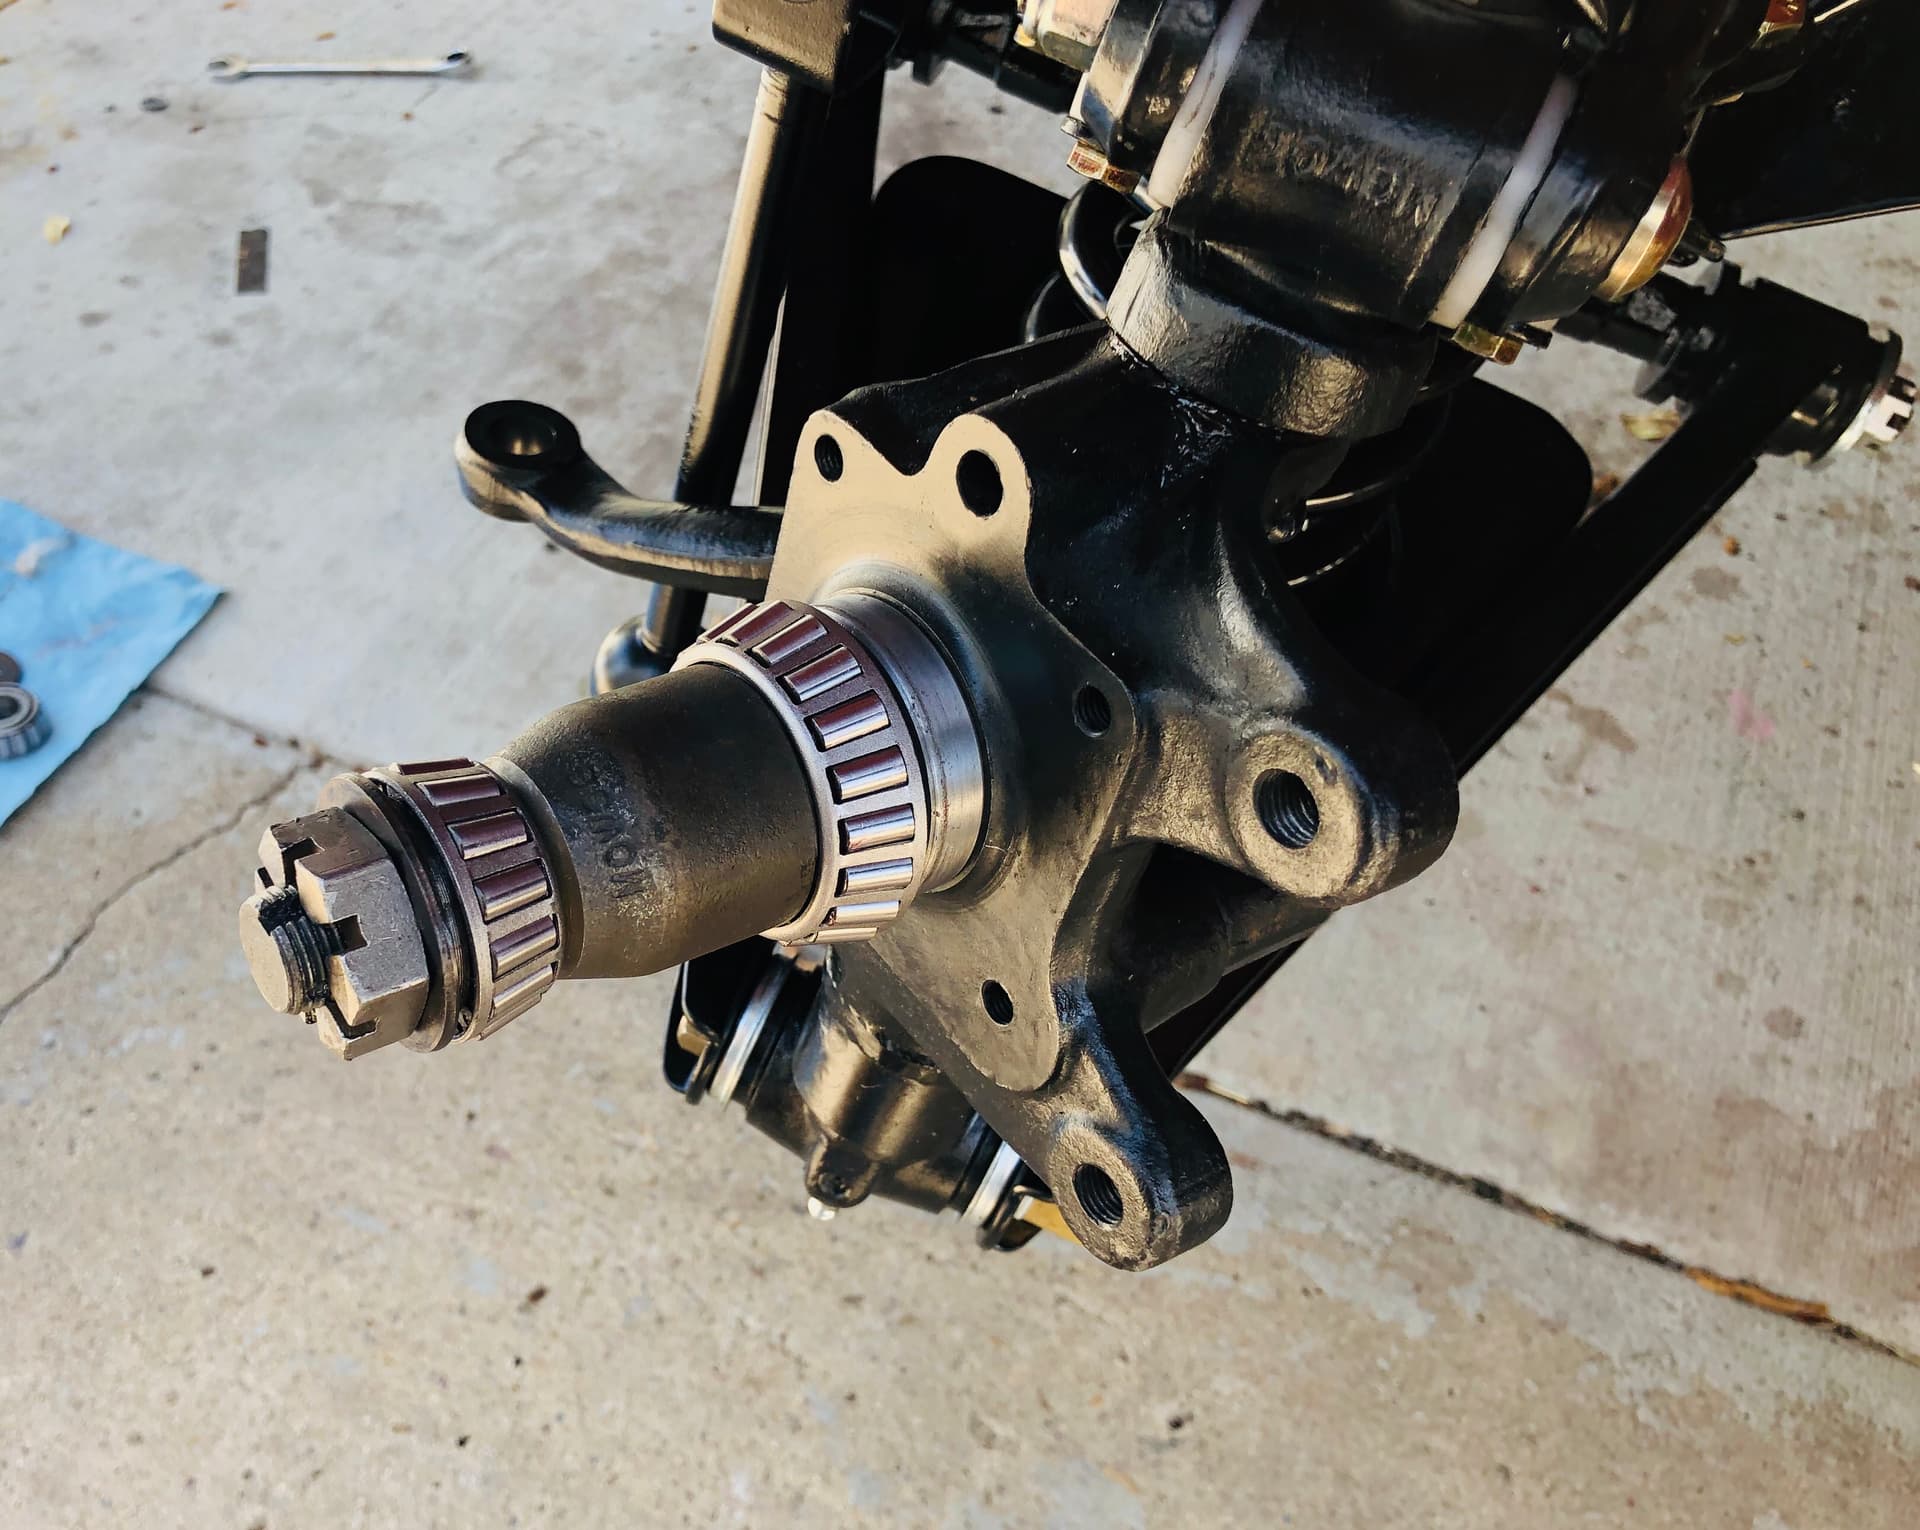
Finally getting around to installing these bearing spacers that I bought from Denis Welch in the UK (part no DWR JSUF141-3). These fit inside the hub and with shims allow you to safely put some pre-load on the front wheel bearings. They are so beautifully made they could be art. They will first stiffen the stub axle, and second, hopefully stop the bearing from turning on the axle and wearing it out. Some photos below show the basic set up - inner and outer bearings, with a shim between the front bearing and the spacer. Other photos show wear from spinning on the stub axle and wear on the outer washer from the bearing turning against it. This is probably hard core racer stuff, unecessary on street driven cars, but it’s something to do during these times.
Good looking piece of kit: I made similar spacers like that for the front ends of Formula Vees to stabilize the ball beatings, and stiffen their spindles.
I didn’t replace the axle - probably should have. I expect the tension on the spacer will stop the bearing turning. I didn’t mention that with the spacer you now tighten the nut down hard so hopefully nothing moves.
Hi John - yeah that’s them - they print the other letters and numbers on the product which seems confusing. The shims I used are called Arbor Shims and are 3/4 by 1 1/8 inches in size. Mine are Precision Brand (US company out of Illinois) low carbon steel UPC25180 for an assortment of thicknesses, or 25166 for .005 thickness. I used thickness of .022 and .021 made up from several shims for the left and right installs. Finding them in Canada proved difficult. I only found one place that sold them - Transmission Supplies in Calgary. McMaster Carr has them in various sizes and hardness in the U.S. I’m thinking that harder than low carbon steel may be better - time will tell.
I had my Welch spacers sent by Royal Mail or DHL - can’t remember which, and they were here in about a week. Can’t remember the exact cost of shipping - it’s was under $20.00 as I recall (and I shipped 4 for 2 cars).
Thanks Terry. I’m lining up rainy day winter projects.
I think I’ll spring for a pair. I know it’s going to vary car by car but do you recall the shim thickness you used on each side? also how much pre-load? I’m just looking for a starting point.
EDIT: Just ordered a pair, 69.85 GBP, about 96 USD.
Yes - I used .022 and .021 for shim thickness left and right. I wouldn’t exceed 45 ft lbs for torque because of the flat spot (it’s only 1/3 of a bolt diameter) but otherwise I think you strive for the highest torque up to that that will allow you to insert the cotter pin.
The object is to remove all fee play in the bearing and have a small amount of pre load. So you start with a .025 or so shim and see if you have free play then go from there. Thicker shins push the bearings farther apart etc. Substitute shims until you get a slight drag on the rotor that’s more than drag from the grease in the bearing.