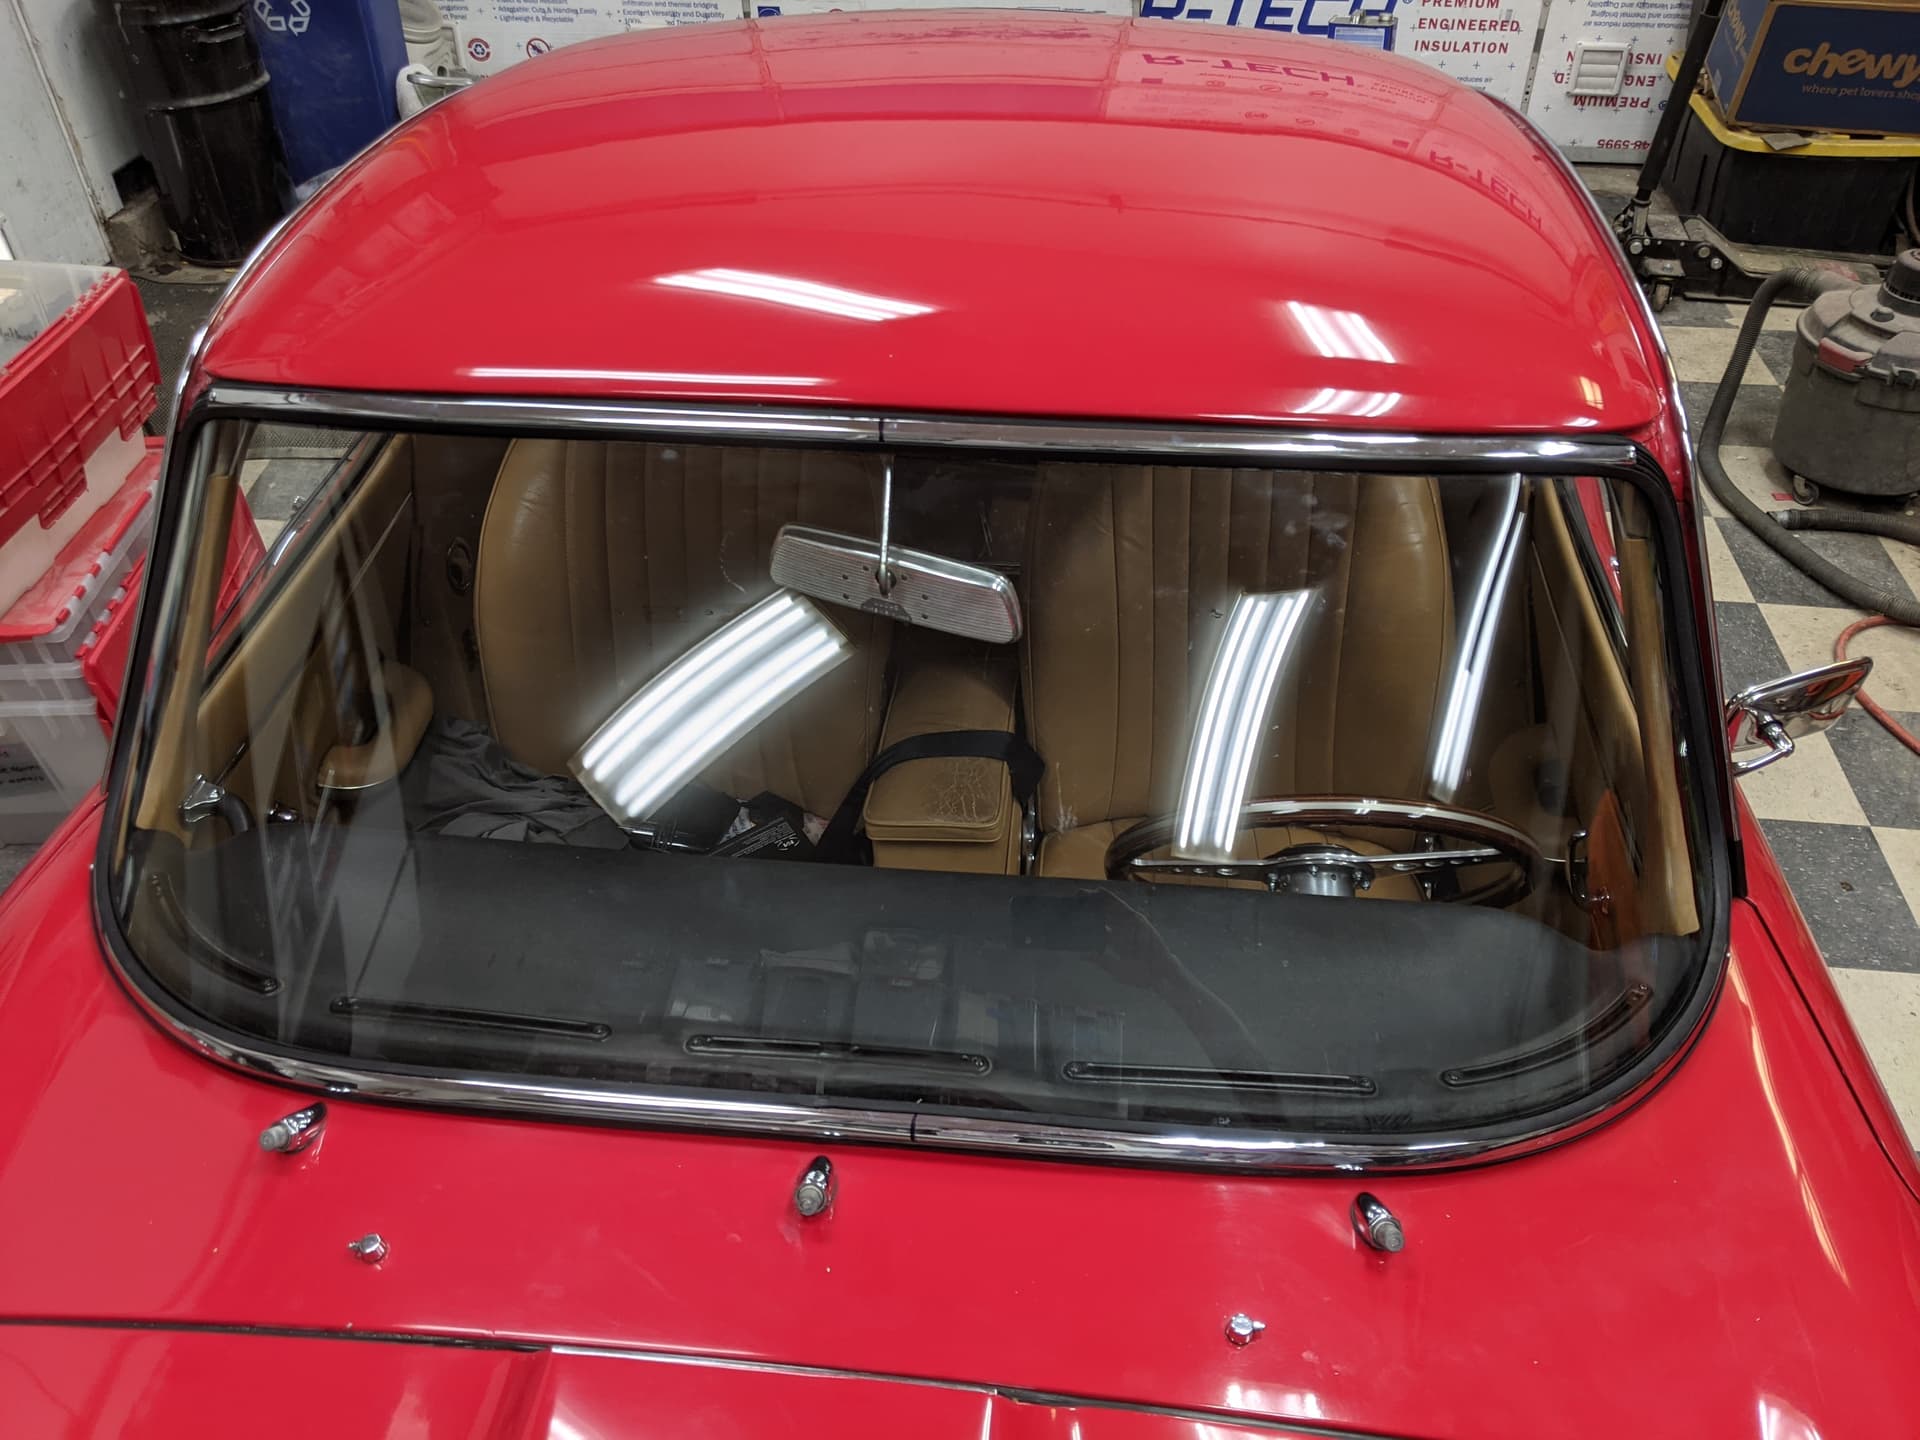
A few months(!) ago I had a new windshield seal installed as part of some other work I was having done on the car. The shop asked if I wanted to save a few $$ by installing the trim myself, so like an idiot I said “Sure!” Well, I’m at a loss as to how to actually get this done.
For the top and bottom pieces, it appears to be pretty straightforward: get the trim fitted with the help of some 3M weatherstrip adhesive, tiny screws, and a lot of 4-letter words in-between.
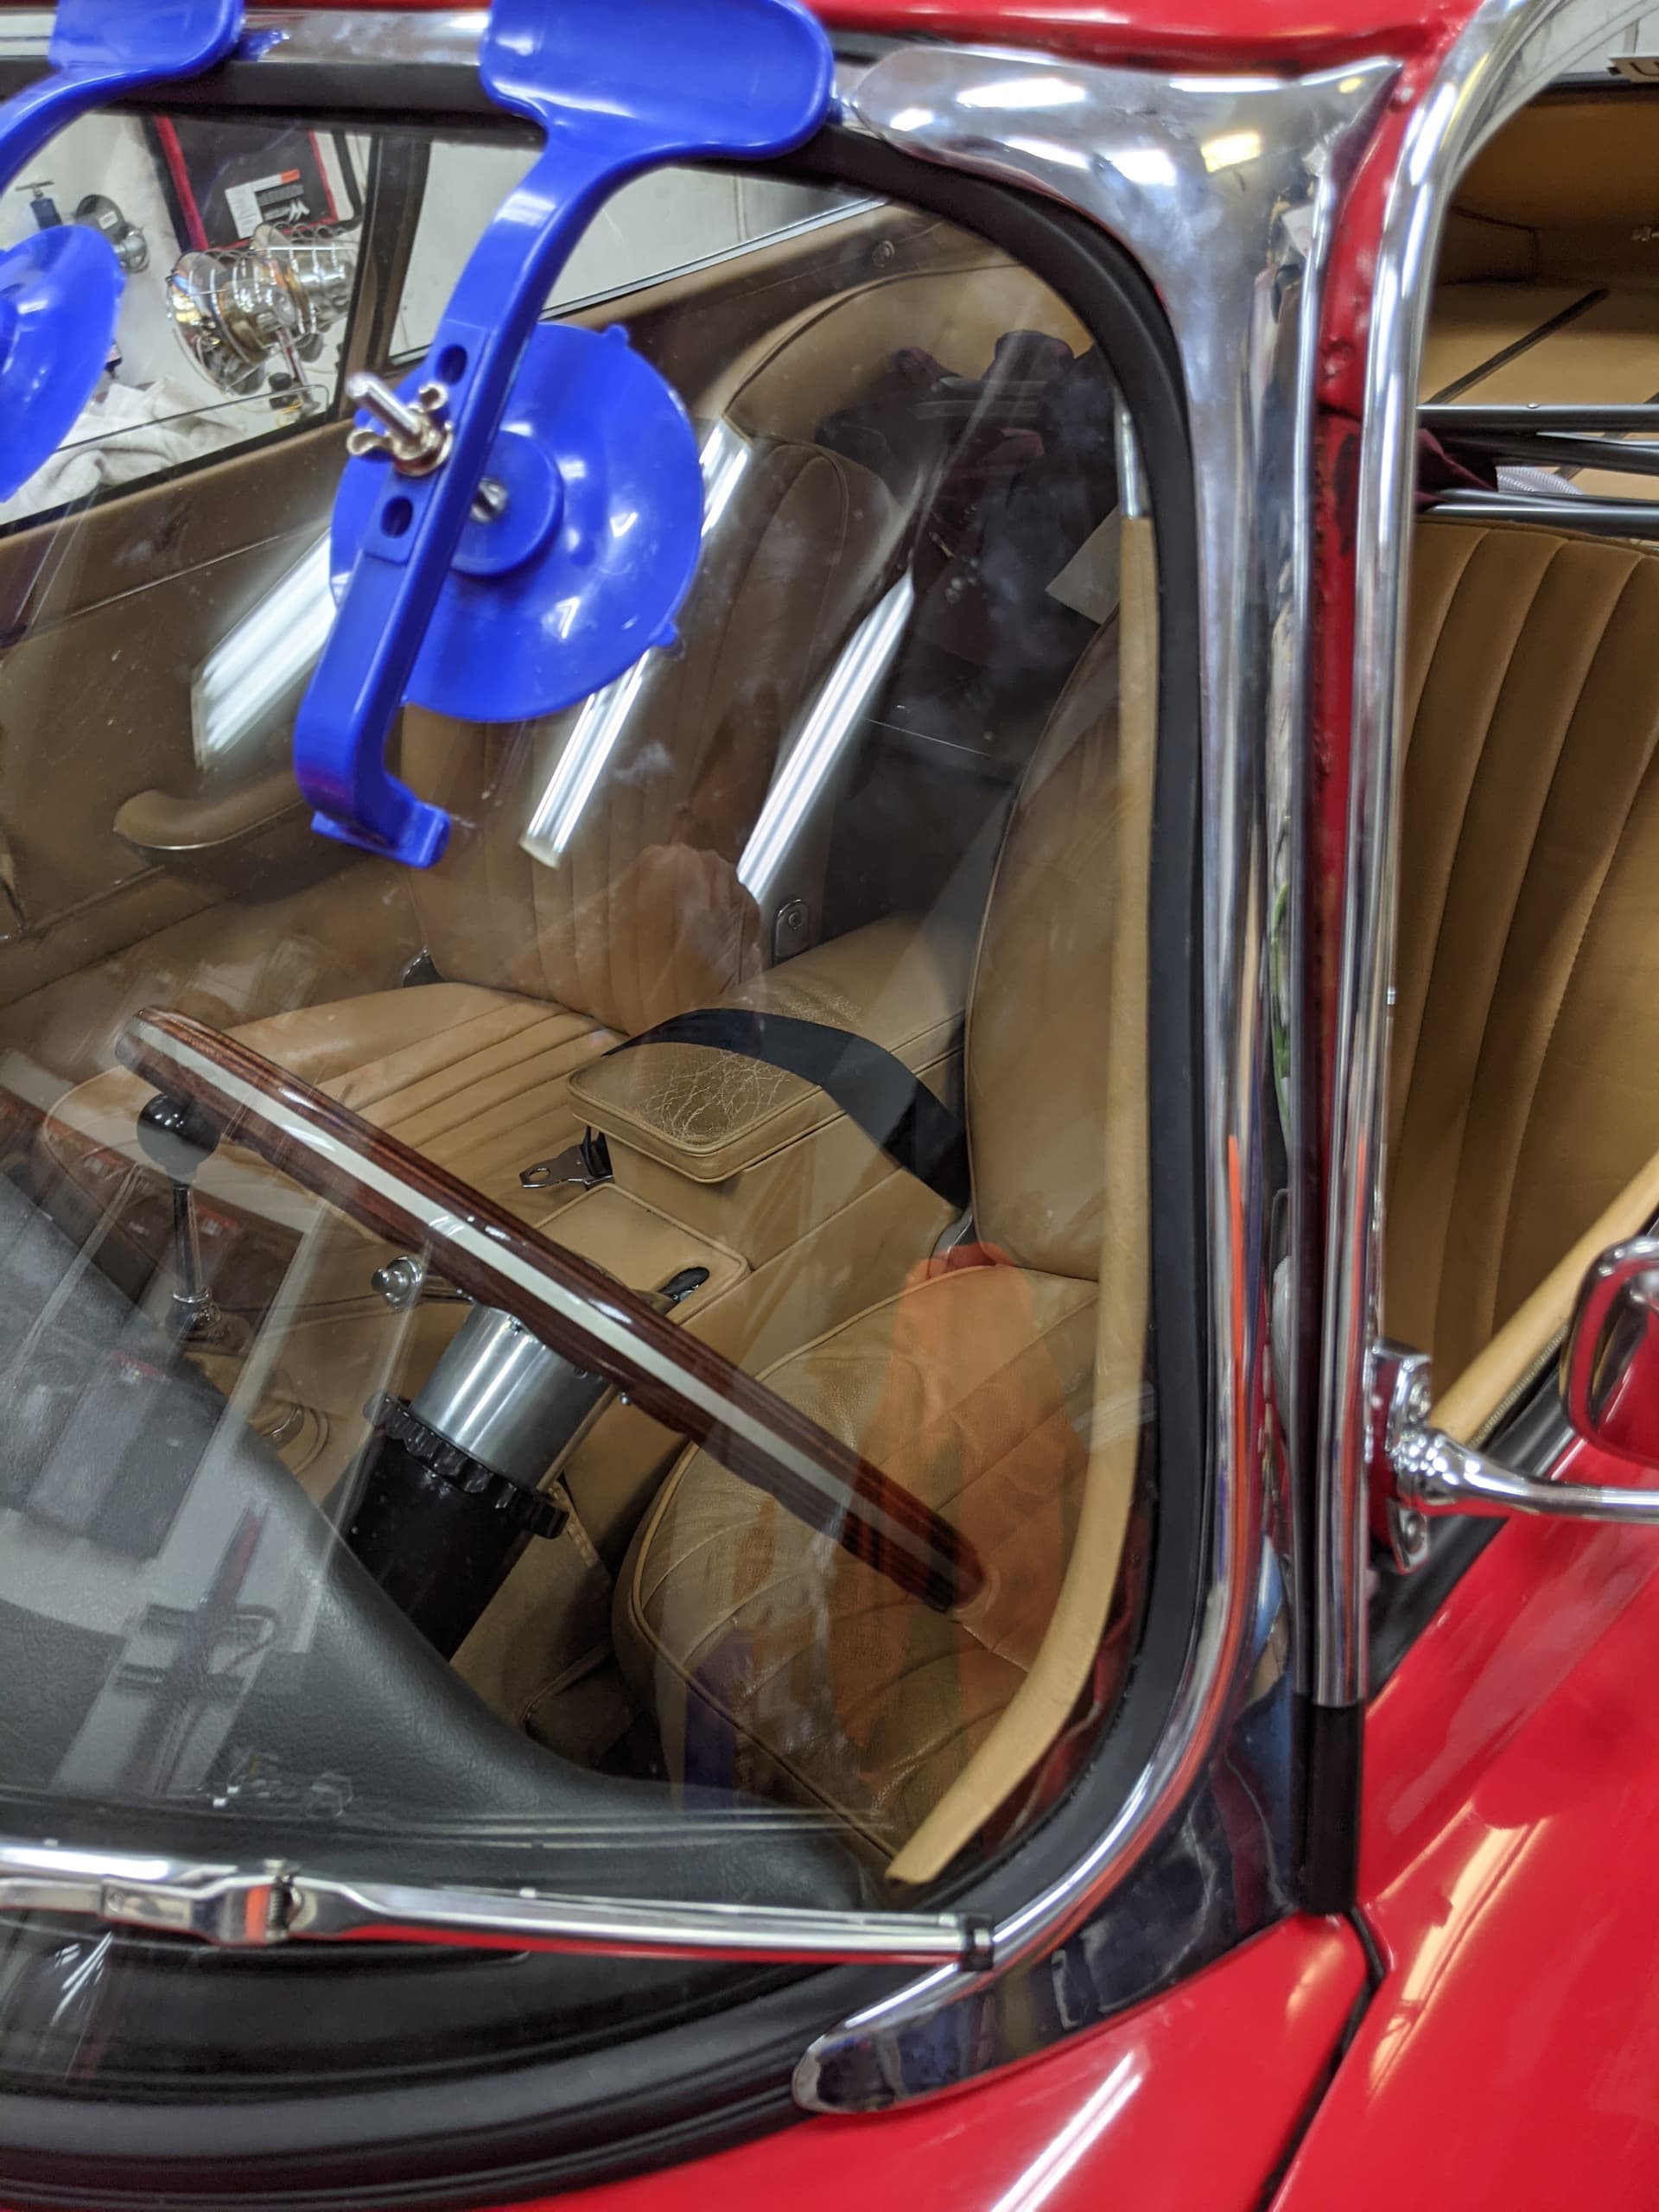
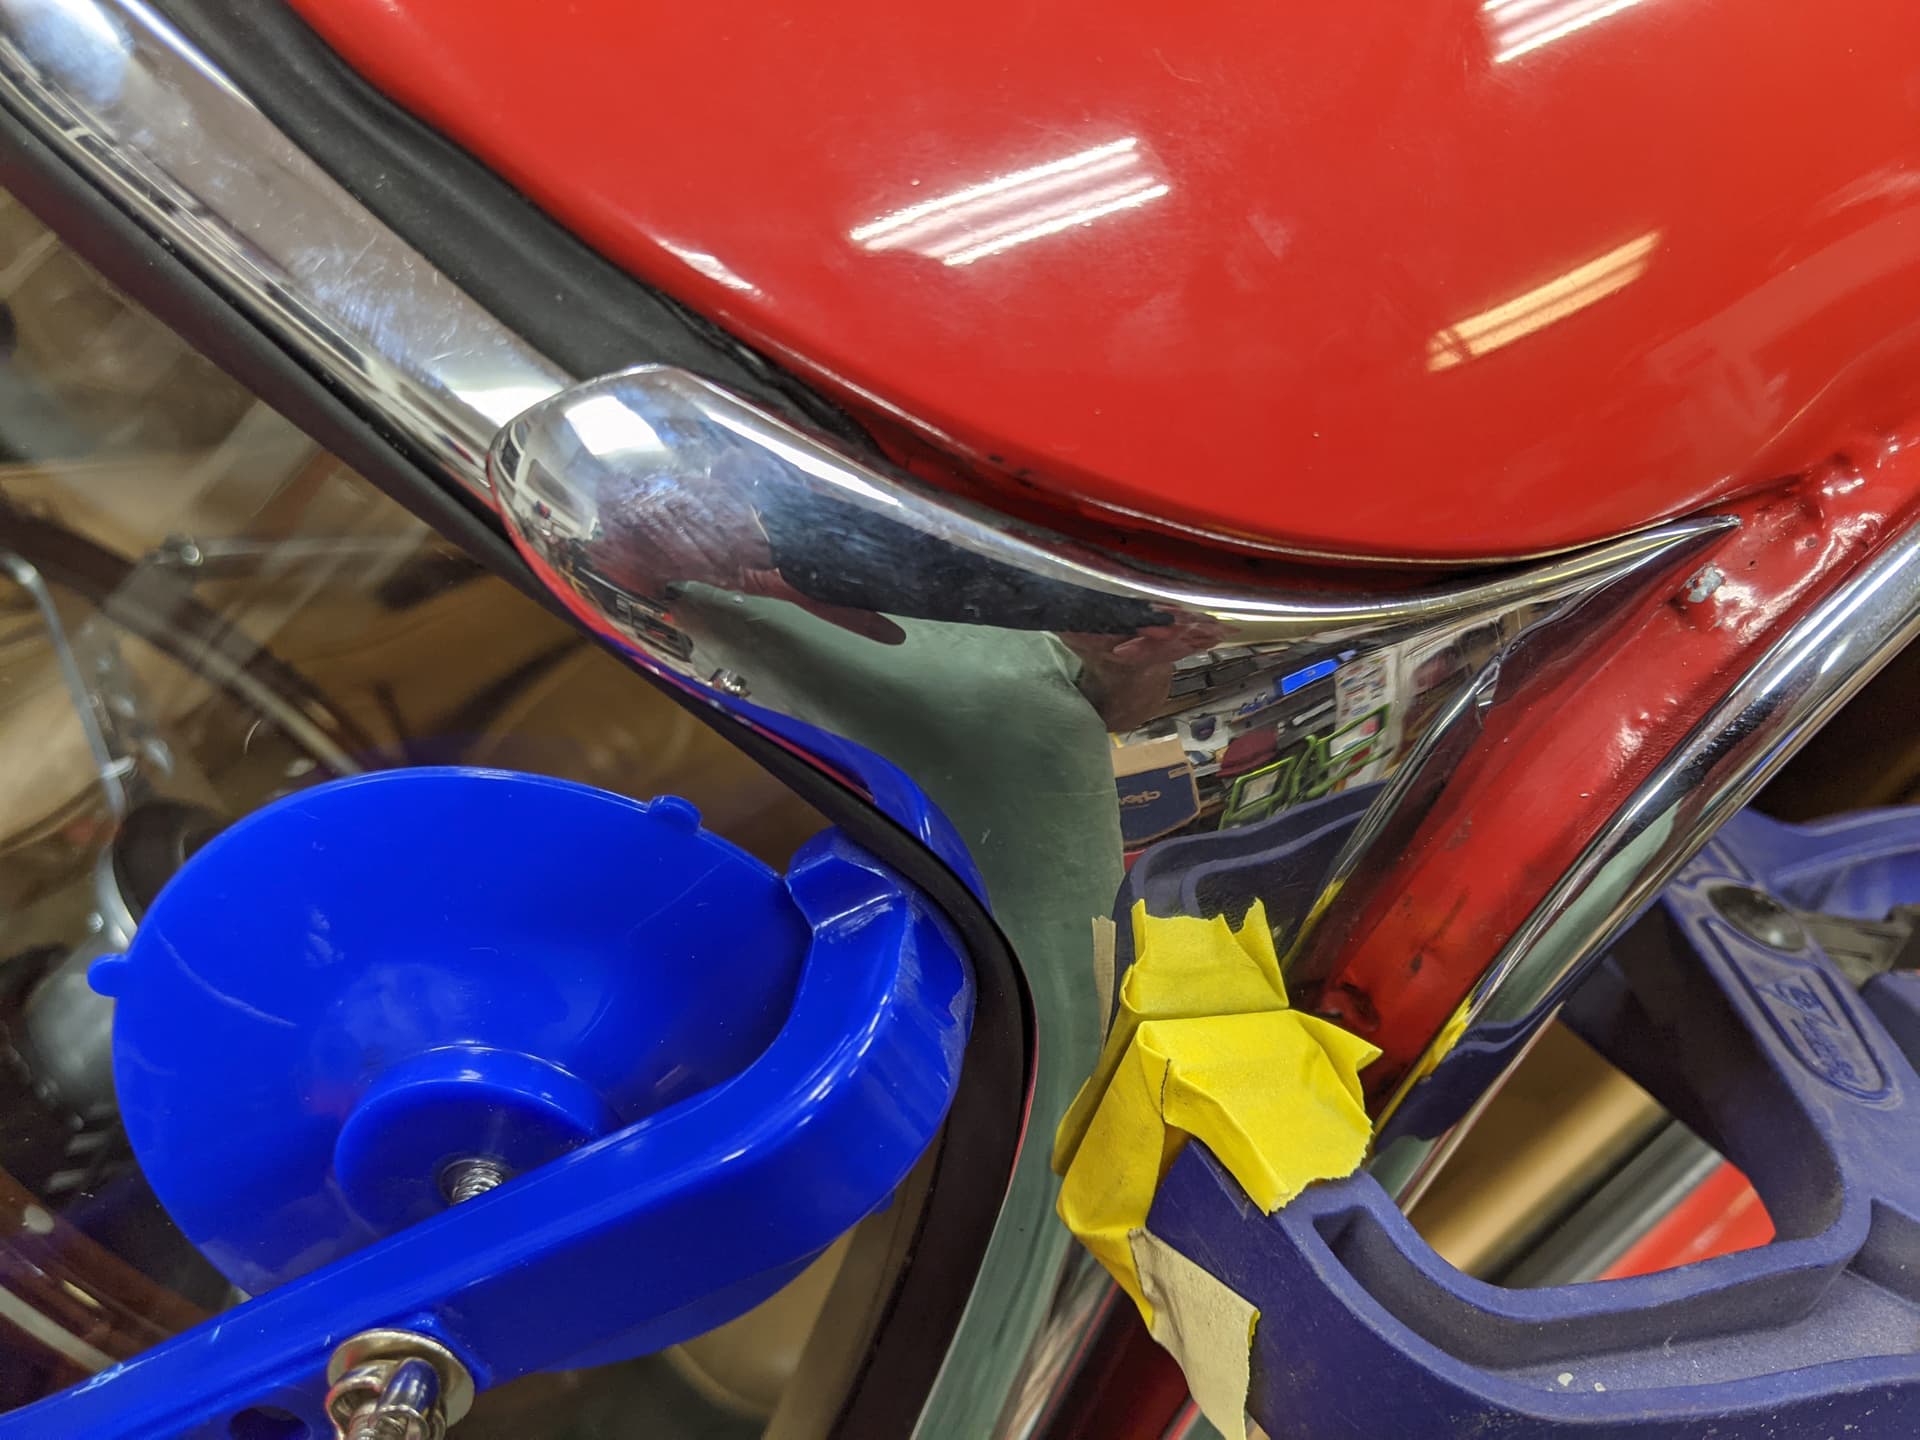
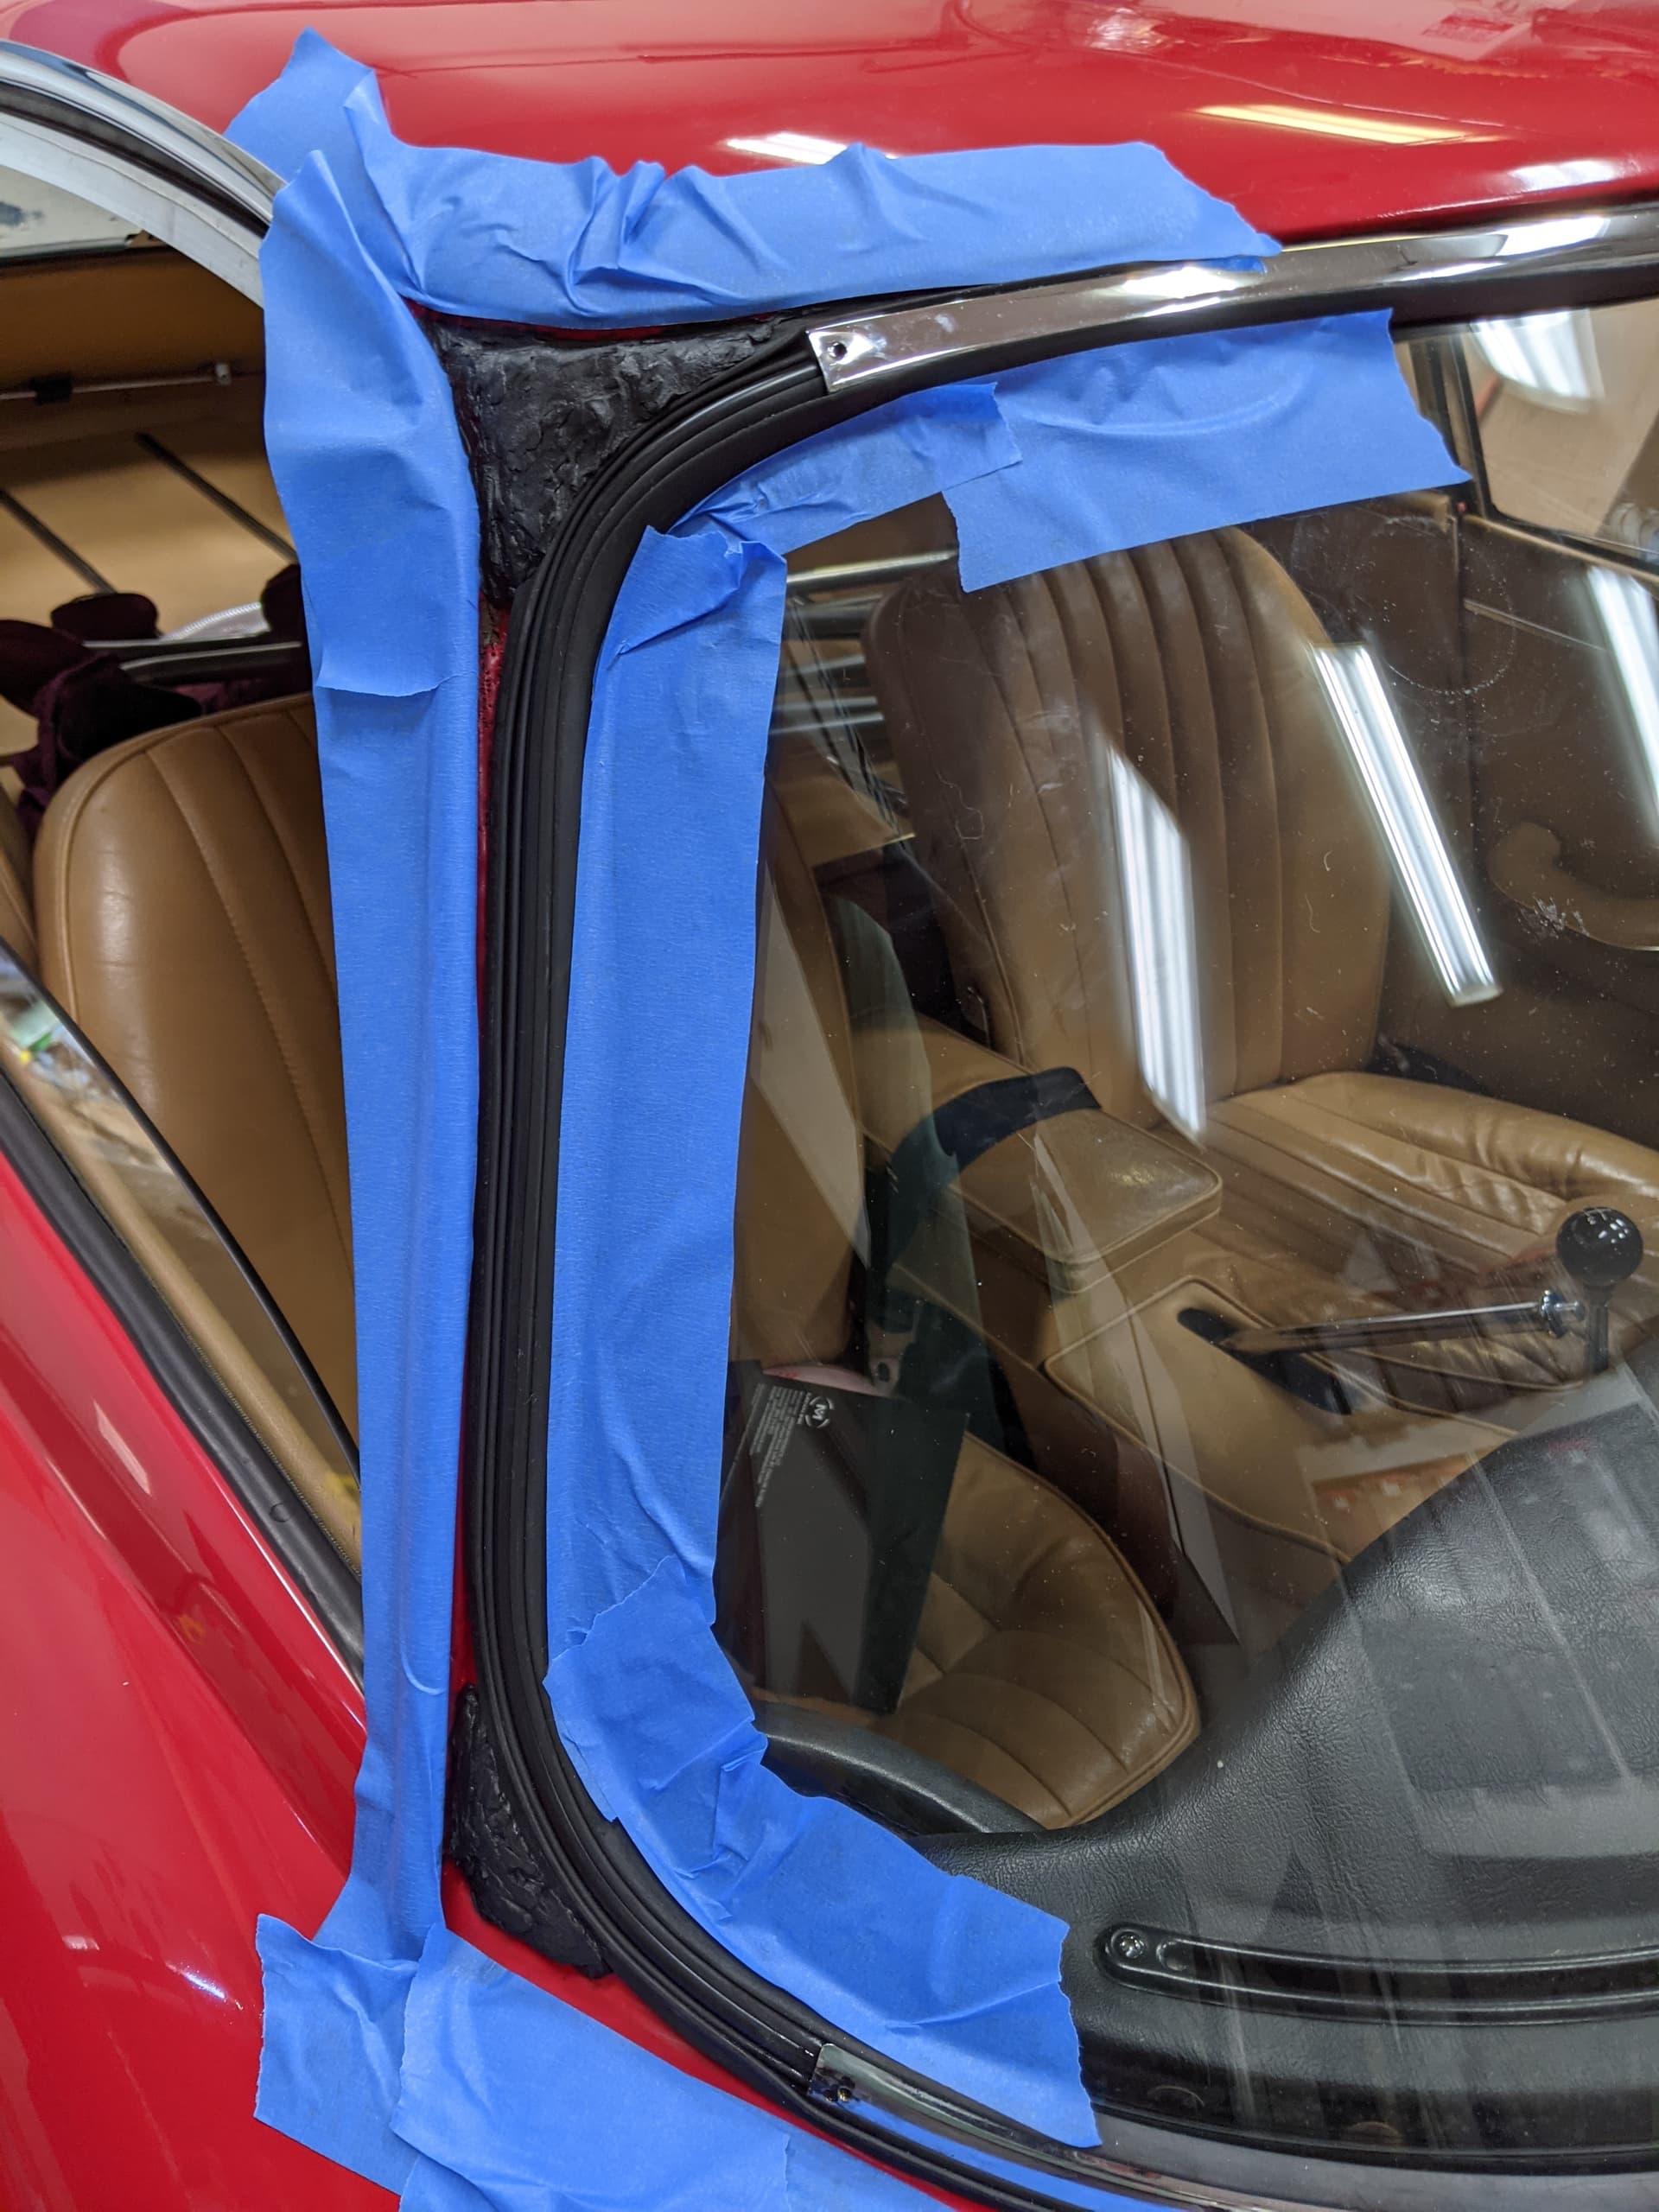
For the side A-pillar pieces, it’s not as clear. It appears that part of the piece tucks under the rubber trip, and then the rest is held on with a lot of adhesive and a prayer.
My car has an aftermarket windshield, aftermarket seat, but original chrome trim, which was in place before the windshield was removed. The side pieces do not match the curve of the rubber very well.
I bought a set of Sealey clamps based on a google search, before I even found people using them for this, so that was just a lucky guess.
So, any other words of wisdom before I dig in?
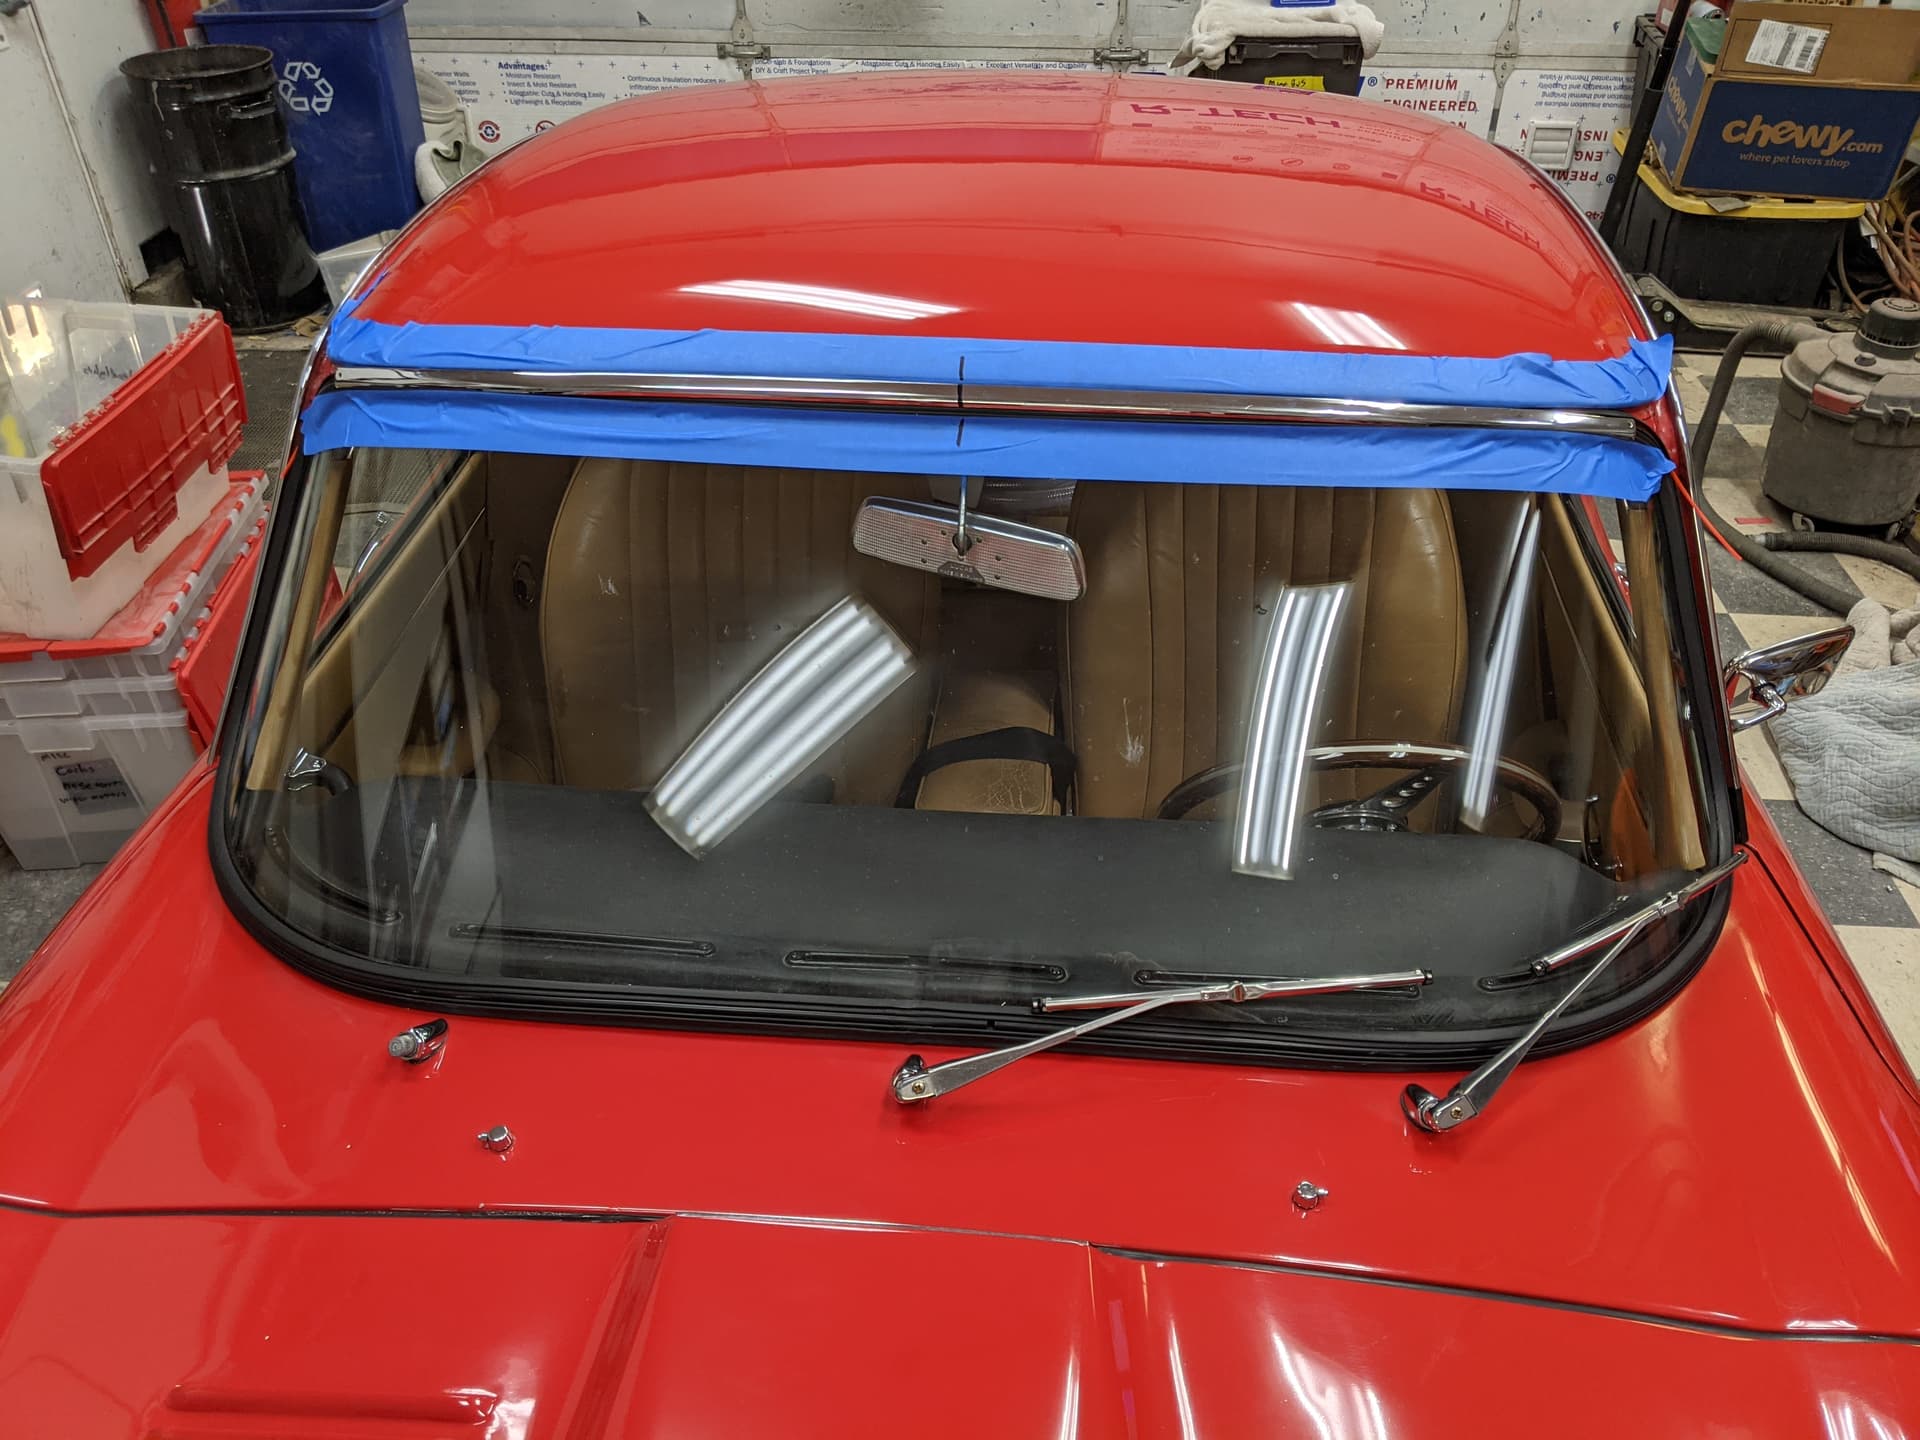
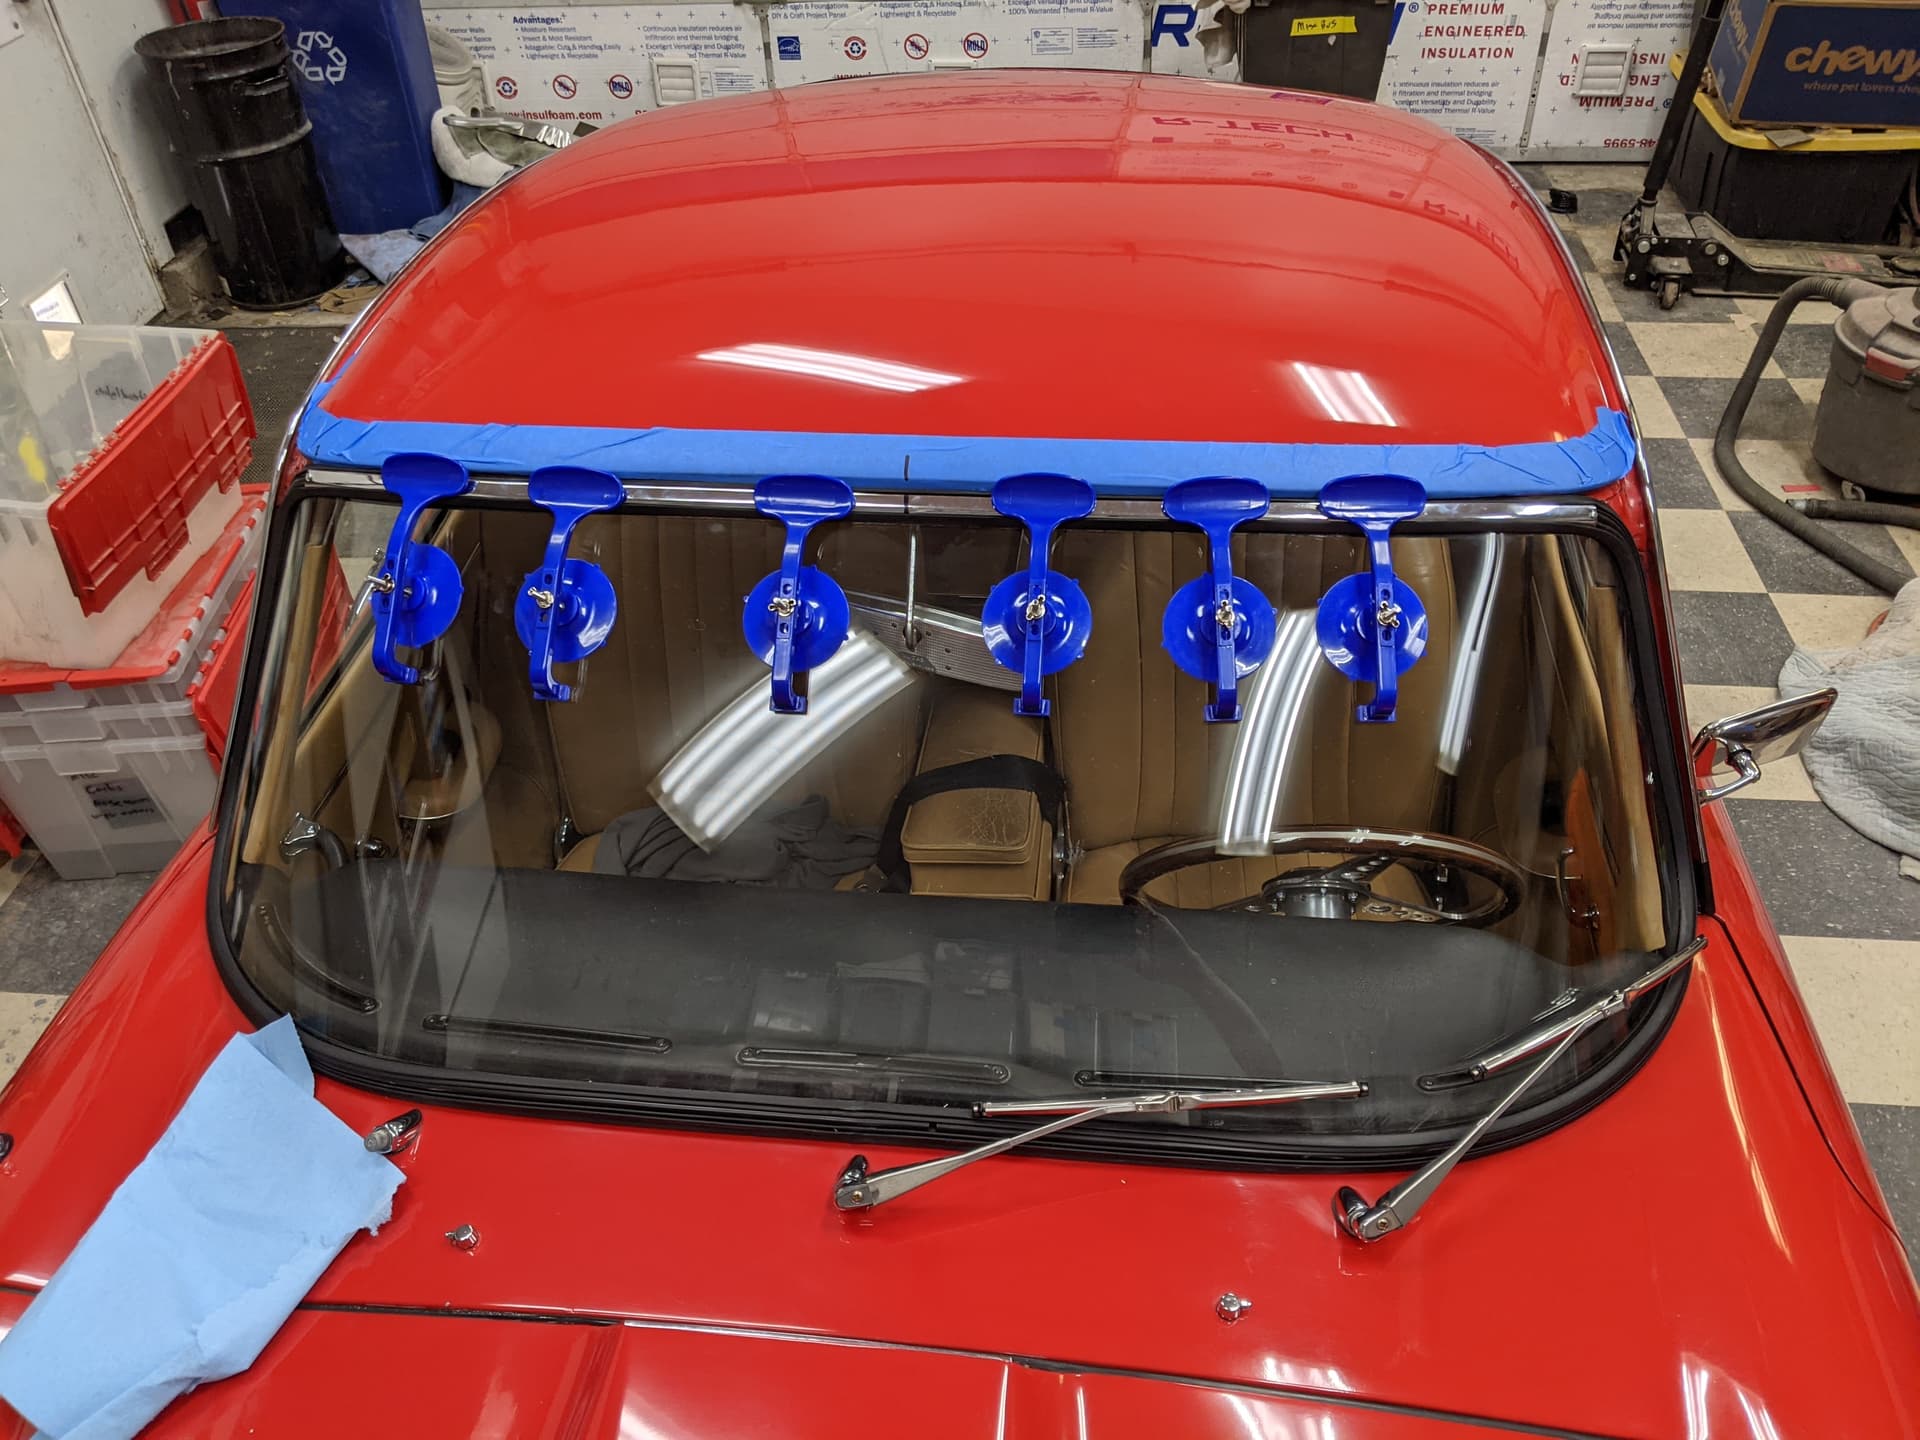
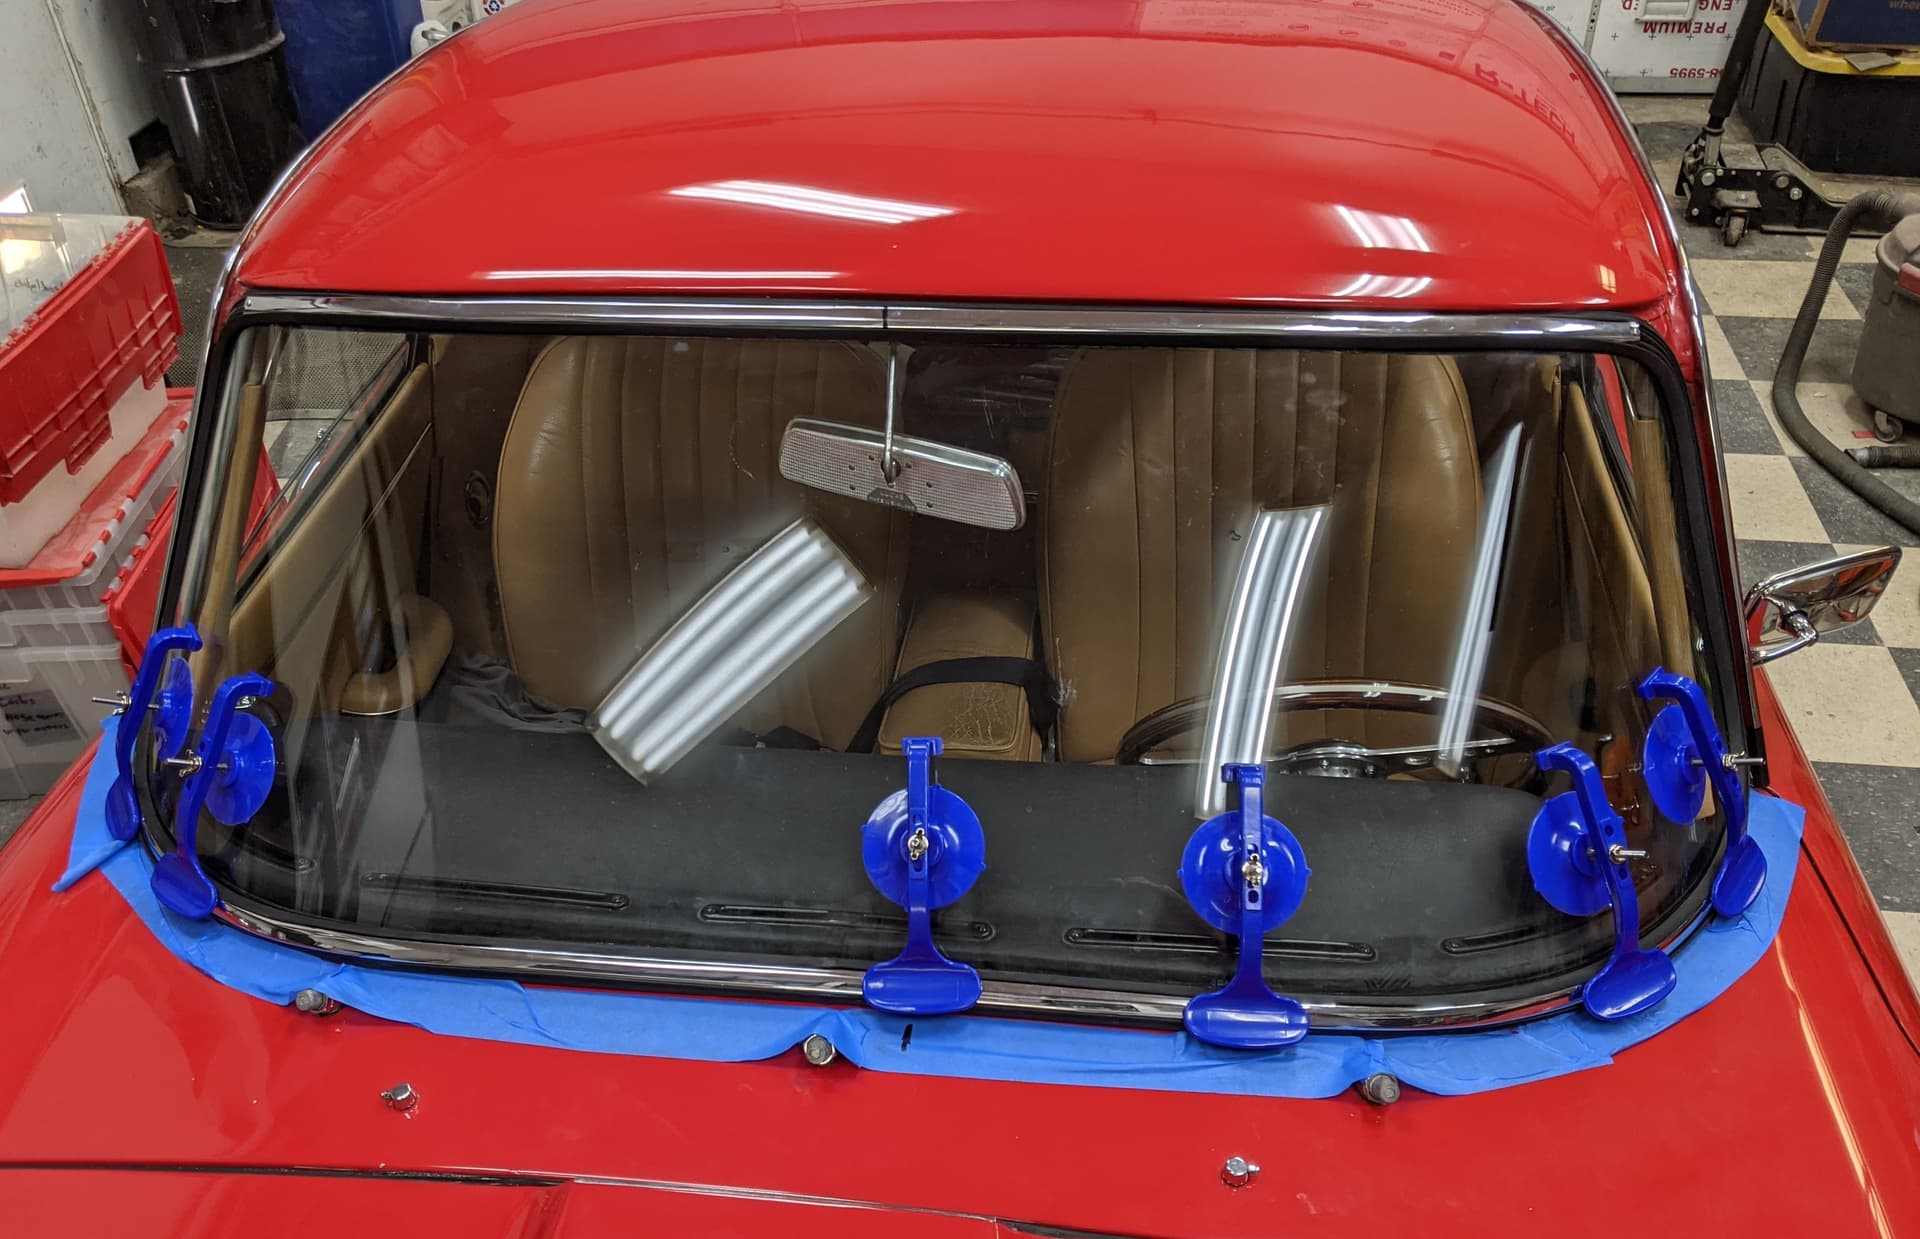
I did some experimentation with the top strip and the clamps.
Thom, It looks like you are well on your way to getting the front trim installed. The clamps you are using are perfect for the job. Here’s a series of photos I made when I did mine. It wasn’t an exact fitment as the side chromes were different on each side.
Could you loosen the locking strip on the upper corner and shove the corner of the seal outwards towards the chrome? It will probably need to stretch so you might need to remove more of the locking strip than you’d like.
I recall having to do something similar on mine to make the originals fit a new screen. In my case the top run was too low relative to the side trim. My installer used a nylon/polypropylene or similar rope to pack out the rubber from the edge of the glass by the amount required, which permanently reshaped the area so the seal contour matched the trim. Worked a treat, still working over 20 years later…,
I like the clamps. Maybe you could post a url for where you bought them.
You are lucky you have the original chrome strips.
Some of the chrome strips come with holes at the end. I have had some success using sheet metal screws at these locations. I needed to grind the heads down so that just a smidgen of screw slot was left, in order to keep the screws from pushing up the side trim.
Here is an article I did. There may be some tidbits in there that you can use.
Yup, that’s what I’d do, insert something into the rubber channel. Unfortunately, that part is already done and it will need to be removed again to do that. I suspect it’s the only fix though. He could nudge it away from the glass, but tension will pull it back soon enough. A shim would be needed to hold it away from the glass edge. It could probably be tested first though by removing some lock strip, spraying with soapy water and pushing against it with plastic tools. If it works then that corner of the glass will have to be popped out…bummer.
Andy, What you see is a bead of 3M Black Super Weatherstrip Adhesive. Unfortunately, it doesn’t smooth out very well and I found a piece of black rubber beading the proper size to glue in the gap for that top curve. The black adhesive has done great job of holding on the side chromes so far. I used it fairly liberally under them and kept them securely in place for a couple of days using those blue clamps. Perhaps something like dumdum would work better to seal the corners as it might smooth out better.
Today I started on the bottom piece. I didn’t take pix, but first I ran a piece of weedeater cord in the channel and left it for a day or so, to kind of “open up” the rubber. Today I did a test fit of the lower trim, and after about 45 minutes of wrestling with it, I got it in. Now I’m reluctant to take it back out and glue it because I don’t know if I can get it installed before the glue cures. It’s actually sitting fairly nicely in the channel.
Yes, looks good. I did not use any adhesive under my upper or lower windscreen chromes. As mentioned in a comment above, I used a lot under the side pieces and they help hold in the upper and lower chromes.
I installed a couple of screws in the ends of the trim and then removed the clamps and tape. I’m going to leave it like this for a few days to let it settle. It’s interesting how much the seal will move against the windshield.
The passenger side trim piece looks like it will be fairly straightforward, but the driver’s side is going to be a pain.
I chickened out and didn’t trust the lower strip to hold without adhesive, so I added some to the extreme 8" or so where it is most likely to pop out.
While that is curing, I started mocking up how I’m going to attach the side pieces. My biggest question is what sort of product to use to attach them, since there’s such a large void behind the concave shave. I’ve seen “dum-dum” eg https://smile.amazon.com/3M-08578-Black-Strip-Calk/dp/B000PEZ1L4 but I don’t know if this is appropriate for external use, and would it have enough grab to hold the trim pieces on. I also have a significant gap on the driver’s side between the windshield seal and the rain gutter. I’ve thought of “hiding” this with some flat-black paint; I’ve had good success doing that on other cars where there was a gap due to a shrunken dash.
Installed the easier of the two side trim pieces this morning. I used some 3M strip caulk to fill the void at the top and bottom, and then 3M weatherstrip adhesive on both the trim piece and the windshield seal. Clamp the hell out of it and hope for the best.