Just to focus my engine strip down questions:
Inside this looks pretty good. I’ve attached photos of no.1 piston, and one of the cam lobes.
No.1 piston is domed (SE engine), and has markings for ‘front’, ‘G’, ‘EH’, ‘1’ and ‘6C’. No mention of part number or size. I’m pretty certain the ‘6C’ is not 0.060 but maybe a grade marking or similar. Can anyone advise? The bores look very good with a minor step at the top and no scuffing or ring damage as far as I can tell.
The cam lobes look pretty good, too. I don’t know what the aftermarket cam situation is but I’m very happy to stick with these if they are considered useable. This is one lobe - all lobes are in the same condition, no chips, scuffs etc. Still a pronounced nose on the lobes, I’d say.
Well… THAT cam lobe looks perfectly usable, and assuming the other 11 look as good, and if the ring lands measure out within specs, a ball hone, cast iron rings ((DO NOT use chrome rings), clean the crank, and new bearing shells should do ya good.
The letter G on the piston is a grade related to finished bore size; there were F G H J and K. G was for 3.2677" to 3.2680" or 82.999 to 83.007 mm bore.
The number 1 is for cylinder no. 1 (rear) and the dome top identifies it as 8:1 compression ratio, which most of them were.
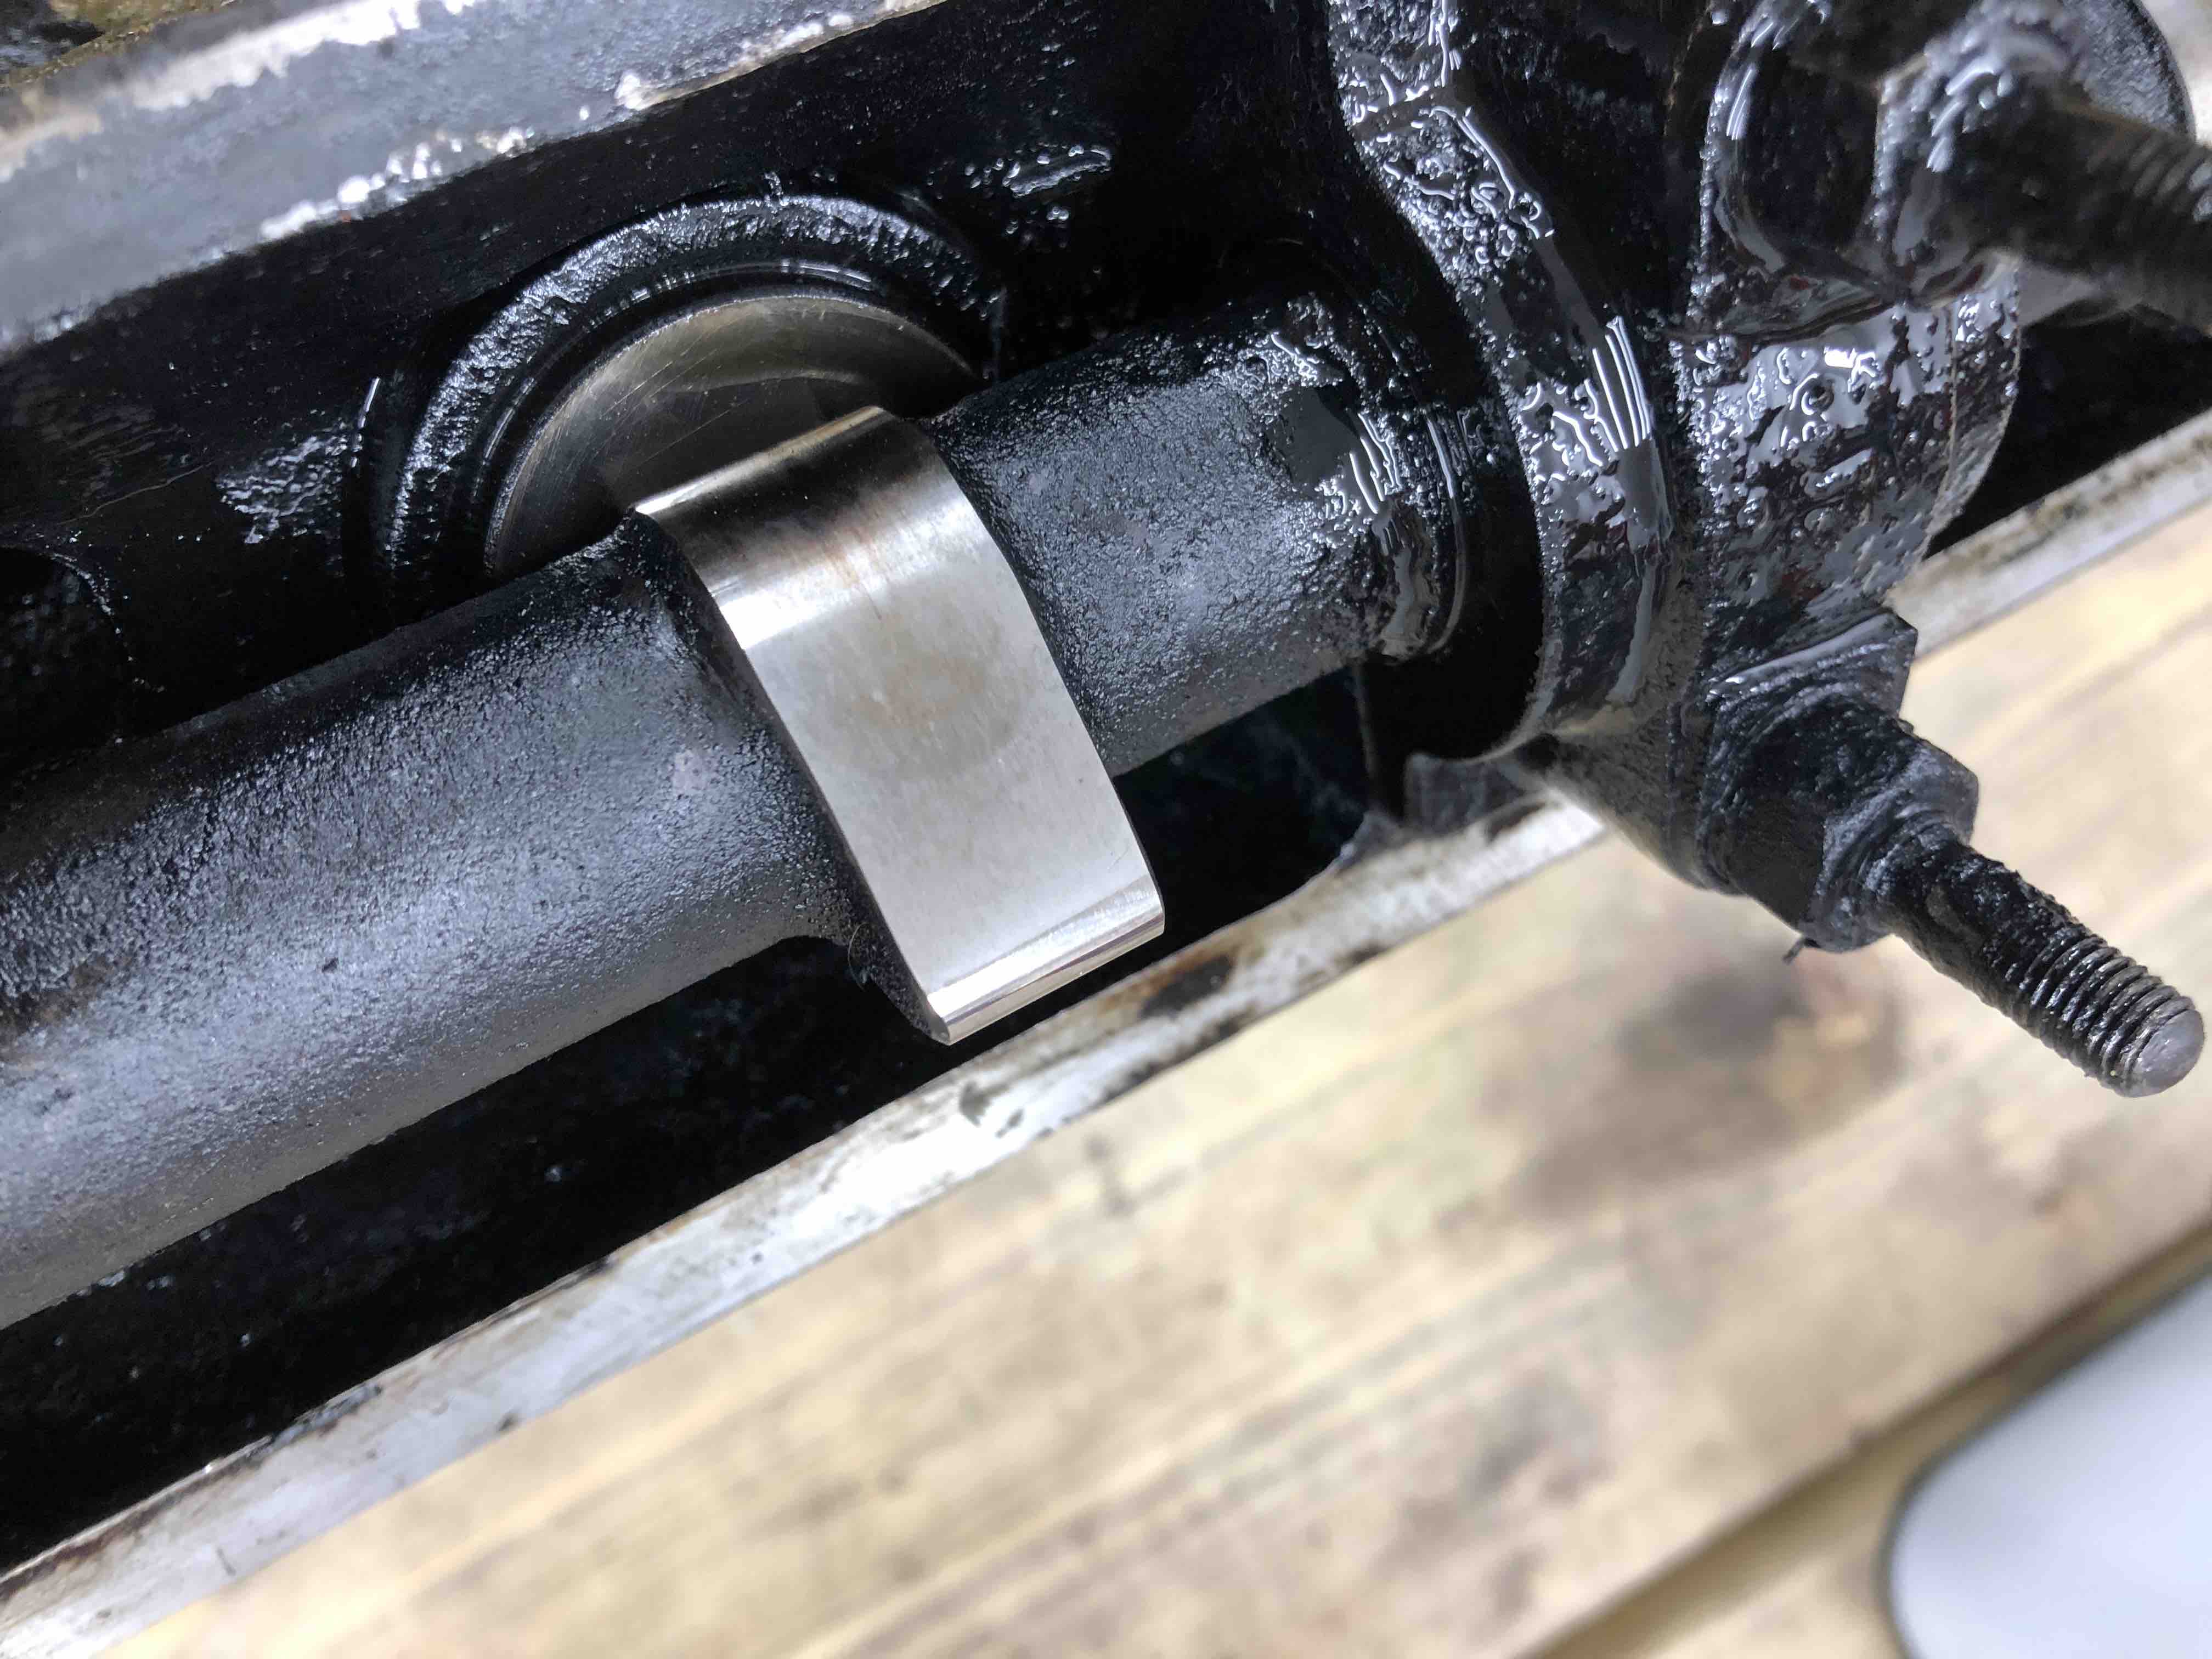
We had a discussion about cam wear a few weeks ago. You might measure the peak to foot and side to side and the difference should be about 3/8" and should all be about the same. We don’t often hear of cam wear but I did find one.
There are some score marks in that bore. If they don’t hone out I’d be going oversize and bore. Also a fair bit of oil sludge deposit on the cam mounts so the engine will need a good clean out.
Thanks all - from what you say, Rob, it seems the ‘G’ indicates that this is still std bore. As to the score marks Matthew, it’s difficult to tell from the photos. I haven’t turned the crank over yet to check all, and a lot of what you can see is actually lines of crud - I need to wait until the engine’s out and I draw the pistons, then I can clean it properly and mic the bores for ovality etc. That said, I’m assuming at least a hone, more likely going to first oversize.
on the cams, on the shaft, sprocket end, look for TINY part #, C5717 C5718 if 3/8 lift, C2444, C2237 if 5/16 lift, hard to see,light has to be right, magnify, Back of cam to lobe should be 1.425 on the 3/8, 1.36 on the 5/16. The lobe shown “looks” fine. shaft journals are 1.0 (+/- .001) Cam bearings usually do not wear much, but are easily replaced and not costly, You do know that the cam bearing caps are all numbered to match numbers on the inner head lip, and MUST be returned EXACTLY in same place and orientation,must match number on cap to head lip, Inspect now,before removal and make a note as well, this match is ESSENTIAL, The Cap nut torque is small,132 in lb is Coventry West recommendation, but no more than 175 incl lb (11-14 ft lb) but use a quality inch lb, and do not over tighten,when it clicks once,stop, BTW…loosen and re tighten cam cap nuts evenly and slowly across all cap nuts as the cam is under some pressure from lobes that are down, cams shafts are surprisingly fragile, With that much sludge be sure to clean out the central cam oil way. It tappets (followers) are ok, not scored, fine to reuse in same place, if replacing see SB105 as early ones are sized with a letter mark, Wish luck and enjoy the process, Nick
Thanks for the numbers, Nick - C5717 and C5718, so they’re correct for the C-type head I hope.
Where can these SBs be accessed? One of my cam followers has a slight ‘pattern’ on the base, another has what might be a very fine hairline crack on the outside. It’s not reached through to the inside but should be replaced.
Edit - just looked online and only one size is sold. How would that work?
the cam followers are easily replaced, not costly, can be done as needed, no need to replace all, do micrometer the old, and note, then the new and note, will be helpful at some point to know. So,early, the cam follower guides had a size, and the letter for the size was stamped in the oil alley near the guides, and the early followers had a corresponding letter size, A, B, C, Later these sizes were made uniform and no letter stamp or etch, BUT Service Bulletin 105 deals with what follower to use IF the sized original guides are in place, AND you have an old follower that does have a letter grade etched, Later tappets from the change onward have no etched letter and fit all… As to a source for a Service Bulletin set, XKs San Luis did have a set, tho some hard to read, and some missing; there may be other sources, Some on this list have it, as do I, but mine is inaccessible to me til late Spring, By the way, cam bearing caps were not installed in the same orientation at the factory, that is,the C number may face one way or another,so use ONLY the small stamped numbers on the edge, to match the numbers on the head inner oil galley lip, and don’t forget to clean the cam inner oil way, this is also the time to install the follower guide hold down kit, Nick
Thanks Nick, - follower guide hold down kit? There weren’t any retainers when I removed them - what is this, please, and what does it entail?
Edit - OK, found it on some of the supplier sites. Drilling and tapping to fit. Is this a common modification, and is it needed for a car used on the road only? My block and head are matching numbers to the car and it’s a C-type head. Not entirely sure I want to start modifying it this dramatically. What is the general opinion for normal street use in the UK?
When I purchased my XK120 DHC back in 1963 you could remove the oil filler cap and watch the guides in view rise up slowly until they connected with the cam and were tapped back down again! My guess is that at some point during the car’s first ten years of life (during which it was clearly ‘used and abused’ as they say) it must have overheated horribly causing the problem. It is my understanding that the items are originally sweat fitted by putting the head in an oven. Anyway, I pulled the head and a local machine shop rectified the problem. I have not had a problem since, after heaven knows how many miles. For normal street use (I am in Canada) I personally would not bother with the modification.
The hold down kit was developed in response to a problem with the 1970s era XJ6 which would drop valves when severely overheated.
There was poor quality control along with union problems during the Leyland era that were blamed.
This was also the era which saw a lot of Chevy 350 lumps for the same reason.
We have not seen this failure much on the 1950s-60s era engines.
Thanks Rob, I recall seeing it when this video link was first posted a little while back and recall the chap involved was wearing a pretty hefty pair of gloves!
And don’t forget to clean out the oil passages incorporated into the camshaft drive plates(serrated plates), which feed oil to the underside of the chain sprocket(s).
I have come across similar devices, such as bolt-in spider kits to allow the use of a roller cam in a pushrod V8. Still not entirely sure I want to drill the head so will pass for now.
I have seen evidence in a head that an exhaust guide did lift up,it is nicked, by the cam and the bits of metal no doubt went into places they ought not, It is almost always exhaust, because of the heat, The manual explains how the head is heated, when guides are to be replaced, As Paul says,easy,so that is not the issue,just whether you would do it to your head, I suppose that IF,the guides DID lift,damage to the head/engine/bearings et al may be more than a few tiny tapped screw holes, (the hold down itself "could " be removed at any time, leaving
The chap in the clip is fitting the valve seats, not the tappet sleeves.
Love the health and safety. Flat cap and a tee shirt, and he takes his gloves off to do the job once the head’s out of the oven!
According to the credits, the narrator is Deryck Guyler, but it doesn’t sound like him to me.