well I see why the bearing spun on the shaft. Looks like it would’ve been a bumpy ride for the bearing.
I don’t think the picture shows it very well, but the outside bearing race doesn’t look like it was pressed all the way in. because there’s about a 3/32nd of an inch lip between the race and the housing.
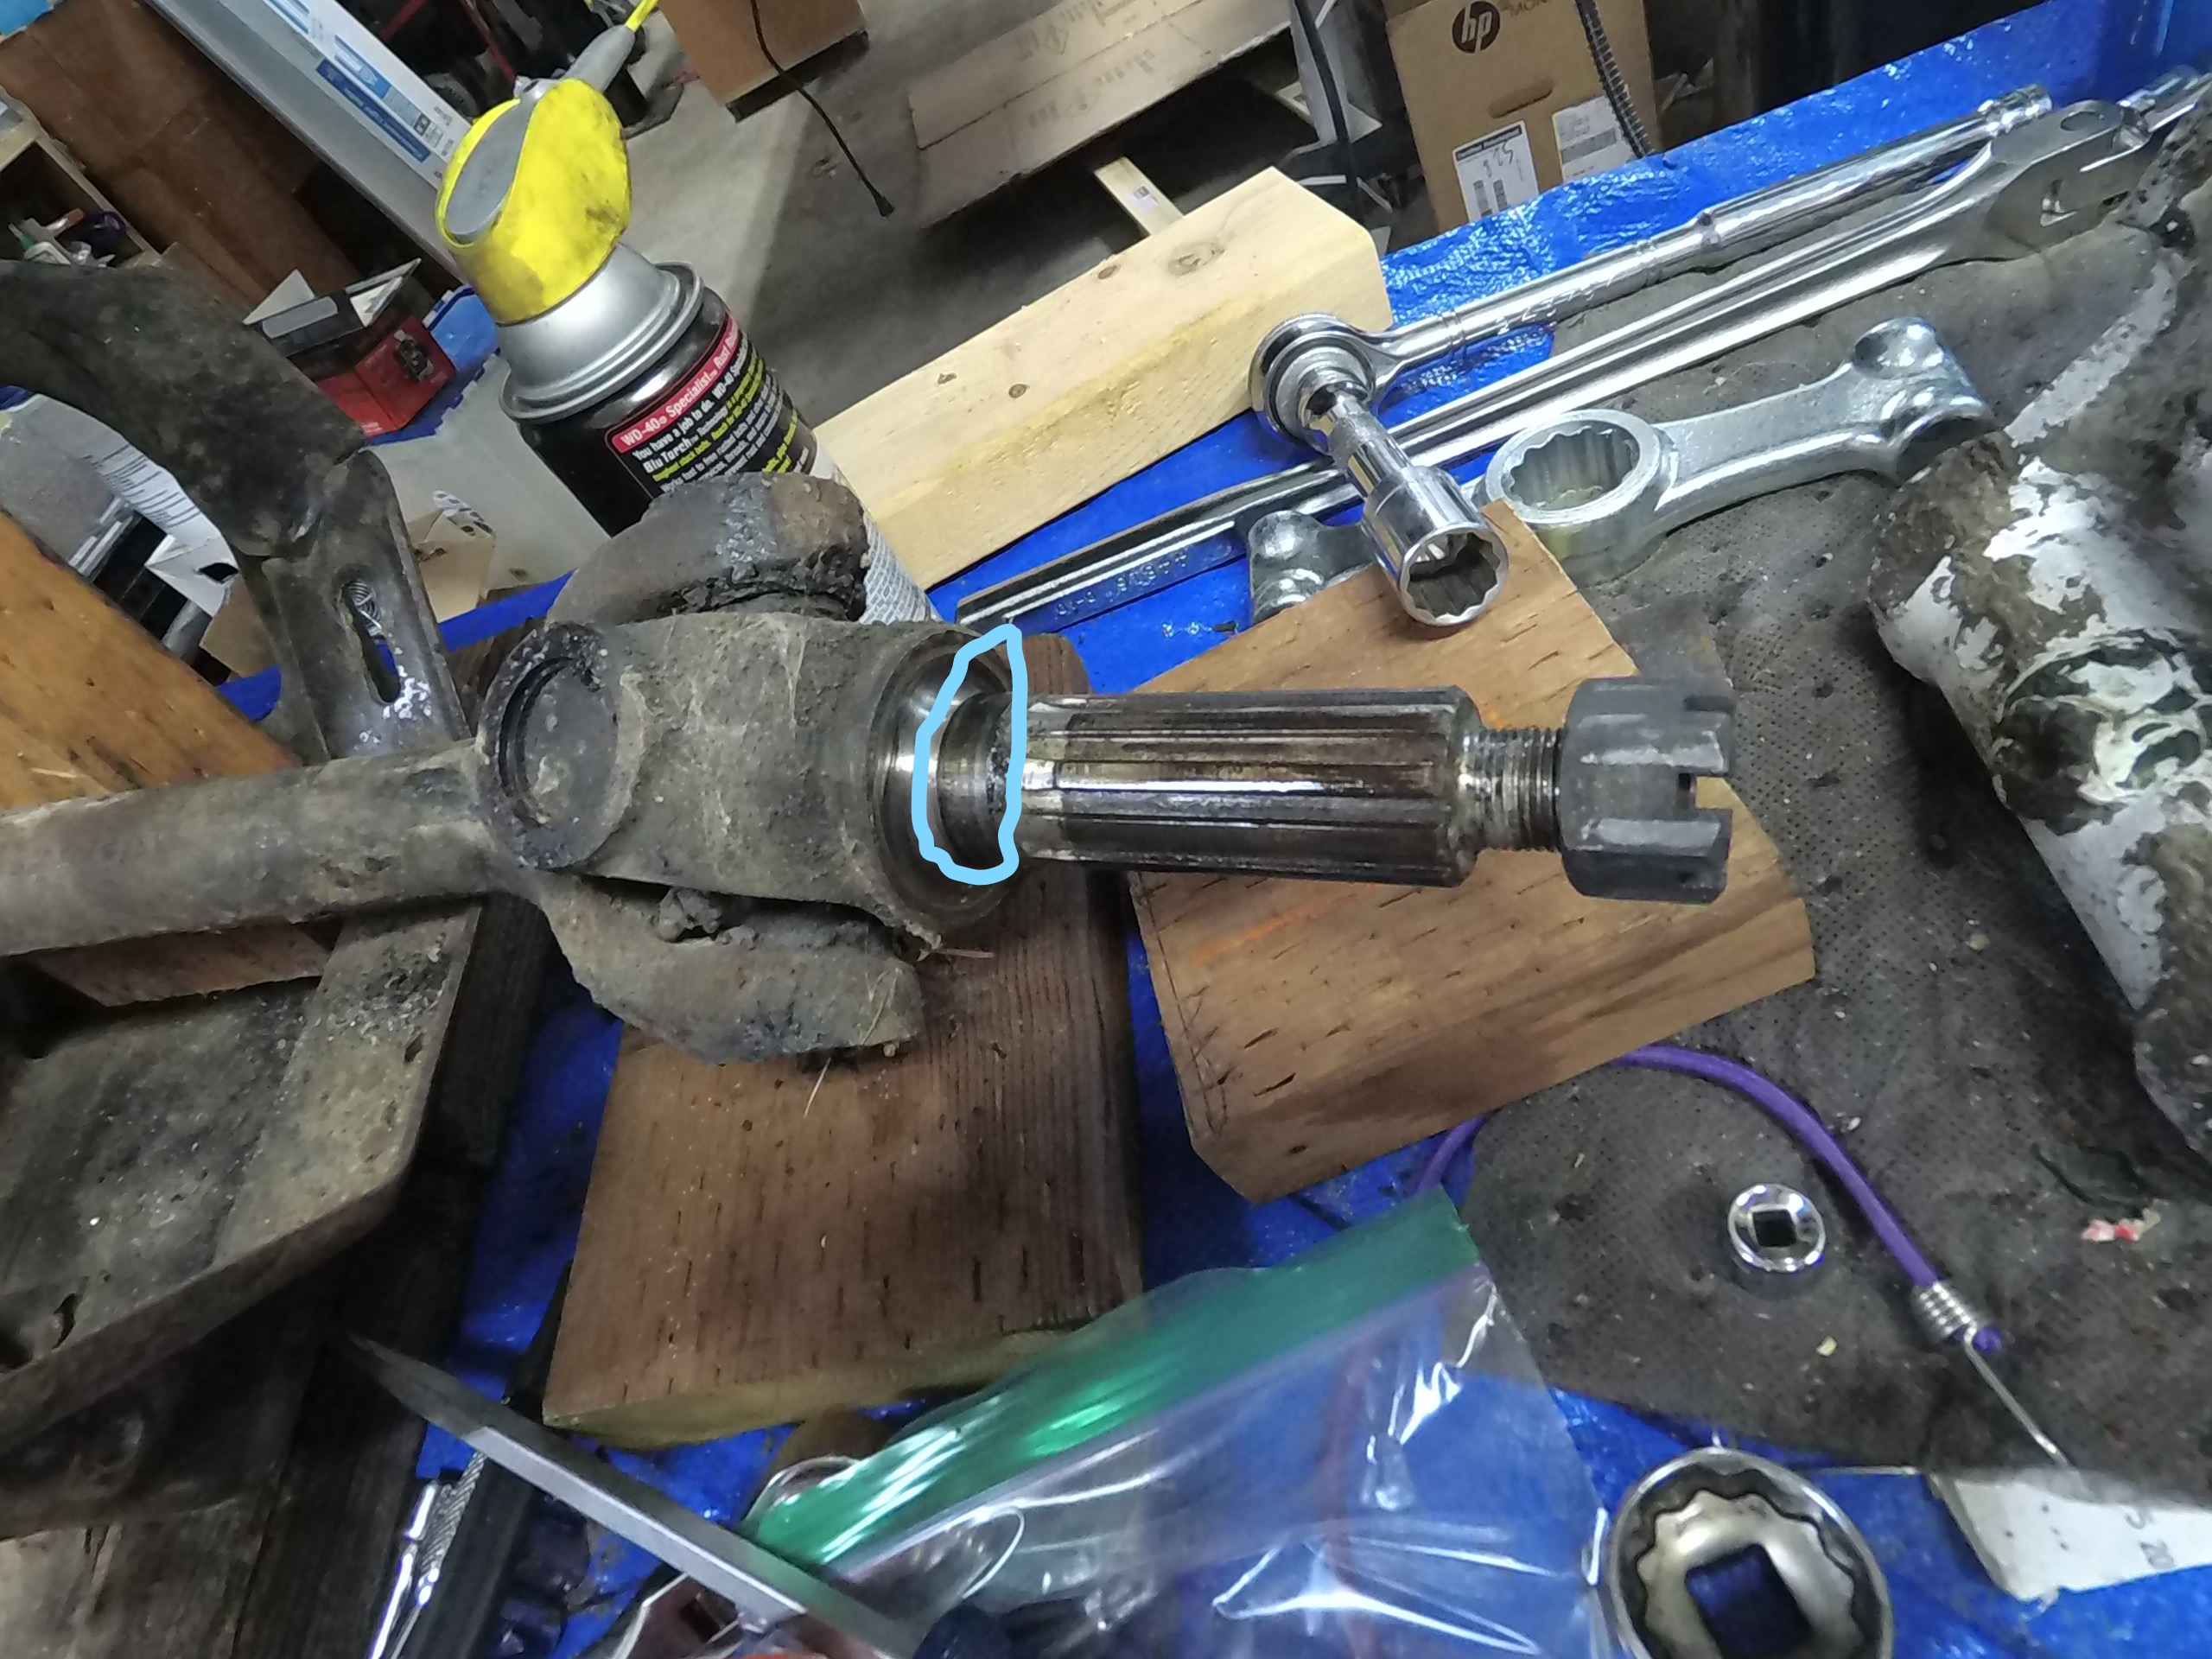
Of course the Go Pro focused on everything BUT what I wanted it to focus on - the shaft on the hub. I’m thinking this isn’t usable. Does anyone know what the serviceable measurements are? I didn’t see anything in the manual.
I know the proper thing to do is to replace both pieces. I’m a bit limited on cash. and I"m trying to cobble something together to drive to the big Jag Festival in California at the end of the month.
Not really related
I posted my first video on youtube - using a can of compressed air (well not air, but CO2) to remove the seal retainer. check it out.
Please leave comments - on what I can do to improve my channel. My plan is to have video all of my Jag related escapades to help those like us, well me especially, who’ve been smitten with the Jaguar bug.
I used the weld bead on the race trick on the fulcrum races on the carrier, and it worked slick. I’m going to put it up on youtube later on today. This actually works too fold, give something for the drift to catch as well as something to break the race loose.
Questions?
Parking brake fork
Is this bent? Duh, Yes it is, I mean is it supposed to be bent like this?
First off, I don’t do things half-assed; the flip side I have a limited Jag budget - Left over money after; house, dog, kids, wife (nails, hair, waxing) girl stuff; and I’m trying to get something together to drive to the big Jag Festival in California. and at this rate; it isn’t looking promising. If I can’t make it I will be so disappointed.
I found the kit on Amazon. Maybe Rockauto isn’t carrying it anymore.
OH, and the part number is different. not sure why but it’s a VKBA3473 either that or the box is miss marked. Sorry. though the picture looks right on amazon.com
The IRS is out of a XJ12 Series I or an XJ6 3.4 manual Series I. The IRS is a power lock Salsbury Diff, but the part numbers are the same from a Series I through a Series III XJ. I’ll check the parts book for the ’88 XJ-S. Oddly enough, the Jaguar parts numbers aren’t the same; but they cross reference to the same physical parts. I checked .
Hmmm… I wonder why?
Contents of the SKF VKBA3473 Bearing Kit.
When I got around to putting the bearing races in the carrier only to discover the SKF kit does not have the inner wheel bearing and race. I’m not sure what it’s for exactly… the seals and 1 of the bearings were correct. @Wayne_Canter I hope you didn’t purchase this on my ignorance. Sorry buddy if you did. If nothing else you’ve got two sets of outer wheel bearings and seals.
Outer bearing is a Timken 18690 Jaguar Part Number C19066
Outer race is a Timken 18620. Jaguar doesn’t have separate part numbers for the race.
Inner bearing is a Timken 18590 Jaguar Part Number C15230
Inner race is a Timken 18520. No separate Part number from Jaguar
Outer seal is a SKF 18565 Jaguar Part Number C19068 and C24789
Inner sea is a Timken 40520S Jaguar Part number C15321 and C19066.
If you’re shopping rockauto.com for the bearings and seals, I’ve had good luck with Centric brake parts. I haven’t used their bearings though. I know they are made in China; for whatever that’s worth.
Hi,
It’s me again. above I listed a link of a video on my YouTube Channel about the hub assembly and how to determine the wear and usability of steamily damaged parts. Would one of you kind gentlemen please review the video, and report back please. I’m trying to put together a parts list, and I don’t want to spend anymore money than I have to (right now).
The bearings are constrained by the endfloat, which means that the seal track and the spacer are held within those limits. 0.002 runout on the track is normal (it’s grease inside, not oil). Your spacer and seal track appear to have pitting (this is common) - you need to stone this off carefully, keeping the surfaces dead flat, otherwise you’ll never get repeatable results when trying to get the endfloat right.
You need a clamping wedge type bearing puller to get the outer bearing inner race off the hub. Be careful not to damage the water slinger when removing that bearing.
The inner bearing, inner race is a press fit on the hub. Stone that ridge off the hub and you should be ok - but you also need to check that the land on the hub carrier which the inner bearing outer race seats on hasn’t been damaged when the bearing spun - if it has, then you need either a new hub, or you’ll need to machine the hub down until you get a good land, then you’ll probably need to make overthickness spacers (i.e. unless you have a mill, and a lathe, and you really like machining… you need a new hub).
“Clean”??? No, no, no. That’s only clean enough for disassembly… You want everything absolutely spotless before you start assembly. Scrub everything with a brass wire brush, stone off nicks and burrs, then clean the bench and cover with some fresh newspaper and do a final rinse with Coleman fuel. I wash and blow off all the tools (including the press and bench) before I start assembly of anything like this, and cover everything with a cloth if I need to walk away before it’s done.
When you assemble to check the endfloat, just use a light spray of something like WD40 as assembly lube.
**
It’s the retraction plate, Mark - drawing the pads back from the disc when the brake is released…
It’s not really an elastic ‘spring’ action; as pads wear the prongs deform inwards - but retain enough ‘spring’ to incrementally withdraw the pads. They are not strong enough to overcome sticking pistons or linkages…
The plate is routinely replaced when bent, they are not supposed to ‘re-bent’ - but yours seem reasonably OK…?
**
The outer bearing races should be fully seated, Mark - but standing proud may mean that the bearing is wider than standard…?
However, if the outer race is not fully seated by 3/32" there would be a problem getting the preload, bearing play, correct using standard shims…
The inner race on the inner bearing is used for adjusting play, pressed on the hub with a shim used to prevent the race from being fully seated. The available shims vary from 0,109 to 0,151" in 15 steps - and the correct play is 0,002 to 0,006", so there is some precision involved…
If the outer race is not properly seated, thicker shimming is required - and wrong play, too tight, may explain why the bearings were overheating. Causing bearing to spin, hot or cold - though ‘spin’ would likely be a very jerky affair…
I’m assuming when you speak of the “Land” it’s the where the hub has a swell or lip. where the diameter of the hub increases. If that is the case, then I think I’m okay because there is about
So how does get assembled?
Do the races and the bearings and grease seals are installed in the carrier, then the half shaft with the seal seating rings & water shield is loosely assembled and pressed onto the bearings… and not having the proper Jaguar tools sounds like a recipe for disaster. This is sounding very complicated.
Is bearing spins common? I’ll replace the hub before I spend time "machining a mating surfaces.
Clean
The hub isn’t clean, the bearing is still on it for a couple of reasons, mainly I wasn’t going to spend any time taking it apart if I replace the hub with something from EverydayXJ.
The input shaft has spent time in the blast cabinet with walnut shell media. The discoloration, short of putting it running it through a hot parts washer, that’s about as clean as I can get it. Is it still not clean enough? there isn’t any grease or dirt, but it is discolored.
Assembly
I was going to pack the bearings with grease in a traditional (American) way. A glob of grease in the palm of one hand and hold the other, and work the grease into the bearings and retainer from one end to the other. then set it into the race. It never crossed my mind to use a lightweight oil. Did I understand your correctly? Final rinse. is brakekleen acceptable?
I wasn’t worried about the assembly until now. This is a classic case of “I don’t know what I don’t know”.
the only discoloration is what looks like copper on the grease seal seat, and where the bearing spun on the shaft. The race is crazy pitted. I haven’t wasted any time trying to clean the bearing because, well it’s gonna be tossed. Now I understand when I pressed the input shaft off the hub it let go with a vengence. bits flew everywhere. except the hub and carrier.
If you watch the video you get a better look at the hub and input shaft assembly. The quote below contains the video that I’m talking about.
This takes me back to when I got the Green XJ6 about 5 years ago. I was petrified to replace the ball joints. but with yours and everyone on this forum sharing their expertise to assist people like me with more ambition than brains, succeed at repairing their Jaguar.
Yes, that is exactly the kind of bearing splitter I mean.
I’m talking about the land in the bore on the Al hub carrier, where the bearing outer race seats.
Assembly order is:
Mark each part “Left” and “Right” with a sharpie (everything).
Press both outer races into the hub carrier.
Press the outer bearing inner race onto the hub.
Fit the outer seal.
Spray with assembly lube.
Fit the hub into the hub carrier.
Press the inner bearing inner race onto the end of the hub.
Put the seal track and spacer onto the yoke and check the measurement. (buy a max size spacer to be able to measure).
Write which size spacer is needed on each hub with a Sharpie.
Store the hub carriers, hubs and seal tracks so they can’t get contaminated or mixed up.
Order the spacers required.
Once you’ve received the spacers:
Measure the spacers with a micrometer.
Fit the inner seal to the hub.
Fit the inner U/J and flange to the halfshaft.
Fit the yoke and U/J to the halfshaft.
Assemble the seal track and spacers onto the yokes (paying attention to your copious notes, side markings, and sharpie marks indicating which size spacer).
Fit the yoke into the hub,
Fit the castle nut, torque, fit the splint.
Grease the hubs and U/Js.
Actually, you only need two tools: a hub puller to press the yokes out, and you’ve already done that, and either a tool to measure the spacer or you just buy one of the max size spacer and do some math.
I’ve done something like 15-20 IRS rebuilds, only twice have I seen a spun bearing. There’s such a huge grease reservoir in the hub carrier that it would probably not have run dry - it’s more likely that someone got some contamination into the grease while lubricating. I don’t like the pop off caps, so I modify the hub carriers, see: Vent hole in rear bearing grease plug - #5 by Andrew_Waugh for details.
I normally just use spray assembly lube, then when I’m finished measuring/assembling and I know I won’t be taking it apart again I grease from the hole in the hub carrier and spin. Normally when I rebuild an IRS it sits around for a while before going back into the car. I will give the diff a spin every now and then while it’s waiting to be reinstalled.
Relax, the worst that can happen is that a wheel comes off. Just look at the section drawings so you understand the mechanism, and follow the shop manual for tolerances etc. Most people do not use Loctite when fitting the yokes… I used to, but now I don’t.