It depends a lot on the size of the slide hammer. If you can fit a impact gun in that area, as suggested by Jim, you can get a small slide hammer in there, as I do on a regular basis when removing a stuck, original component.
1 Like
I love how you refer to it as a scheme. ![]()
1 Like
I think I can hear a thwack coming with a big hammer or maybe he’ll be delicate and use a bearing puller😀
F**k that!
I’m heading for the oxy-acetylene kit.
![]()
1 Like
Fire is so primal ![]() every man likes it
every man likes it ![]()
1 Like
Hello Paul,
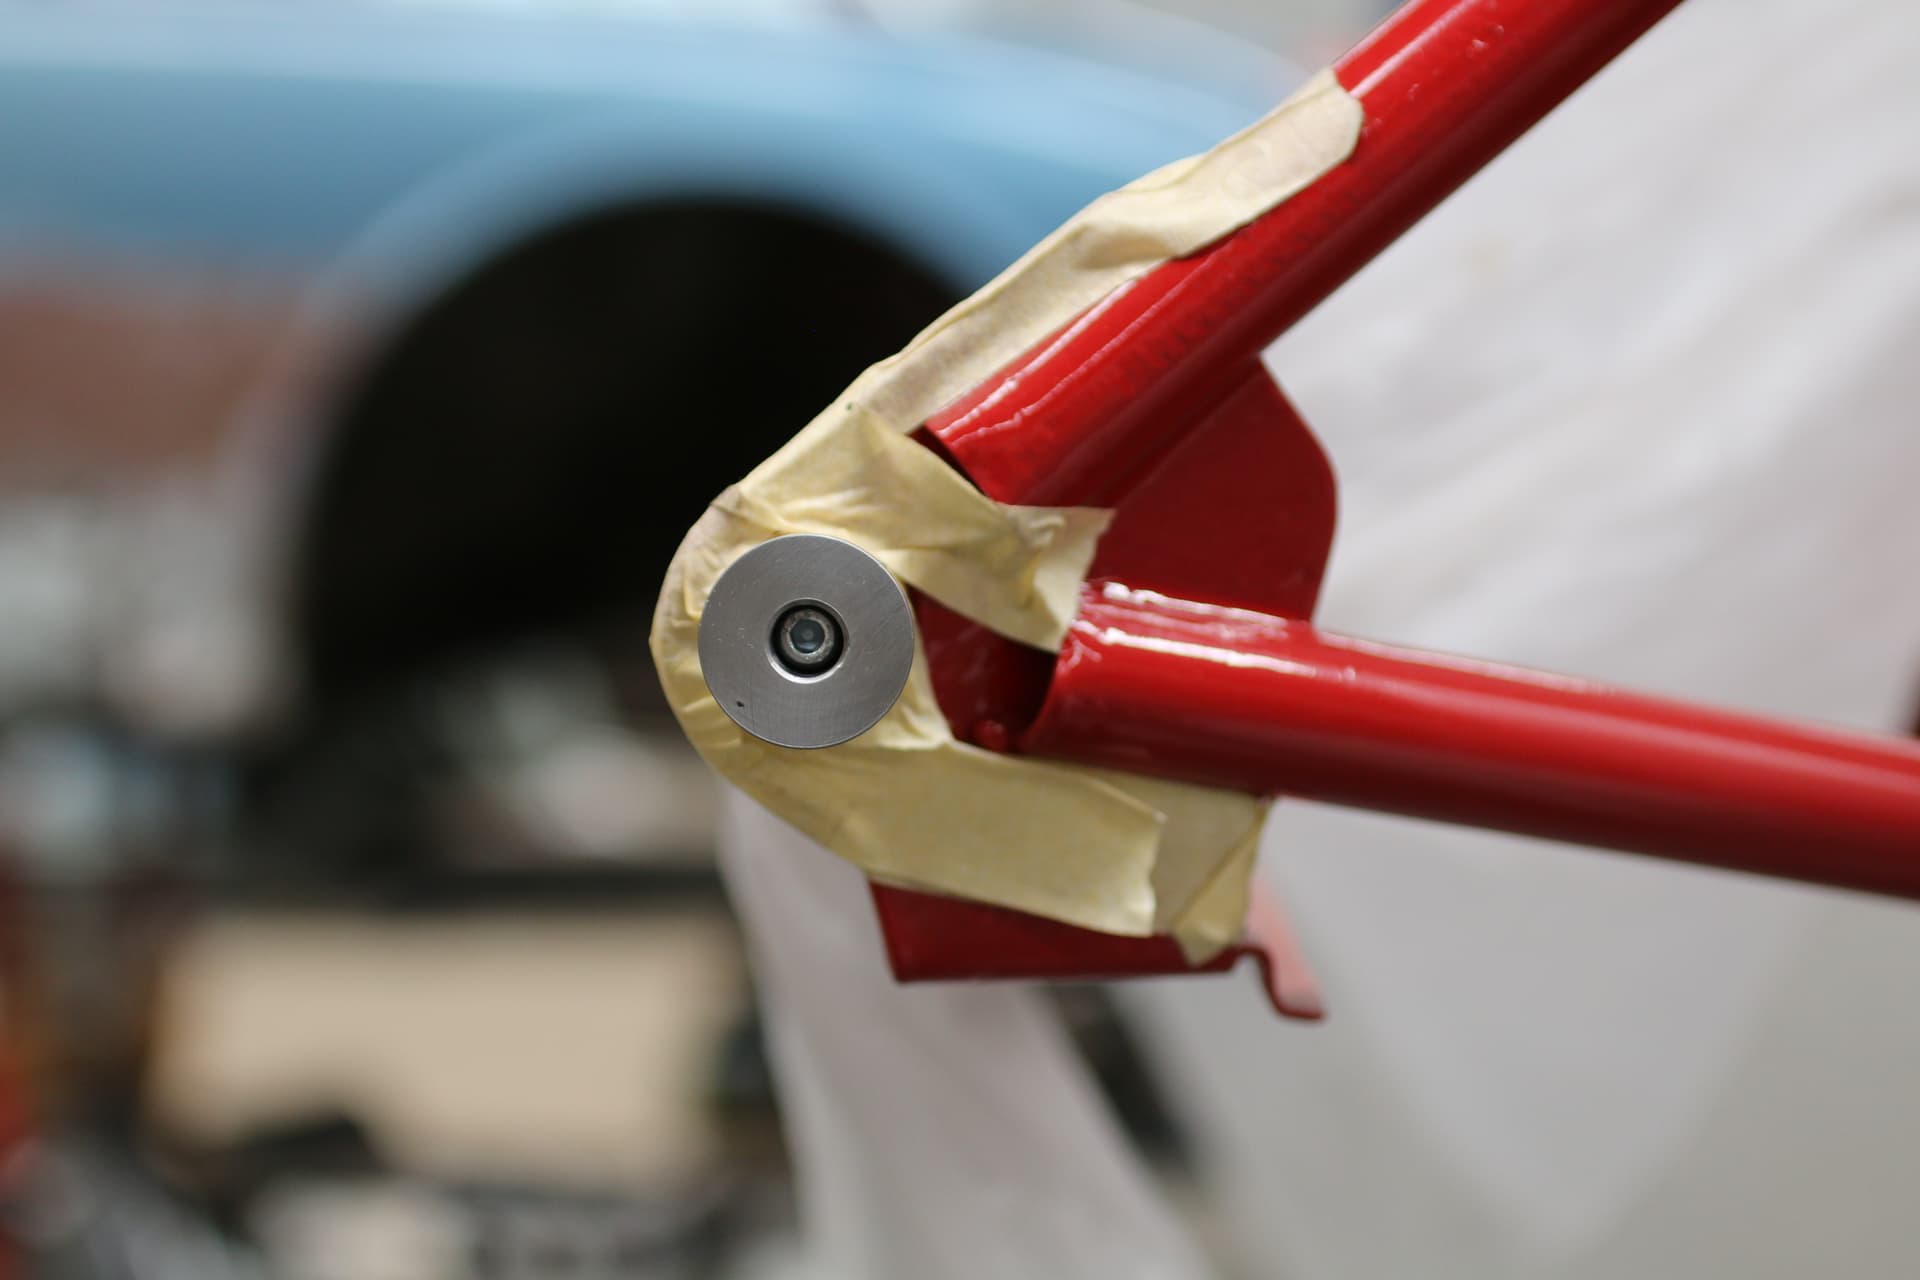
Another Scheme I use if the slide hammer doesn’t move it with the first few tries and given that I’ve already tapped the start of the Top Hat Pivot bore, is with the following device.
The following picture shows the shank of a 3/8" UNF bolt that has the end drilled and tapped to take a 5mm or 3/16" UNF Socket Head Bolt. The Socket Head Bolt is simply to provide a method of screwing the device into the Threaded Hole in the end of the horizontal bar once the securing bolt for the Top Hat Pivot Bush has been removed.

The following picture shows the device in place. The Top Hat Bush has been removed for clarity, but obviously, the Top Hat Pivot Bush would still be in place when assembling the Threaded Shaft.

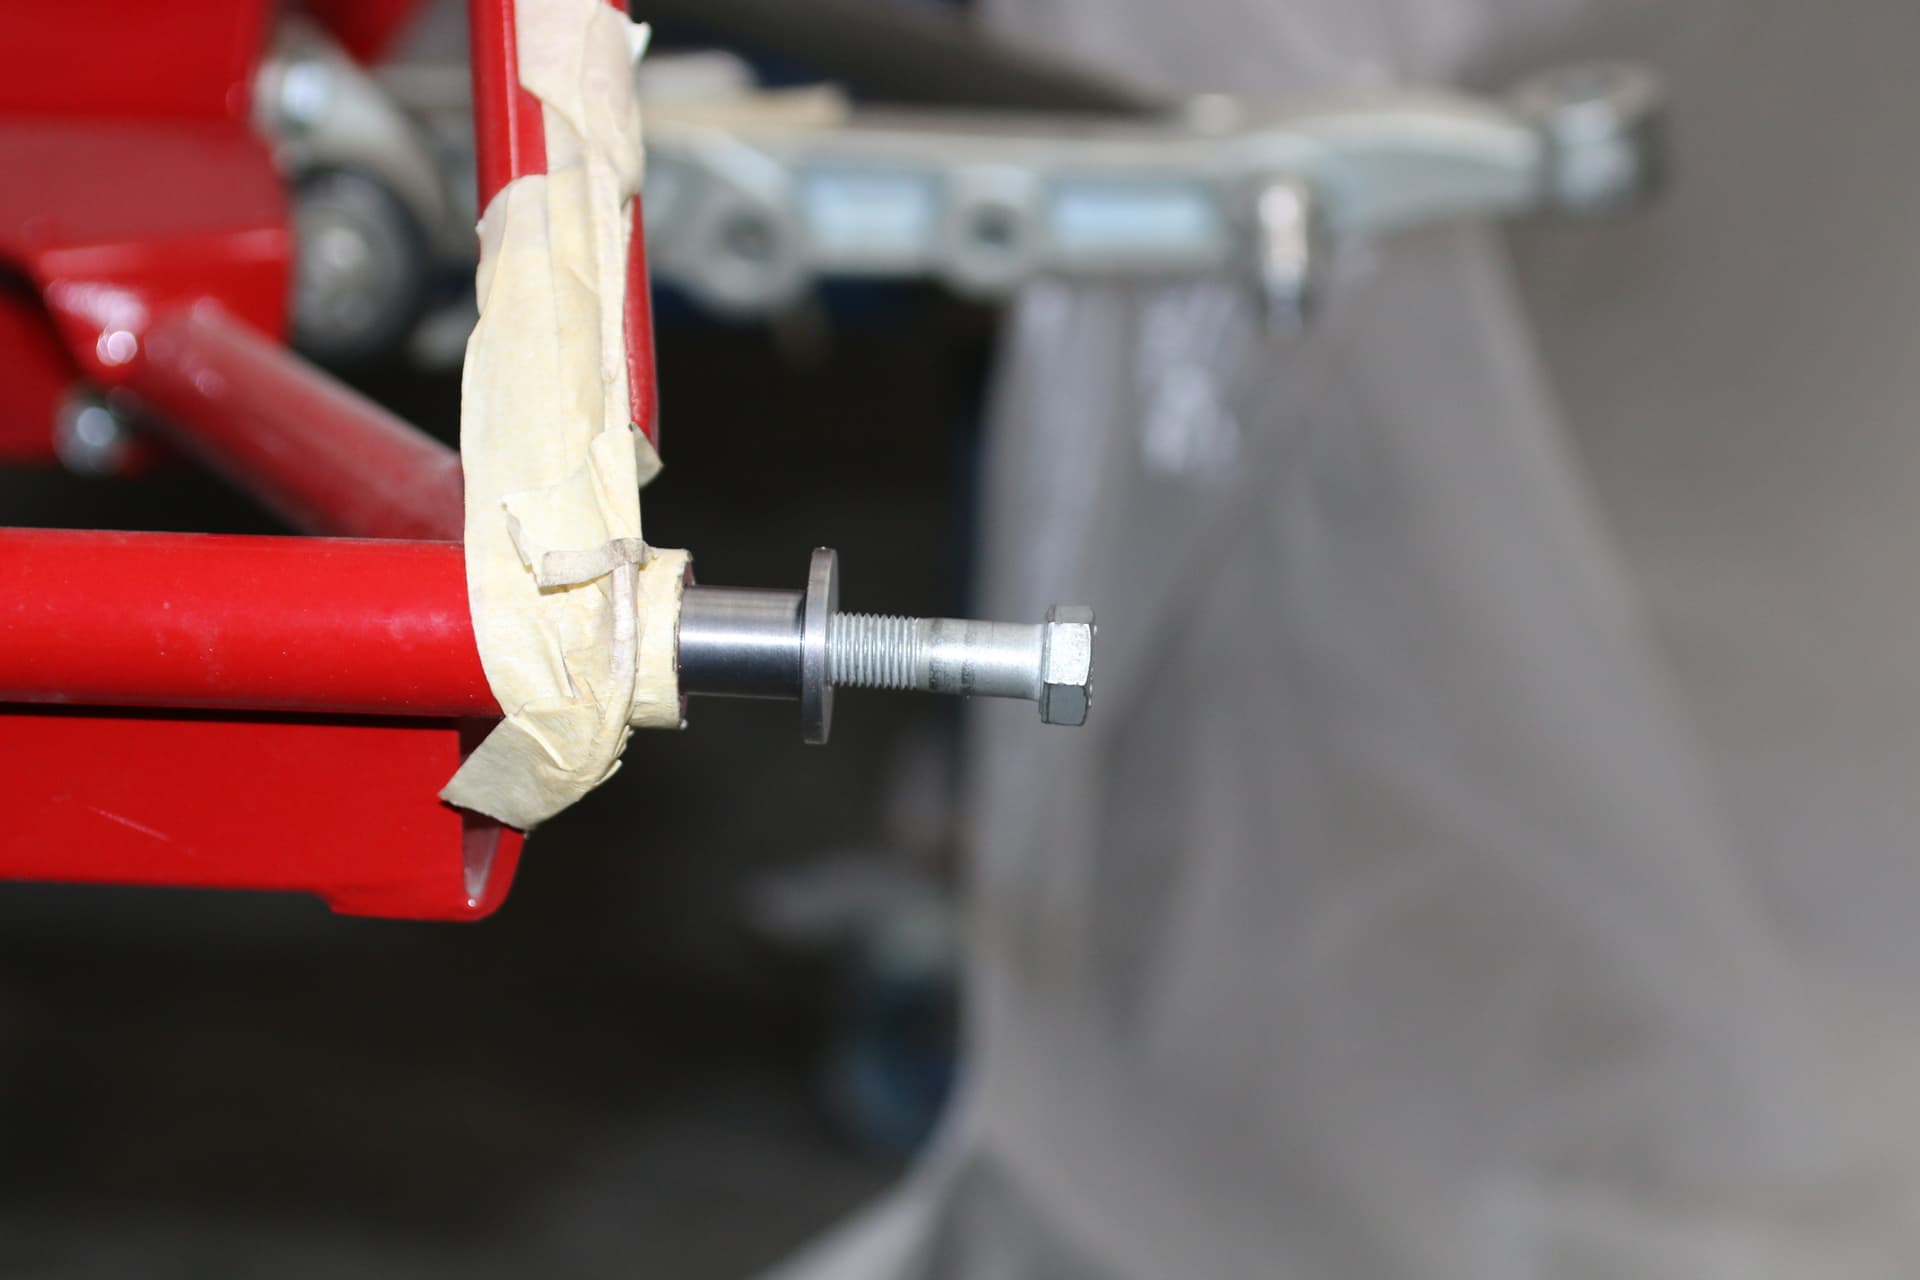
The following picture shows the Top Hat Pivot Bush tapped to accept a 7/16" UNF Bolt.

The following picture shows the Threaded Shaft in place inside the Top Hat Pivot Bush, ready to accept the 7/16" UNF Bolt
The following picture shows the Threaded Shaft being assembled using an Allan Key. The Allan Key is also used, when required, through an axial hole in the 7/16" UNF Bolt to stop the Threaded Shaft from turning, should that occur when winding the 7/16" UNF Bolt in.

The last picture shows the 7/16" UNF Bolt in place, with its inner end hard up against the face of the Socket Head Bolt. Extraction of the Top Hat Pivot Bush is accomplished by winding the 7/16" bolt in and therefore, jack the Top Hat Bush out.
Regards,
Bill
2 Likes
I had this problem and Ole Würtz helped me out in a 2015 post. Sorry, I can’t find the pictures but once you get the bush tapped to this point:

you find a deep dish socket large enough to clear the bush flange but still rest on the bonnet frame. Then stack several washers on top of the socket, run the 7/16" bolt through the washers-socket and thread into the bush. As you tighten the bolt, with the head of the bolt drawn to the washers, the bush will be drawn out of its prison by the threads. Go slow. Give the pressure time to work. If needed, remove the bolt and add more washers then repeat in order to get enough “throw” to draw the bush completely out.
No banging, heating, welding or cursing required. Good luck!
3 Likes
This thread, combined with the step-by-step photo documented, “Removing the bonnet”, by @davidxk
made this exercise incredibly easy. I really (really) wish I would have made this effort last year before replacing the aluminum radiator that had been installed in my car, with the original radiator, with the bonnet in place. That was totally, unnecessarily, annoying.
One minor addition that wasn’t mentioned is that you (might) need to detach the license plate control rod. It took me about 5 minutes to figure out why the bonnet wouldn’t just back away from the car after I removed both bushings.
Ed

2 Likes
If you want to remove the radiator there is no reason to remove the bonnet. Is that the sole reason you want to remove the bonnet? At 90 degrees position you have full access to the radiator
2 Likes
Thanks, but my radiator is good now. Last year when I restored the original radiator, I was such a rookie at working on my car that I didn’t even know that I could remove the bolts that secure the springs to the bonnet frame, so that I could rotate the bonnet to 90 degrees. I swapped radiators with the bonnet at a 60 degree angle, or whatever it is with the springs in place.
Something is now horribly wrong (I fear) with my engine, so I took the bonnet off to start disassembling my engine. I’ll be starting a new thread on that soon.
1 Like
Out of curiosity, how many times did you hit your head?
Been there, done that. Thankfully @Wiggles educated us on the 90 degree tilt option. My head wounds were still healing at that point. ![]()
1 Like
Did you go to Dr. BooBoo? ![]()
One nice feature of Mercedes cars, at least the two I owned, was that the hood brackets had a release allowing the hood to open 90°.
Let’s see, 2 head gashes (nothing needing stitches), minor scrapes to my shoulder, elbow, wrist, and a stiff neck from bending at unnatural angles to try to see what I was doing with the bonnet in the way.
Dues? Don’ts? Earning stripes? In the end, I was still proud that I got it done.
3 Likes
