I started a thread “Terrible Squeal” that ended up being my damper. I intend to continue it with a step by step picture tutorial when Im done but meanwhile I thought i post this bit.
I won’t go into detail just yet but removing the damper almost proved impossible. Getting the Main bolt off was a piece of cake using the starter bump method. But trying to remove the damper with a puller was a nightmare. I had to apply so much pressure on the puller that one of the two 5/16" bolts that attach the puller to the damper litterly just pulled out past the thread in the damper. I have never seen that happen before, I mean snapped/sheared bolts sure I seen plenty of those but not this.
Anyhow as with everything Jaguar it seems anything you do ends up having unintended consequences So my plan is to drill out both 5/16" holes and rethread them to 3/8" (which would be stronger anyway) if I ever have to do this again.
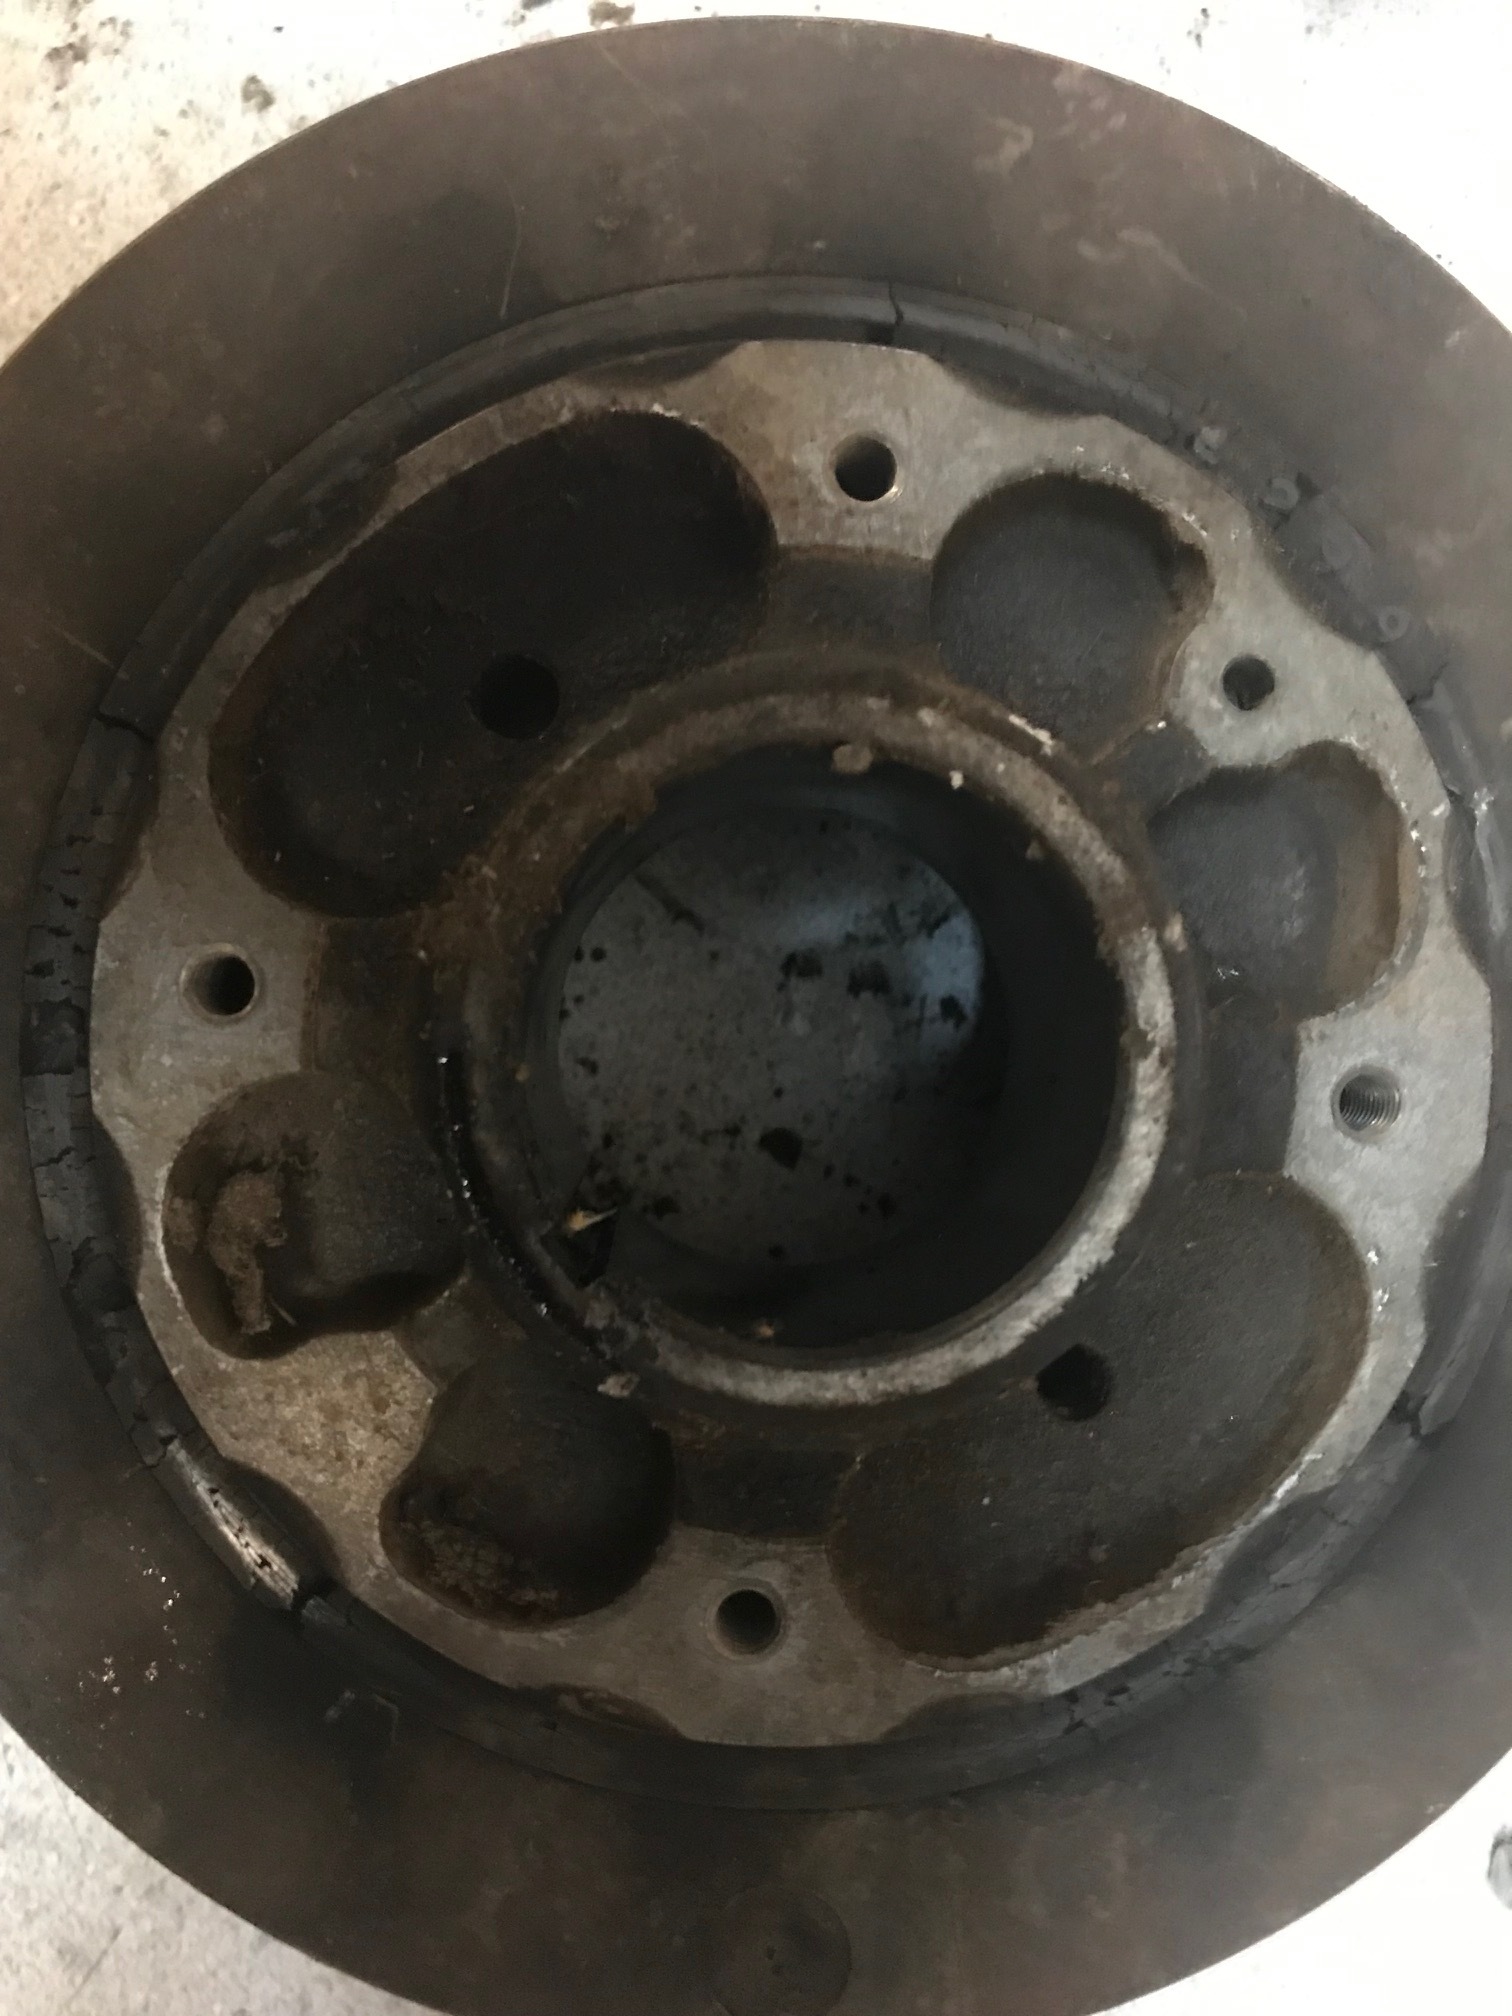
The grey arrows point to the two threaded holes the puller bolts into. The blue arrow show that there is enough clearance from the center bolt flange for the larger 3/8" bolt to still fit. Obviously I hope I never have to pull that damn damper off again, but you never know. So this is planning for the worst.
Anybody see a problem with this.? The damper guru says that he rebalances the unit after repair.
Should be ok to open the holes up, while you are in there you could re-attach the reluctor wheel so that the ignition is advanced by 5 deg which would replicate the ‘Andy Braket’
Andy was one of the guru’s on the engine development of the AJ6 engine and Jaguar erred on the safe side as far as max advance was concerned, Andy produced a bracket that replaces the original CPS bracket and alters the position by 5 deg. When I had the damper off my ‘92 4.0 I re-drilled the roll pins that located the reluctor wheel to rotate it <> the 5 deg.
This is very interesting topic! I look forward to your pictures.
I still can’t stop thinking that a readily available damper from another car brand could not fit. Of course, we should know what brands probably use similar dampers.
There well may be some other damper that would work but everything seems to be Jaguar specific. Also you can see the reluctor wheel (to the right in my picture) that bolts to the damper and that looks VERY specific to me
Can you notice some deterioration in the harmonic balancer’s rubber?
In order to remove the damper, did you remove the yellow engine driven cooling fan?
A fellow of mine just reported that it was easy to remove the damper by using a puller. However, the engine had been removed from the car.
Are you going to advance the ignition as suggested by Robin?
The yellow bladed auxiliary cooling fan sits in front of the condenser and radiator so that wasn’t an issue. Oh yes like most things it would have been way easier with the engine out but certainly doable this way. Yes from the little you can see from the edge the rubber looks pretty deteriorated.(click on picture to enlarge it)
I did not want to have go through the hassle of removing the radiator (there is a lot connected to it) and there is sufficient room to use a puller while it’s still in place. I did everything from under the car while I had the front end jacked up, much better access.
The problem I had was the damper DID NOT want to come loose until the very end of a real struggle. Strangely enough when it FINALLY came off the saft was still lubricated and there was no corrosion holding it together. So why didn’t it come off easily, I have no idea !!
So as I sit here after a tough day at the salt mine, enjoying my first martini of the evening, contemplating my martini shaker:
I have an ‘a-ha’ moment (these seem to be more frequent when martinis are involved…hmmm…). After shaking up a martini, if I try to remove the top of the shaker without first removing the cap it is nigh on impossible. Hydro and/or air lock perhaps? With the cap first removed it is easy to separate the top from the bottom. Do you suppose the tolerances between the shaft and the damper are close enough, and with the lubrication added to the mix, you have a similar phenomenon?
As one who has ponied up the pesos, dished out the deniero, poured out the pounds for the original, real-deal ‘Andy’s bracket’ I will say it was a good investment. The old girl has more pep in her step with it fitted.
Dennis, who’s gonna rebuild your harmonic balancer? And do you know how you’re gonna start pushing the rebuilt one onto the crank until the original bolt catches the thread of the crank?
Dennis, Dale did mine. They attached a paper saying the rebuilt balancer needed to be baked for 2 hours. Then later they commented on my video that they bake every balancer routinely before they ship it out so it can be bolt on right away.
Robin, how the reluctor wheel should be re-attached so that the ignition is advanced by 5 deg? There are four holes in the wheel and the wheel attaches to the damper by four bolts.