So you’ve just heard some horrible noise coming from under your hood. Something in-between a belt slipping and your engine coming apart with both a continuous loud squeal and metallic knock. Well there goes the engine, but wait … it may only be your harmonic damper that has failed.
-
First check that it isn’t just one of your engine belts slipping. While that may produces a similar squeal a bad damper noise is a whole lot worse.
-
Now it’s time to crawl under the front of the car and draw a straight line from the front to the back on the outer edge of the damper and it’s attached pulleys with a white paint stick or piece of chalk. Run the engine for a while until you hear that God Awful noise again and then check your white line. If part of the line is not lined up with the rest of the line your damper is damaged and needs to be replaced or repaired.
-
Good luck on finding a new one, and why trust a used damper (if you could find one) when you can have yours rebuilt so it’s actually better than new at a very reasonable price. These are the two names that kept popping up and they seem to be the go-to guys for this repair, but do your own research …
Dale manufacturing, located in Oregon http://www.hbrepair.com Damper Doctor, located in California https://www.damperdoctor.com -
OK, let’s repair that “damn” damper problem !. Here’s what you’re going to need …

A. 3/4"-16 x 2" bolt
B. Spacer used between washer and bolt head (may also use a stack of 3/4" washers)
C. Large washer 2.25" wide. I had to make my own with thick aluminum stock and hole cutters.
D. Puller that comes with inexpensive kit (you’ll need two 5/16"-18 bolts with two strong washers)
E. Long bolt that comes with puller kit (needs to be cut down to 3" length so it will fit in limited space)
F. Inexpensive puller kit available everywhere (you won’t actually use most of it)
G. Large assortment of wrenches
H. Torque wrench with 150 ft pounds capability
I. 1/2" breaker bar 24" long
J. 33mm six sided deep well socket
K. Damper lockdown tool you’ll have to make for final torquing
-
You’ll have to remove the two belts first and that may not be as easy as you think. Depending on how long ago (if ever) you’ve tried to move (or remove) your alternator and air conditioning compressor enough so you can slip off the belts you may find it a serious pain. I ended up using a lot of degreaser on the nuts and bolts and a large assortment of wrenches; 10mm, 13mm, 14mm, and 15mm. Access is very limited.
-
Other than loosening the alternator enough to slid off the belt which I did from above the car everything else in this entire operation I did from underneath with the front end of the car up on jacks. I can’t imagine doing it any other way. TOP TIP … When you finally loosen the nuts holding the alt/ a/c compressor thoroughly clean the threads of the bolts enough that you can finger spin the nuts back on, you’ll be happy you did!
-
It’s time to remove the “mechanical” engine fan and shroud. If you have a later model you’ll be removing the “electric” fans and shroud.
-
Now under the car we go. Access is very limited but it can all be done without removing the radiator which you really DON’T want to do because it involves a whole new can of worms!! TOP TIP … Before you go any further place a thin piece of plywood 23" wide by 19" high inside against the radiator. Just one slip of the breaker bar or socket wrench and you radiator could be toast. This is a chance you don’t want to take … you’ve been warned.
-
First you’ll need to remove the damper bolt. The bolt requires a 33mm socket. Yes there are other sockets that are close to the correct size (and more readily available) but this bolt is under a lot of torque and if you somehow end up rounding it off without removing it you are in a world of hurt. So use a 33mm 6 sided deep well socket and be safe.
-
Now use a breaker bar (1/2" is plenty strong enough) that is 24" long. After removing the air filter box you can slide the 33mm socket on the bolt and rest the other end of the breaker bar on the frame where the filter box was. While holding the socket tight against the damper bolt have a helper barely beep the ignition key. I held my breath while I did this but it turned out to be no big deal. The damper bolt loosened right up, and I could unthread it with my fingers.
***** BEFORE YOU DO THIS MAKE SURE YOU REMOVE THE COIL WIRE GOING TO THE DISTRIBUTER ***** You DO NOT want the engine to start !!! DON’T FORGET THIS !!! Put a warning note on your steering wheel.
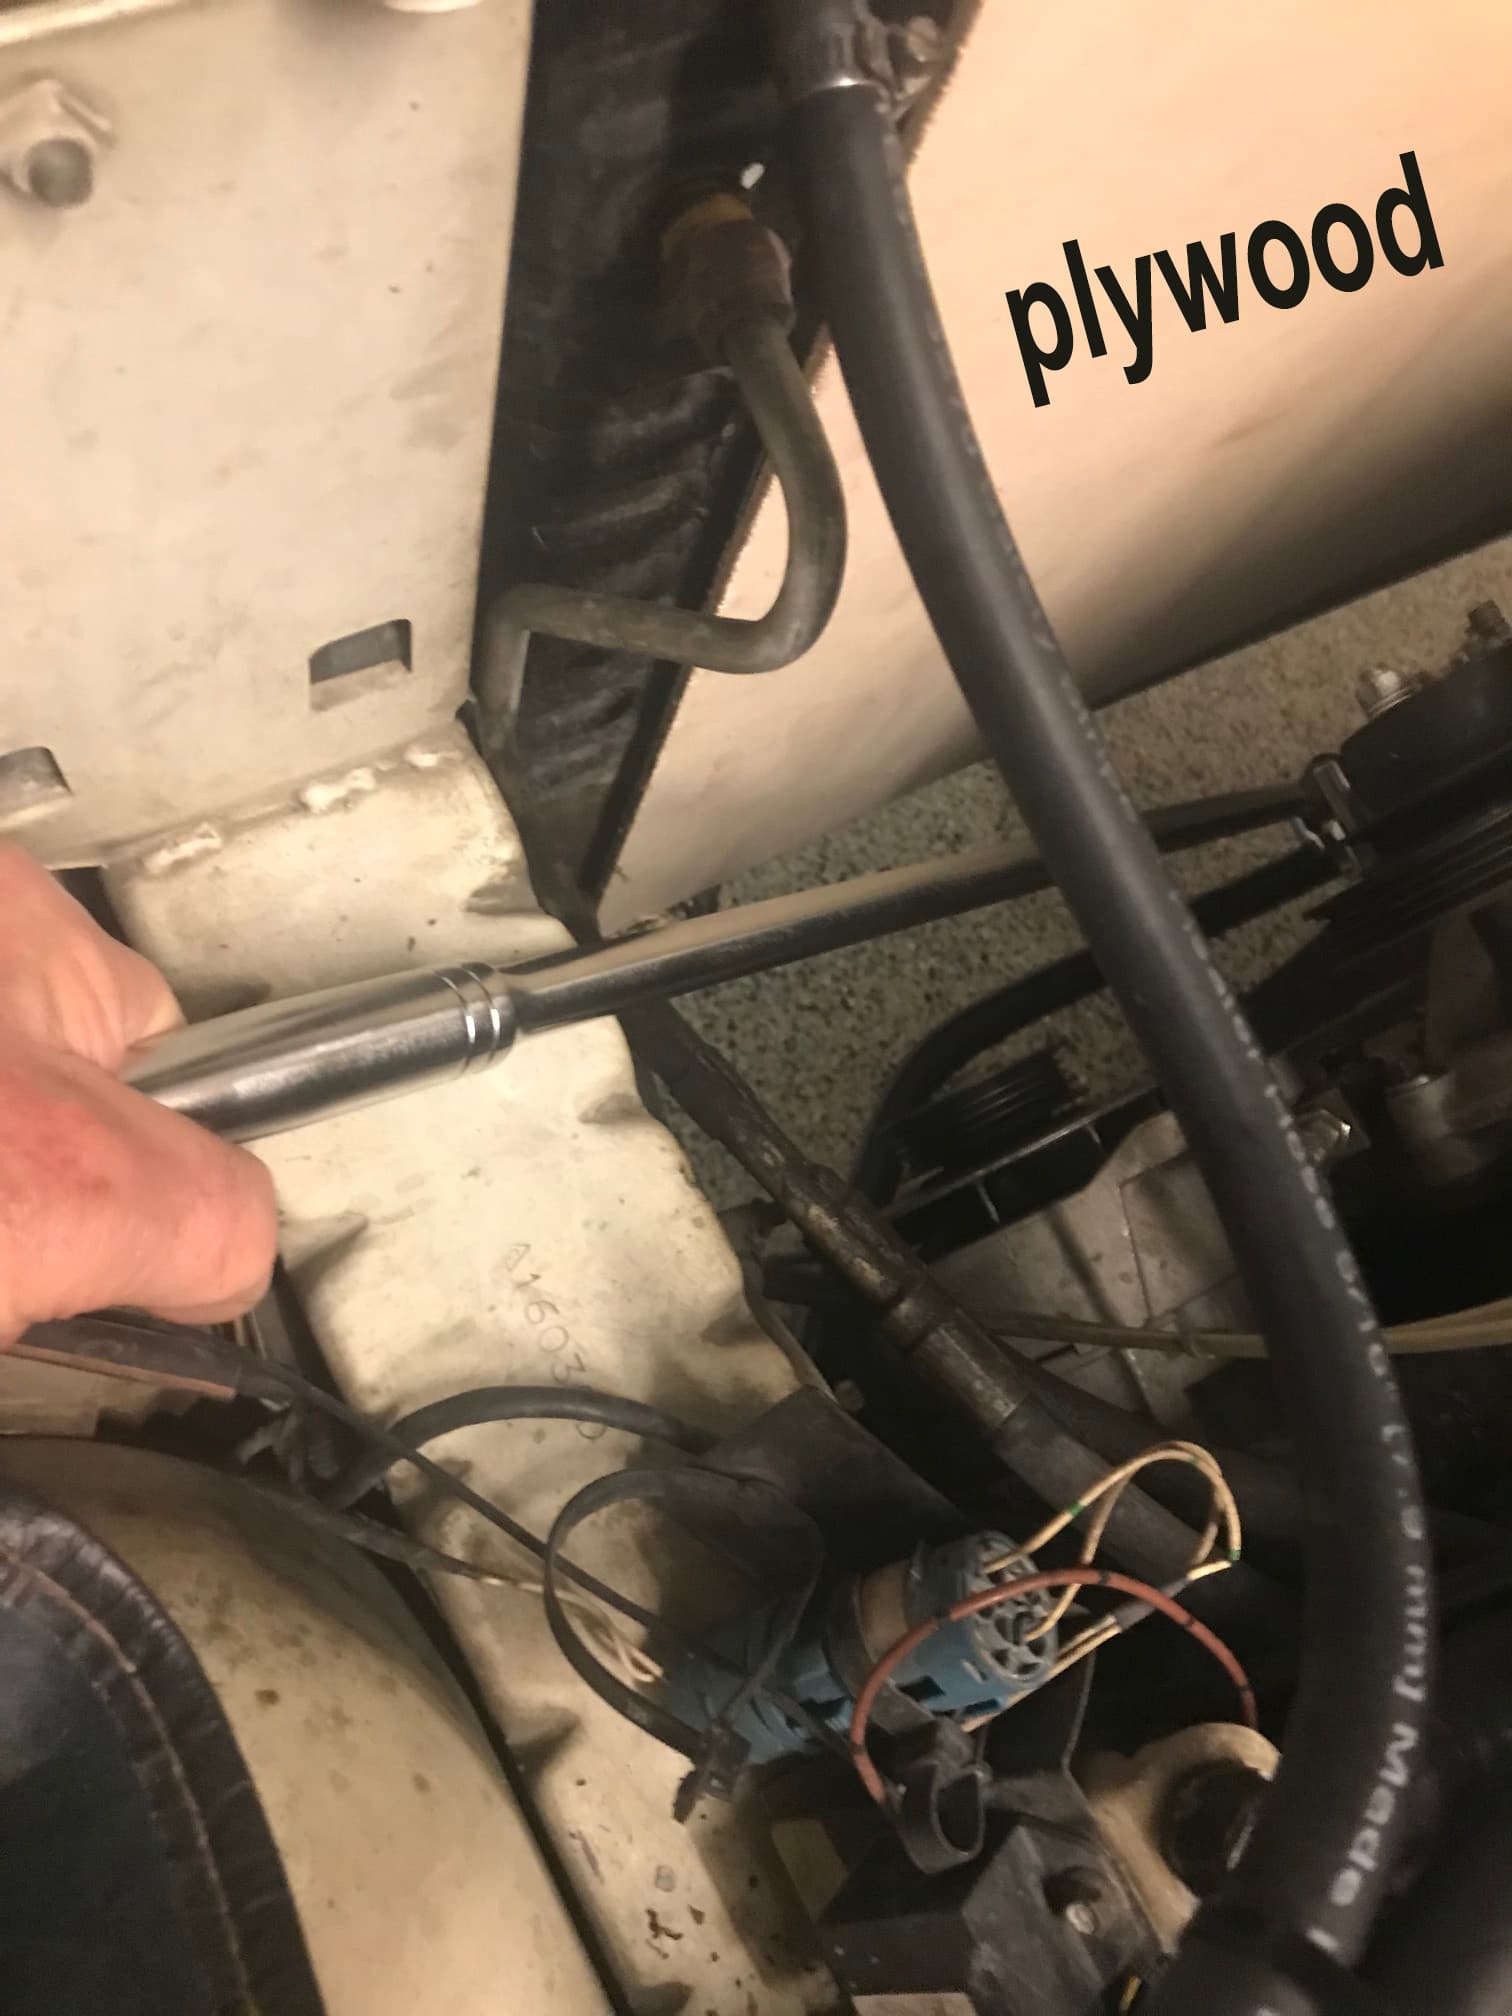
I’m holding the end of the breaker bar just for this picture. I actually held the socked tight against the bolt and let the end of the breaker bar just rest on the chassis while I had my helper beep the ignition.
-
To remove the damper you’ll need a puller. You can’t using a standard puller that attaches to the back of the damper, it won’t work, and if you try something cute and damage the reluctor ring, another world of hurt. So purchase a puller kit from any auto supply for around $16 and modify it by cutting the large bolt so it will fit in between the radiator and puller. Use the puller as directed and the damper should break loose and pull right off. I sent my damper to Dale Manufacturing and the repair cost was about $220 which included return shipping. Very pleased with the whole transaction. TOP TIP…The two threaded holes you’ll need to use on the face of the damper will be full of crude, so spray a liberal amount of brake cleaner in them and use some Q-tips to clean them out. Make sure you can easily thread in your two 5/16" bolts .
-
So now you have your damper back and you’re ready to reinstall it. “TOP TIP” Make sure the woodruff key fits tightly but freely in the slots on the crankshaft snout and the damper. If it doesn’t use a file and carefully dress it until it does. Ensure that the damper fits back on with the woodruff key sliding into both the snout and damper slots without having to force it. You should be able to slide the damper on by hand for at least an inch or so, if you can’t, double check the slots and key are properly lined up, again don’t force it.
-
It’s doubtful that you’ll be able to slide the damper far enough on the snout that you can use the damper bolt to tighten it down, the bolt will be too short to catch a thread. So you’ll need to source a 3/4"-16 bolt about 2" to 2.5" inches long to start installing the damper. That size bolt is hard to find so I purchased one on EBay for about $12. You also need a thick washer 2.25" wide with a hole in the center big enough for your 3/4" bolt to fit through. This may be something you’ll probably have to make.
-
Place the large washer on the front of your damper and use whatever spacers/washers you need between your new longer bolt head and the large washer so you can tighten down the damper. After a few turns you should have the damper far enough on that the original damper bolt can now be used to do the rest. My damper easily tightened right down and there was no doubt when I had it on as far as it would go. You’ll feel it bottom out.
-
The damper bolt needs to be torqued to 150 ft pounds. Fortunately my torque wrench went up that high. However before you can reach that torque the crankshaft will simple rotate instead of tightening the bolt. So you’ll need to lock down the damper with a homemade tool that bolts into the two 5/16" holes in the damper while the other end rests on the frame where the air filter box (which you removed) sits.
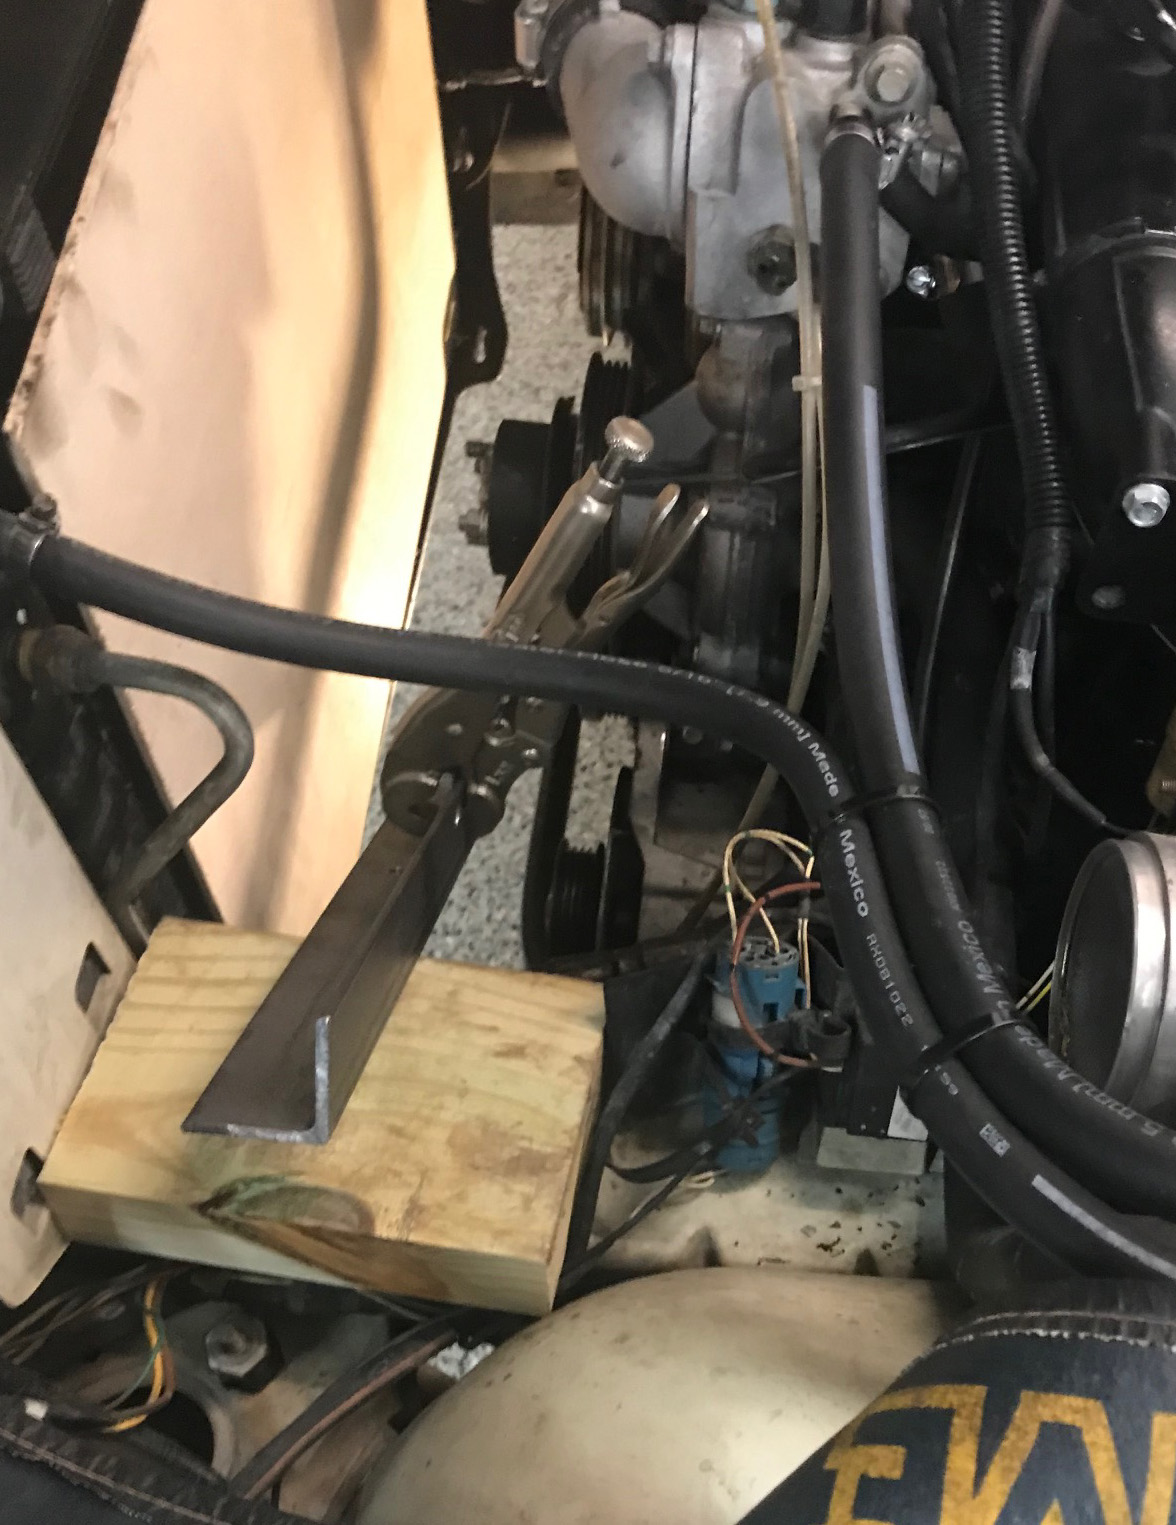
Here’s my damper lockdown tool in place. A bit of an overkill with the angle iron, I’m sure flat bar would have worked just fine. Don’t remember why I still had the vice grips attached (I used it while I was drilling the holes on the drill press). Retorquing the damper bolt to 150 ft pounds required a little muscle but was surprisingly easy to do with the damper locked down.

Another damper lockdown tool I saw online which shows how it bolts to the front of the damper.TOP TIP… Remember when you make this tool that you have to leave enough space for the socket to fit in between the two arms.
- Now reattach … your belts and apply the correct tension, the fan(s) and shroud, the air cleaner box, and you’re all done. OH YES, and now you can plug the coil wire back into the distributor.
So if you have all your tools fabricated and gathered you’re ready for this project. Honestly my biggest headache was figuring out what I needed and buying or making it. Final Top Tip… instead of running all over town just purchase the things you need online. GOOD LUCK and safe driving ![]() .
.