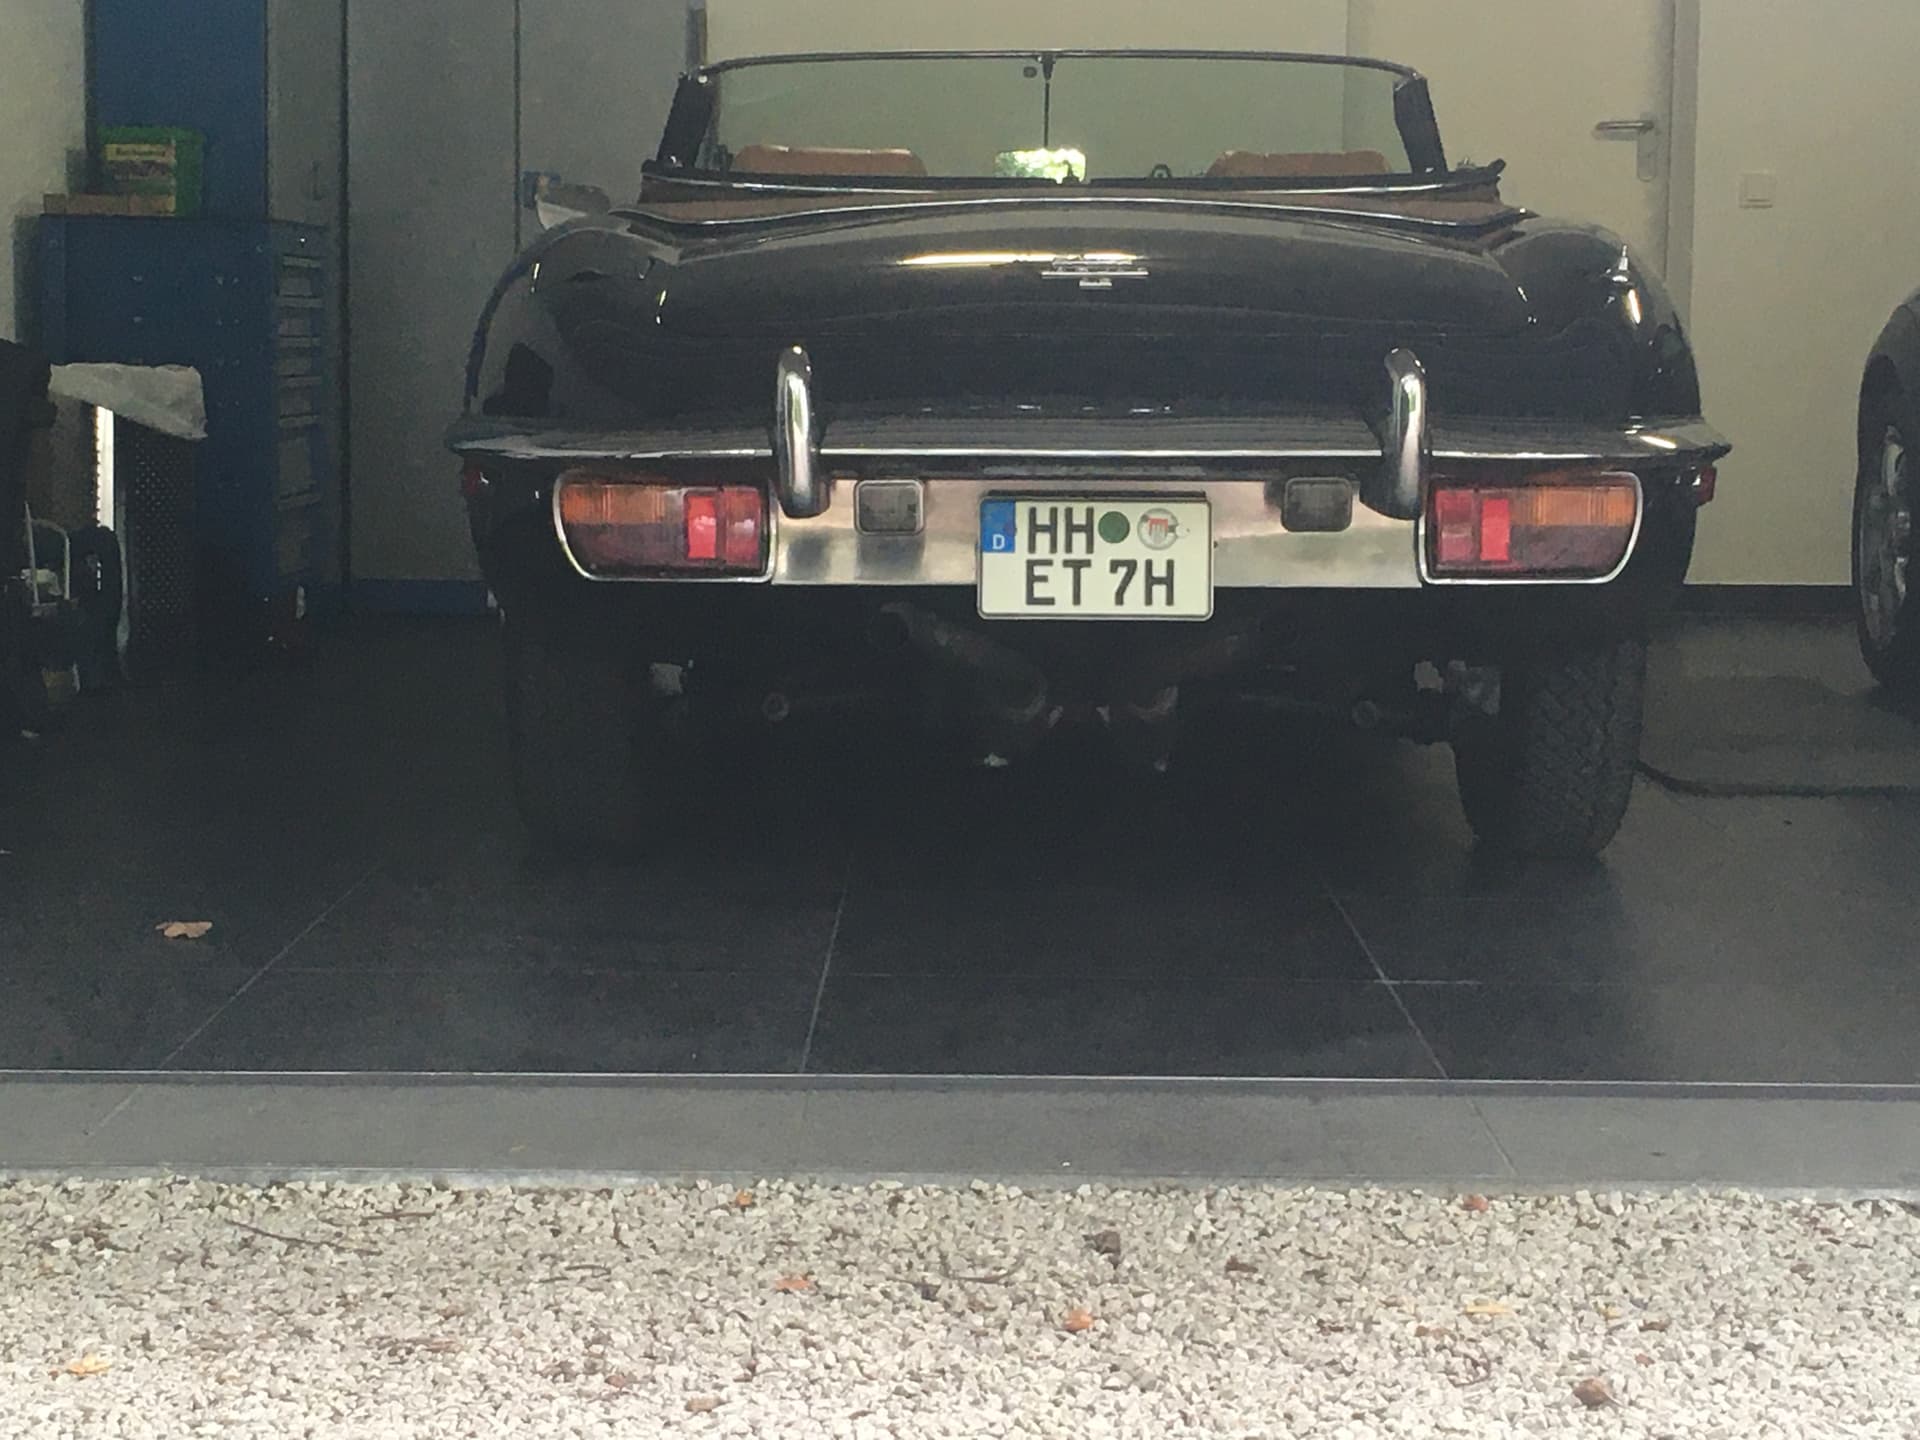
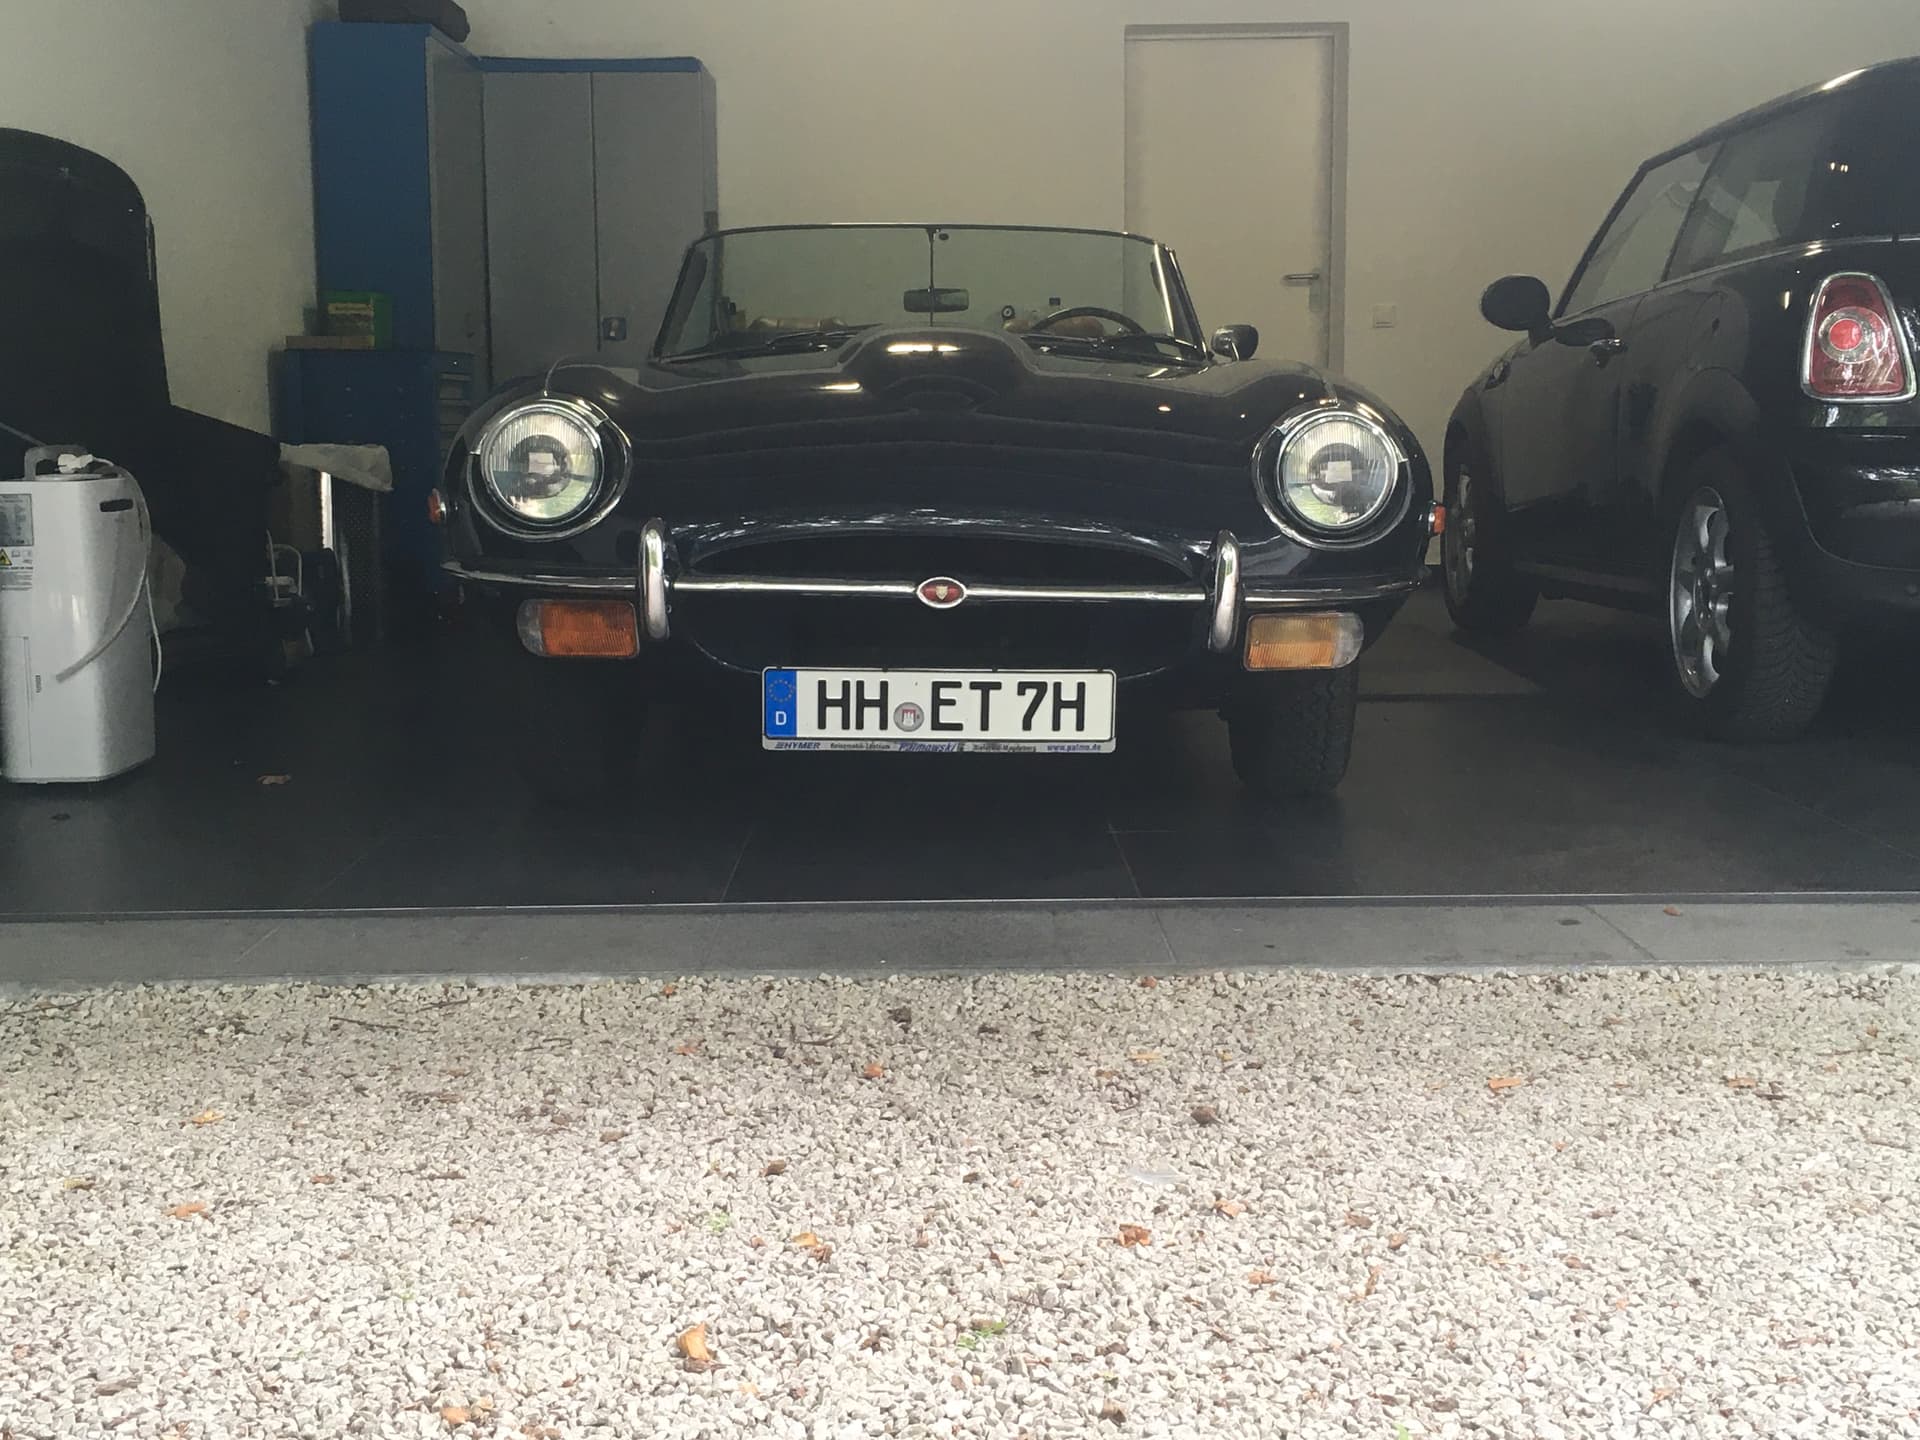
Yesterday I noticed a difference in ride height of about 2 inches front and 3/4 inches rear on the driver side vs the passenger side. I think it can be told by looking at the pics that something’s wrong here.
My research on this forum led me to believe that the torsion bars were not reinstalled properly using distancing links when the engine and transmission were out for a rebuild decades ago.
A couple of questions if I may:
am I right to assume that the smaller difference on the rear will be taken care of by adjusting the front left TB up?
I tried to do the work on the left front TB this morning but could not get the upper wishbone and steering ball pins off. I followed the instructions on Haynes but both wouldn’t move a bit even hitting the pins hard from below using the hammer from the tool kit. I didn’t dare hitting harder concerned that I might damage the threads of the pins so finally gave up and put all back together.
Am I missing something here or just more power with a bigger hammer needed?
Hello Jay,
Some advocate simply hitting hard the side of the female component of the Ball Joint assemble, with a large hammer or dolly held on the opposite side. This momentarily distorts the female components and the tapered shaft of the Ball Pin loses its grip with the tapered female bore. I dislike this method with a vengeance and would only resort to it if my life depended on it, as the chances of this working without marking the assembly in some way is unlikely.
Hitting axially on the Threaded end of the Ball Pin is very unlikely to work, notwithstanding that it would seem to be the most logical course of action. Treat yourself to a gift and purchase a Pivot and Fork type of Ball Joint splitting tool. These work a treat and do so without any damage to the parts being dismantled.
Hello Jay,
Be aware, there have been numerous threads here about torsion bars “sagging” after a while. As a mechnical engineer, I can’t really postulate that happening as they happily operate well within the elastic range of the material but anecdotal evidence would suggest otherwise. In your case, I would question that they were put in improperly decades ago and you are just now noticing the problem. As long as you are going to the effort of taking them out, for not too much money you can buy new ones from a reputable supplier like SNG and minimize the risk that yours are going to keep sagging.
BTW. You certainly know that in LHD configuration, the battery, driver, and fuel tank all conspire to make the drivers side sit lower. Some add a small amount to the setting link value on that side to counteract this effect.
As far as the relationship of front to rear, when I “corner balance” race cars, it can easily be seen by the scales that “adding weight” to one corner of the car (by adjusting spring perch height) will transfer weight to the opposite diagonal corner. So yes, in general, if you raise the ride height on the drivers front, you are going to add load on the passengers rear corner and thus compress that spring and lower the ride height there. I wouldn’t want to predict how much but since there isn’t really any built in adjustment feature on the IRS springs, what you get is what you get.
Given that they are off sides, yes. Raising the left front will load the right rear a bit
could not get the upper wishbone and steering ball pins off.
Bill’s described method does work. I use a soft dead blow hammer to the side of the knuckle while having the joint under stress with one of these. There is another tool called a pickle fork. They work but they’ll also can destroy the boot. This tool won’t cause any harm. Wear hearing protection because the bang can be loud and sudden. This one happens to fit both steering and upper balls
The qestion is which side to adjust, is the left side too low or the right side too high? Disco0nnect the anti-roll bar then check the ride hight according to the service manual for the correct height from the floor to the inner control arm pivot point, then reset the incorrect side using the setting guage. If that doesn’t correct it then you’ll have to reset the other side. But please use a ball joint splitter as others have suggested.
The only way I have ever removed ball joints and tie rod ends is using two hammers, and a pry bar. Loosen the nut, leaving it on only a few turns. Put the pry bar in place, to apply force down on the control arm. I usually put my foot on the bar, so I can provide significant force, leaving my hands free. Place a LARGE hammer on one side of the arm over the tapered pin, and whack the opposite side of the arm smartly with a small hammer. After just a few whacks, the arm should simply fall off. I have yet to see a joint that cannot be separated this way.
Unless you have rear shocks with adjustable spring perches, the rear height should be fine once the front height is corrected. If it is not, then the springs should be replaced.
Yes, amazingly it hasn’t snapped in half yet. It’s a substantial little tool. I always wear goggles and crank on it at arm’s length because I’m always afraid it will detonate but so far so good.
Thank you for confirming the unequal weight balance on LHD cars. It is something that I have always suspected. I also wonder if the cast iron exhaust manifolds/downpipes are heavier than the intake manifold/carbs as well, perhaps insignificantly. More significant are the AC components, which I’ve seen are always on that side of the car also.
Hard to tell from the rear pict on my ipad but obvious from front.
Just a thought since I can’t tell the tilt from rear.
A car will sit like that on a non-level surface. Before you do anything make sure your slab is level or you’ll be chasing your tail.
Probably not the issue but thoght id mention it
Depends, if the retaining nut is a nylock type then sometimes the pin will not have sufficient resistance and will spin when the halon meats the thread. Sometimes in this case you can use a standard nut to pull the taper into the suspension arm
Hi Jan…its far easier with the car up on a lift to adjust the torsoin bars. It saves you lying under the car…so if available use a lift…i think however that as your haveing problems just seperating the ball joints then adjusting the torsion bars isnt going to be simple…its really down to mechanical experiance working on cars and it comes with practice and experiance. …if your bars havent been removed for a long time the bolts and bars could be difficult to remove…then there is prep to make them easy to adjust…cleaning up all the splines so you can slot them in easy then pull them back out to get the correct position…i strongly reccomend that you dont ever use s hammer to bash anything…its not needed…and never mentioned in the service manual…a proper joint breaker as detailed in the above posts…and a mallet (copper/lead) just to tap the bars if needed…note if you remove both bars they are handed and need to be fitted back onto tbe correct side…pay attention to the flexi brake hose by supporting the hub with wire/string etc…The Jaguar service manual details this process very well…dont forget the very small torsion bar retaining bolt holding it in place in the lower wishbone…re assembling the ball joints…dont grease the taper pin of the joint as it can make it difficult to tighten the nut becaus the pin slips on the grease…Steve
There are tricks to getting them back on. The easiest method is an air tool because it spins fast enough to gradually overcome the friction from the nylock. It’s really hard to get an air tool on the upper joint though. So you can use ratchet tie straps to pull the upper and lower arms together to create friction on the ball, or you can put a jack under the lower and use a pry bar to pull down on the upper one while turning the nut.
I had the hide adjusted by a local shop. Result: even height but 3 inches too high. Then they readjusted. Result: ride height now about 1” under the minimum (after applying tolerance of 1/4”)…
My question is if this is mechanically still acceptable (optics are fine for me) or if I should go back and ask them again to adjust upwards by 1 1/4.
It really depends how you drive it. I drive it like I stole it. If I drove your car I’d scrape the muffler, and might even crash the down pipe (which can easily crack the manifold). If you drive conservatively and brake for road dips and bumps this is likely fine, so long as the photo was made after already taking a test drive, because it will go down a bit after the first drive.