Yes, that is the silver lining.
Rick
Yes, that is the silver lining.
Rick
In my never ending quest for over kill, I have made a tool to help mark a consistent overlap for the headliner tuck. Basically it hooks onto the support lip then extends beyond the edge of the headliner and wraps back around to a known dimension. In case that is not confusing enough, here are a few photos. It works very well and provides the confidence to cut the headliner.
I ended up using an overlap of about 3/4". This worked out well except in the two aft corners. Here the support to roof clearance closed up to less than an 1/8". I knew this going in, as I had previously gone around the entire perimeter bending the lip(s) to get a consistent gap of approx. 1/4". But in the corners I was basically trying to reshape an eggshell. Wasn’t going to happen. The correct thing to have done was to cut a couple of slits and reweld. But at this stage of finish, I’m staying away from welding.
If anyone is reading this before going to paint, that is a good time to even out the gap around the entire perimeter.
But in my case, the only option was to thin out the headliner. Sanding out with 36 grit sandpaper works well.
Not sure.
Rick
Rick, I would expect nothing less!
I think it was Bernie.
More to the thread topic, I like the headliner cut tool Rick. I think I’ll make one. And I’m aware the “rails” can be tight to the roof, so I’ll pull them open a bit with a slide hammer I’m thinking. Keep the pics and progress coming!
Another noobie question re: adhesives and their effect on painted parts.
A good deal of my upholstery will be glued to the body shell which has the same 2k base/clear as the outside. So I expect no paint interaction there. However, I also have quite a few bead blasted and repainted parts done in whatever convenient black paint was around, usually Krylon or Rustoleum. Examples are the toothed headliner skirt retainers and the the front headliner support.
As a test, I made a couple of samples using Krylon on steel with K-Grip and Weldwood Landau adhering to the wool cover used to for the sun visors which is the same as the headliner. For such a small sample, I used acid brushes as the applicators which maybe makes for coating that is a bit heavy.
The first thing I noticed is the adhesive seems to soak through the fabric very quickly and secondly the paint wrinkled and lifted on the K-Grip sample. The K-Grip solvent is methylene chloride which is a paint stripper when in concentrated form. So the wrinkling is not real surprising.
When assembled and rolled the adhesive bled through both samples and stuck to the roller.
When pulled apart, the paint failure is obvious on the K-Grip. Thw Weldwood seems OK. But the bleed through is terrible on both.
So my take away so far, is to only use K-Grip on 2k surfaces and to find a better technique for the wool fabric in general.
Advise appreciated!!
[Edit] To overcome the bleed through problem should I consider one of the 3M spray adhesives like 77 or 90?
Rick
Bleed through of the contact cement through the wool material shouldn’t be a concern because the wool should never be glued anywhere that it is exposed to view, ie, not covered up by other parts.
So for the wool headliner surround, I used 1/8" soft open cell foam glued to the metal of the surround and also over top the front and rear add-on pieces. Then, the pre-cut hemmed pieces of wool with the rubber insert were pressed into the gap between the headliner and the surround frame, pulled down neatly over the foam and either glued at the bottom of the door or window frame where it will be covered by the cantrails, or pushed up to be gripped by the saw-tooth sections and secured there. The wool should not be glued to the foam anywhere.


AS for the glue removing paint, I think it saves a lot pf trouble if one avoids using any air drying paint at all on a restoration, only two-part products. I generally used epoxy primer for those items, grey or black.
Great explanation Clive! I was confused by my disassembly pix that don’t seem to show any foam but still show presence of glue. Here’s an example. Maybe the foam has turned to dust and is just not visible. I don’t really see any glue on the wool either.
My front support actually showed felt.
I like your approach. It makes sense that the wool is not glued anywhere visible.
Thanks again
Rick
Scott, good work, like the photo. Is the rubber for the rear back door “one piece”?
I have to buy one, but these back door rubbers are more expensive then the front window screen rubber that I already bought, STRANGE at the least Mister Barratt!!
Was it easy to do this job?
Frank.
Hi Frank. Yes the back door rubber was one piece. It came from Barratt and worked just fine. Not it was not an easy job to do as I’m a first timer. The interior trim has to go on the door before the glass that’s not so bad but it takes a while. But the glass was an effort. Here’s a link to when I did that: What did you do to your E-Type today? (Part 2) - #646 by Wiggles
Rick,
3M makes a professional spray adhesive for Headliners. I recommend that. I used it on my Bettie and the headliner is still looking great after 7 years.
https://www.3m.com/3M/en_US/p/d/b40069438/
John
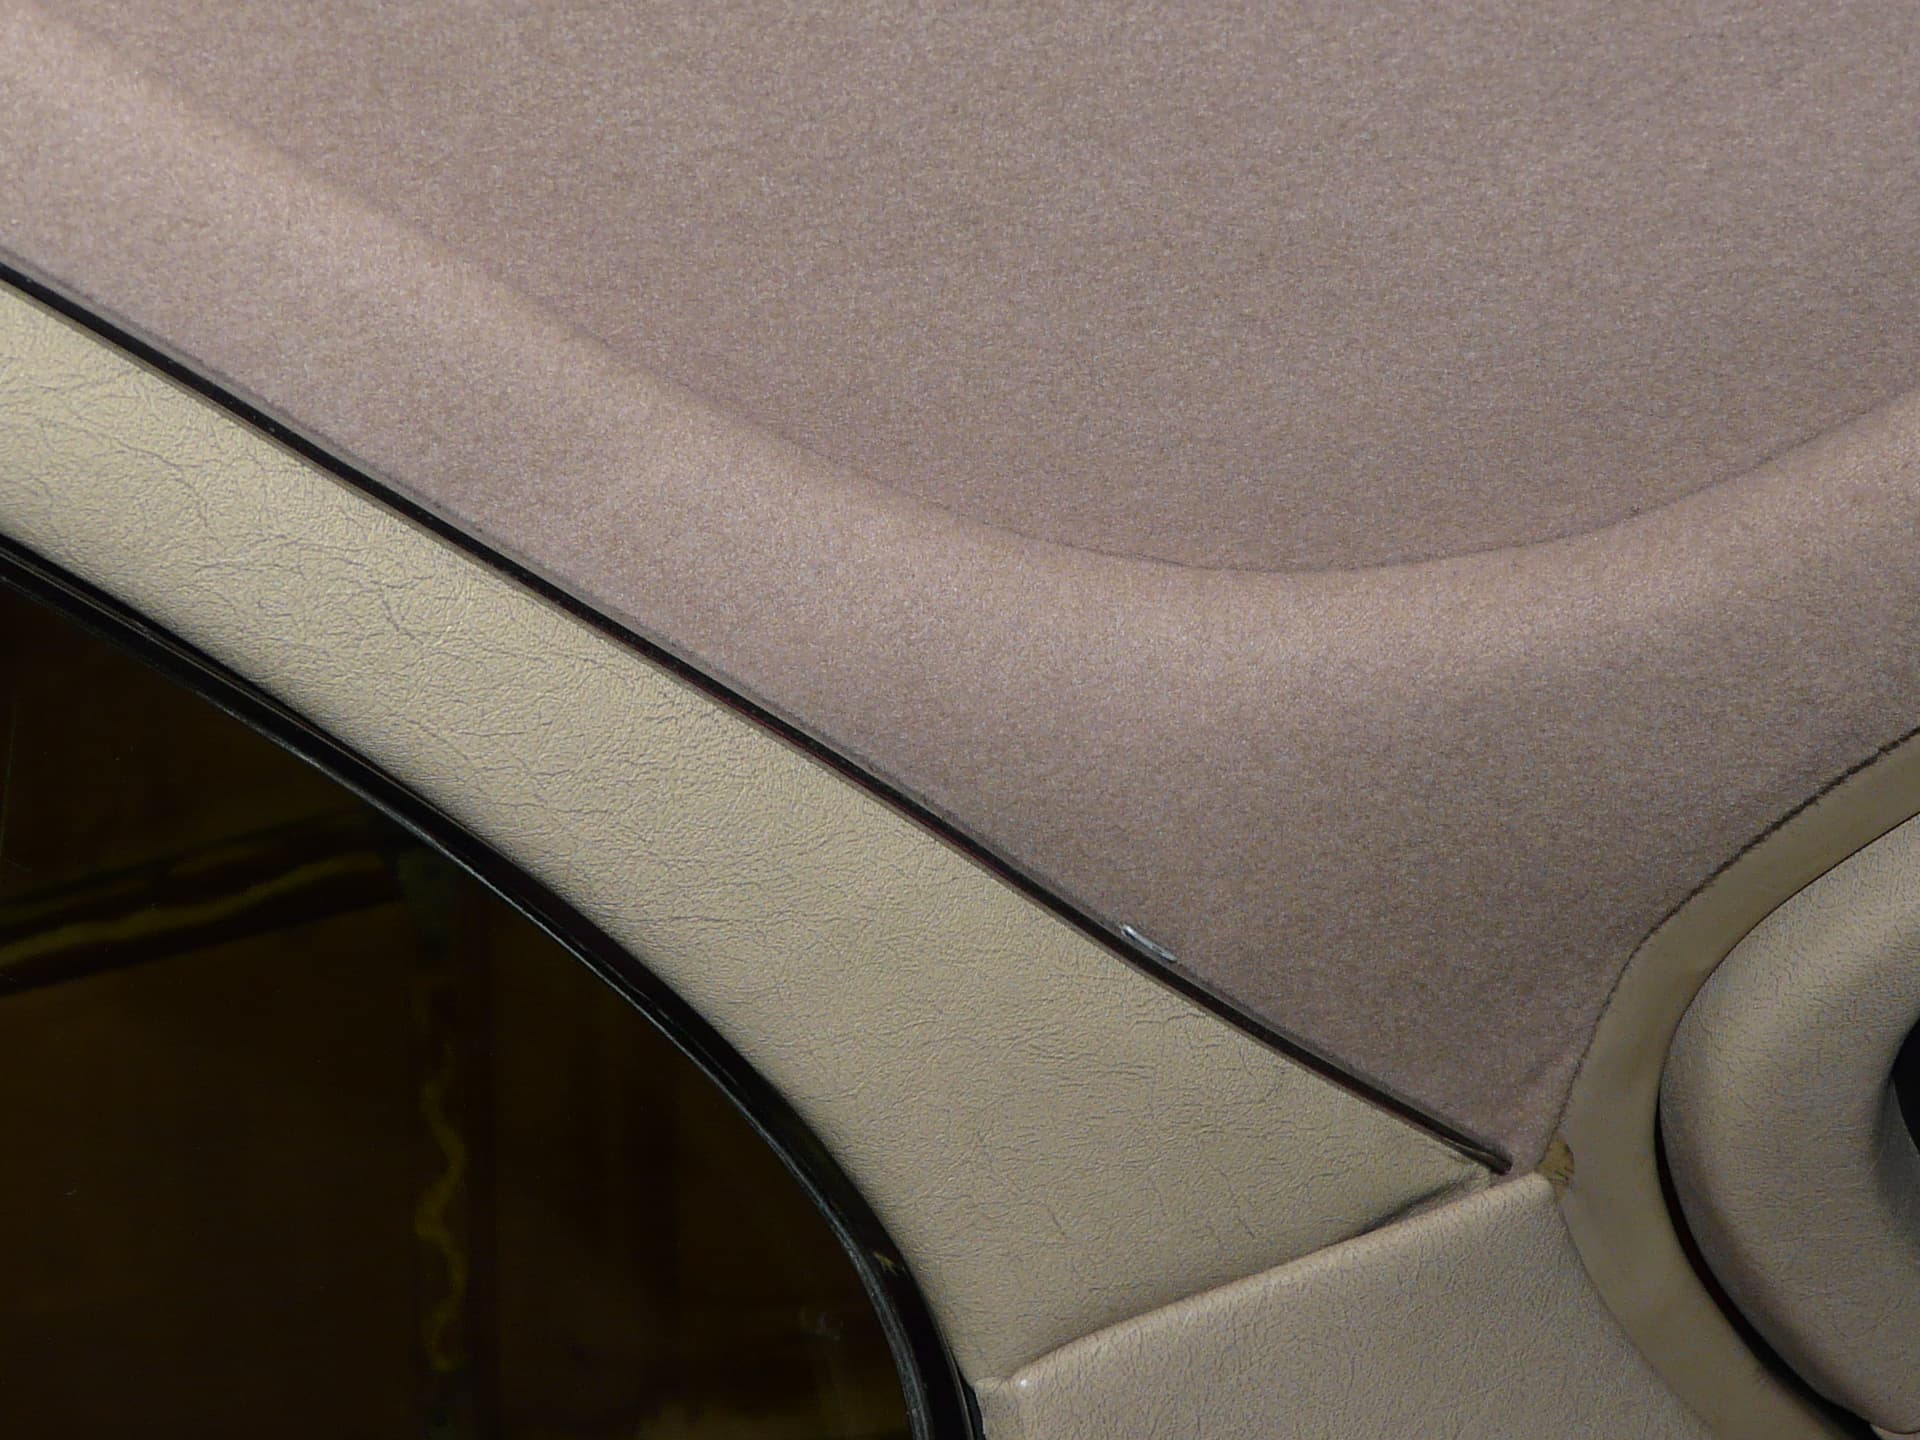
I’m probably overthinking this, but since I’ve never done this before, details matter. In the picture below, does the foam follow the red lines or the blue lines? In other words, does it wrap around the edge or stop at the “horizontal” surfaces?
Thanks
Rick
Thanks John
Rick, I honestly can’t remember that detail. It must be 25 years ago that I did this. But I added another photo above of that area when finished so maybe that helps.
If you look at the first pic of the rear end where the wool is taped to the headliner, you could do a dry run with the foam just to see how would look. I don’t remember if I chamfered the foam edge or not, but you could tuck it up to the red line and pull down the wool to see how it looks before you commit to gluing maybe.
Ahhh, a chance to do a prototype! I love it.
Rick

I tucked the foam into the slot but only just a little bit for a clean edge. As you can see from my photo you need to tuck the fabric for the edge trims into the slot where the headlining ends, so it cannot run to the second red line.
Good luck with it.
John, is that a contact adhesive that requires coating both surfaces or is it a single application?
I have to redo my hardtop headliner, again. After only a couple of years it’s developed a sag. The material’s in excellent shape so I can just reglue it, but would rather apply the adhesive only to one surface.
Nick,
Yes it is that type of glue. Both surfaces are sprayed and allowed to tack up, then you press them together and that’s it. No chance to move it after you touch them together.
What kind of adhesive did you use? I hope it wasn’t Weldwood Landau!
Rick
Thanks John. I am still fighting to get to the stage of your photo. The tuck has gone OK except in the corners. It will be fabric only there. And even that has been a struggle. I’ve had to try a few different hose diameters. I’ll post when I have success.
Rick