Yep, that’s what I’m saying.
Where are you in the process?
have you got the fan and clutch assembly off yet? Status update please.
I haven’t had time to do any more with it this past week. Hoping I may get a day this coming week. In the meantime, i’ve bought all new belts and ordered a new water pump for it. If i’m getting this deep into it, I figured I should just change the pump too.
This was supposed to be a quick “replace all the hoses” job. Lol
While you’re at it, don’t for get the thermostat, haha…
spanner wielding jaguar owners beware.
Every time, ok 3 times, I’ve replaced a thermostat in a XK6 the long housing bolt head twisted off. I’m not 200lb gorilla either. I’m of slight build, and frankly not as strong as I use to be. Essentially what happens is the steel bolt and the aluminium housing get entangled in a romantic interlude, and would rather die than separate. I say. So be it.
The net result the head of the bolt twists off. I’m using a 3/8" drive moderately sized handle and the head still comes off. Bugger! I’ve done it so many times I count on it. I’ve tried penetrating oil, heat, cold, impact, and mostly prayers, in order to un-entangle the two with no success. What happens is the long shaft of the plated bolt becomes one with the housing via, I’m assuming, some sort of galvanic corrosion / oxidation. Or a form of electro-plating / bonding. the block is grounded, and electrics can be questionable on a Jag. I’m not a metallurgists and frankly not that smart.
Once the housing is off, it’s pretty easy to get the bolt out. Typically I use a bit of WD40 on the threaded area let it sit, tap (on the end that once had a hex head on it) the bolt with a hammer GENTLY to loosen up what remaining romantic bonds may still exist. Then chock the remaining bolt in a 90 degree headed drill motor, and slowly spin it out. I’ve also used another tool that’s proved handy is a broken bolt remover tool - not sure where I got it I looked for a link, but if I don’t know what I’m looking for, it’s really hard to find. ANYWAY, it looks like a drill chuck with a 3/8" drive end on it to attach a ratchet. Works great! - not so good for really tight places though. Sometimes it takes a couple doses of P oil and tapey tap taps. to get it loose. If it puts up any significant fight, then STOP. It’s a grade 5 bolt and will twist off at the threads which is a really bad day. intake and water rail off to the bench. Yep done that too. There’s a pant-load of fasteners that hold the intake and water rail on. Just Say’n.
I replace the bolts with stainless, then put a condom on it in the form of a coat of anti-sneeze such as copper grease, or Permatex grey anti-seize compound, be sure to put a bit on the threads too. Stainless has a nasty habit of stiction. If left uncheck will pull the threads out of aluminum.
I’ve got nothing against inter-metal marriages, but when it interferes with my task at hand; I’m putting an end to it. Sorry Bolt, Sorry housing - you’ll get over it. 
I have a new thermostat on hand, ready to change. Thanks for the heads up about that bolt. Looks like another headache i’ll end up dealing with. At least now i’ll be ready for it!
When rebuilding my ZS carb hot water choke…I found the steel bolts seized in the aluminum housing. I found a recommended technique from a British carb rebuilder…he recommended…heat the aluminum housing with a propane torch…then immediately quench with water. This technique worked fantastic at breaking the grip on the bolt and allowed its easy removal.
May be worth a try.
Cheers
Gary
1 Like
Nice tip! I’ll give that a go on my XK6 rebuild.
**
If it is any consolation, Mark; you are not alone…
“Remove and grease the long bolt on the thermostat housing” should be part of the maintenance schedule…![]() Actually, brute force will not loosen the bold, the marriage between long bolt and long housing is made in hell.
Actually, brute force will not loosen the bold, the marriage between long bolt and long housing is made in hell.
And when the bolt snaps, which it does at the drop of a hat - great patience and all tricks available should first be tried. I’m not sure Gary’s heating suggestion will work on this long connection - but with the work involved with a broken bolt I would be willing to try anything. But no brute force at any time…![]()
Frank
xj6 85 Sov Europe (UK/NZ)
**
1 Like
Make sure your thermostat has the tickle valve. and make sure it’s at the highest point when you install the thermostat. If it doesn’t have one, I’ve drilled an 1/8" hole in the outer ring of the thermostat, then put a cotter pin in the hole pinched the ends over so it would come out. but it still wiggles around in the hole.
The purpose of the hole is to permit bleed through which will make purging the air possible. I went to the local parts house and purchase 3 thermostat that were supposed to be the right one. none had the relief hole and 1 was too deep. Finally ordered from Terry’s Jag. Got the green box with the exact part. emptied my pockets twice as quick as the local parts house; but it was worth it.
My prayers are with you. NOT BRUTE FORCE, 
cheers,
Mark
1 Like
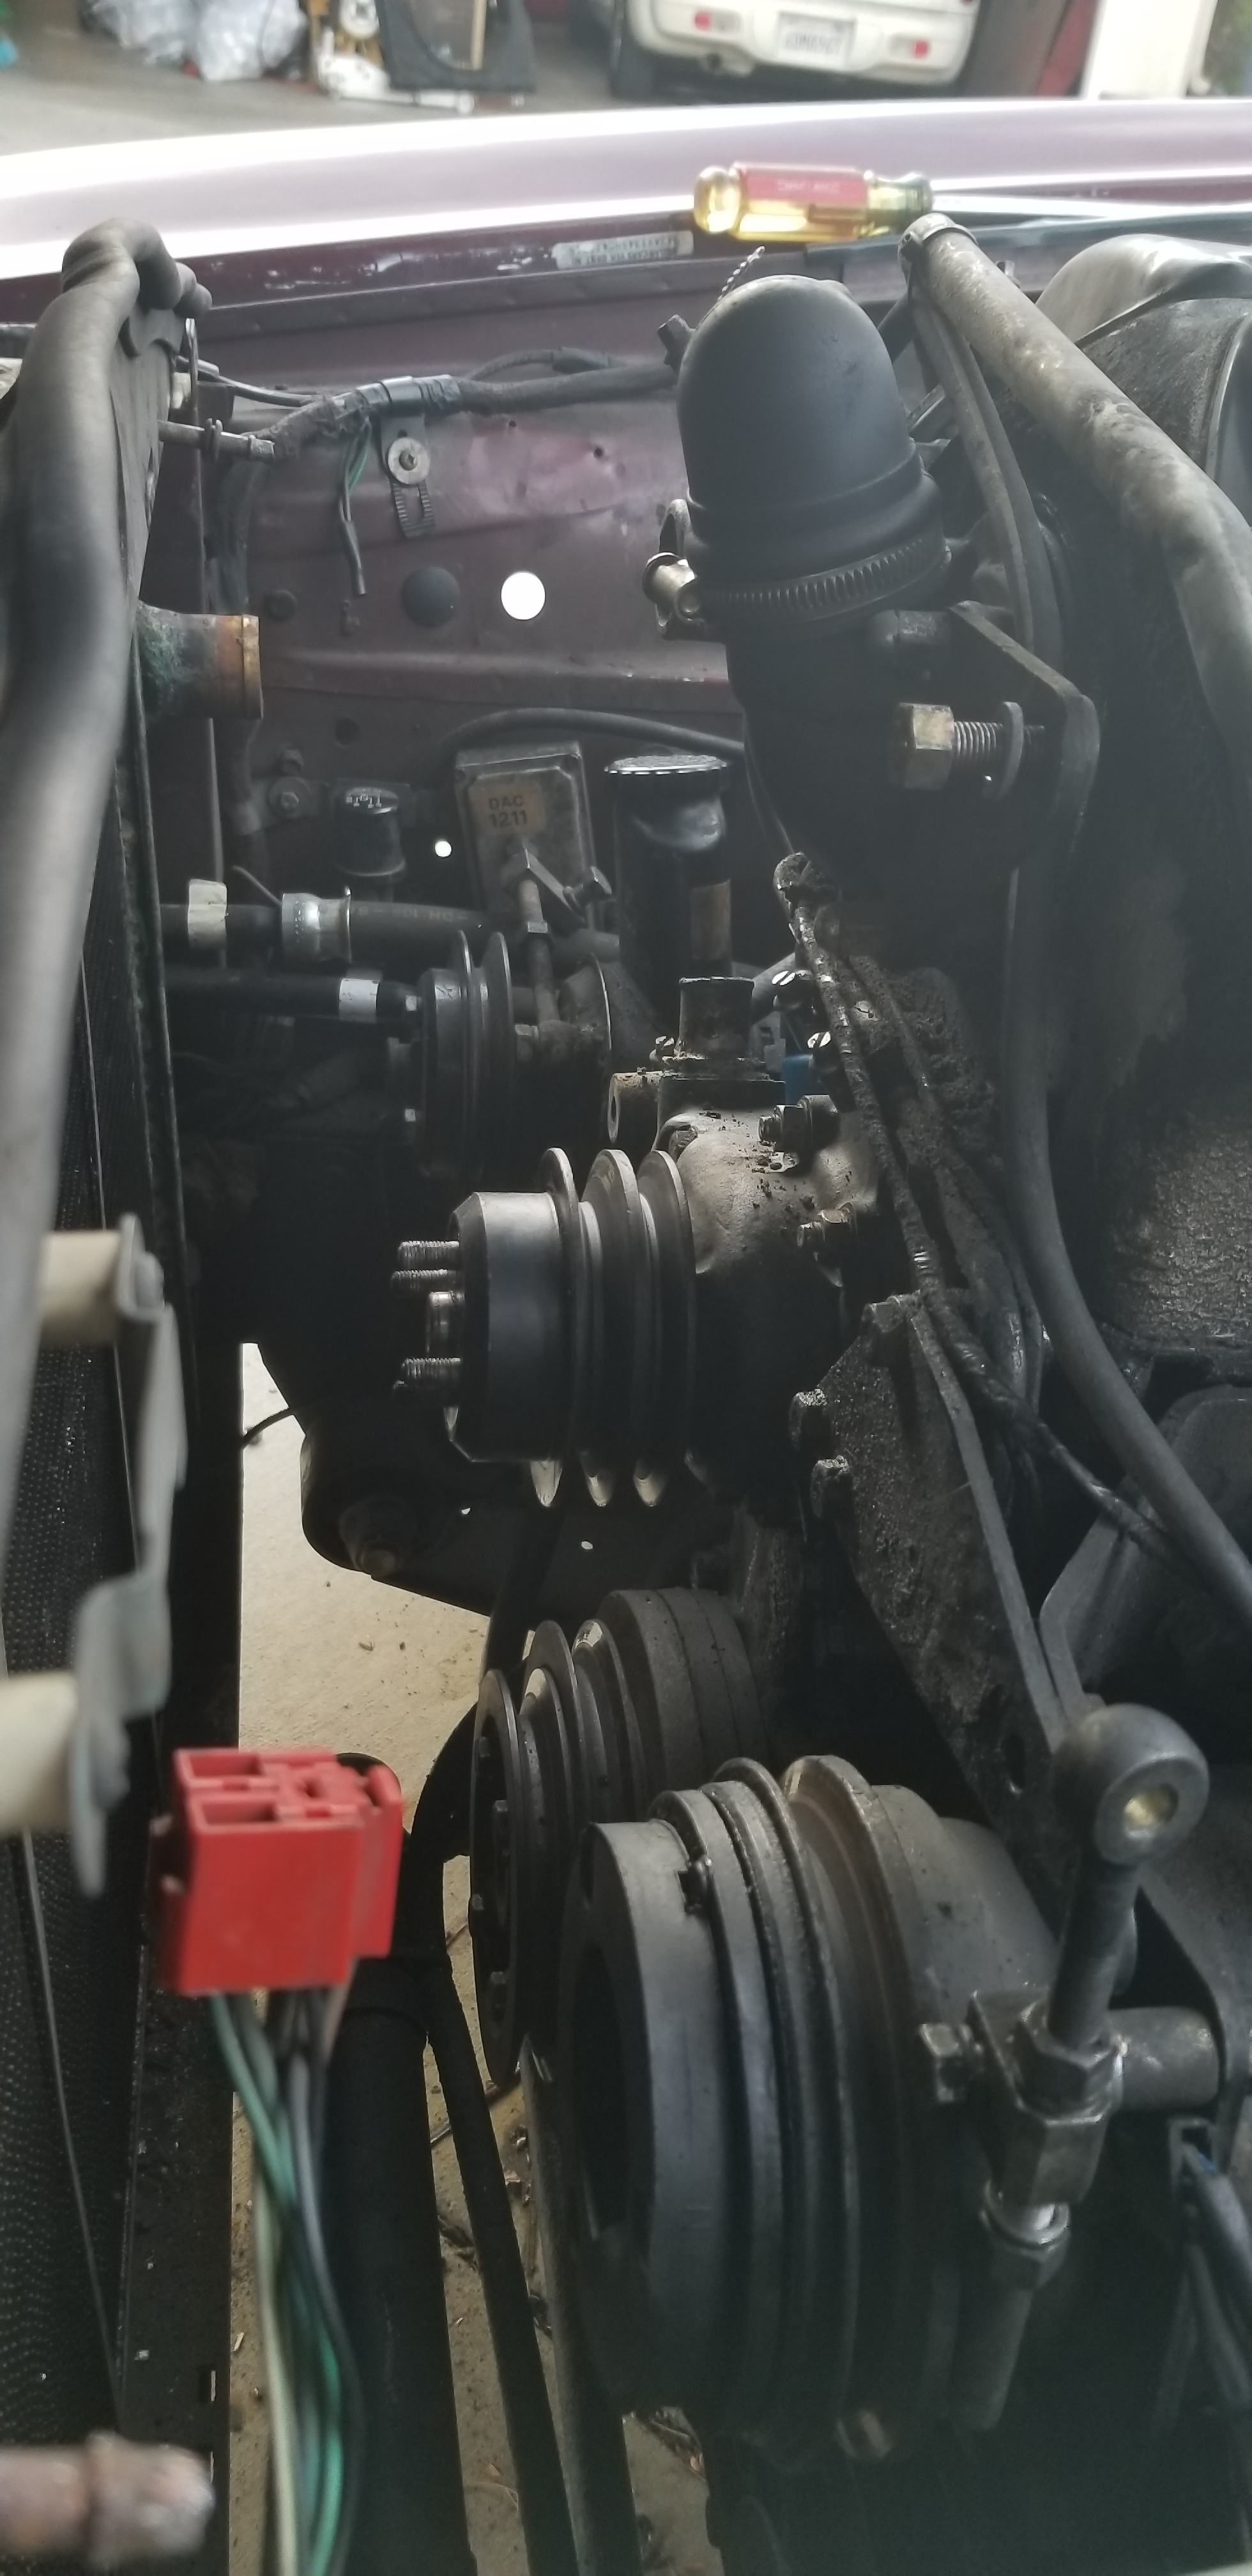
So, I made a little more progress today. The fan is off! Thank you all for the tips, I did end up removing the 6 bolts on the upper radiator support and easing it forward a little too get the fan and shroud out.
Since I bought a new water pump, I wasn’t worried about causing any damage to the existing one; so I got the hub and pulley separated with a BFH and a screwdriver 
Smog pump is now removed, i’ll tackle the water pump and thermostat housing next time out!
1 Like
Percussion often wins the day…
Kudos on the persistence.
Carl
Well, my poor car has been sitting in the driveway waiting for me to complete the cooling system overhaul. It will have to wait another week or two before I have any real time to spend with it. I now have all new hoses, fan, fan clutch, water pump, thermostat and radiator waiting to go on it. I noticed the new (aftermarket) water pump comes with 2 hose nipples that need to be screwed into it; but there needs to be a 3rd nipple that screws into the right side of the pump and connects to the hose for the throttle body.
Does anybody know the correct size nipple to use for that connection. (I will try and remove/ reuse the one from the original pump if I have to, but I’d rather get a new one). It seems odd that they only provide 2 of the 3 required nipples with the pump, but after reviewing the contents photos from various online sources, they all only show 2 being provided.
when attempt to take the nipple out, you’re probably gonna meet up with some resistence. watch my video on “Honey I shrunk the seal!” use this to try to shrink the nipple, I’d be hitting is daily with WD40 Rust penetrant. It works well, but you’ve gotta keep at it, because the stuff evaporates.
this is what I’ve done. If the car gonna sit for a spell, then squirt the joint with rust penetrant (oil). then go out the next day take a look at the joint to see if it’s still wet from the penetrant if so, then I usually way another 1/2 and check it again. Once before I go off to work, and again when I get home or sometime in the evening.
When you’re ready get it good and cold then wrench (spanner) it out.
Cheers
Mark
1 Like
Just wanted to give you all an update on my progress. The good news is the job is now almost complete I need to attach the lower radiator hose, and the small bypass hoses, secure the fan shroud and fill her up with water. (Antifreeze will come after a leak test and flush). Thank you to all who provided me with much needed and valued advice here. You guys are awesome!

1 Like
Nicely done! Kutos to you!
Looks wonderful.
1 Like