Tim the ring shown in my photo is a spare I obtained from a scrapyard Wolseley some years ago.
The wheel / boss and manette assembly on my 100 replica is a mixture of parts.
When the manette is in place the upstand on the boss is not visible, so as long as all the parts fit
use the best wheel…
Peter B.
Hello Peter,
It would be a pity not to restore both wheels while I have access to a very skilled restorer. The better of the two wheels has two unthreaded drillings in the boss on opposite sides, unfortunately. Any thoughts on how to fill in the drillings?

/Users/timothyfox/Pictures/Photos Library.photoslibrary/resources/proxies/derivatives/50/00/50cb/UNADJUSTEDNONRAW_thumb_50cb.jpg

Best wishes,
Tim
Tim two of the holes , one each side, are used to locate the manette by means of pointed grub screws
that nip upon the disc shown .You will have to determine the holes that mate with the disc.
The surplus holes I would tig weld but a solid alu rivet knocked in ,filed and polished, might do the job.
Peter B.

Thank you, Peter.
The higher of the holes are the unwanted holes. The lower two are those which locate the manette. The threads are not too bad. I’m still confused at what purpose the additional drillings would have served, as they are not threaded? Thank you for the suggestion about the aluminium rivet. I think that will be the best solution.
Kindest regards,
Tim
Ed when I recond the wheel on my car, my not to “in depth” impression was that the alu part of the rim
was riveted to the steel part, but after more thought, due to this thread, perhaps not so! As we know the SS1 wheel has the alu boss and rim cast over the ends of the spokes, so was the same method
employed on the rim of the 36/7 wheels? it seems logical.
Peter B.
The early SS Jaguar wheels 36/7
Had spoke with a T shaped end, The rim was in 2 parts aluminium rivetted together. These are easily picked by having a completely flat area being the outer end of the spoke, And more clearly defined finger grips.
However when I re-do them I laser a whole 4 spoke wheel in one piece [ in steel witha 1/4" wide rim that is hidden between the two alloy halves Then once we had done this, It was possible to cast new alloy rim halves in alloy and make new wheels, Slightly msmaller in diameter wit the shrinkage but only about 1/2". Then some early 1 1/2 litres had 17" steering wheels and these are convenient for SS100s, so I did some of these.
Looking at aMk IV St wheel today, they had the canceling ring pretty much flush. Other models had manual adv/ ret so to accommodate the lever , from memory, they may have needed more clearance


.

Thanks for the reply Ed. So my recollection , it is pushing 30 yrs ago, that the two alu halves
are riveted is correct, some relief that my memory is OK.
For the black finish I powder coat then flat, powder coat and flat again, then polish with a buffing
mop. Do I recall you use celluliod?
Peter B.
Thanks Peter and Ed, more fascinating stuff.
I agree that for Tim’s wheel hub, tig welding, filing and polishing would be best if you can manage it. Looks like somebody was drilling trying to remove the manette. Since they are so close to the holes you want to save, you might consider putting a sacrificial screw in each of the threaded holes during the welding to limit distortion there. Something with a head on it that you can easily remove later.
My wheel measures 18" outside diameter and the rim is 7/8" width and 13/16" thick on the finger nubs, 11/16" thick in the finger valleys.

Another detail difference I noticed is my spokes are black all the way to the center.

I learned what happens if you remove that larger screw, the self cancelling ring moves. I guess its provided for an adjustment. The Service Manual Plate 72 says not to mess with it.
And this excellent discussion has made me notice something else, that my advance lever is not connected to anything. Something to pursue on another thread when the weather gets better here.
Peter The original black finish was celluloid. The early alloy rims are easir in that they don’t develop fatigue cracks at the spoke ends. The later ones with cracks are better welded [ TIG if poss, Butt soldering or brazing doesn’t have mush tensile strength…
To duplicate the thickness of the celuloid we spray a few times with polyester spray filler, then Hi [ fill then 2 pack black. I feel that powder coating give a bit hard feel. The 2 pack is extremely durable. Unfortunately doing one at a time is wasteful as apart from more paint missing than hitting it’s wasteful on thinner and paint. Ideally one would do them in batches. Additionally Powd r coating makes keeping the beading on the inner end of the sokes hard. The heat may loosen solder if used or damage adhesive if that was used.
To fill in Tim’s excess drilled holes, itmay be better to find out what thread they are and turn up and thread a piece of aluminium, screw it in and cut off flush. The original holes were 2 BA. { I think]
Rob . Your adv/ret lever should connect to the inner manette tube { if it’s there.] Not that one needs to use it with modern fuels { I don’t recall a car made in the last 70 years that sued them.
Tim , Your wheel might be held up looking for brass D beading. My brother is doing a MK IV wheel at present [ he says never again] and has used the last of our cache. You think you have bought enough but it uses more than you think. The last came from Model rail live steam supplies who sold me their last stocks.
. I’ll have to google and see who else might have it
Whilst on manettes, the knobs are Mazak and often crumble. The way we go is investment cast new ones in brass, although the dip is cast in situ with the lever. They are tricky to get back on with the spring, But there is a clever easy way.
Trivia point to discussfor toay… I am told that SS saloons had the knurling on the dash knobs as a criss cross pattern.Post war were straight. And that some intermediate cars had a mixture { Which sounds like Bill… don’t waste anything.

The additional holes are drillings without any threads. The grub screw holes are okay.
Perhaps the additional drillings were used to pull the wheel off at some stage if it had seized on the splines? Pretty ordinary solution! Other than that I have no suggestions.
Tim
The excess holes could still be tapped and an alloy grub screw inserted… from inside and outside cut off flush and polished along with the rest of the centre. I wouldn’t think welding to be a good idea for numerous reasons.
Ed Re the spoke to rim on the later wheel solder NO! but brazing C`mon ! I can think of brazed
joints under far more stress. For the raised feature on the inner end of the spokes I silver solder
a length of mig wire then fettle to obtain the profile, and of course using siver solder, no prob with melting in the powder coat oven. Tis true, that from the oven, powder coat is not the best feel, but
flatting and buffing to a pollished finish gives the rim that “plastic” celuliod feel
Silver soldering a .11/16" ball bearing on to the lever, then chroming ,is one solution re the mannete
controls, but who would not commend your endeavour.
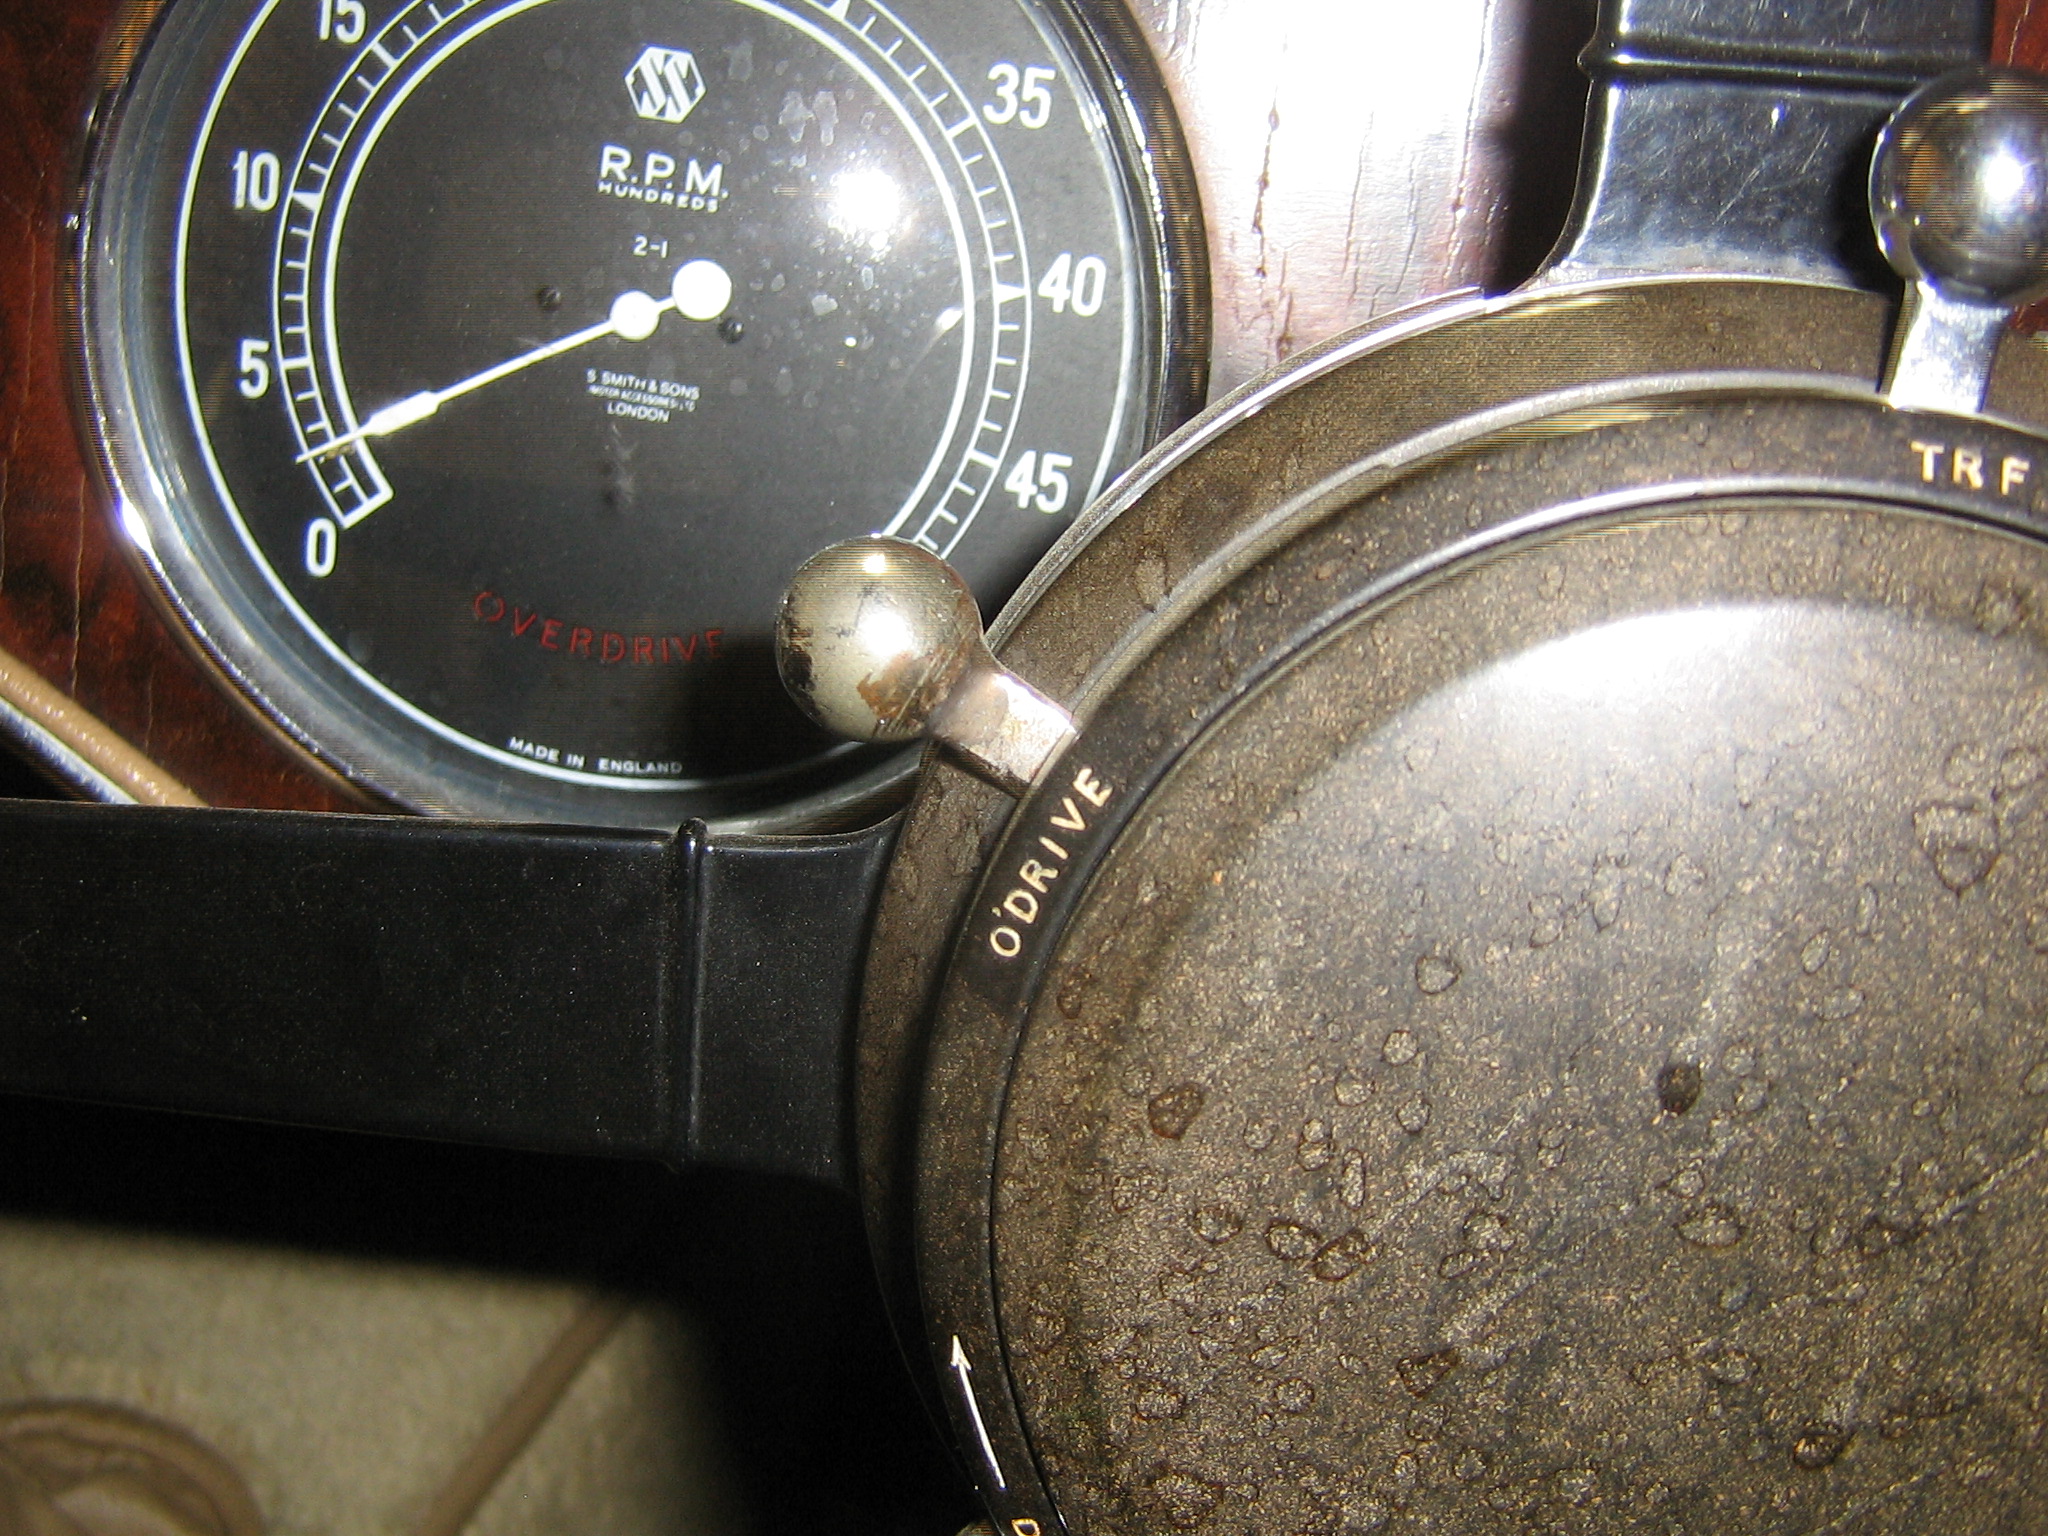
Photo shows a lever I added to the manette on my car to operate a overdrive.
Uponr reflection I would not tig the excess holes , instead I would load a reel of alu wire in my
mig welder and give the holes a quick squirt, distortion no probs!
Peter B
Peter
That’s an interesting dashboard… SS100 needle on a black faced SS100 style tacho, Nicely done. But My limited understanding is that brazing [ inc silver brazing ]is good for compression joints but not so much for tension., The problem with powde coating we found was leaving the plated inner ends to the spokes.
Originally cad plated, we’ve tried tin plating but ended up lasering new spokes from a satin finish stainless steel { for SSs]
Lasering the whole wheel inone piece was convenient, stornger and made alignment easier. but was wasteful of steel, NOt an issue with on e offs but Bluemells doing thousands would have stamped them out separately close together.
The trouble with repairing holes etc in aluminium is that the colour of the new alloy is unlikely to match, So I would think the smallest possible insert, Allthe many varieties of alloy are slightly different coours. I knew someone with a brass bodied Packhard. The trouble when getting brass sheet to repair parts,was that the colour wasn’t the same. So he sacrificed some from the roof and painted that and used the donor bits to repair. Likewise I have a repaired [ extra hole welded] in a rocker cover. Nice weld but the colour is different.
BTW , just googled and D section { called ’ half round’] brass beading is available in suitable sizes { 1/16" or 3 /32’] from a model steam supplier in UK Reeves model engineers on line, not expensive. Sold by the foot.
Thank you very much Ed. I’ll look them up presently.
Cheers,
Tim
When I built the car the dials were refurbed with the correct colour, or as near as dammit, faces.
Circa 1995 I started to collect parts to build another 100, , SS1 tourer chassis, `38 engine correct
axels etc. Prefering black face white numeral I had the instruments refurbed so.
I changed the complete correct face intruments in my existing car to the black / white numeral type,
the correct colour dials along with the other parts were then sold 2006 approx to our man in Holland.
The chassis and other parts , I believe, went to Israel not sure!
The amount of brass added to the steering wheel rim / spokes is well within any tension liable to be applied.
The later wheels I have zinc plated, then mask off the inner part before powder coating. If the
zinc is to bright I dull it with a light application of rubbing compuond.
If the excess holes were say, 3/4" dia, then discolouration / distortion might be a prob, but with
3/16" holes ! I think not.
Peter B.
This place has brass half oval and pin moldings, page 28.
http://www.restorationstuff.com/pdf/RestorationSupplyCompany.pdf
From the “that’ll buff out” stock. Somebody installed the clearance badge on the wrong side when Bill wasn’t looking.

It’s up to Tim’s preference. 3/16’ holes will tap to 1/4’. I have 1/4" BSF alloy bolts in stock and Tim is welcome to pick up one if he wishes.
Hello Ed,
That’s very kind of you to make yet another generous offer, thank you. I shall be in touch.
Kind regards,
Tim