Well it may or may not be ultimate depending on the input. After 20K miles the rope seal that was installed after my engine freshening has started to leak more than I’m comfortable with. What was a dime or quarter sized drop is now more like an old school silver dollar. I haven’t completely ruled out just replacing it with more rope. 20K miles and 18 years is not an awful record. The leaks also got way worse after a multi-year hibernation. I suspect that being allowed to dry out might have contributed to it’s end of life. But I want to consider all my options before starting this.
I’m seeing 4-5 options out there at the moment.
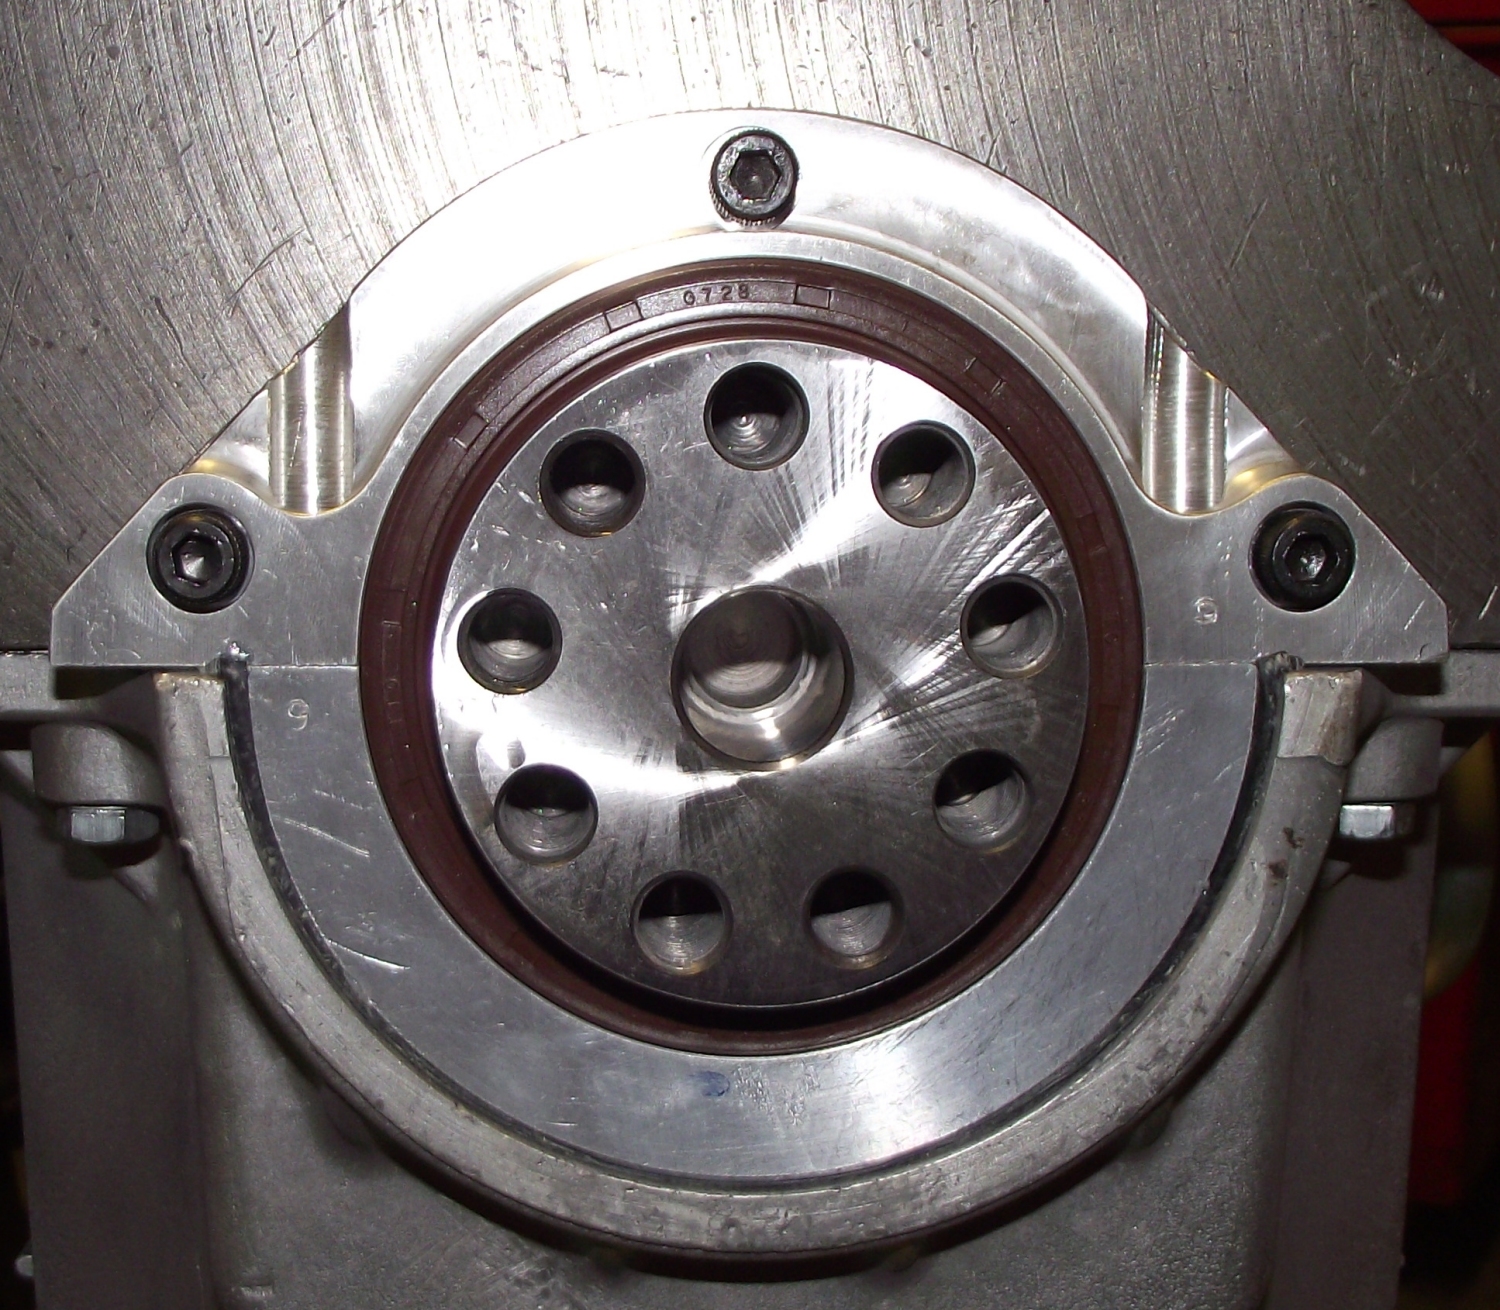
I think the granddaddy of them all might be the Rob Beere. I’m not quite understanding from the page description how this all works. Judging from this photo, it appears that the crank is actually shortened? It’s been a long time since I saw mine apart but I recall the seal riding on the scroll which is right behind the flywheel mounting flange. This photo shows the new seal riding right on the flange so either the seal carrier is much thicker or the crank is actually shorter. If the latter, how does that work? It’s not like you can swap the gearbox input shaft for a longer one.
It would seem that the strongest argument supporting this one is that it’s a single piece seal. Provided the machining is perfect, it should last the rest of my life. Detriments, the cost for sure, and major surgery to the crank.
I think the most popular kit is the Terry’s kit. I know Eric and Mike Moore have it installed. In what way is this superior to the other options? I watched the install video and my first impression is that there are some fiddly steps involved in a leak free installation. The need to trim the seal halves concerns me. I’m not really sure from the video whether all four ends need to be trimmed. Also he assembles it and one end still seems to protrude (perhaps it’s just the angle though.) It also seems to require a fair amount of silicone which seems like it could be another point of failure. Is there a metal frame in this seal? If so then they must have used some sort of a saw to bisect it. That would mean lost material resulting in a gap once installed. Is it depending on silicone to fill that gap? I guess they could have started with 2 identical seals and bisected them a bit long.
I’ve seen some discussion about the XKs kit but no testimonials. I thought that it had a single cut in the seal. But the main ad page shows no cuts and the replacement seal page shows 2 cuts. If it’s 2 then it’s no different from the Terry’s.
Lastly SNG. I haven’t heard any discussion at all about their products. Interestingly they show 2 different options, but make no effort to distinguish between them. Does anyone know more? Is it again a 2 part seal?
It appears that the Rob Beere set up requires that the flange on the crank be cut off. You’ll notice that the holes for the bolts holding the flywheel on are no longer open at the end like they are on the stock flange, which suggests they’ve been drilled into the journal. This would shorten the crank for sure and require a custom flywheel. It may be that part of the hole for the input shaft journal may reside in the flywheel. His ad suggests that you need a new flywheel. I think that Beere markets quality products, and he’s been building racing cars for years - but I’d be a bit leery about this setup. On the stock set up the flange is a tight fit into the flywheel back plus they use large locating dowels. Beere’s setup doesn’t do either.
Terry’s system looks very simple IMO. Bill is very approachable - if you have questions phone him. The seal has to be trimmed as suggested in the video. If you didn’t the excess would cause distortions in the seal at the joint. We’re all used to the manual saying DON’T CUT THE ROPE SEAL, so his instructions are initially alarming. If you’re careful and align one end you only have to trim the other end. The seal is obviously for another car - it may be manufactured already cut. Most seals like this have an internal circular spring that holds it against the journal. This one doesn’t it appears, or it’s discarded. Something to talk to Bill about.
when Rob rebuilt my engine i debated changing the rear seal. Rob advised that a corrected fitted rope seal should be just fine. due to cost and a non reversible mod to the crank i stayed with the rope seal. Thats was approx 12 years and 25k miles ago. i get virtually non drips.
Good observation on the bolt holes. I gather they’re blanked off to prevent oil seepage into the threads since the flange is now the sealing surface. Not sure if they go into the journal or if it’s a whole new flange. Is the journal that large such that it could accommodate those screws?
Also IIRC you are correct that the factory flywheel has a recess that fits snug over the flange. I can see how that might be kind of important for location. Without it, it would depend entirely on the bolts for centralization. I had a similar issue with my Minilite style wheels that have a separate hub bolted to the wheel. I could never get the hop completely out of them until I had a machine shop cut a slight recess to perfectly centralize the hub in the wheel before bolting it together. I guess if everything is machined to perfection this approach could work but there seems to be a lot of room for mishap.
Not sure about the spring. I know the design you’re speaking of. The original front main has one like that. Maybe this is a softer rubber and the crankcase pressure is enough to hold the lip tip against the journal. The Teflon style front seal is like that, no spring.
Interesting. My rope seal leaked trivially for about 16k miles. Then the long hibernation (over 3 years) and it started getting much worse after I woke it up.
Properly installed rope seals give very little trouble. Using the factory sizing tool is a must. Shortcut the job and you will get leakage. The seals are longer than what looks like should fit. Just a matter of compressing them into place. If you trim them, they will shrink causing a gap which will leak even worse. It is amazing how many do not do the job correctly and then blame the leak on a old style system or design flaw. Food for thought, as there are many different brands of conversion seal kits, what happens when yours gets 5 -6 years old and starts leaking, is the same supplier going to have that exact seal?
Mine was fully stuffed into the carrier by the head mechanic at CJ back when the car was restored in 01. He used the factory tool and gradually clamped the carrier halves together as it was rotated. I can’t recall if any sort of pookey was used on the rope, or carrier but I don’t think so. I don’t recall having to trim anything. I did used a tiny dab of silicone right on the ends or the rope when assembling.
Are you saying they’re good forever ideally? I kind of got the feeling that they’d be good for a while as mine was, but then they gradually wear out. As I mentioned above it went through a long hibernation and that might have kicked off my current situation.
Good point about the replacement seals. I’d actually thought about that myself. I’d only consider it if I could buy a few spares of the actual seal used to put on the shelf. I haven’t committed to this though. If I get another 18 years out of another rope seal that might be enough e-typing for me. Just exploring options at this point.
Oddly enough I had the same question 5 years ago. The date on the replacement asbestos seal I sourced from SNGB was 1970-something. How long will the rope seals be available?
I’m surprised you were sold an original one. I’m pretty sure they’re all reproduction at this point. The one installed in mine might even be reproduction.
The Terry’s kit uses a Federal Mogul seal as for various GM engines from the 70’s/80’s. It’s not going to disappear from production. It comes in standard “rubber” material or Viton. The one in the Terry’s kit is the tougher Viton. The seal is thick and very rigid…no spring required.
I examined the clamshell offering from SNG…no part number, and it looked difficult to install without errors. Neither SNG or Xks offered a two part seal when I was shopping five years ago.
The Beere design gives me the willies.
I wonder if XKs changed their design since the replacement seal they show on the site is two part.
Yeah I’m a little intimidated by the Beere setup. I’m hoping someone who’s used it will chime in. It also requires exchanging cranks. Mine is only cut one over so could have many more rebuilds. What if the one I get in exchange is already four over? I love the one piece seal but those are a lot of mods all at once.
So were you comfortable with all the silicone the Terry’s kit seems to require?
Ideally, the rope seal should last forever. It does not rub hard on the crank and does not dry out. Sitting a long time will let the oil drain/dry out and moisture can get in it. This will cause the crank to rust next to the rope seal and when the engine is turned, it will rip the rope seal causing excess clearance and hence, a leak. Best thing to do is drive the car on a regular basis for many other reasons also.
I’ve always been a big advocate for the rope seal. After owing multiple E’s over the last 47 years I’ve never had one I’ve installed leak. Key is to soak them in oil for as long as you can, never cut, and have some patience when you are forcing them into the carrier. It’s not a 20 minute job… I fit them around the seal portion of the journal when the crank is out of the engine, as I don’t have the Church Hill tool. I do have drawings for it if anybody is interested in making one.
That’s a scenario I hadn’t even considered. Yes there were many challenges during that re-resurrection. Brakes went to the floor. Fuel system, and carbs. I think it burned out the Teflon seal also. When it was removed I found it had spun and torn. I assume it was due it sticking on the long dry crank when it was first fired. They really don’t like to sit.
I’ll certainly consider trying another rope one. Do you worry about the aftermarket seals being sold now? I’m guessing the originals are all gone by now.