One of our next tasks will be getting everything set up in the trunk.
Could those of you with the same model post up pictures or give us tips and tricks to get things correct please?
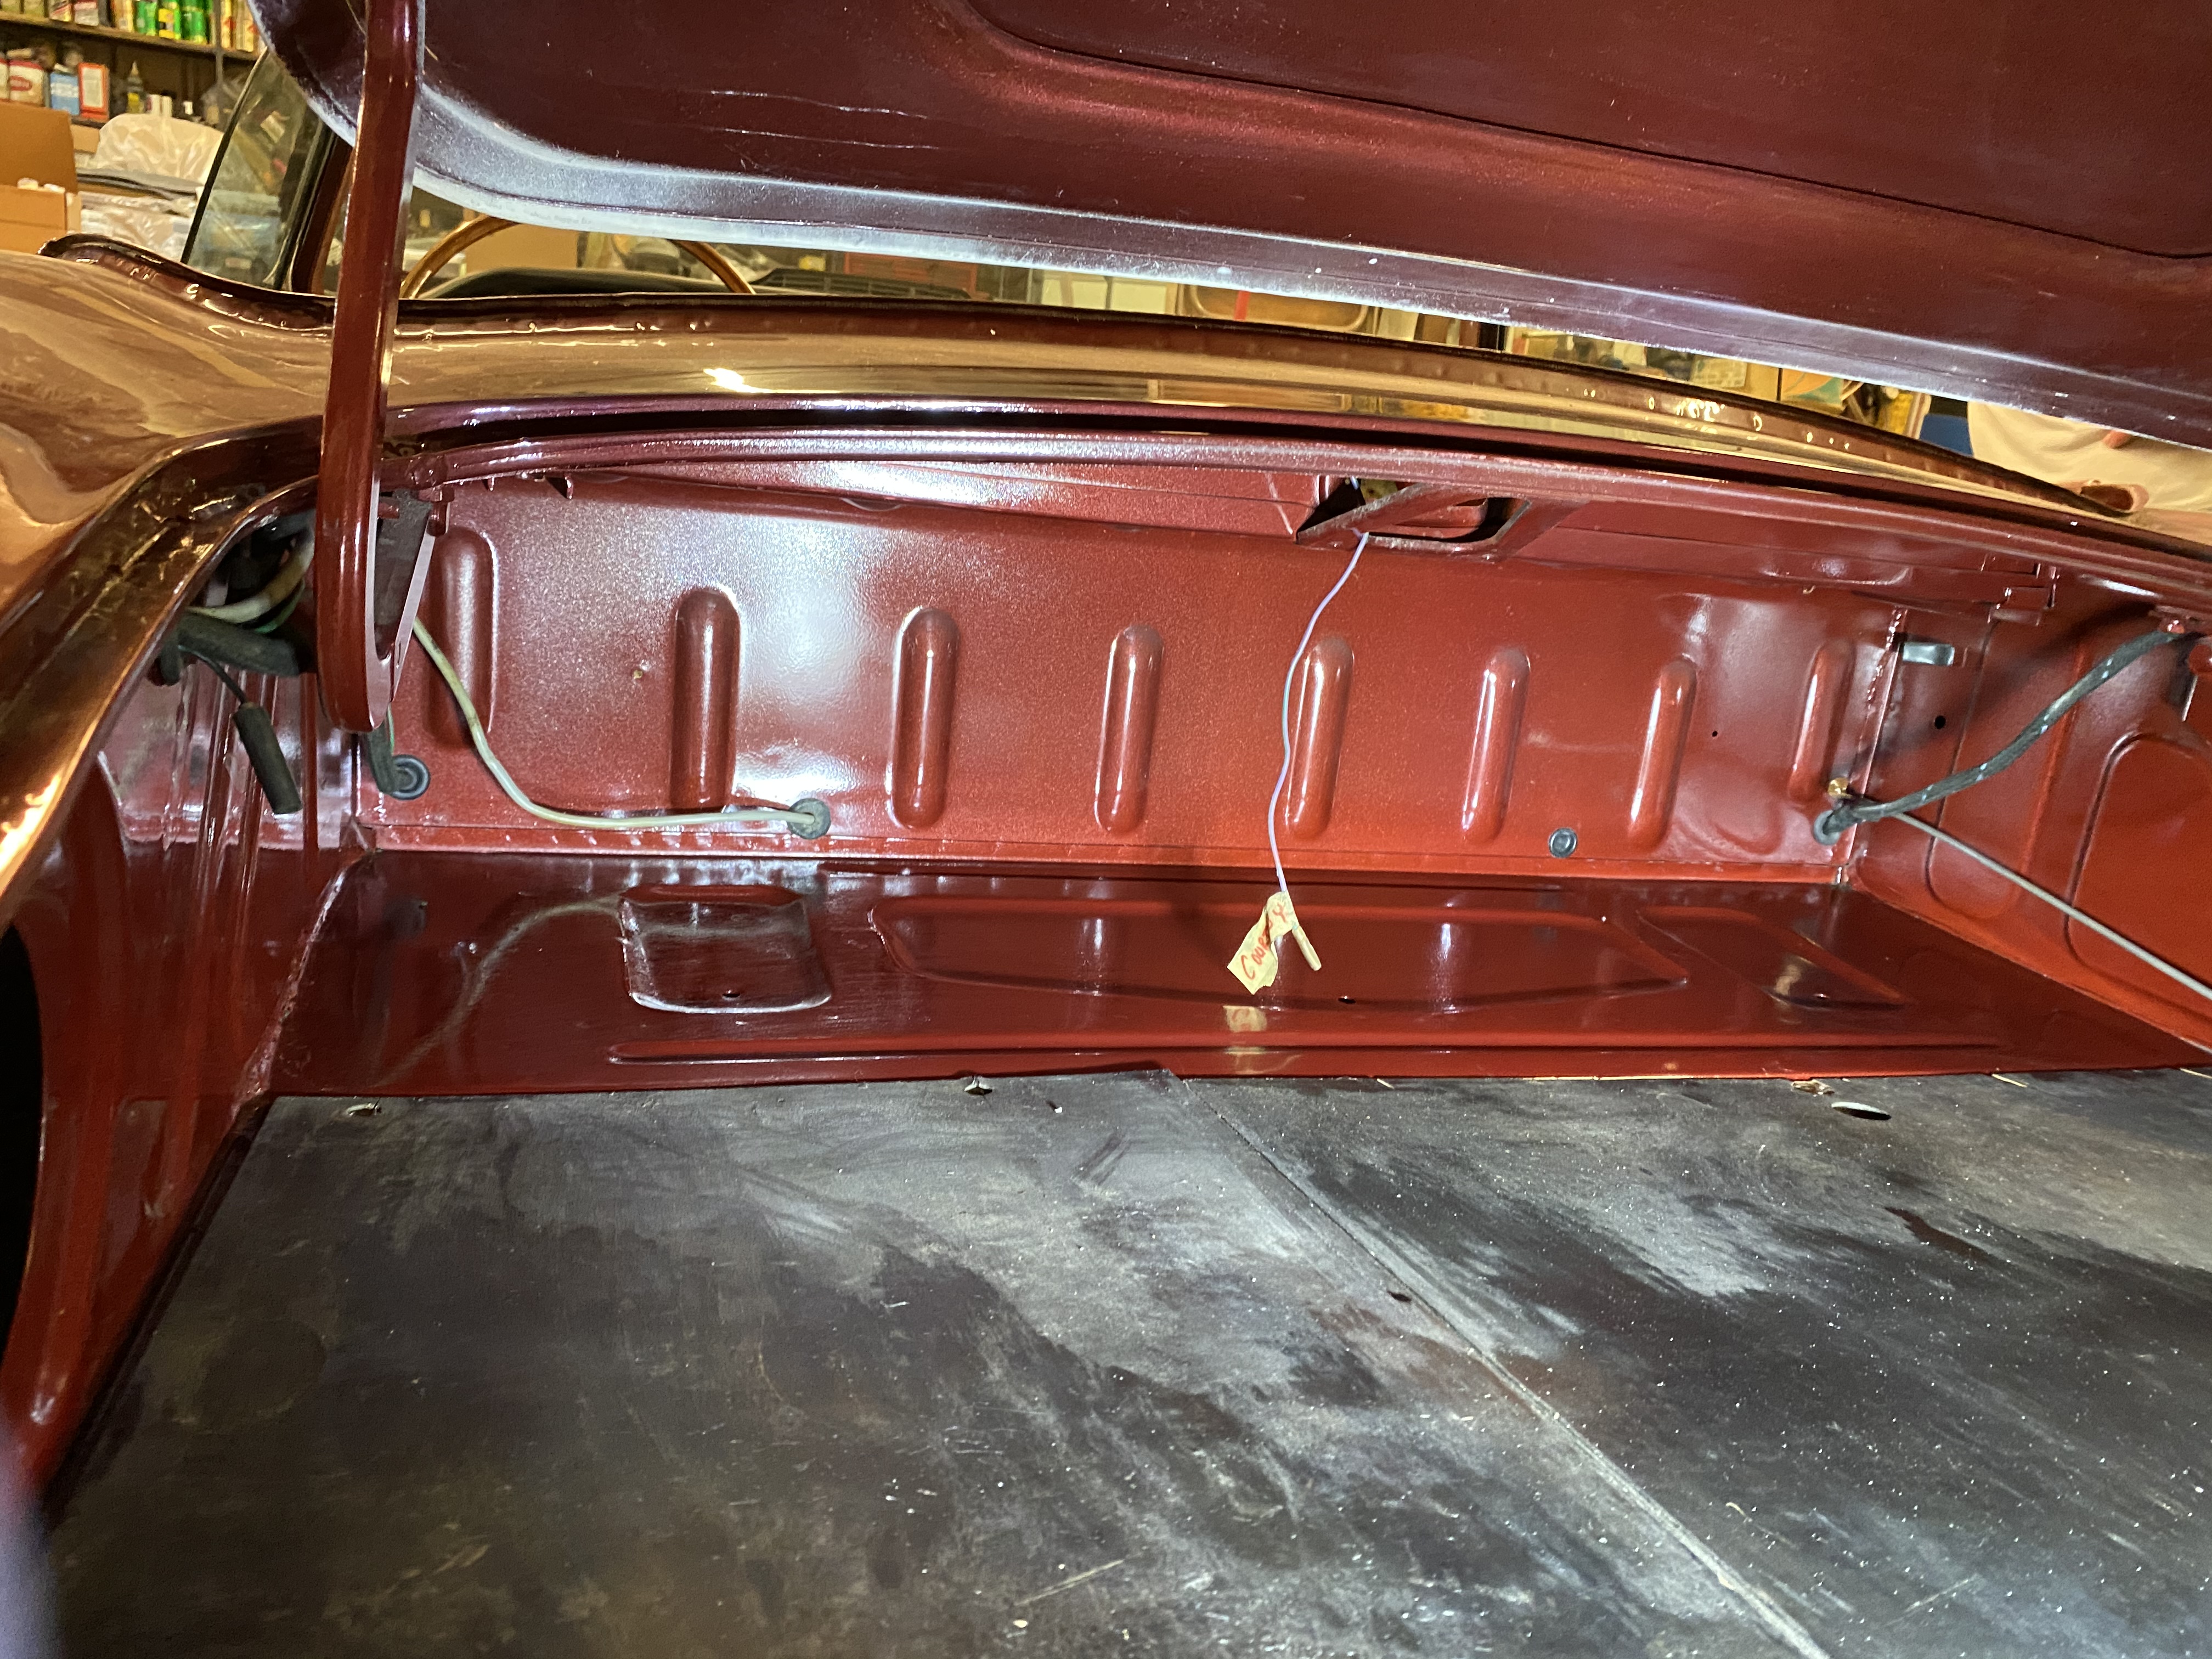
This our current state of restoration in the trunk. There was very recent work done, and as we know, recent work that has been done was riddled with errors. Please point out any issues that jump out so we can rectify before moving forward.
There isn’t anything (stock) in that location inside the cabin. It looks like an non-OEM electrical cable of some sort. What is on the other side of the bulkhead and where does the cable go?
There should be a lip seal around the outer lip of the boot body that seals the boot lid when closed.
The boot release cable should pass through a slot in the boot board support somewhere just this side of the fuel pump opening.
The passenger side wiring harness should go up through the clip right after it comes through the bulkhead and then behind the hinge.
On the right hand side, the harness should go upwards to clip into the tab just above it, just like the left side.
The mystery wire or tube hole. I have a 2 cm dia hole in the same place and mirrored on the other side. Both have a rubber plug in them that is stock. I’ve no idea what it would have been for.
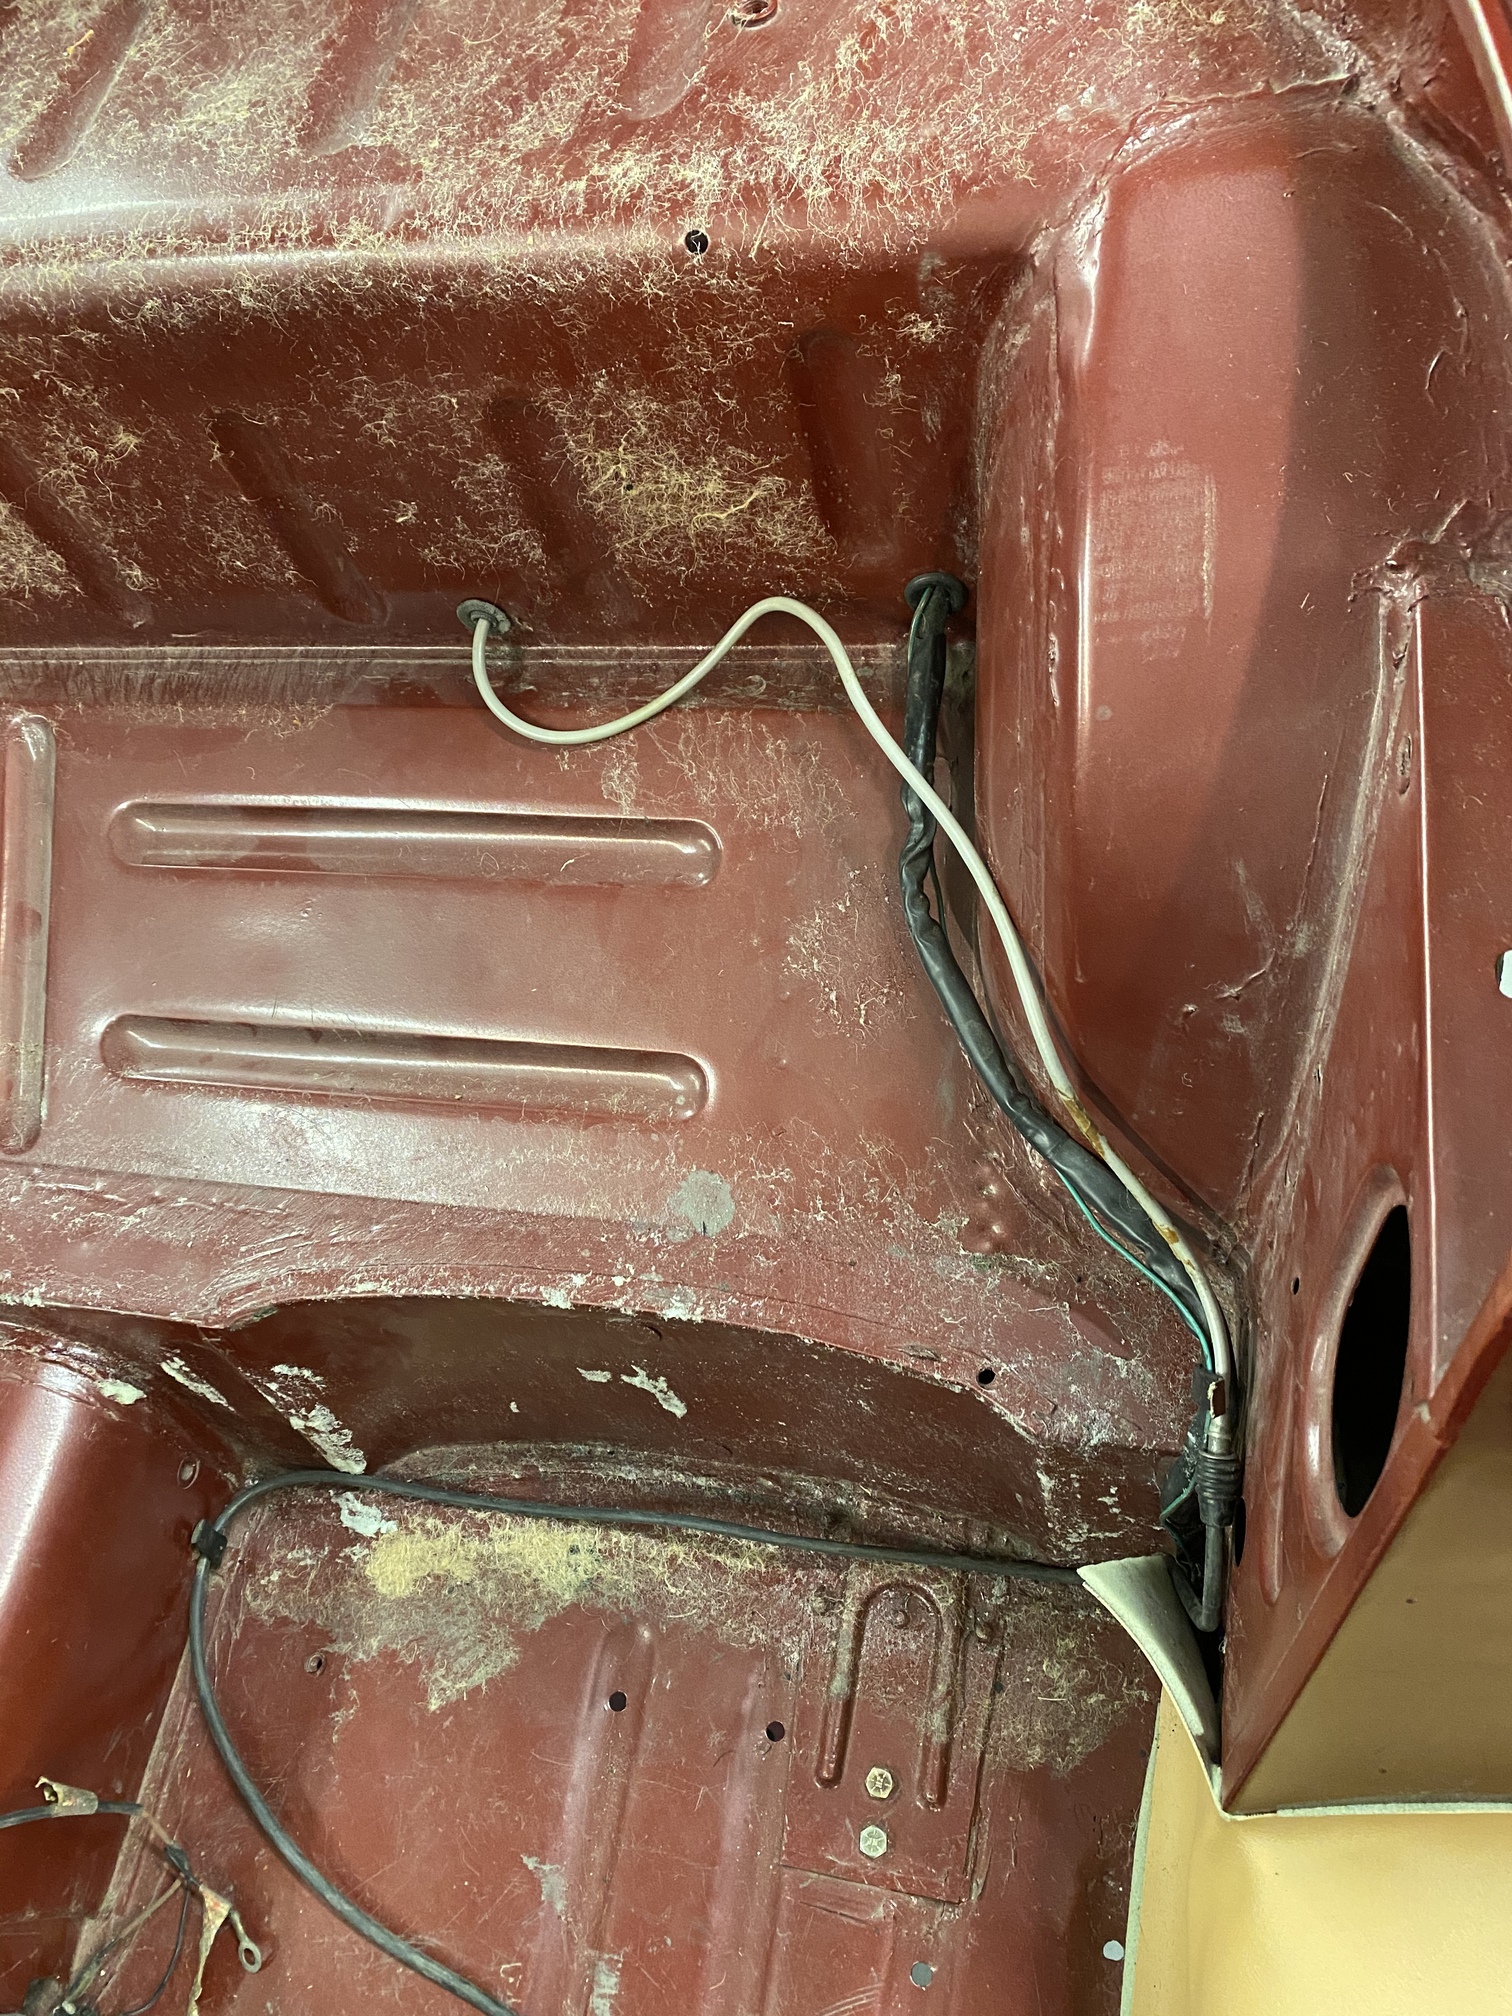
Isn’t that light colored wire the radio antenna cable? I recall Candice’s earlier post on the brake switch location, noting the thick light wire coming out of the middle of the left rear bulkhead which my Series 1 doesn’t have. That corresponds to the location of this one.
I seem to recall that was the antenna cable. At first glance though, it almost looks like a piece of tubing.
Yes, it’s the antenna cable. I’ve no idea why it’s routed that way as it makes interior install that much tougher. They may have routed it away from other electrical wires to avoid inductive noise but there isn’t any in the back of the car. Properly shielded antenna cable should be able to be routed with the main wiring harnesses (IMO).
Will ask the shop guy why the antenna wire was run via that hole.
Going to be pulling the dash back off as well as he said there was a “purple wire to nowhere” so he closed it up. Not excited to see what I find under there.
Last thing I want to do is get all the interior installed and then have to start pulling crap back off.
If it’s a solid purple wire it is likely the + feed to the cigarette lighter (and radio if you have one), not connected until the radio console goes in. Or the map light that is part of the dash top.
I will see if I can find the photo of the purple wire that was taken a while back, will have to do some digging.
There are several pictures my dad took during disassembly, hopefully those will help me out as well.
Of course my dad was using 35mm film, so no digital images. I debated scanning all the pictures and saving into digital format, but that will be a major undertaking.
It used to be that drug stores, like Walgreens, would digitally scan 35 mm negatives into a digital format. It’s been long enough for me, I’m not sure if that still exists.
Sadly, they do not, I checked. Walmart will still develop film “rolls” but will not do anything with a negative. There are a few mail off resources, but have not checked into them yet.
I have a great scanner at home, but would just be a tedious process of scanning and then adding notes dad had on the back of each picture.
I simply take a photo of the front and back of the photo with my digital camera. When I have a lot, I set the camera on a stand and can copy many photos quickly. Not a perfect copy, but very good. And quick enough that I actually will do the job.
Tom
Hard to tell from the photo but as that’s the location and if it’s a shorter wire then it’s most likely the map light + wire. There should be a purple/white wire that goes from the map light switch to the map light that provides ground.
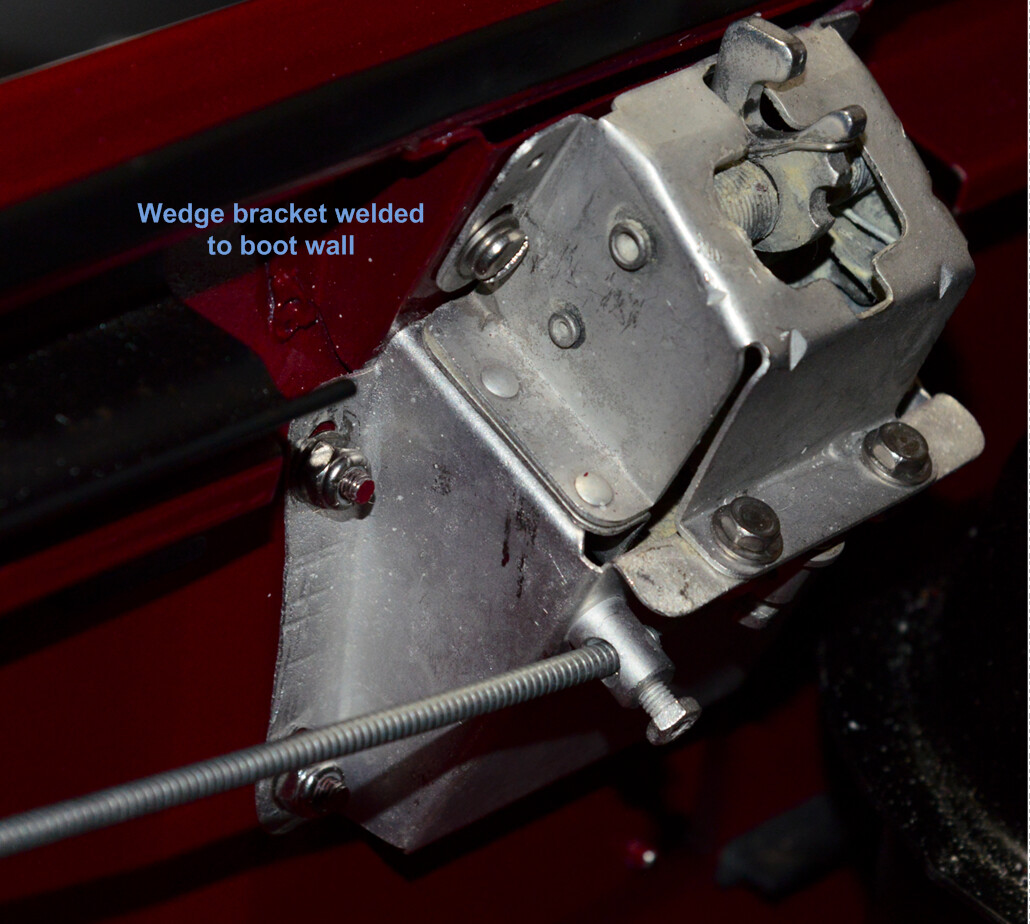
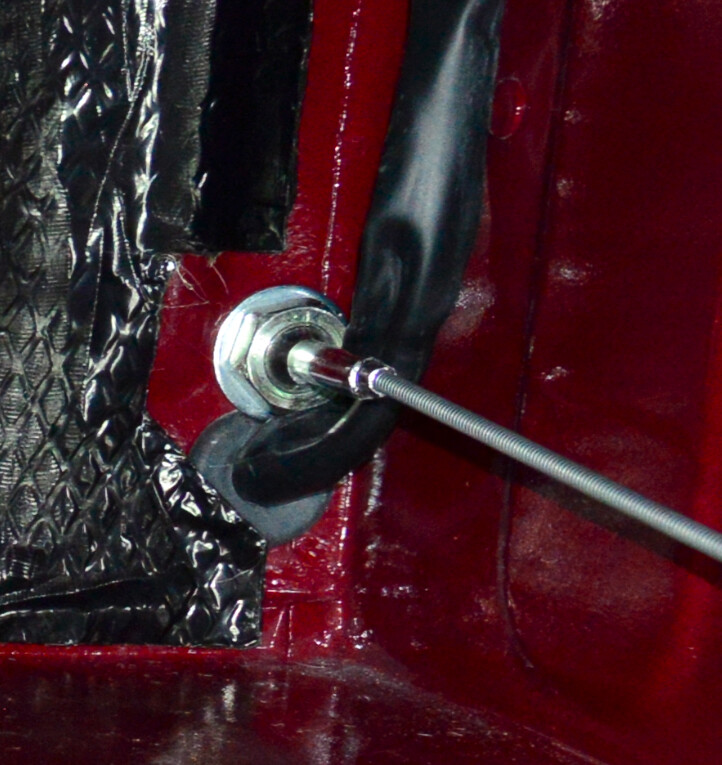
No, we have that, I am referencing where the cable (BD27158) comes directly through the hole behind the passenger seat, is there that portion of the cable bolt to hold posterior side of that cable in place, or simply a grommet?
We have everything you have pictured above, but that picture is very helpful in making sure we have things arranged correctly when we get to that point.