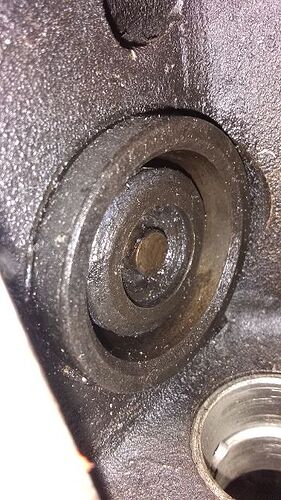
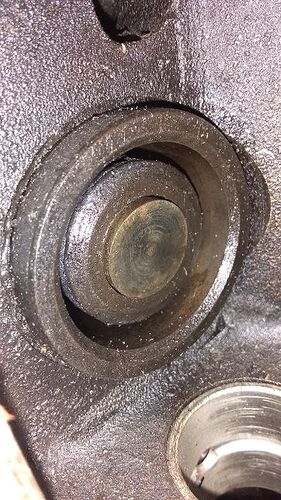
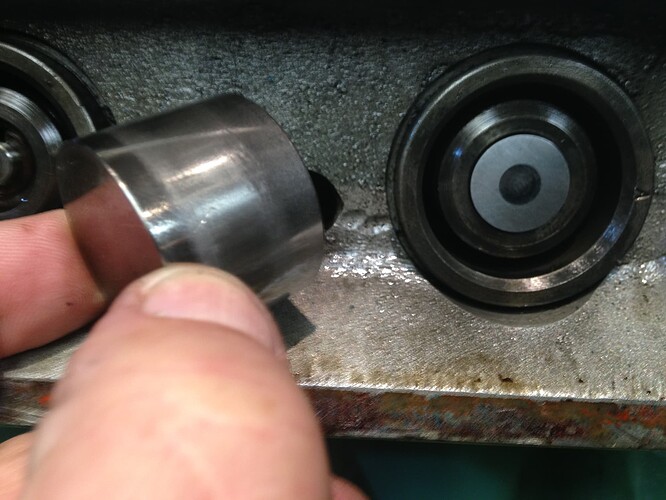
Steve, I’ve simplified matters by tilting the head on the blocks so the valve tops are horizontal, this keeps the shims in the right place. Each time I remove the cam and dismantle, the shim is still in the correct place so I think things are OK.
I’ll see how it goes after the bench test.
Hi Roger…I dont think things are ok…there is no way a shim should not stay in position even if the head was tilted to about 45 degrees or more…iv shimmed numerous xk head on the car…iv never had or seen a problem of the shims not staying in position…Steve
It’s not so much the height but the thickness of the collets on the taper. If theyre too thick on the taper they’ll push the spring collars further down.
I’m away for a few days so the bench test will reveal an improvement or not - I think it may be a ‘bedding in’ issue. Obviously the clearances won’t change, just the retention of the shim.
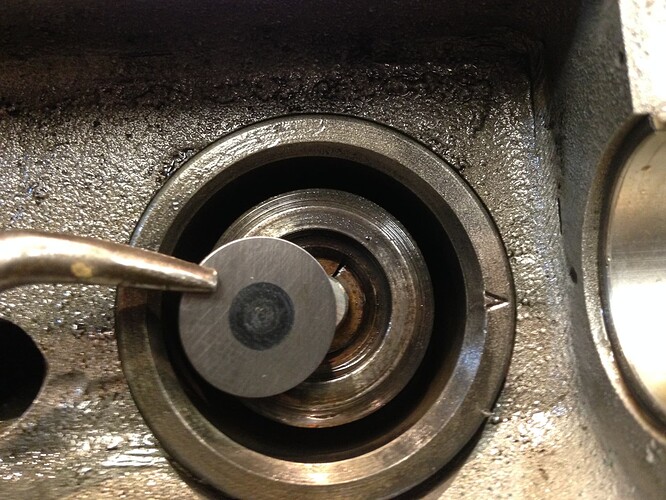
Here is a head with the valve collets set correctly. My depth gauge would not fit in there to take a measurement, but the depth of the valve stem is about 1/16" below the collar.
Here it is with the shim in there.
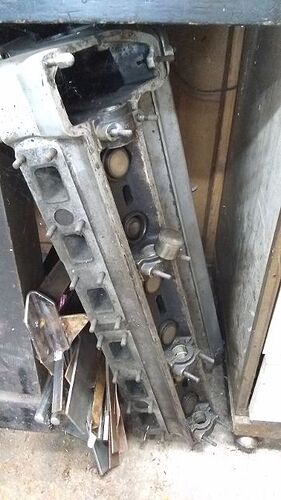
This head is at an 85 degree angle, so there should be no question of shims falling out or shifting around.
Your valve collets are not set correctly in the collars.
You need the correct spring compressor. You can’t do it with the one like a c-clamp made for pushrod heads.
Nice pictures, the ones we needed - but if the collets are seated they are seated?
Mike.
Shims should not just slide out of the location in the collet when the head is on an angle. This indicate to me that the valve seats have been inserted too deep in the head which is causing the valve to protrude higher than the collet.
The pictures I show are my head on an angle and the shim sitting slightly proud of the collet.
If your valve stem is higher than the collet then the shim will move about inside the bucket
It has been a long time since I did one, but I thought it was possible to put the collets in wrong, so the valve springs would be too compressed and the collars thus too low.
Morris is raising a possibility that I hadn’t thought possible; valve seats set or cut too deeply, or valve heads too thin or stems too long.
In any case, I think we are agreeing that the shims should sit down in the step of the collars. If they don’t, something is wrong.
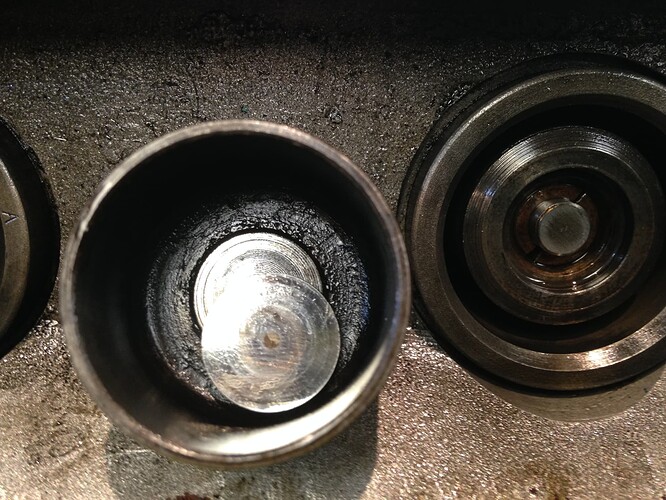
Here’s a head with the shims installed, but before the tappets have been installed. The shim bears on the valve tip, but the recess in the retainer restrains it radially. The top of the shim stands proud of the top of the retainer.
It may be possible but it would look so wrong that you can instantly tell. It is possible to have one of the two too low and binding on the stem. That is obvious when it happens; I do it all the time because our DIY valve spring compressor is garbage and needs to be improved. Once the collets seat in the groove they sit, and as long as there is any spring pressure the valve stem will always have the same distance… slightly below the collar.
Mike, looks exactly like when I’m doing it… just a lot cleaner and the head sits as it sits in the car.
and to be concise: the shim MUST rock slightly on the valve stem. Then it is a matter of calculating the correct shim to get the desired cam to tappet clearance. THE RULE: a replacement THINNER shim gets you MORE clearance by the amount it is thinner than the one being replaced; a thicker new shim decreases clearance by the amount it is thicker than the one being replaced (the thin shim lowers the tappet surface away from the cam lobe.)
Factory Service Bulletins Revised Valve Train servicing:
Valve clearance: Production Changes in the valve train are in the Service Bulletins (SB) and Parts Supecede lists.
SB 65 April 1950 006, 008. And amend P37 of Owner Op Handbook
C head, 1/5/8 exhaust valves and enlarged valve throats, hi lift cam
Valve guide, see SB102 clearance .006/.008, valve seat angles 30 deginlet, 45 deg
exhaust.
SB 95 lenghty see the SB.
SB95A “”
SB105 April 1952: from W4483 the valve and tappet guides were all modified to permit fitting of hi lift cams without modification. For engines 4012-4482 only the inlet valve guideswere not modified,the others were. For all earlier engines the required modifications were as set out in SB95.
SB108, June 1952:
valve guide inlet C7260 supercedes C5744/2
Valve guide exhaust C7261 supercedes C5745/2
Valve seat insert inlet C7258 supercedes C2165/2
Valve seat insert exh C7259 supercedes C2164/2
Tappet guide C7262 supercedes C5746/2
SB109 valve clearance change for racing with hi lift cams, .006/.010.
SB116A an interesting note that 8-1 compression engines would have 120 psi correct compression (105 if 7-1). Many later discussions, and TSB for XK150 show compression at much higher numbers 155 for XK150, 8-1, …How, Why…perhaps due to head milling over time, without compensating for that with a thicker head gasket? But that would seem to raise the compression ratio?? Jaguar cautioned about raising compression by milling the head.
SB124 ,May 53 for ignition settings.
SB129, Aug 53: valve spring breakage, a new spring C7136 outer; and C71237 inner fitted to SE cars from W9487, and were specified as the only spring to use for any replacement with either cam. The new spring had a red stripe vertically on the coil and the dimensions were different from the earlier.
C2272 outer 1.775in C7136 outer 1.937: C2271 inner 1.515, C7137 inner 1.636.
Tappet guides and valve seat inserts…temp and time for heating of head reduced.
SB131 valve clearance for hi lift cams now .006/.008 and std cars the same., this reverses SB 95/109, but see SB140 that goes back to .004/.006 for all XKs except true C type race cars and hi lift in competition remain at .006/.010.
SB132 Sept 1953: .006 .008 clarifies what was intended in SB95…that for competition clearances were 006 010…but for road use 006 008,
SB140 Jan 54: …now, all except C Type and competition are 004 and 006.
SB142 and SB 149; caution regarding avoiding valve to piston contact with hi lift cams. See these SB for detail
SB146 Apr 54, new inlet valves fitted from F2365 part C8248, has depression in the valve head. Replaces earlier C2246 with flat valve head.
SB147: noisy valve clatter…exhaust all other possible causes…, exhaust valve sticking occurred where the head had the exhaust valve guide that protrudes into the exhaust port casing. A modification was set out reducing the length of the guides…must see the actual SB147 for the details: Note some discussion that the stem tip end had a special metal hardening treatment…that if removed promotes wear on the stem,.
SB149 May 54: new inlet valve C8248 had a THICKER head, and was liable to contact the pistons even with std 5/16 cams. New exhaust valves C8313 had a stem of reduced diameter under the valve head. and new guides C8312, were shorter, now 1/15/16 (earlier were 2 5/16) and without the earlier counter bore at the valve head end of the guide. Note to refer back to SB 142 and 146.
Nick
Somewhere I have read the correct “installed height” of the valve stem top
It may be in the archives, or perhaps Hammills book on rebuilding XK engines
I believe this figure would/should be known and measured by a machine shop, or how else could they cut seats and get things right (on any engine) ?
.320" (320 thou) between valve stem top and back of cam lobe is what I’ve read somewhere. How you would measure it I’m not sure…
a standard feeler gauge set would be thick enough I think, with most of the blades together. I think my stock set is nearly .5" thick
otherwise a piece of shim or sheetmetal, and feeler gauges
Hi Roger…do you have a resolution to the shim issue…Steve
Hi Steve,
I had a chat with Rob Beere, who said to use the usual seating method for new valves of a few taps on the valve stem with a brass drift to help the collets settle. I had done this anyway but gave a few more knocks to help. I think things are settling a bit anyway as they all have a ‘step’ now, albeit not a big one. Placing a straight edge across the top of the valve cap and using feeler gauges to measure the gap to the valve stem head gives a dim of between 4 and 6thou, which I think should locate the shims OK in service. The caps are the ones they use in their race engine builds, which are subject to higher revs than I will ever use, so I’d guess valve bounce is not a consideration here.
The shims I’m using to get the correct valve clearances range from 94thou to 100, so he thinks I’m in the right ballpark. Bizarrely, I have assembled a couple of the old valve assemblies for checking purposes, and for some the valve stem sits level with, or above, the top of the valve cap. I think that shows how the collets settle with use after assembly.
The head’s assembled now, and almost ready to refit. My brain is still trying to wrestle with the '68 Mustang’s clutch, and how to reconcile myself to a clutch release bearing that is always in contact with the pressure plate fingers, so once that’s sorted I’ll concentrate properly on the Jag again!
