Hello all,
I need to get a couple of these little guys, but I dont know what they are called so it hard to find them on the web.
Anyone can help please?
Thank you.
Hello all,
I need to get a couple of these little guys, but I dont know what they are called so it hard to find them on the web.
Anyone can help please?
Thank you.
Ha, looked harder and found it:
H.T. Lead Clip
EAC5045
Unavailable - No Longer Manufactured

Look up the zip tie spark plug wire clip. it works well and if done right can look pretty good too.
Eric,
Jaguar calls this part a “Cable Tether” on page 2E 09R in the Series III XJ6 Parts Catalogue. The correct Jaguar part number is C33460. They are easily found on eBay and from other sources with the correct part number and part name. Each car was supplied with four of them to keep the ignition cables neatly routed.
I purchased the Jaguar Parts Catalogues for my Jaguars many years ago and refer to them regularly when researching and purchasing parts. Having the Parts Catalogues has saved me lots of time and money. The Parts Catalogues are a very worthwhile investment if you plan to work on your Jaguar yourself. Used XJ6 Parts Catalogues sell for $50 or less on eBay.
Paul
That HT lead holder is quite common and can be found at OReillys or NAPA etc.
A nice addition is the flexible PVC sleeve that can be had for ~4$ at Welsh.
Tidies things up nicely. A very nice piece to have I think.
Then a couple black zip ties within the plug alley.
Love the look of those cardboard conduits in the plug alley too, but they are quite pricey usually as I recall. And when they fail or fall apart, you are stuck with it as the bracket is held in place by a head nut. that always bothered me
Had it look it up. They seem to hide it well. zzzzzzz
Their prices are quite good.
Kind regards
I paid 30 euros for one of these cardboard conduits but on a car where it’s not original I would keep scanning ebay for these clips or in the US ask someone who dismantles either the cars or the heads.
They look nicer than the zip ties and are numbered. And original.
Hmm…I remember them being more expensive.
Appeared quite common to separate from their brackets as mentioned above, which always turned me off…maybe foolishly.
That pvc sleeve rides up and over cam cover or between cams at front of head as original on earlier cars.
Keeps away the need for anything else in my opinion…with proper wire lengths of course.
Well, £26 plus tax from British parts in the UK. Probably more in the US…
They will break and are probably a hassle to install, the little clips are much easier to work with. The sleeve is a good idea but the clip brackets will do a good enough job. Probably depends on Eric, originality and ease vs. good looks!
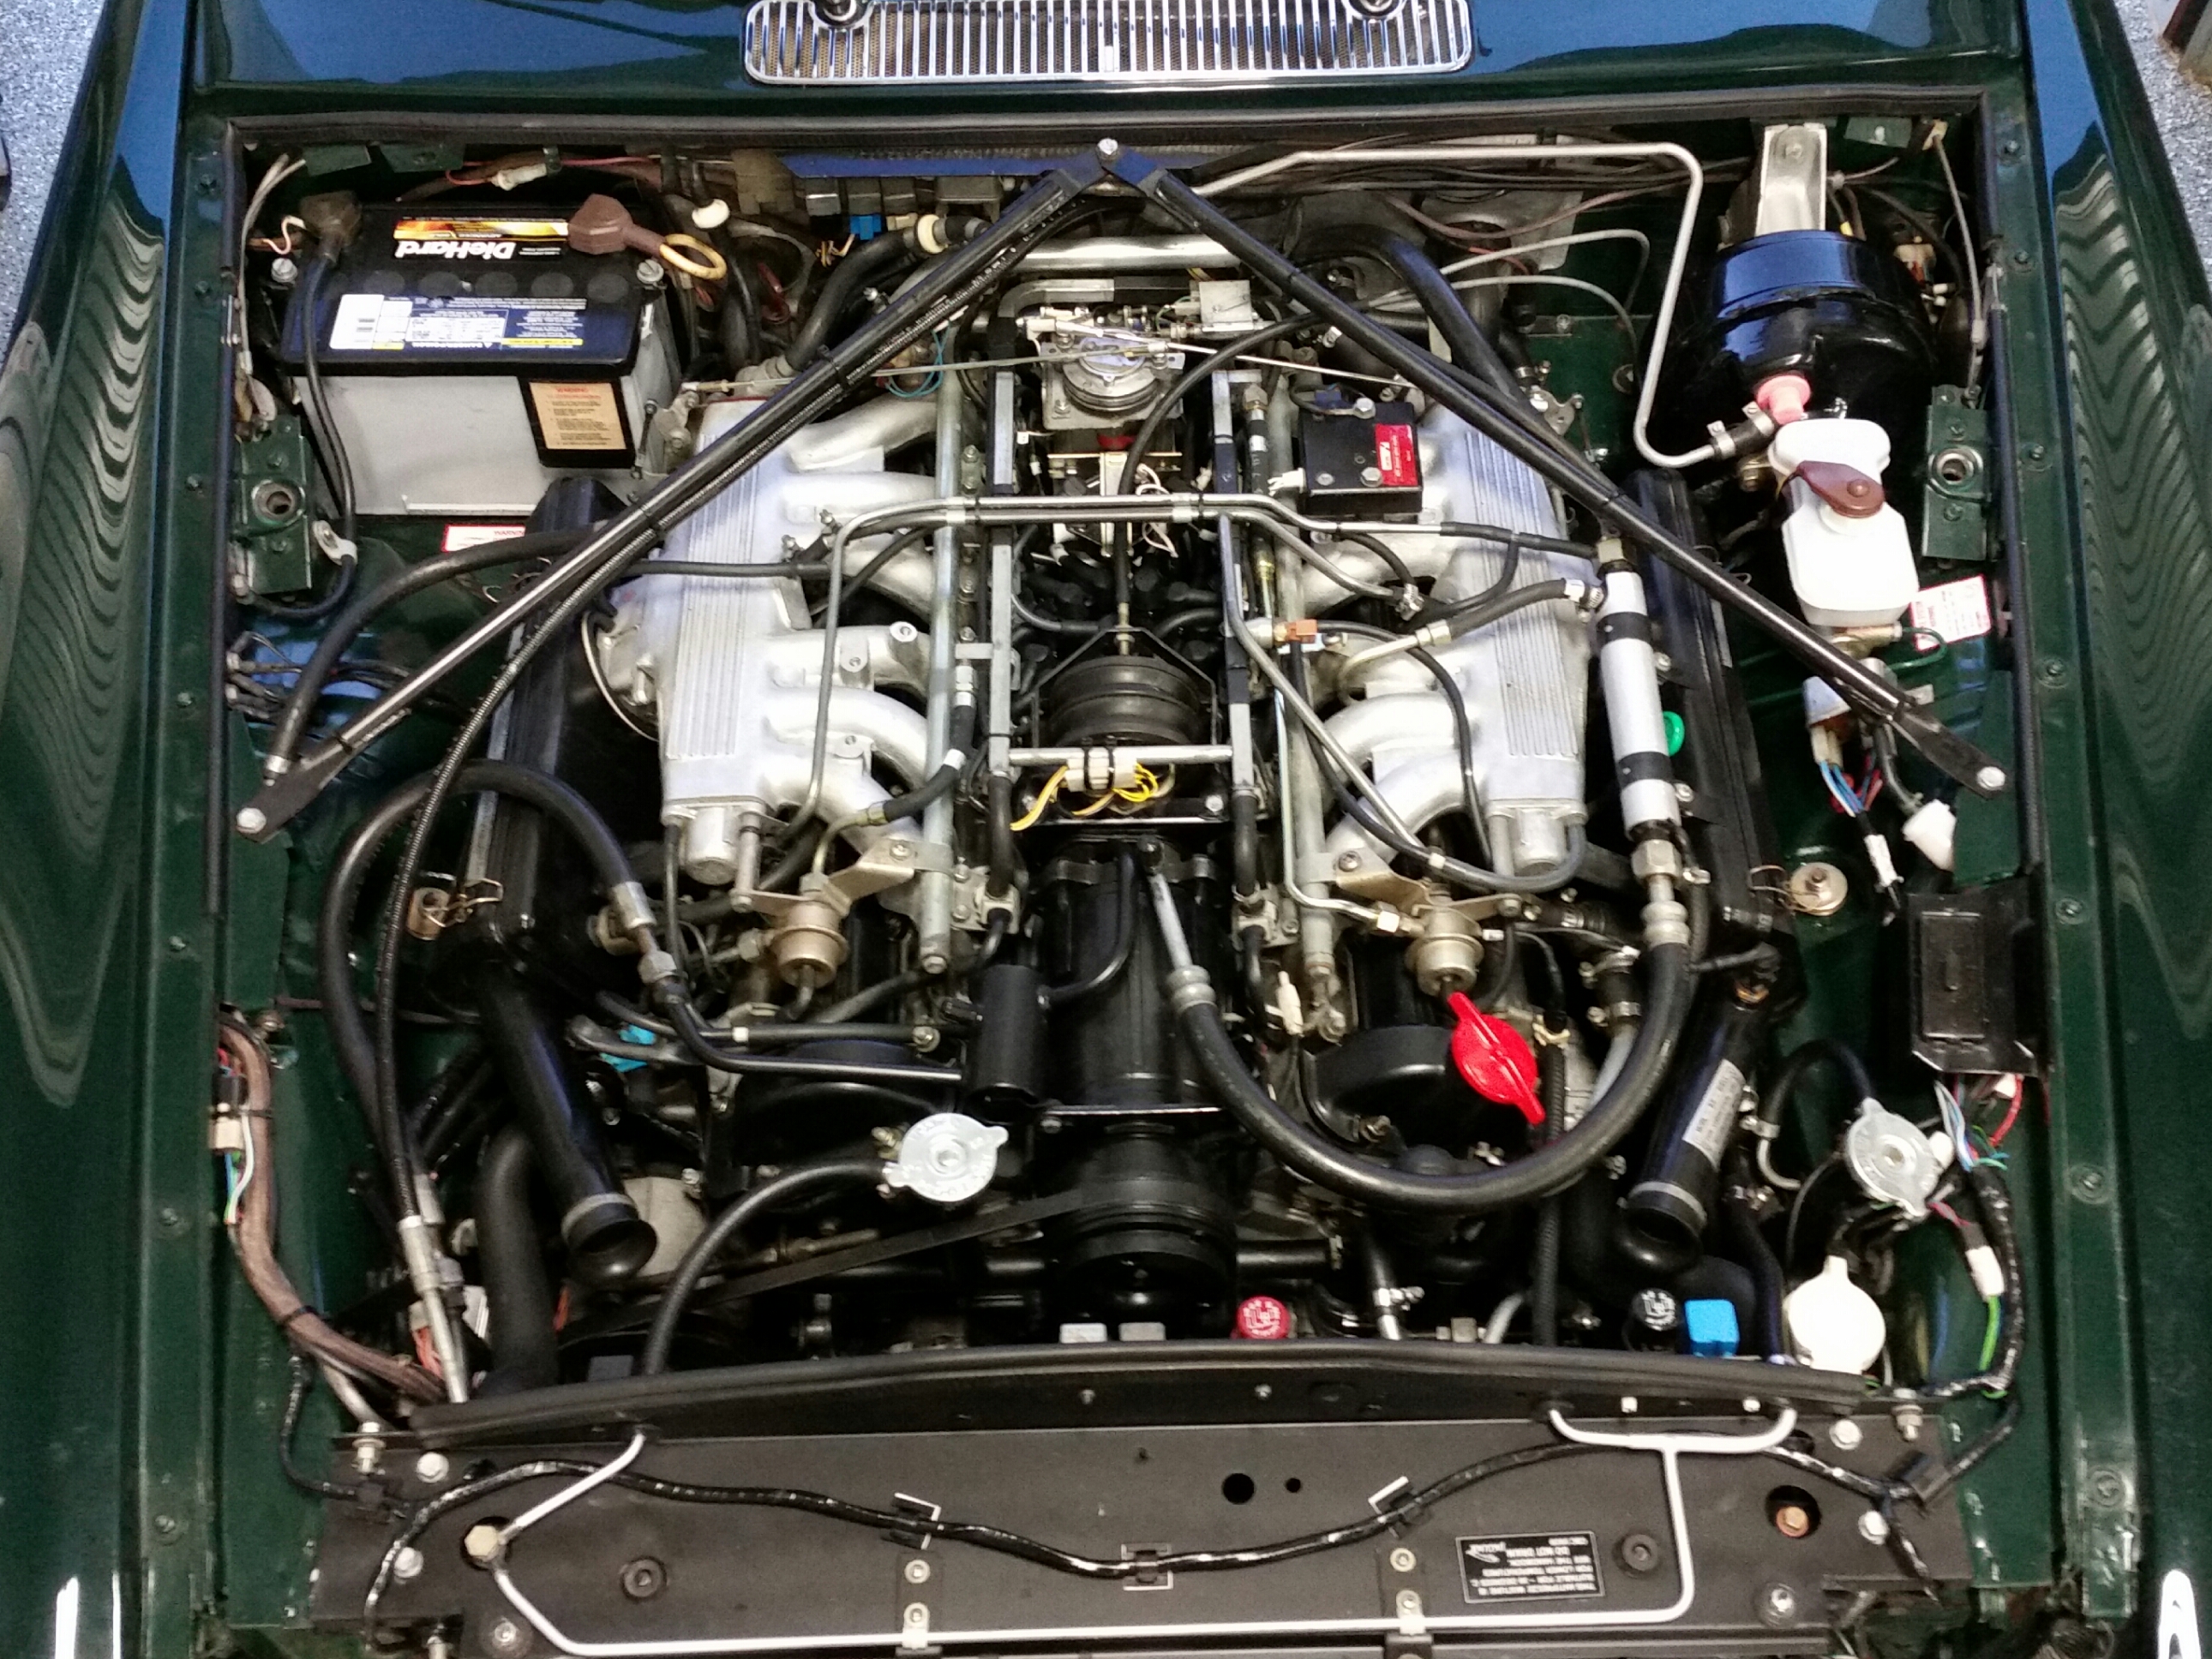
Attached is a picture of the engine bay of my former 1984 XJ6 Vanden Plas with the four Cable Tethers circled in red.
Paul
The conduit were never good and most still aren’t!the fixing rivets break away very easily when installing. But they do look neat and were of course OE back in the day.
Thank you all, I found someone who has a few of these clips (the usual friendly s/hand Jag parts fella).  .
.
I for one don’t really like the conduit thingy and prefer the HT cables visible and swooping over.
Whew.
What an engine bay. That’s dreamy.
Man after my own heart!
Hello Paul - you got rid of Tweety before I came back on J-L - is this a picture of your engine bay - that is really showing some patience and work - looks great - Tex Terry, II - 1991 XJS V12 Classic Coupe, 1986 XJS V12 Coupe - sent 10/6/2020 1135hrs. EDT USA.
Oh good lord, no!
It was of a fellow listers engine bay: for my tastes, it’s a bit overdone, but just GORGEOUS!
Demian,
Thanks. That was a picture of my former 1984 XJ6 Vanden Plas that I sold earlier this year. Attached is a picture of the engine bay of my 1990 V12 Vanden Plas (5.3L V12 w/ Lucas ignition).
I competed them both in JCNA Champion Division concours.
Paul
Hello Paul N. - did you do the cleaning process with your engine installed, or out of the bay? - just looking for some pointers/procedures to do the cleaning while the engine is in the bay - Tex Terry, II - 1991 XJS V12 Classic Coupe, 1986 XJS V12 Coupe - sent 10/6/2020 1243hrs. EDT USA
Madness.
Like a great old master painting for me, I don’t know whether it motivates or depresses me as it’s unattainable.
Meh…motivates.
Tex Terry II,
So far I have completed wall to wall engine bay restorations on four of our Jaguars including a 1987 XJ6 Vanden Plas, 1990 XJ-S convertible, 1990 V12 Vanden Plas, and 1984 XJ6 Vanden Plas. Both of the XJ6s had failed engines so I removed those engines, restored their engine bays and the replacement engines with the engines out, installed the replacement engine, and then completed the restoration and reassembly. I restored the engine bays of the two V12 cars with the engines in place because the engines ran great. In all four cars I removed as many components as I could and after inspection and cleaning I either replaced, polished, or painted everything so that it looked as new. The engine bay restorations took months and I often posted about them on Jag-Lovers and provided pictures of my progress as well as advice and lessons that I learned.
Some quick general advice includes:
-expect it to take longer and cost more than planned
-take lots of pictures and keep a detailed notebook of your work
-have copies of the Repair Operations Manual, Parts Catalogue, S-57 Electrical Guide, Owners Manual handy and use them
-don’t take shortcuts, if you do it will take you longer in the long run
-label, bag/box, and organize parts in the order removed so that you can put them back properly
-stay away from hazardous cleaning products, I mostly used Simple Green
-buy parts in advance of your needs so that they are on hand when you need them
-test the components that you remove if you plan on using them again
-have a parts car (I had three of them) as a ready source of replacement components and harvest them as needed
-try to work on the car and make progress every day if at all possible
I have a policy that if I take anything apart and end up with extra parts after putting it back together again that I have to eat those parts. So I try to make sure all the parts go back on the car where they belong. 
Paul
Hello Paul N.- thanks for the short process listing - looks like I have been headed in the correct direction as I do have the manuals, empty containers for removed parts, lots of tape for labeling parts removed, some small brushes, plastic bags to cover areas, small fastener to reattach items removed, small electric steam pot for loosening old grease - was thinking of using the disposable cleaning wipes to get grime off wires, and hoses, that has dripped down on underside (usually left from just cleaning from topside with spraying method) - have looked at a lot of videos and it seems that most just show shortcuts to making the top of the engine area “look nice” - years ago I used the Gunk engine cleaner spray and rinse method, on top and underneath, but that was on engines that were in a more open area (less items installed), and did not have cloth covered wire harness - not able to start yet (still have leg healing) but trying to get set up - will be doing this cleaning with the engine still in the bay - Tex Terry, II - 1991 XJS V12 Classic Coupe, 1986 XJS V12 Coupe - sent 10/7/2020 1336hrs. EDT USA.