1989 XJ6 3.6litre Front springs have identical top and bottom “LOCATORS” they come in TWO thicknesses Id like to have the parts ready minimizing downtime
Anyone know if they were all 1,5MM or 4.5MM I gave a look-see and it appears the top ones I think I can see the edge was thin (1,5mm) I could not see the bottom ones buried in the spring pans
Old JAG numbers were:
1.5mm CAC 9822 dealer says superceded to MNA2162AB
4.5mm CAC 98221 dealer says superceded to MNA2162BA
I suspect thin ones came from factory and thick ones offered to adjust height or any sag
Anyone worked on the front springs and know the thickness?
Thanks to all
Brad
Hi Brad!
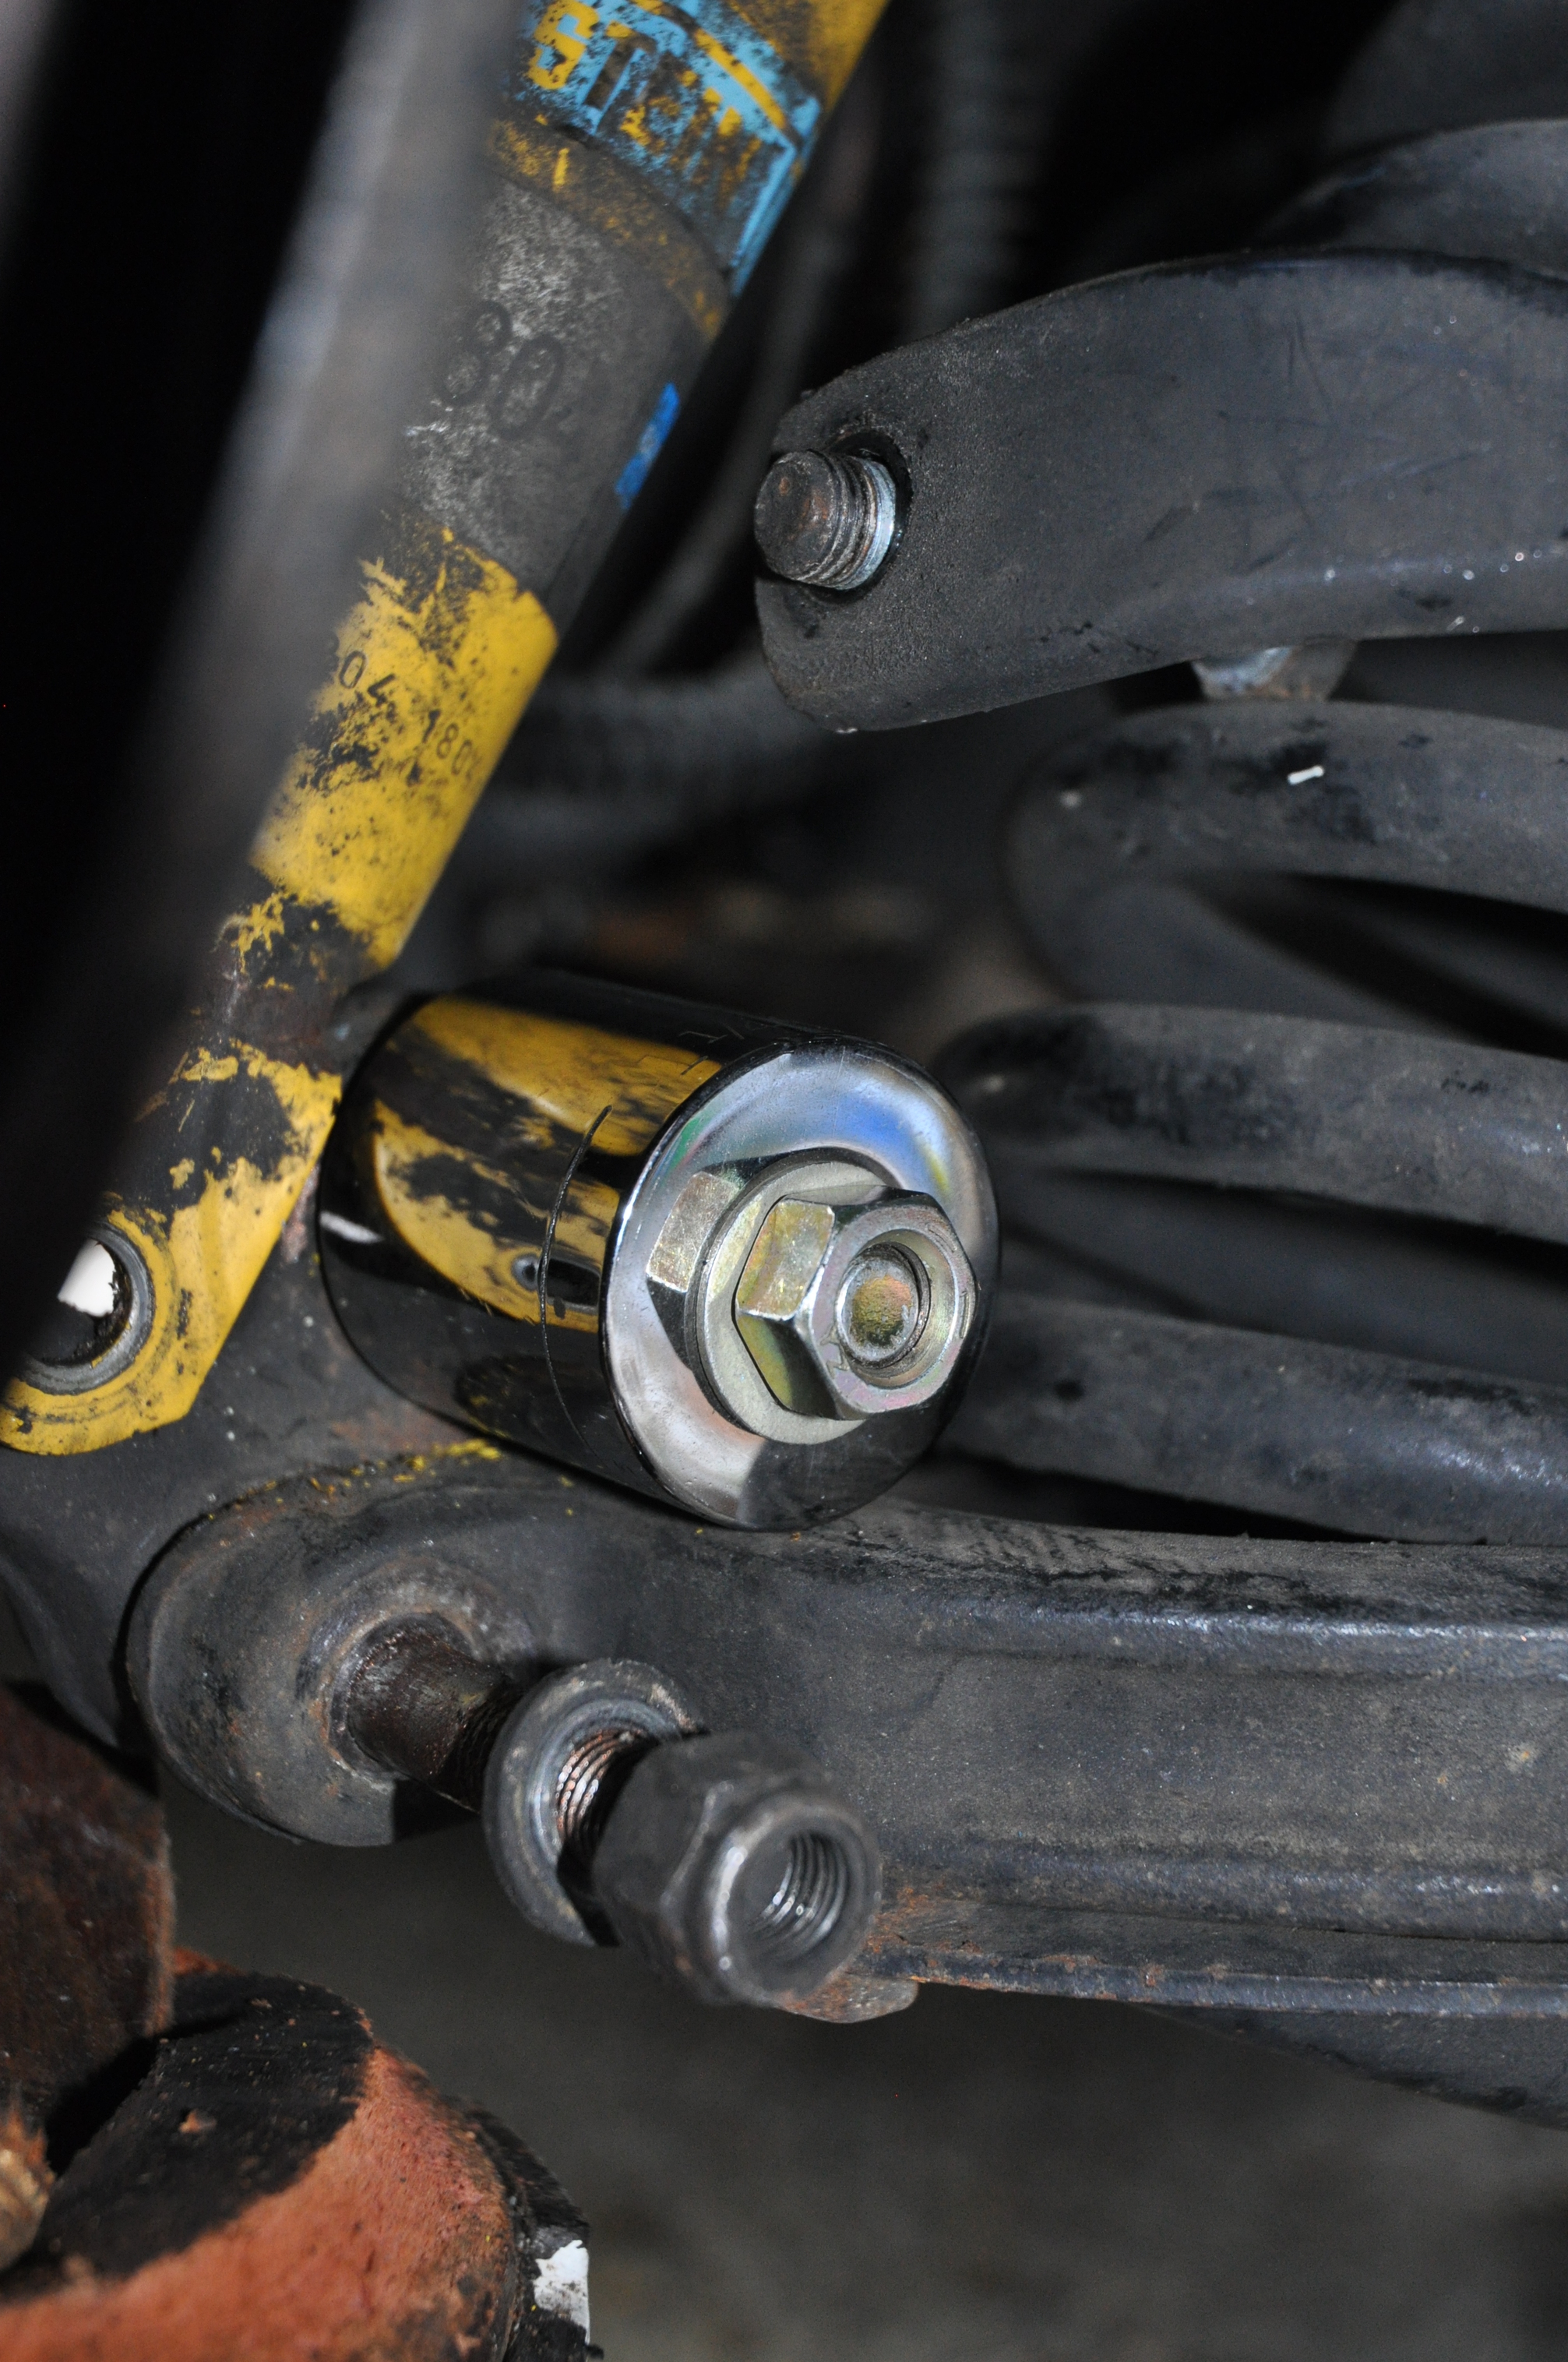
I wish you started this tread about 2 weeks ago when I had to remove the lower arm to replace the shock lower bushing. But this picture is the best I can do now. I’ve never replaced those locators and their edges are pretty thin so I guess they’re the 1.5 mm ones.

WOW thats a great post yes they look like the thin ones so yours were thin top and bottom. Were good with electrical if you need any advice.
Thanks for the pics and info Ill probably order 4 new thin ones the local JAG dealer is cheaper than the Jag parts places
What year was your car and do you know the FREE length of your spring?
By the By I changed the lower shock bushing Ive heard it done using bolts sockets etc… I had a hydraulic portapower with C clamp for end it was still tough to get out…
My car is a 1994 MY (made in the month of March). If I remember correctly the length of the front spring is 16". How long did it take you to replace the shock lower busing with this technique? I started around 9:30am and finished after 4pm the same day inc. a trip to a machine shop to press in the new one. I had a polyurethane bushing before that just fell apart so removal was effortless. If I’ll have any electrical issue, I’ll definitely ask you. Thanks!
Joseph Not sure how long it took I checked my pic archive started with hydraulic ram and accessory C clamp but the C clamp had no level flat area to rest-press on on the Jags LOWER A arm and kept on tilting sideways.
We switched to a grade 8 bolt setup. On back side of A arm pushing old bushing towards front of car we had grade 8 nut, then stack of washer to take up slack, for pusher to push OUT or IN the bush we used an oversized HEX NUT (had to turn it on a small lathe (could be bench grinder adjusted also) to match the OD of the replacement bushing. Other side of A arm (towards front of car) we had a 1 1/4 socket *verify the ID is bigger that the replacement bush) a washer and the hex head of the grade 8 bolt.
After removal we used Dremel to really clean out the ID of the A arm and chamfer the edge to facilitate bushing insertion. The lathered with antiseize put new one in with same setup
Since I had to try 2 times one with hydraulic and final success with bolt cant say how long it took Will try to attach 2 pics showing “setup”
Other pic showing “PUSHER” side of the grade 8 bolt setup with painted blue oversized HEX NUT as a bushing pusher

ALSO
Havent tried it but maybe next time if OLD LOWER SHOCK BUSHINGS outer metal shell protrudes and I belive it does, heat the old bush and remove the metal center and rubber-drill if you have to, then collapse the outer metal shell with AWL or drift and wack it out.
Thanks Brad. So it’s possible to replace that smaller bushing with your technique. The new ones I bought are URO so I don’t know how long they’re gonna last but will try your method next time.
When I replaced the orig. bushings with polyurethane in 2011, I did it the same way that you wrote in your last post. Here are some pics:


Since those poly bushes didn’t have the metal outer sleeve, installation was pretty easy with that spring compressor.