I know this has been discussed at length and I have done my best to read everything available. Based on what I’ve read, here is my plan for my 24 Hours of Lemons outboard brake conversion on my 88 XJS.
Based on this [racing] IRS Conversion
I’ve sourced X300 axles, hub carriers, hubs, calipers and rotors. That should give me a vented 12” rotor outboard. The axles will need a spacer for where the old inboard disk brakes mounted. My plan is to maybe just cut the friction ring off the rotors and re-use that?
The hub carriers themselves should bolt the the lower control arms (is that the right term?) but will may need a bushing since the pin/bolt that holds the hub carrier to the lower control arm is smaller on the X300 than the xjs.
I’ll need to fabricate a brake line to run out each side to the calipers. Maybe just a long stainless steel brake line? Any idea what size the connectors are I should look for?
Not worrying about the parking brake because race car.
What else am I missing?
Remember to put grease in the punkin.
Don’t ask…![]()
I don’t see why that wouldn’t work. You may need to think about ensuring it is properly round and centred to prevent any rotary imbalance.
The need for a bushing at the fulcrum pin, and issues with the brake line endings, are due to the shift to metric fittings on the X300. The brake line layout is pretty obvious once you have everything else in place, just make the ends match the metric fitting at one end and imperial at the other. Also, ensure the flexible hoses are positioned to allow full suspension movement. When I did my IRS conversion (regular 1994 XJS, not XJ40/X300) I went with cupro-nickel (Kunifer) for the brake lines, it is a little stiffer to work with compared to copper, but it doesn’t work harden. The pipe, fittings and a brake flaring tool are not very expensive.
Definately use CU/ni line for the brakes, steer clear of copper and stainless. First one as mentioned will work harden, second nasty to flare at a guess. When I track my XJR I notice that the rear brakes wear down airily quickly, maybe reduce the pressure a bit if you can?
Bob,
I did this project a number of years ago when the wife had an '89 XJS. - one of the two best things I ever did to the car. Unfortunatly, the car was hit in the rear end and totaled in January of 2009. But I pulled the complete powertrain and the outboard brake cage assembly to save it for the '92 XJS she bought as a replacement for the '89. The link for the .pdf file of my project is below. I can sent you some pics also if you wish - just send me your emai/.
XJS Outboard Rear Brakes conversion.pdf (77.5 KB)
Follow up question. Will the stock 15s clear the larger 12” rotor or am I now looking for wheels too?
Bob, very observant - it’s quite close but OK - see photo. I have a set of 16" rims that will take care of that on the "92.


Initial mock fitting after pulling the hub and axle is very promising. Knock on wood this conversion seems like an easy button mod. (Famous last words)
Oh…NOW ya dun and gone and jinxed it.
![]()
Hey! Looky what you got now, double rear brakes 
So when I fabricate hard lines do I want bubble flare or inverted flare?
The XJS is an ‘88 and the donor car is an X300 XJ6.
It really depends on what you are hooking up to. I think the official way is to split the hard line on the body side, and then run a pair of hoses to the calipers. When I did it, I found it easier to keep the single hose to the cage, put in a split on the cage, and run hard lines out to the edge of the cage. Hoses from there to the calipers. I picked the hoses that matched the late XJ12 stuff at the hubs, and made up line endings to suit. Once you have a flaring tool it is pretty simple, you just need to interface with the correct male/female and metric/imperial joins.
This was basically my plan. Hard lines from the center split out to the new brakes and use the rubber lines that came with the setup from there.
I guess I’ll just have to plan around a bit to get the right fittings and flares.
I think I used the original tee with the imperial fittings, cut the left/right hard lines and reused those end fittings with my new lines. The other end of each line was whatever metric fitting was required for the new XJ12 hoses. Just make sure you get the correct male/female fitting and flaring. Also check the flexi hoses are positioned so they don’t strain under full suspension travel. My MOT guy gave me a demerit for that and I had to shift the locating bracket.
As well as the copper nickel tubing and a flaring tool, get yourself a proper pipe cutter. Hacksaws are for hacking - you don’t want rough edges and metal shavings inside your brake lines. The fittings are inexpensive, I got a bunch of them from eBay. I used the spares to remake the front calliper crossover pipe - who would’ve believed that the official Jaguar item wouldn’t fit the official Jaguar callipers  Also used a couple to make a bypass for the crappy vacuum servo on the Alfa.

Well, hopefully he disconnected the inboard ones, so he won’t have to mess with them ever again (right?) … Heck, why weren’t they just removed … ? ![]()
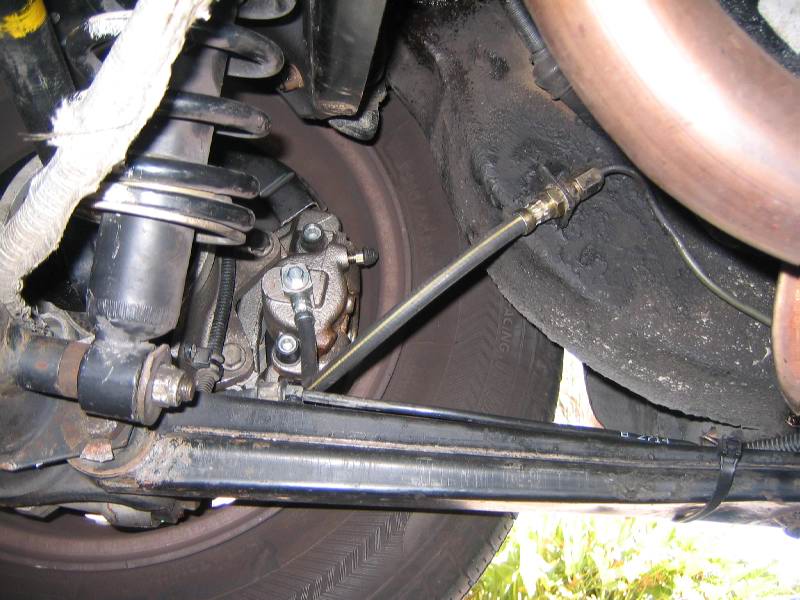
I just noticed something in that pic … why does the radius arm look so huge??? I had them pictured to be maybe not more than 2’ in length … ?
I think that’s just the angle of the picture. They are about 2 feet.
I did remove them. I just wanted to make sure the hubs and axles lined up before I tore everything down.