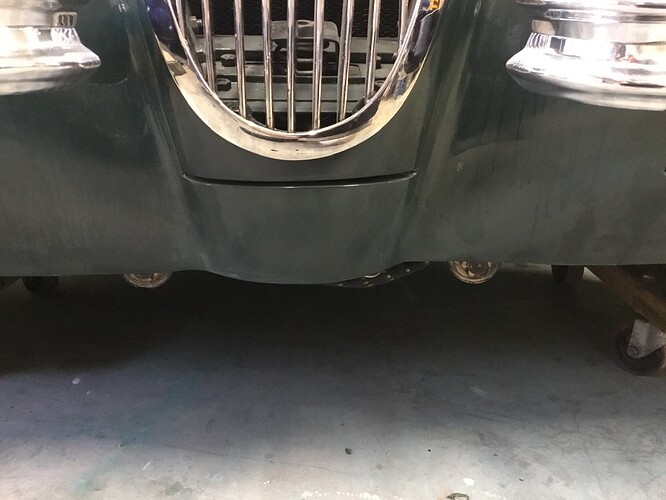
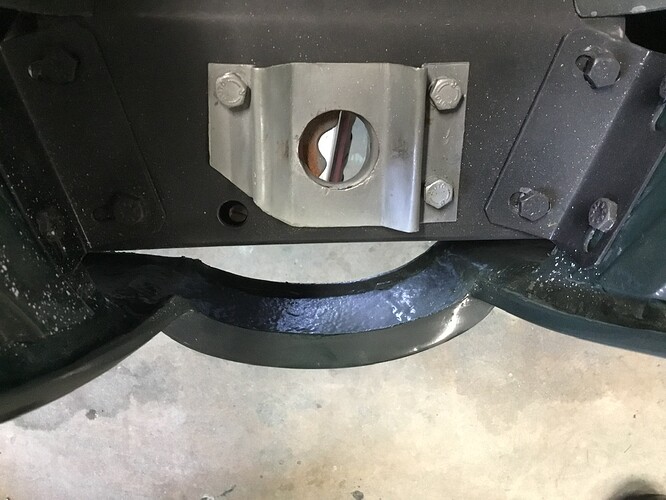
Sounds like a good plan, Charles. I used 18 gauge sheet. I started by cutting out the top flange, using a contour gauge to match the opposing flange of the bonnet. Next was a cutting out a sufficiently long and wide rectangular piece followed by folding up the bottom edge over a length of 1/8” wire stock. I stump formed the rectangle using body hammers, using the loose top flange as a template for the upper curvature and contour, then tigged it to the piece when it was formed to the desired shape. A few trial fits on the body and tweaks with hammer and dolly and it was ready to tig weld in place, followed by body solder to finesse the joins. Turned out pretty good.
Charles and Brian: It’s going to be a challenge for Charles to fabricate Brian’s chin piece by long distance. Especially because of the condition of the front of Brian’s car. It’s doubtful what Charles fabricates for his car will fit Brian’s XK120.
To expedite the process, Brian should make a simple wire form showing the exact shape he needs. This would be done by bending individual pieces of wire to the desired shape of the chin piece and then welding them together. Having an accurate wire form template will greatly facilitate Charles’ panel beating efforts.
Mike E;
Texas is big, I’ll grant you that… but Brian just lives “across town” (one full county) from me… about a 45 min drive, depending on traffic. You (Mike E) wrote: “It’s doubtful what Charles fabricates for his car will fit Brian’s XK120…” Not to be a braggart, Mike… my Metal Fab skills ARE fairly decent, I’m NO Wray Schelin, but in theory, the chin pieces for the XK120’s “should” all be the same “basic” form. Brian’s “chin” is mangled, mine is "bent… actually, “tweaked” sideways, so I’m going to have to “average” the two 120 “chins” (easier than it sounds)-- I’ve done this “method” “side-to-side” [mirror images] on other vehicles I’ve worked on, and it’s worked-out rather well…probably as good, if not better than some of the “after-market commercial” offerings!! And I’ve come-up with some rather good “patch panels”… all it takes is time and Brian said he has an “Unlimited” credit card ;-} (I won’t repeat what his wife said! ;-} ) Seriously, the “key” dimention, in my opinion, is the “bulge out” of the “chin”… that HAS to be correct!! Everything else is made to look good by being “custom fitted”…
Since I don’t have Brian’s FHC here, I’ll just load my Lincoln MIG, my “Panel Beaters Bag & Stand” ALL my dollies and hammers, etc, into the Pickum-Up Truck and haul tools to Brian’s place!!
I believe I can “form” the basic shape of “a” 120’s “chin”, the “upper lip” that conforms to the bonnet and probably even “start” the curve that goes around the re-enforcing wire under the bottom (Brian; You DIDN’T cut that wire, Right??)… I’d rather the Reinforcing Wire still be “intact” (in one piece)… My limited experience on this is, if the wire gets “cut”, it’s a bi*ch to ever get the original shape back! (my LF wing “bottom” was slightly bent when I bought the DHC, Ive never messed with it, BUT I believe I have formulated a plan to correct the problem, and NOT have to cut the re-enforcing wire, at all!! The Downside: It will NOT be “quick” NOR “easy”!!)
I’ll use MY 120 as a “basic pattern” for Brian’s “basic” chin piece… Once I have that shape, I can go to Brian’s and do “some?” (all??) of the “Hammer/Dolly” fitting… (Brian; You DO have an Oxy/Acet rig, don’t you??) After that, it’s welding (and possibly some “Hammer”) time and it might STILL require some more “Hammer & Dolly” work and a couple more trips (days-weeks-- we BOTH have a LOT of doctor visits in our futures!!) to get it completely done to (our) satisfaction… but we will “git er done”!!
Carolyn & I have had our COVID Shots. I believe Brian said his family have, as well… so THAT “problem” shouldn’t be an issue!!
Charles Ch #677556.
Well, that was entertaining, Charles.
A couple of points. Brian’s said his bonnet fit is poor. So was mine. Variable gap, mostly, but also uneven overlap. I decided to get the bonnet fit right before letting in the chin piece, just for some added flexibility to work the two wing edges independently. It required a fair bit of cutting and welding followed by a skim of solder to get right, then fitting the chin piece was pretty straightforward. As to the wired bottom edge, I peeled back the foldover about an inch on either side into the lower wings then cut right through the rolled edge of the wing and the wire. The 1/8” wire let into the finished patch panel overhung by the same inch on each side and when I was finished with dry fits and final shaping, fit the panel, butted the severed wire ends together precisely and tigged them home, followed by rolling the lower edge of the wing back up and completing the welds. This approach worked quite well and allowed for 95% of shaping the chin piece before final fitting to the wings.
Nick;
In talking to Brian, he noted that his bonnet is “loosely fitted”… I take that as the mounting bolts are finger tight. Brian also noted that the Bonnet Latch pieces are NOT fitted, which is okay as they will not come into play until I have “the”/“a” chin piece “positioned” to see how it fits-up… Once I’m that far, THEN pieces will start getting tacked to their “areas”. This will NOT be a fast process… In fact, I figure just making the “chin pieces”, NOT including any “fit-up” work, will take several weeks… at best!!
I appreciate your “write-up” on how you did the “rolled-edge wire”… That info WILL come-in handy!!
Charles Ch #677556

