I’m making progress with the restoration of a rust-free 1952 XK120 OTS. I’ve recently mounted the body back on the frame and no longer have a need for the roll-around body jig that we custom built. As I don’t plan to do another XK, I’d be happy to make the jig available to someone rather than just cutting it up for scrap. It is located in central Virginia and probably wouldn’t be worth shipping.
The jig was built with casters as the body was in good shape and didn’t need to be put on a rotisserie. However the jig could probably be converted to a rotisserie with minimal effort. The jig fully supports the body and bolts to it in the following locations: 1) in front of the radiator, 2) the firewall, 3) the main sill mounting points with adaptors, 4) the flange behind the seats, 5) the main mounting points over the rear axle and 6) the flanges along both side of the boot interior.
About how much does it weigh, and when do you need it gone? If you can wait a month, I would be interested, but I just this week had surgery to reattach a ruptured bicep tendon. I’m a week and a half from being allowed too drive, and a couple of weeks after that before I’ll be cleared to lift anything “heavier than a coffee cup”.
The jig is made from thick wall 2" square tube and is about 12’ long and 4’ wide. It probably weighs 200 Lbs. I also have cockpit braces to support the body when it is lifted from the chassis.
A month storage really isn’t an issue. I’ve moved it outside so it may develop a little surface rust in that time.
Hi Bruce,
My apologies for reopening an old topic but I’m wondering if you are able to assist me please.
Before I go on, I have to say that I’m envious you have a rust free car and I’m certain it will be magnificent when completed.
I have a '53 120 OTS which is sadly a basket case that has been abused and neglected. The restoration will be long, arduous and no doubt expensive. C’est la vie. I have no desire to restore it to concourse level but to a level that I can use it and enjoy it without fear of minor mishaps that can happen during normal driving or on rally’s.
That said, I need to construct a body jig to provide access to the undercarriage so repairs can be made.
I appreciate the simplicity of your jig and wondered if you have a design for it or the measurements used for its construction. Also are you able to post some images of how and where you braced the cockpit so the body could be removed.
Any assistance or insights would be greatly appreciated.
Cheers,
Gary
Sorry, I did not create a detailed drawing of the jig.
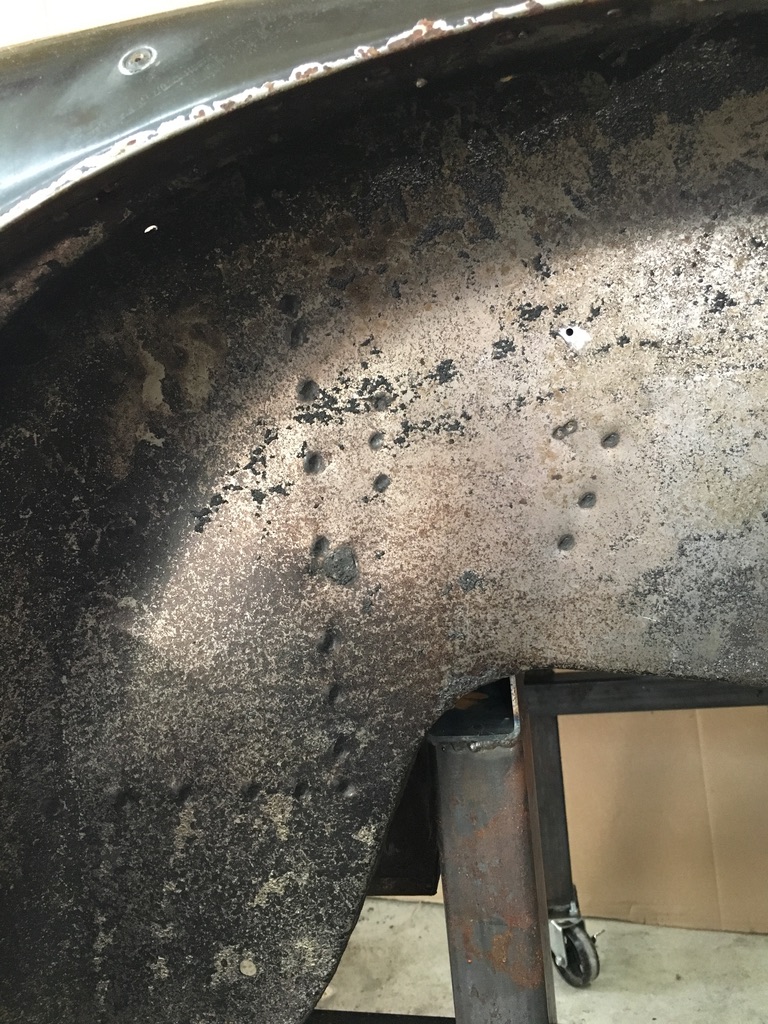
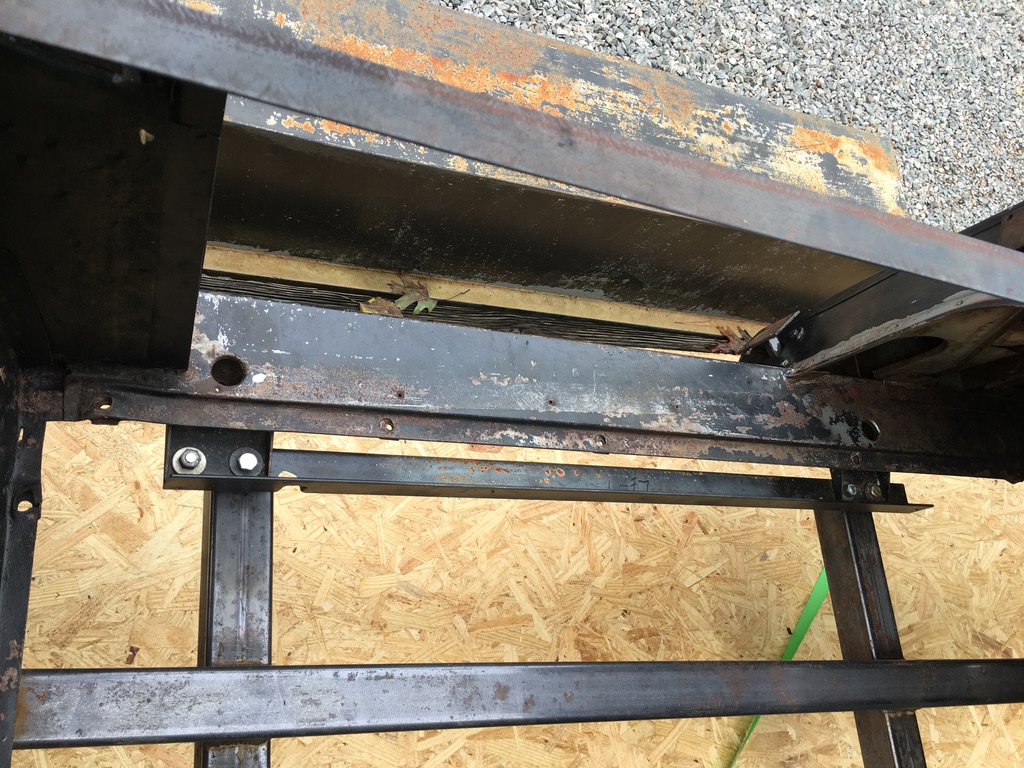
To construct the jig, we offered up the square tubing and fitted it to the body rather than the other way around. This approach worked for me as we were starting with a sound, rust-free and accident-free body. The primary attachment points were as follows: a) the three bolt holes just forward of the radiator on the bottom closing panel rested directly on the front crossmember of the jig, b) the bolt holes in the bottom flange of the bulkhead/firewall rested directly on the jig side rails, c) the bottom flange of the bulkhead at the forward end on the battery box rested on the jig side rails, and the two body mounts just above and to either side of the rear axle rested on a rear crossmember. That crossmember was then mounted (welded) to the jig side rails at the appropriate height with two vertical support members. After the body was secured to the jig, additional supports were fabricated to take the load of the rear body and welded at the appropriate height to the aft end of the jig side rails. As you can see from the photo, the jig was mounted on steel casters to facilitate movement. Due to the condition of the body, I did not feel it necessary to tilt the body. However the jig design could have been converted to a rotisserie.
Separately from the jig described above, I fabricated two other sets of supports:
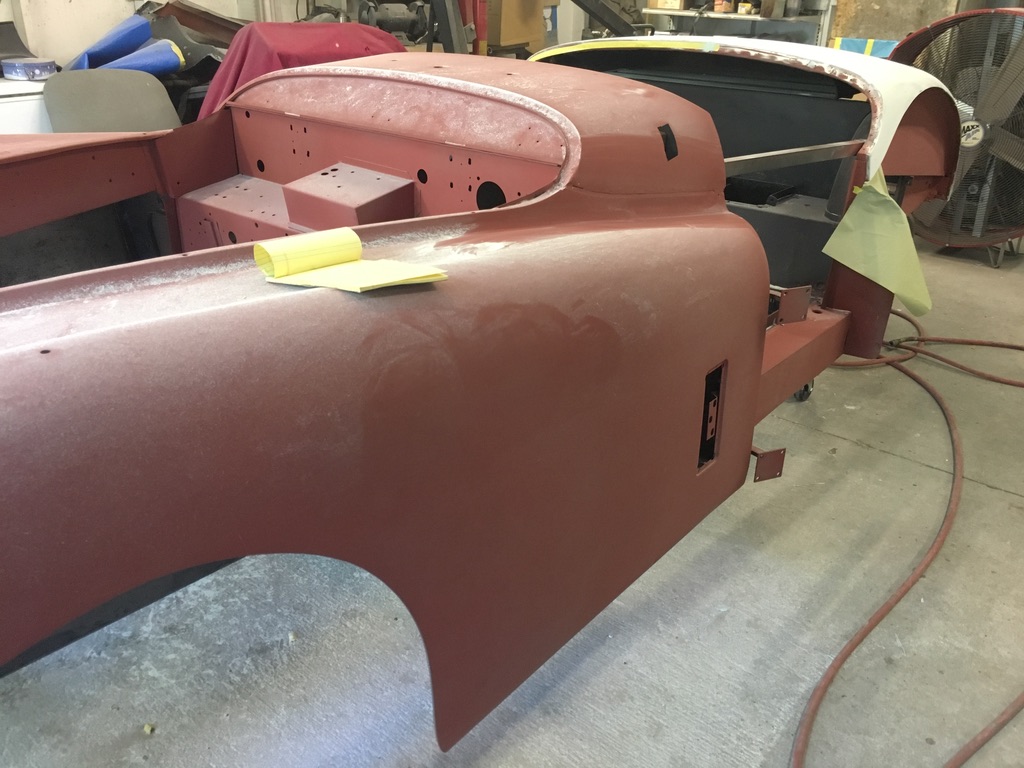
The first were two longitudinal supports to brace the open cockpit. They were constructed by first mounting a short section (approx 6 inches) of angle stock to each end of the inner dashboard/firewall using the original holes, support pieces and bolts that originally held the outer windscreen posts. Next a section of angle stock (approx 30 inches??) was welded at its forward end to this short piece and then the after end was drilled to line up with the soft top frame mounting bolt threaded receptacle. I had planned to install cross braces in an “X” configuration but didn’t feel it was necessary given the minimal flexing of the body. These two supports effectively bridged the top of the door openings and prevented sagging of the body when it was lifted from the chassis.
Additionally, I mounted a section (approx 36 inches) of angle stock under the body mounting tabs in each sill. These pieces were used as the primary load bearing members to attach lifting cables to the body. I installed them by unbolting the four body mounting tabs in the sills, removing the shims or packing pieces, slipping a length of angle stock under the two tabs in each sill, and then bolting the angle stock to the body tabs using the space previously taken by the shims. I then attached cables using small shackles to the forward and aft ends of the angle stock in each sill. The forward cables ran through the openings in the cowl and then through a crosswise spreader bar to prevent damage to the cowl. I joined the upper ends of all four cables together with a larger shackle to the hook on a shop engine hoist which I used to lift (and later replace) the body from the chassis. Once the body was resting on the jig, I installed two additional jig crossmembers which were then shimmed as necessary and then attached to the angle stock lifting pieces which remained bolted to the body mounting tabs.
Hi Bruce,
Thank you very much for the detailed description and also the photos. The will be invaluable when I start to build a jig.
I’ll now begin a list of materials for construction.
Cheers