64 S1 E-type roadster restoration

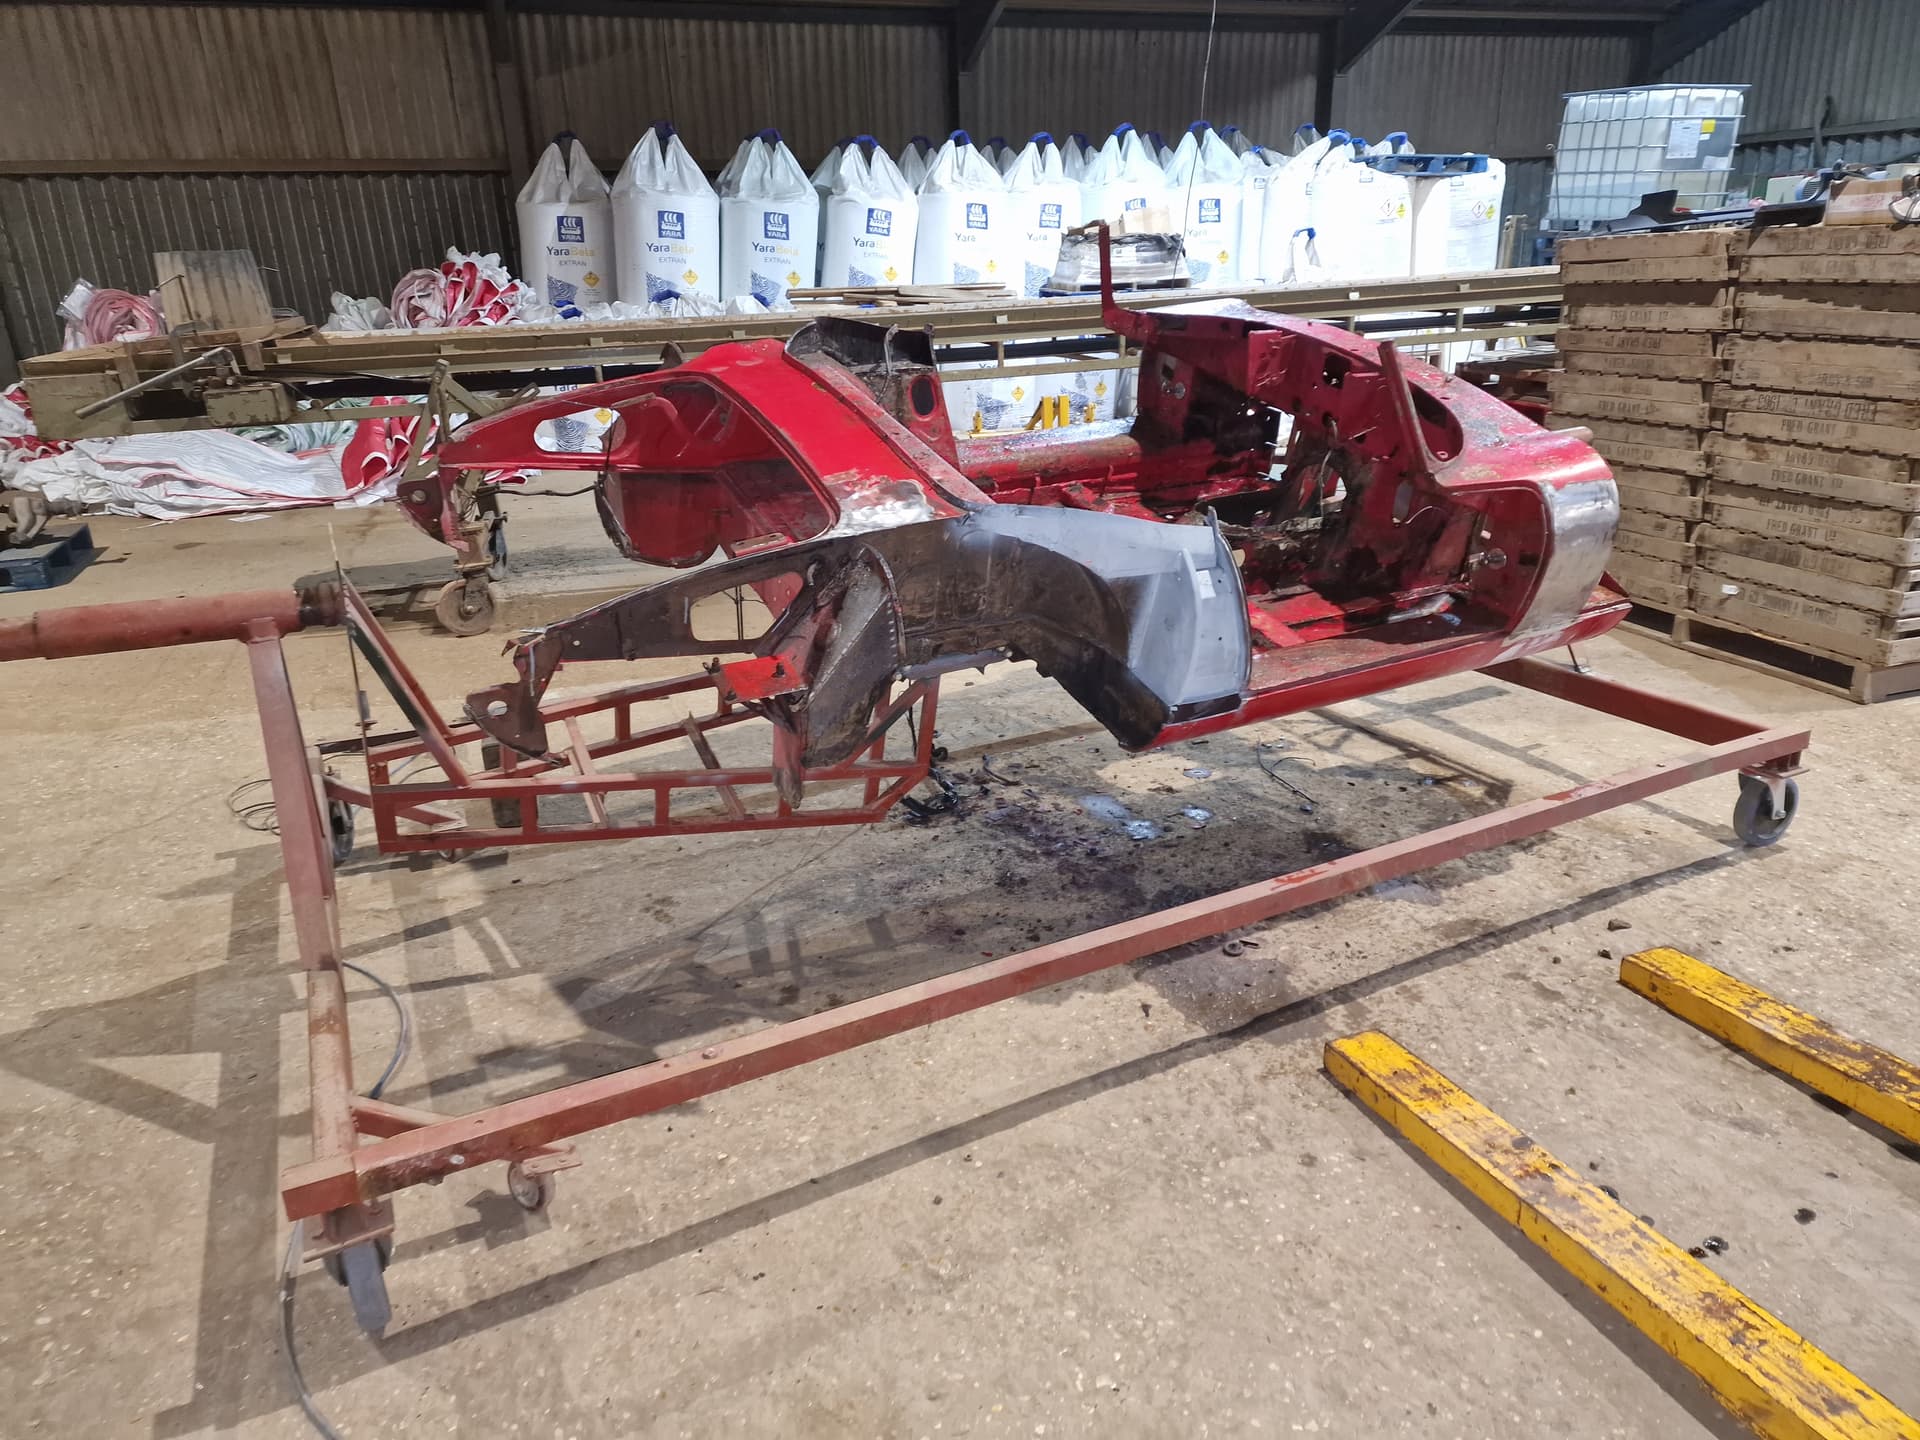
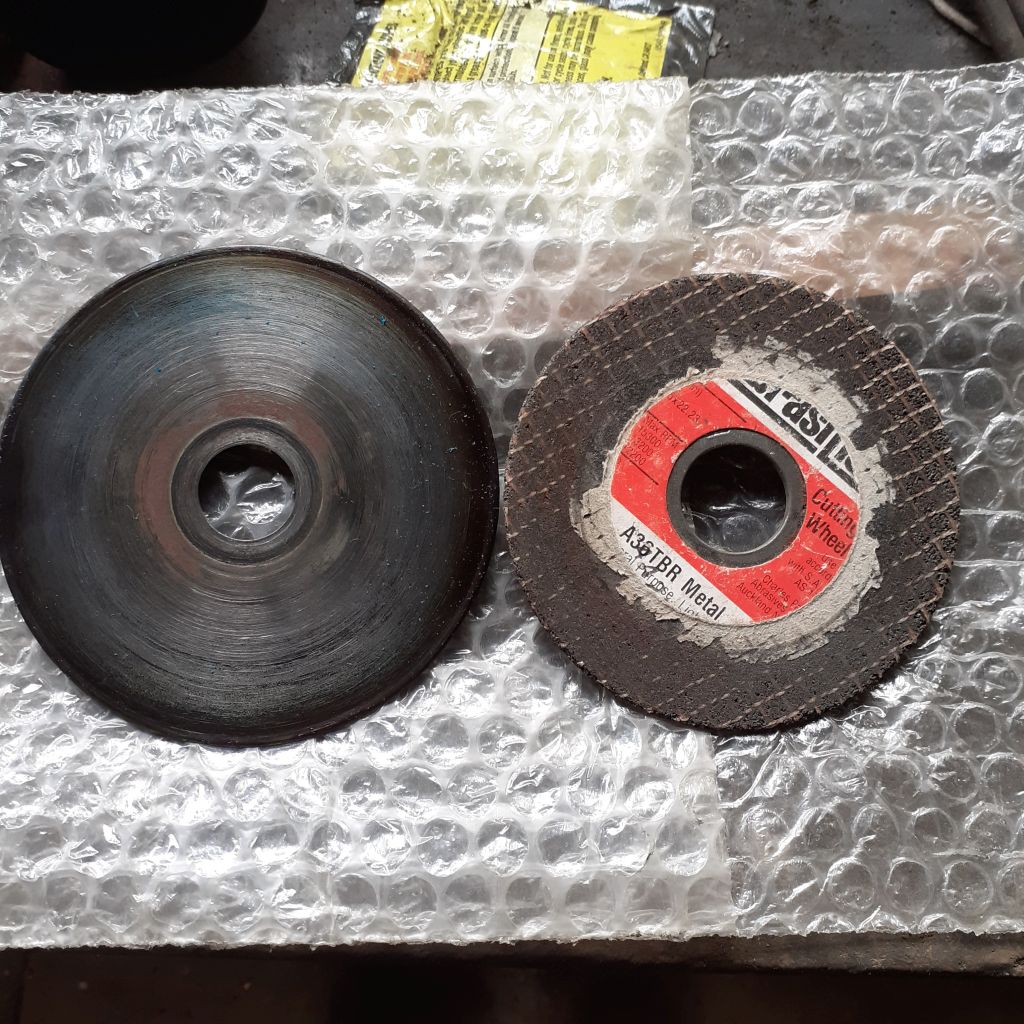
Today I removed the bonnet of the red roadster using an angle grinder.

The advantage of using this method was it took three minutes. The top hats were seized and the frame was rotten clean through on one side.

I then disassembled the bonnet to see what was salvageable.

I saved the headlamp rings and glass, scoops, indicators, one bumper, two bumper extensions, the bonnet catches, air grill, motif bar-thats it.

That little lit however is probably the best part of £1,000 if I had to buy it all new.

The rest is scrap or usable for panel sections only so is in storage. Chuck wouldn’t throw it away so neither am I .

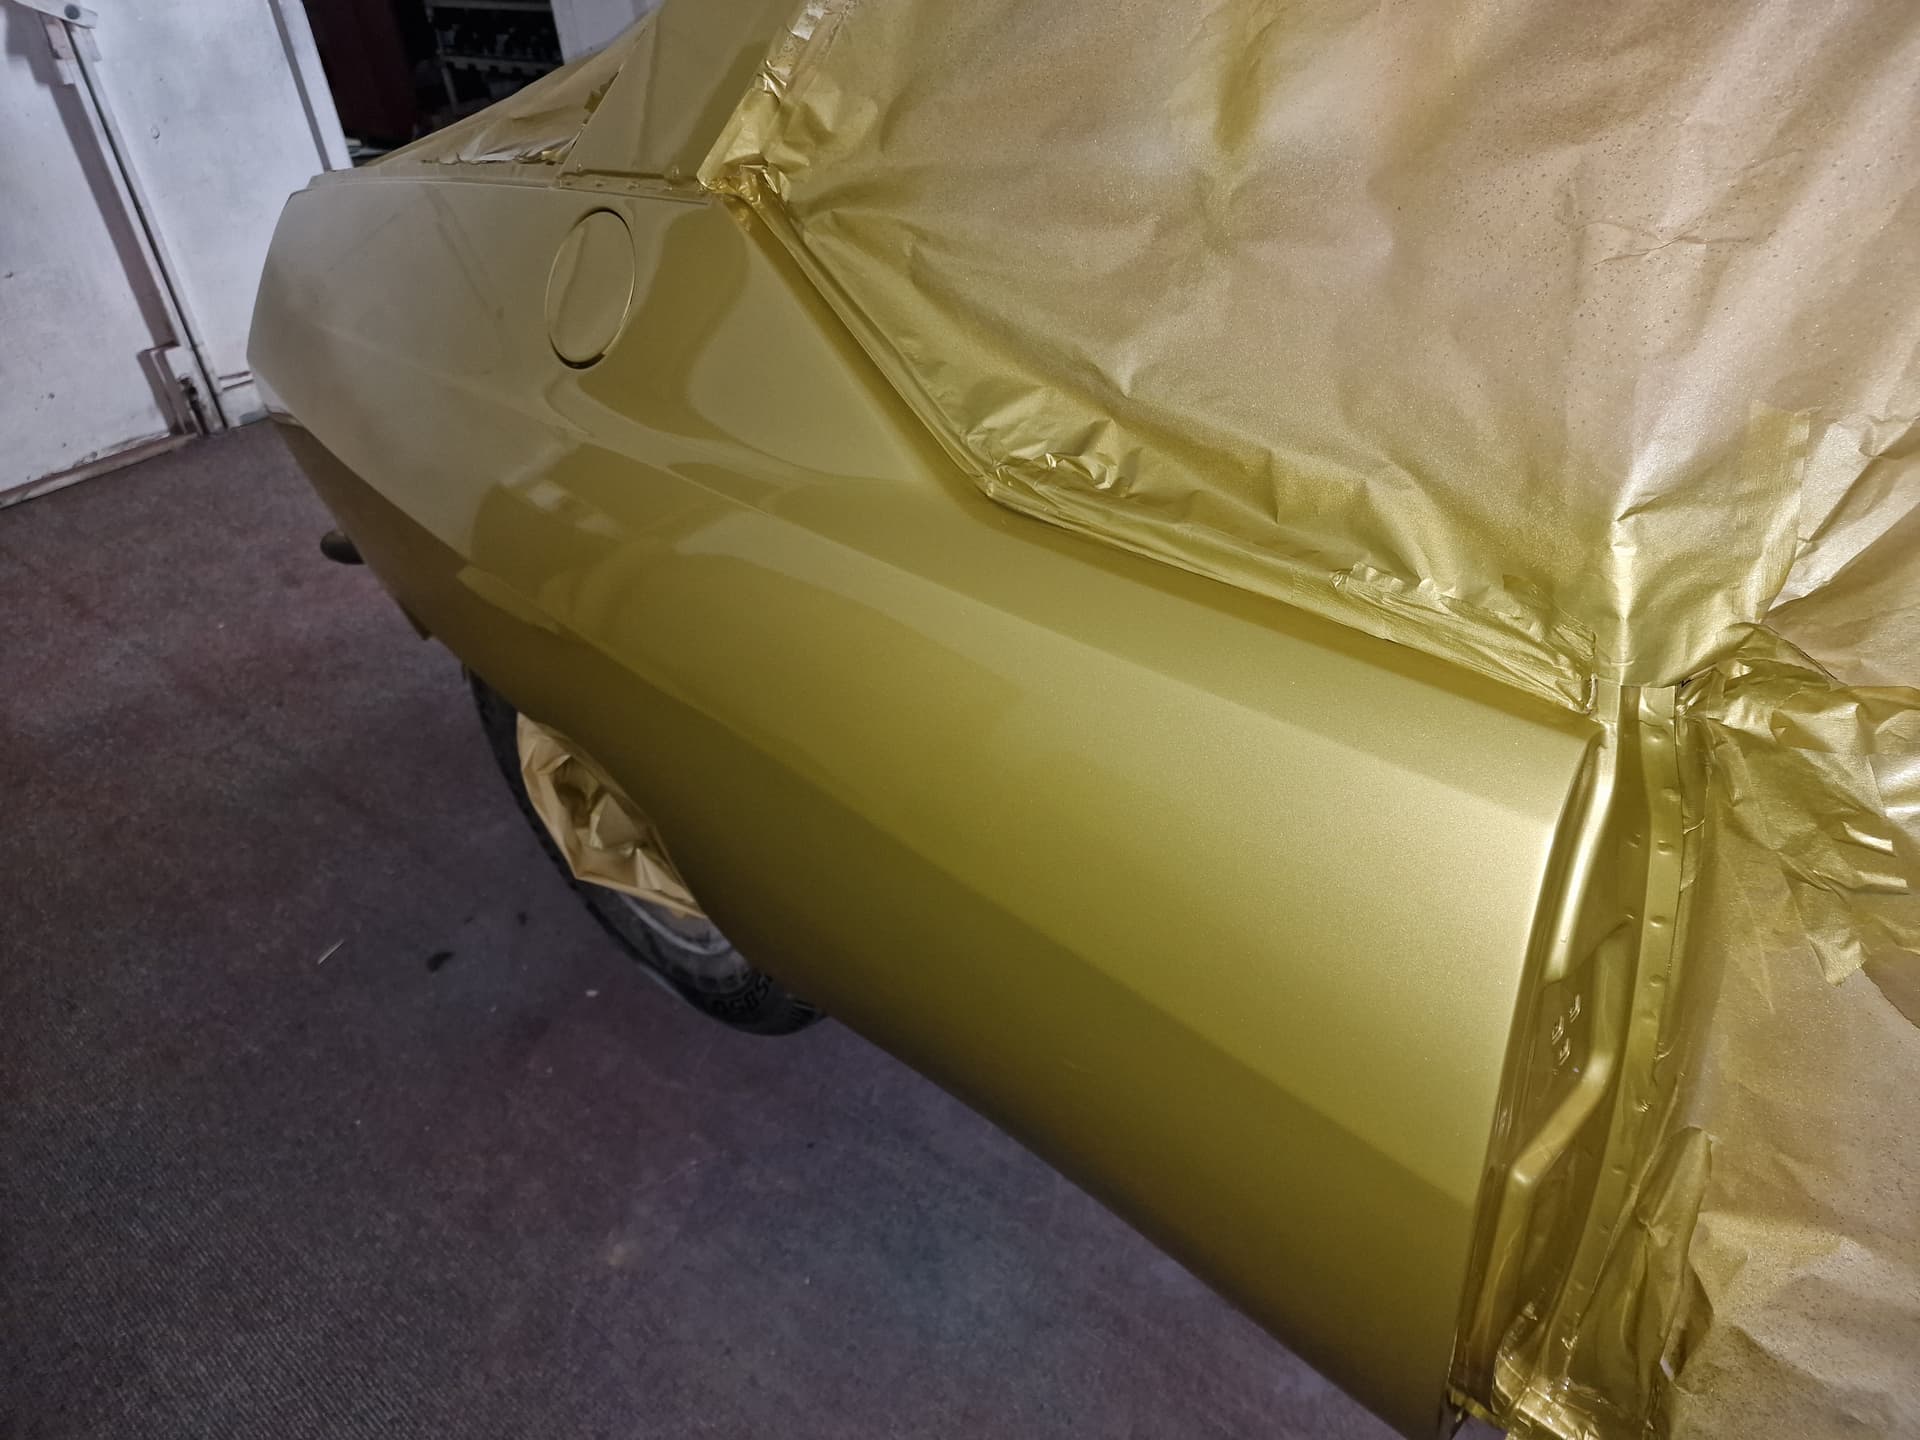
I also did a bit more on the grey FHC, it is very nearly finished.

I closed the tailgate and that was it, pulling the release did nothing. It was stuck shut.

I decided the problem must be at the seat end of the cable, so a carefully undid it all with the seat in place only to find there was nothing wrong with it.

I clambered over the rear and undid the catch bolts from inside the car, releasing the tailgate.
With the tailgate open, I could remove the trim panel and the catch mechanism.

Inspection of the mechanism reveled is all to be intact. A mystery?

I put it all back together and it didn’t work! At that point I gave up, then I ungave giving up and removed the rear catch mechanism again.

Closer inspection of the wire pinch bolt revealed the head of the bolt was bottoming out before the cable was being pinched, allowing the wire to slip when the release was pulled. A new bolt 3mm longer solved the problem.

I then fitted the ITG back plate to the throttle bodies, making sure it cleared the closed bonnet, marking the bolt positions with a scribe and the using a hole cutter and drill bits. I extended the throttle cable by fitting a much long cable, fitted a return spring to the throttle pedal inside the car, finished off the mudguards with the rubber strips and mounted the ECU properly behind the glove box.

It is running very well on start up, however it is rich as I cannot set the TPS position. (throttle position sensor).

That is because I have the wrong USB cable.

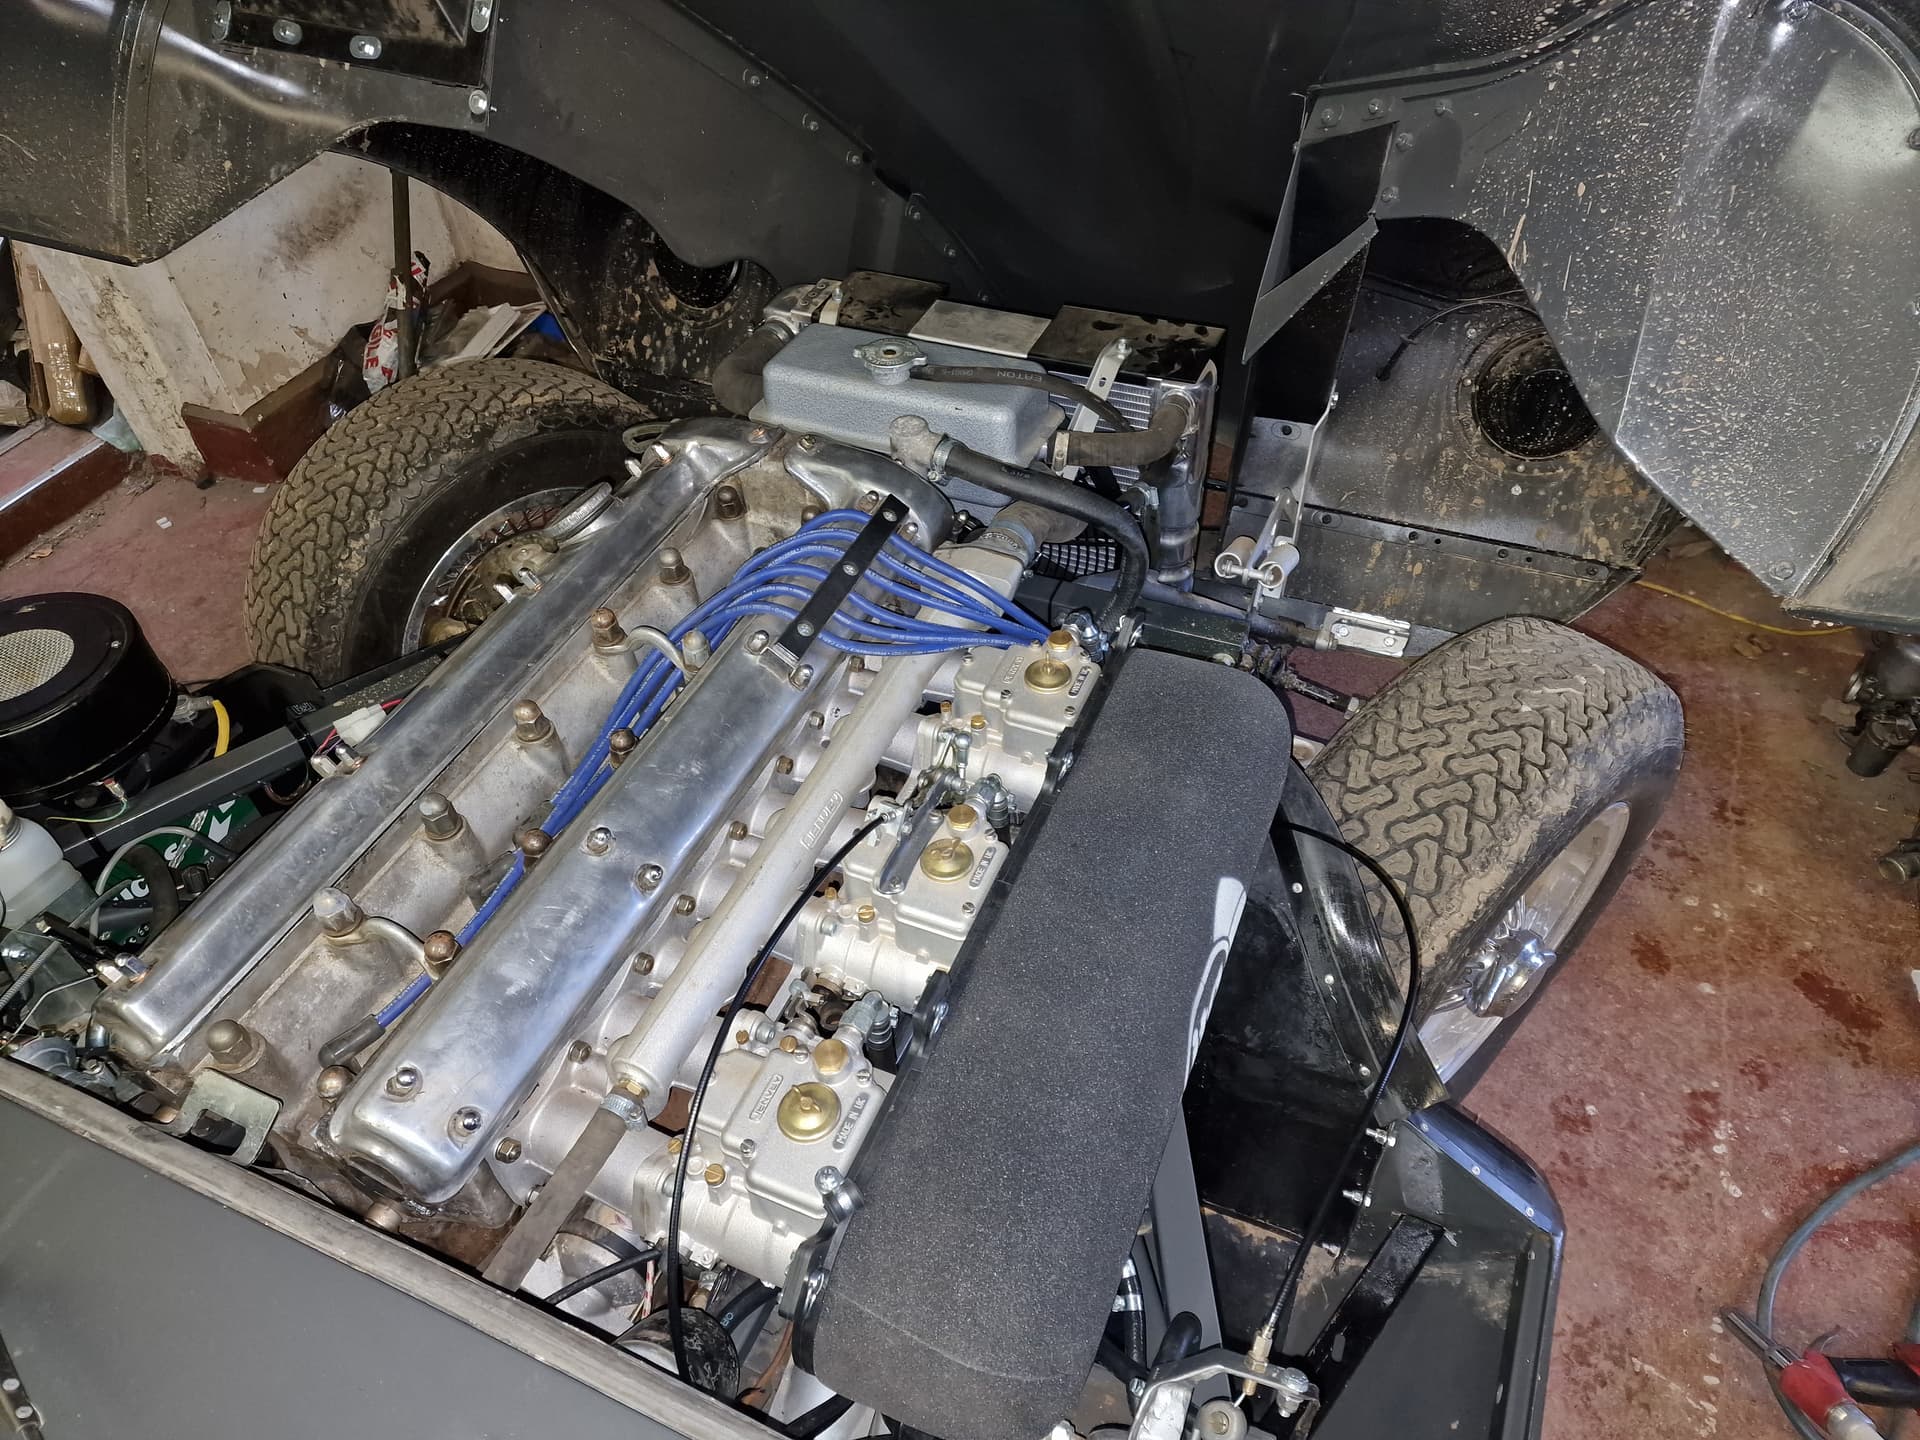
I performed this task on the silver car years ago and have not had to touch it since. Must have lost the cable in the mean time.

My workshop is still full of grain, should be out week after next so I will be able to get stuck into the roadster properly.

3 Likes

I’d be interested in some pics of the bonnet you took off . Don’t be to quick to condemn it, anything can be repaired it’s mostly labour now if the labour is free

Well I decided to get on with disassembly yesterday, as my other projects are stuck in various parts of the county. Renault 4 bits stuck in a postal strike, Emerald ECU that need a connector that has vanished in transit.

Got to pick up my crazy gold SM next week. The paint is looking excellent. I am leaving the front end panels off until the engine has come out and gone back in after preventive maintenance.

E type doors stripped regulators worn. Shells not rusty. Off for blasting tomorrow.
Interior out, seats are good, hood off, console out, dash out, boot lid off.
Wiper rack out. Loom out.
Tank sump seized on, so I cut open the tank to allow me to use a hole cutter to release the sump so I could remove the remains of the tank.


Once the tank was removed, the boot floor and all the boot/IRS panels were inspected and look excellent.

Screen out.
I resurrected my trusty rotisserie in the main workshop. Its still full of grain.
I then lifted her into the main workshops as I was hoping to remove the forward section of the car from the tub, but I ran out of time.
Exhaust off.
I managed to release the front suspension, the 4 reaction plate bolts, the two 5.8 side reaction bolts and one of the 3/4-11/16 main reaction plate side member bolts.
The last one defeated me as it was time to do something else, so I called it a day.

I have concerns about the rear wings and the inner wheel arch panels. I detect all sorts of skulduggery there, so tomorrow I shall be increasing my order to include a pair of rear wings and inner panels.

I really want this car in the paint shop by the end of Jan, and dont want to be held up by a little bit of rust!

5 Likes

Bloody hell James ……what drugs are you on :rofl::flushed:

A lot achieved in such a short time ……and how many cars have you got on the go at once !

And do you do this all whilst farming as well?

My hat is dipped to you sir

I can only do about 4 hrs a day and I’m fully retired

2 Likes

Thanks Danny.
Bacon and eggs and a mi-spent youth in the motor trade I think. Thats what kept me going today,

I thought i was going a bit slower than usual, as I have had to fight rust. This car has not been like the American cars I have disassembled recently. They have all come to bits nice and easily.

Once I get those frame bolts out, she will be split in half and on the rotisserie for major surgery. Maybe by the weekend.

The engine and gearbox is booked into Johns for a rebuild. It is very seized. Not worried about that though. I also really want to flow the head a bit (we have a cfm machine) and get it all balanced like before. I also want 10:1 CR on this engine.

I have a few cars on the go, the XK120 is behaving, as is the quick S2 FHC. My Citroen Ami is stranded in the South of France needing my attention.

I have owned an SM before, they make an E type look like a walk in the park maintenance and repair wise. Citroen basically created hundreds of unique parts with no expense spared to make their version of the ultimate car in the early 70’s. They went bust doing it. The SM is without doubt the most difficult car I have ever tackled.

I really want a V12 2.88 diff. I think it really works well with the 4 speed synchro and an uprated motor.

I already have the Wheels (center laced 6.5 inch Phil Halliwel), throttle bodies and manifold (Heritage), new wiring loom, ECU, coils and triggers, EZ power steering, seats and interior. I thought I would give Baratts Girling brake kit a go as it looks good on Richard Micheal Owens channel.

Non of that matters though until I am in receipt of a rust free perfect painted body shell, so my focus is on that for now.

6 Likes

I have a friend who had an original RHD SM ……nice car …I believe there were only a very few RHD made I seem to recall 4-6 or maybe that’s what came to australia …… anyway he sold it a few years ago (10?) for $A47k ……should have kept it…or more accurately I should have bought it ! I think it had a engine from a masarrti ?

1 Like

Many years ago I worked in Paris one week every month. The ‘office’ moved around but occasionally we found ourselves working in or around the centre, the Elysee Palace close by.

One thing that struck me was the very superior Citroens being driven as official cars - usually SMs. These cars cannot have been run of the mill production cars, their finish was so good and certainly nothing like the finish on the cars we saw in Blighty at the time.

I don’t lust after older French cars, but I might give house (garage) room to a DS. Such a quirky car.

Well I got a bit done.

I repaired the B-post area with new panels, ended up removing both rear quarters and the boot floor.The shut panels and supports were OK however the hood surround and forward splash panels needed changing.

The rear wheel wells, quarters, boot floor etc are toast, so off they come. I have new ones waiting.

Corrosion had taken its toll I am afraid.

Engine and gearbox out and on the rotisserie.

The main structure is still strong and also square. However I am removing all the plating and bodges and cutting back to original factory metal. The whole floor section is going.

If you decide to remove all of the large lower body sections, life moves very quickly with a 1mm cutting wheel, spot weld removal tool and seam splitter.

The upper bulkheads are perfect, luckily. I had a good look inside the front one today. You can see both side of the rear one. The IRS area is also A1.

Tomorrow I hope to add the bracing in preparation for total floor removal. The dimension between A- Post and B-Post is critical.

Engine and gearbox have gone to the engine builder.

I now have boxes and boxes of parts that have arrived. I am still looking for a V12 2.88 diff.

I am also making a large pile of bits to get blasted.

4 Likes

James, great work! I hope you’re much younger than me, though. I don’t think I could do another project of that magnitude again. :disappointed:

Good luck!

1 Like

Well that is a challenge ! …… love the fact the door catches and bonnet locks are still in place!

Certainly no grass growing beneath your feet. You may well meet your deadline at this rate.
I’m sure you already know this, but I got sick of cutting discs disappearing before my eyes, so bought a diamond disc.


Bought it mid '80’s to cut a hole in a brick wall to fit a new window, but since then it’s also cut tiles, concrete and steel, still going strong. Much cheaper than fibre discs in the long run; used on my angle grinder. Need to remove the safety guard, so need to be careful; I use thick welding gloves.

2 Likes

Yes Kevin, thank-you.
I have a similar disc, they are great,

Been doing some big cuts today with my 16yr old son. He stuck it out which surprised me. He must want something from me!

Straight through the whole car to the tunnel in one go.

Gets quite tiring controlling a 9 inch blade after a couple of hours.

The floors are now all out, along with the sills, inner sills cross-member and toe boards.

I used the big disc to cut close to the flanges, I am now ready to start cleaning them all up.

The trans tunnel looks good, so that is my “lower cross brace”.

I have door beams and a brace between both steering column mounting points and the rear deck panel.

The car had received so much welding in the past than my main point of reference is going to be the new floor section, which I have found to be jigged accurately in the past.

I dont trust any of the dimensions I have inherited and am having to go back to basics.

I intend to skim the main panels on in one, to account for alignment issues and door gaps. That will be a very interesting day in the workshop. It wont be long!

1 Like

Well, after a load of flange repairs, I managed to drop the floor into the roadster project.

A few tek screws are holding it together.

Looks like a pretty good fit. The doors fit the hole well.

Time to think about welding at all in next.


5 Likes

3 posts were merged into an existing topic: What did you do to your E-Type today?

I would be surprised that the internal of the tank was galvanised at that time as Jaguar was considering cheap options as far as possible and gas was not supposed to corrode steel.
Unfortunately, gas today incorporates ethanol which absorbs moisture, and water becoming trapped on the bottom of the tank finally corrodes steel in the loing term.

Imho, if rusted, best is to treat with an appropriate bath including diluted phosphoric acid that will remove surface rust and also passivate steel (acetic or citric acids are only removing surface rust but not passivating steel, so that rust may come back quickly).
Then possibly apply appropriate protective treatment such as resin for a longer term corrosion resistance.

1 Like

Just because it looks a bit like it in his first inside picture. And mine had a trichromate look to it, all the fittings and so on are definitely golden, so I assume mine is zinc coated. But as I don’t know the E types as well I merely suggested he should be careful. Is it plain steel?

The tank drain is mostly intended to drain off water as regular maintenance. Air gets sucked in and during the night condensation forms on the inside walls. Even when not driven, the gas then expands the next day, vapour pushes out and thus at night fresh air is drawn in. And so on. The result is water in the tank sump being the lowest point, and stupidly also in the seams as well. Ethanol is not just hygroscopic but it may also remove water from a tank. Wrong thread for that discussion though!

Phosphoric + sealer would be the luxury solution. Labor and money though.

1 Like

Knock on wood but that’s exactly what I had done to mine 25 years ago. Still holding up as we speak. :crossed_fingers::crossed_fingers::crossed_fingers::crossed_fingers:

Simply the most important thing to do with fuel tanks is to not let them sit for a long time, keep them dead full if they do sit for a long time, and keep driving them!

3 Likes

Unfortunately mine sits in storage locker for too many years on and off since 2012.:disappointed:

1 Like

Tank full… !!!

Maybe I could start a Jaguar exercising service…:smirk:

1 Like