thanks for clarifying this : it makes more sense
I was wondering how air could flow through the smaller condenser and the bigger radiator)
from this older post about cleaning the radiator and condenser
thanks for clarifying this : it makes more sense
I was wondering how air could flow through the smaller condenser and the bigger radiator)
from this older post about cleaning the radiator and condenser
I spent 3 1/2 hours in the garage, but managed to get the coil out,
the steps are similar to the 5.3L, but the air scoops above the radiator are preventing access : I had to take them out, with the whole plate above the rads
removing the clamp of the HP hose helps getting enough movement of the compressor to be able to get an extractor on the pulley
I’ve taken pictures, and will post more later, but the steps I used were :
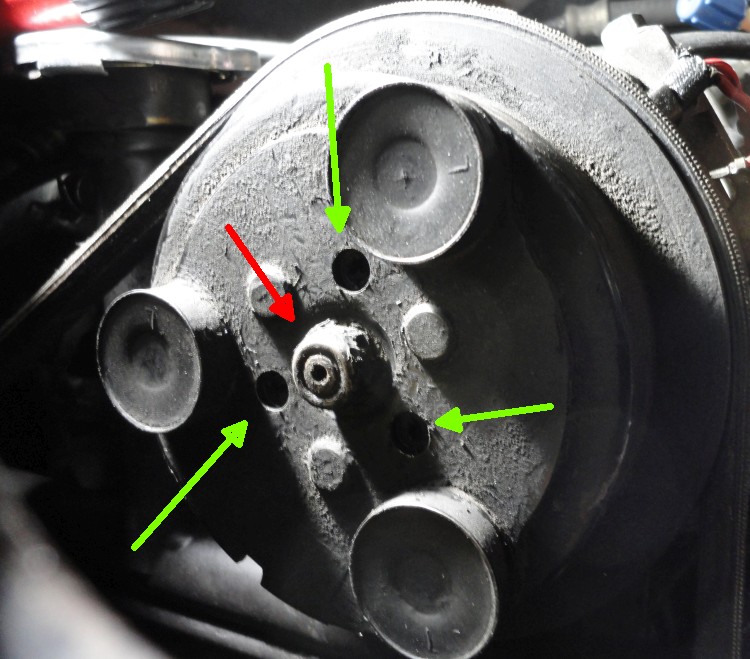
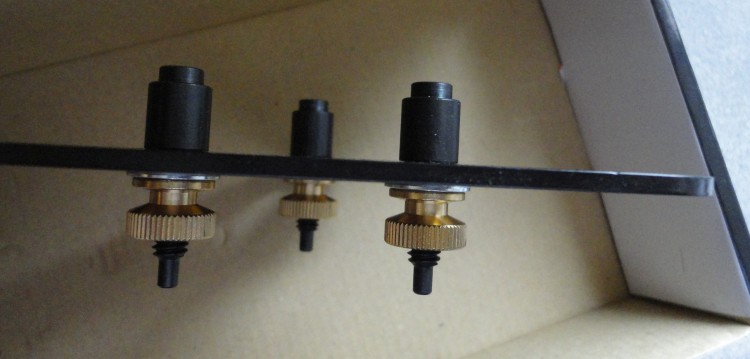
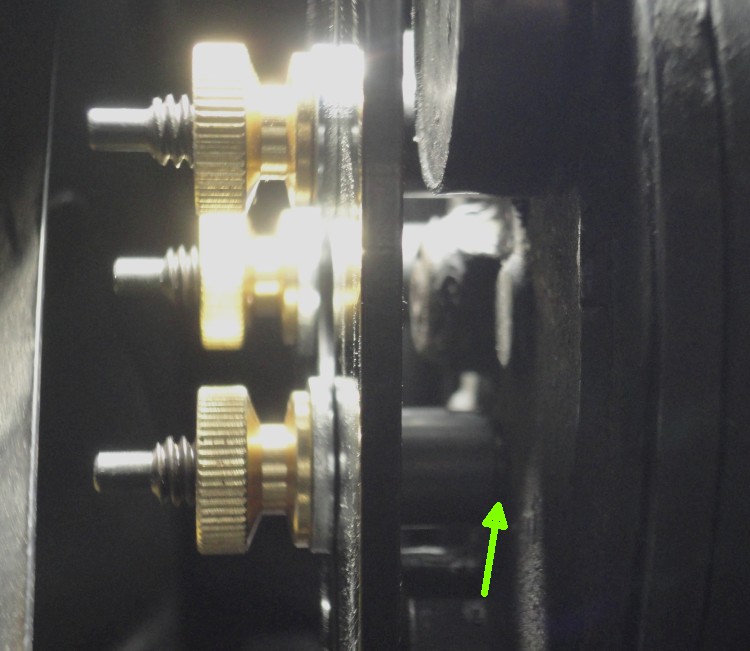

take the clutch face out using a 3 screws extractor (3 x 1/4)
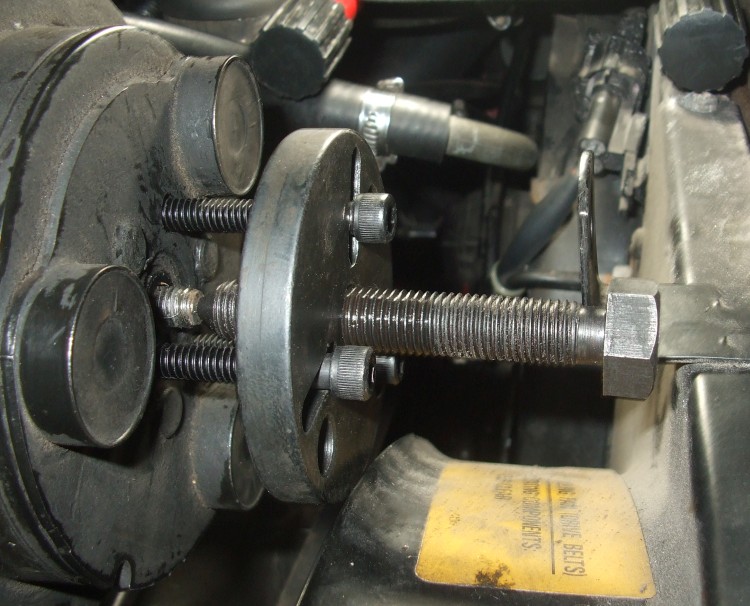
remove the circlip
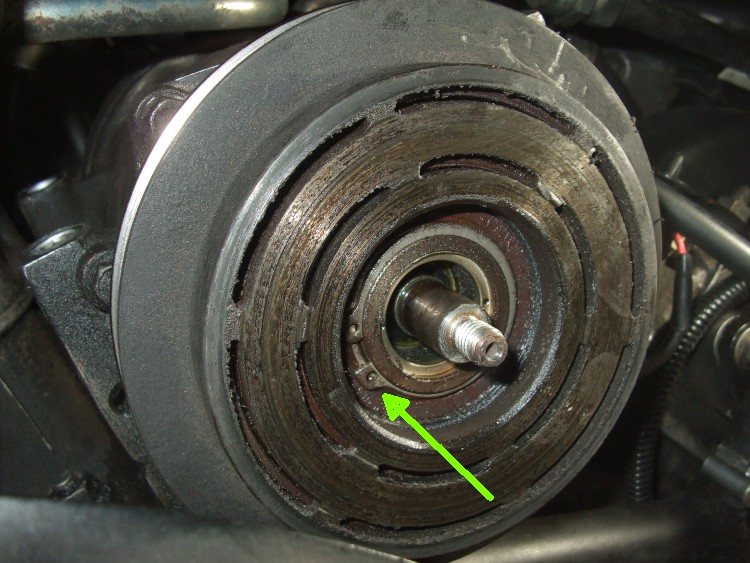
pull the pulley with a 3 legged puller

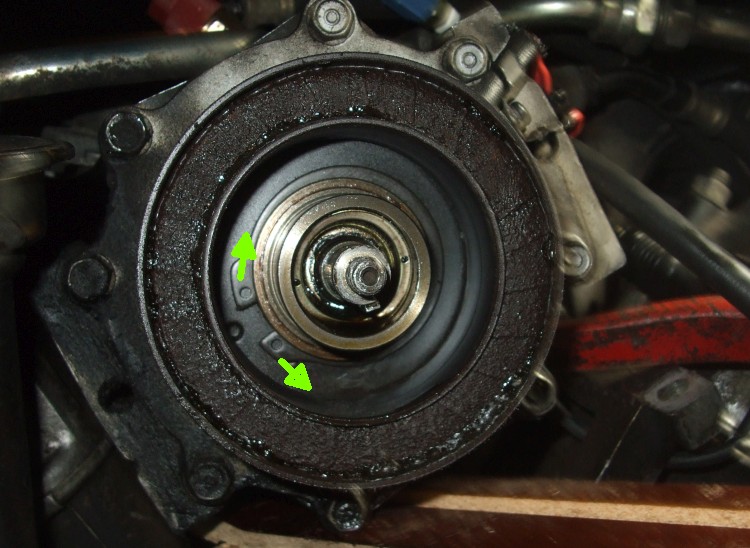
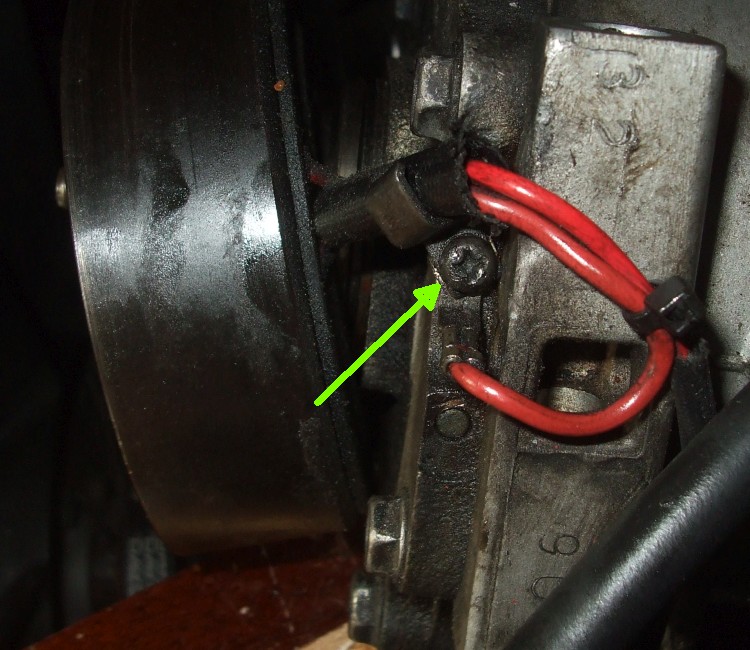
remove the coil circlip and the Philips screw
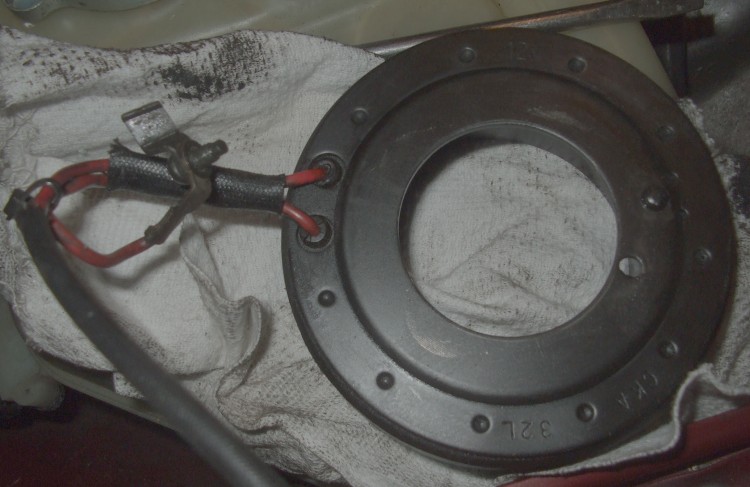
edit : the coil references are not that important as the dimension : I found a French eBay shop able to match the specs of the coil from the ref / dimensions :
outside diameter: 96 mm;
inside diametre: 64 mm;
thickness : 32 mm;
opening diameter : 45 mm;
at a fair price (33€ + shipping)
(not sure of the rules about linking providers : happy to post it if this is ok)
I’ll need to change the connector, and will also change the pulley bearing, while it’s out,
Good result, and 33euro is close enough to US$50 which would be my bet for a fair price.
No problem mentioning a fair and honest supplier, just not allowed to berate the opposite type on here.
If you had 3 X 1/4 screws ( UNC I think ) in the armature then it has a keyed shaft, and not a splined one.
I have one old Sanden given to me for spares, and that has a keyed shaft. I had it on the bench in the factory this morning and in 15 minutes had the coil out. Took longer to find 3 suitable screws.
Luckily the armature was not tight and just putting the 3 claw puller under the head of the screws pulled it off. The pulley bearing is still good.
I also have a Sanden with the splined shaft totally stripped down here at home. I just measured the coil dimensions for that one and same as yours. There is a very good chance all the Sanden SD series have the same type of coil. The connector on the coil wires may vary but that is a minor thing.
The insides of the compressor is an interesting design. If I could get hold of the piston seals I would try and fix this one. Got to say trying to get all 7 pistons into the bores is a major effort. Sanden must have a jig and technique to do it in seconds, like to know how.
No Google hits, no Ebay offers, no Youtube videos mention mention piston seals for sale, or how to put the pistons in the bores.
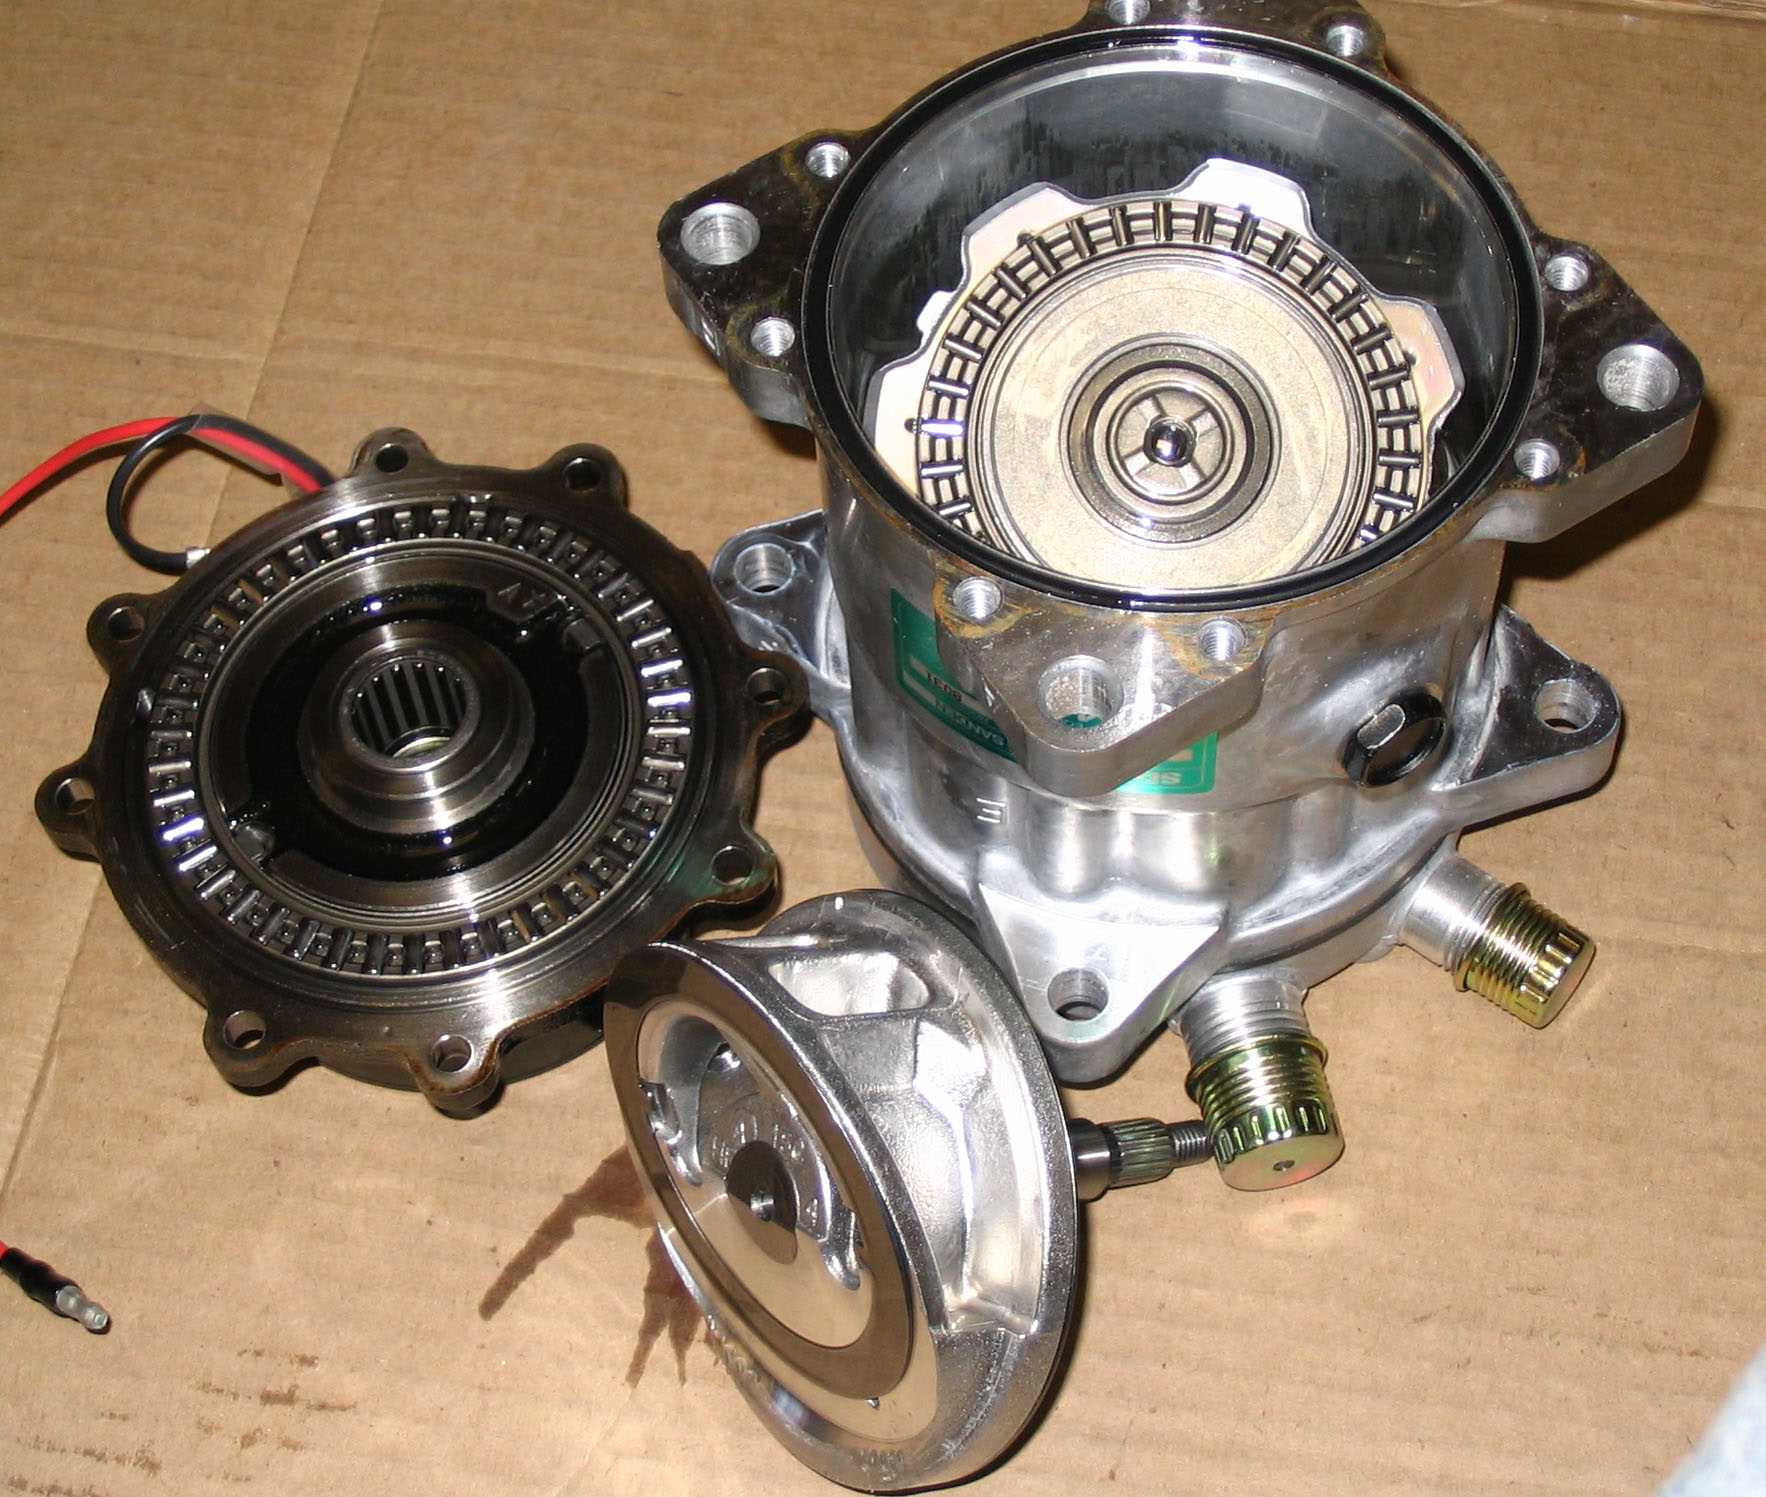
Looks familiar ? This is the keyed shaft version.
Below is the squash plate drive end of the business, and have not seen a Youtube video of this lot.
Not hard to pull it apart, and you can easily replace the roller bearing races, just do not pull the pistons out of the bores. That tells me they rarely give trouble. When the piston seals give out this item is for the scrap heap.
In this case I suspect the steel pan could be cheaper. It is a simple pressing, needing a trim after pressing, then a couple of holes threaded and a paint job. Four stages of manufacture and all should be quick and easy.
Not to mention it is a fair bet they are made in China.
The plastic pan is quite thick and needs 2 dozen steel sleeves inserted before or after moulding.
Made in China would be cheaper, made in Germany perhaps not. Must be lighter and that is a big issue for car manufacturers.
In cost over life it is possibly a disaster because it has built in filter, is not reusable and goes to landfill.
Maybe it scores on fuel saved due to lighter weight.
Jury still out on this one.
Blockquote [Richard_Dowling3] I also have a Sanden with the splined shaft totally stripped down here at home. I just measured the coil dimensions for that one and same as yours. There is a very good chance all the Sanden SD series have the same type of coil. The connector on the coil wires may vary but that is a minor thing.
The insides of the compressor is an interesting design. If I could get hold of the piston seals I would try and fix this one. Got to say trying to get all 7 pistons into the bores is a major effort. Sanden must have a jig and technique to do it in seconds, like to know how.
No Google hits, no Ebay offers, no Youtube videos mention mention piston seals for sale, or how to put the pistons in the bores.
Looks familiar ? This is the keyed shaft version.
yes, very similar, except the body which is not not the “ears” version, but 4 vertical bolts holes
the SD709 / SDH15 have 4 variations of coils (according to the shop), the outside diameter and thickness varying slightly to accommodate different pulley sizes / types (single or multiples grooves)
I haven’t seen anything about the internal seals and pistons assembly , only the main gasket change
edit : I must get more familiar with the forum to use the quote properly
Four types of coil ? I suppose I can believe it.
Having spent many years in engineering, more than I want to admit here, my first question designing anything that needs a part from a supplier is:
" O.K., what is your standard item that is most popular, usually in stock, will do the job and cost least ". Then I try and use it, and rarely want a special version.
Those pulleys can easily be cast, stamped, moulded or forged then machined to suit a one size fits all coil.
I cannot see those coils being more than 5mm different in any significant.dimension.
Yes, well Ford, GM, Benz etc. have a lot of clout but even so surely they can design a pulley to fit a standard coil and make spare parts cheaper ( and less profitable ? )
I’ve never seen the innards of a Sanden before. Hard to figure out how it works. Does the cylinder assembly rotate?
I’ve never seen the innards of a Sanden before. Hard to figure out how it works. Does the cylinder assembly rotate?
The cast truncated cylinder at the bottom of the 3rd photo rotates with the input shaft.
It runs on the roller bearing race you can see on the black front cover on the left of that photo.
That in turn drives the squash plate shown in the body of the Sanden in 3rd photo.
The connection is thru the 2nd large diameter roller bearing race.
The squash plate must wobble but not actually rotate.
In the 2nd photo it is coupled thru what looks like a helical gear to a shaft with a key.
You can see this keyed shaft fits the centre bore in the 1st photo.
It is the keyed shaft that prevents the squash plate rotating
There is also a large ball between the squash plate and that keyed shaft, in the centre of the “helical” gears, effectively keeping the “helical” gears from crunching into each other and allowing them to wobble around while maintaining the correct geometry.
The piston rods are ball jointed both ends. They can be a bit stiff or a bit sloppy, and the sloppy ones make it hard to get all 7 into the bores of the body.
All up a neat design.
here is some video about the Sanden
an animated version
and the “back head conversion” could be useful to swap parts between a coupe and a sedan model
great videos and explanations from all.
Covered not too long ago.
The cheapest (and probably the easiest) solution is to find a compressor that has the correct pulley/clutch (some trucks use 24 V) and mounting holes and swap the head.
John (CJ95) got his compressor for about $150 IIRC, brand new.
http://www.jag-lovers.org/snaps/snap_view.php3?id=1429575347
http://www.jag-lovers.org/snaps/snap_view.php3?id=1429623938
http://www.jag-lovers.org/snaps/snap_view.php3?id=1429575933
Looking at that thing in the photo I figured it had to be a stationary part. That’s where I got confused. Thanks for the explanation!
Still don’t see how those pistons get installed at the factory.
Impossible to put them in by hand, which is why no piston seals offered as spares.
I did try it of course, and a total waste of time.
In the factory can only be one way, with a jig to do this:.
Line up squash plate at correct wobble angle relative to the keyed shaft and keyed centre bore of body. Load keyed shaft with ball into body.
Body must be vertical to retain ball.
Have a fixture that moves in, grabs all 7 pistons and lines them up exactly to enter the bores. This fixture cannot enter the body of the Sanden.
This is all done on the drive side of the body.
Have another fixture on the valve side of the body which has 7 long arms with vacuum pads on the end. The vacuum pads grab the piston crowns which are correctly aligned.
The fixture holding the pistons withdraws.
The arms withdraw thru the body pulling the pistons. or the body moves up over the pistons. The end result is the pistons are loaded into the bores.
Any other ideas ?
The only idea I could think of was to take advantage of the fact that the pistons are all at different points in their strokes, and feed the farthest-down one into a cylinder first. Perhaps just wiggle it until it goes. Once started, move on to the next.
I don’t see how a fixture would work. How would it reach around the wobble plate to grab ahold of the pistons?
Answer: The fixture grabs all 6 pistons while the squash plate is still out of the body.
It locates them in the correct position and knows how much to allow for twist as the gears engage.
The 7 long arms or rods come thru the 7 bores from the valve end of the body.
The arms have strong suction pads that hold the piston crowns so the pistons stay aligned…
Then the arms pull the pistons plus squash plate into the bores of the body, or the body moves forward over the pistons.
The bores have a small chamfer which gives possibly 0.5mm tolerance on getting pistons aligned but they must be dead square to the bores,
Those suction pads must be slightly smaller than the bores of course. I just do not see any other way of holding those 7 pistons in position.
Yes Steve. Great job of collating and posting info from you on the facelift V12 AC dilemna and possible solutions.
My recent comment the other day was aimed just at the recent videos and the stuff Richard posted. Was interesting to watch the videos. YouTube then brought up one where a bloke from down-under, with no intent of re-build, pulled apart piece by piece a Sanden wobble compressor to see the guts. Don’t remember if it was 5 pistons or 7 - - but the action of the swashplate, needle bearings, roller bearings, ball joint etc remained relevant either way
Like Richard has recently posted, I would hate to try to assemble the compressor section without something to hold pieces still
best regards, Jim
Remiss of me. I should have mentioned the fixture locating the pistons must be withdrawn after the suction pads have grabbed the pistons and held them in the correct alignment - of course.
I’m still awaiting the parcel with the coil, (the carrier says it’s been dropped off, but it’s nowhere here), but I received the one with the pulley bearing
replacement is simple ;
removal of the big circlip
pressing the bearing out with a 50mm OD socket
pressing the new one in with a 54mm OD socket
putting the circlip back
I wasn’t sure to change it or not, but the bearing must have been on its way : now the pulley does 3 or 4 rotations instead of 1 1/2
really impatient to get the coil, so I cant refit the compressor
sorry for the delay : I finally got the new coil today, as the intial order was stated as “delivered” in the tracking, but never reached me
the second order went flewlessly, and arrived yesterday evening
the part looks good and similar to the original one
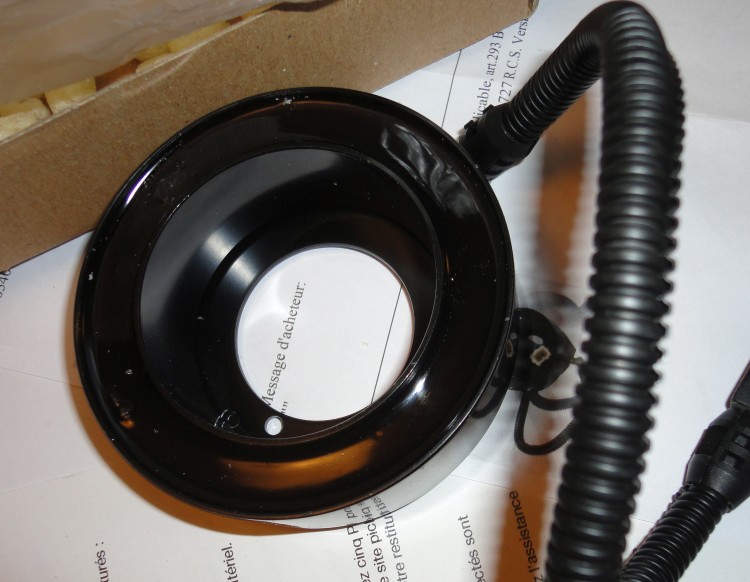
except it has 2 wires intead of one
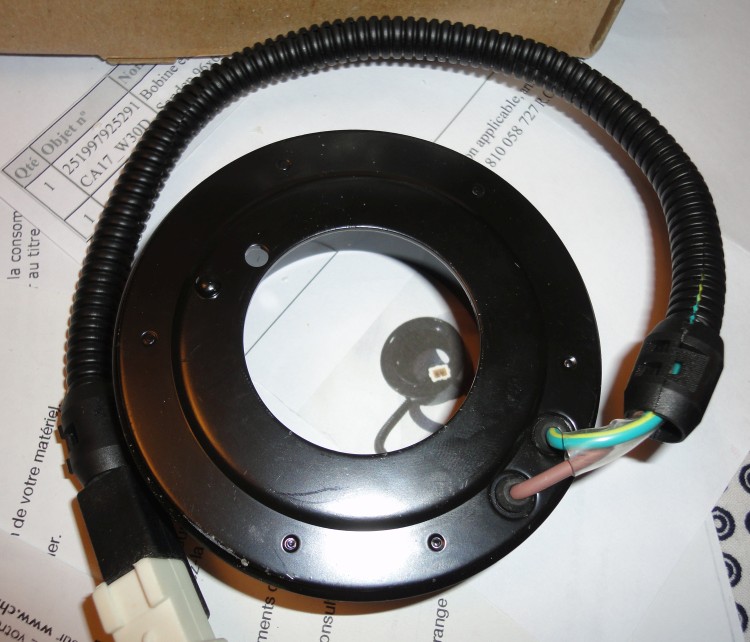
one of wires is brown, and the other is green with white stripe, and I don’t have information about which one is supposed to be connected to ground and which one is the +
my old memories about electromagnets tell me that any polarity will create a magnetic field, whicjh will move the clutch plate, but I’ve read about some protective diode being used, which could blow if I get the polarity wrong
I don’t believe it matters. You can check continuity to ground to see if either is grounded internally, but I’m betting they’re not.
I kinda doubt if there’s a diode in there. The diode is more likely in the controller. Still, you could just check the impedance through the coil in both directions; if it’s different, that would indicate a diode inside.