1966 MK2 3.8 liter with the two SU carbs. It appears that the rear A/F adjustment screw will be very difficult to access. I think I need to remove the plenum. The bolts hold the plenum to the carbs are way to long and I will buy shorter ones tomorrow. It takes a lot of mini turns with an open end wrench to loosen those bolts. Even then the length of the bolt almost touches the dash pot of each carb. Has anyone set up a mechanism to have a flexible permanent flex line, similar to those for rewinding the odometer and the clock?
I can not even see the rear A/F screw without mirrors. Ideally, I would remove the hood, but that’s not going to happen!! If I remove the A/F screws entirely I think I could have an extension cable gently welded so that I could turn that screw from above the dash pots. Or I will check again but I do not think that there is a straight upward opening just to replace the screw with a 4 or 5 inch long screw protruding upwards for easy adjustment.
My plugs are sooting up horribly and I have adjusted everything but the A/F mixture. Literature indicates 1/4 turns can make a world of difference?
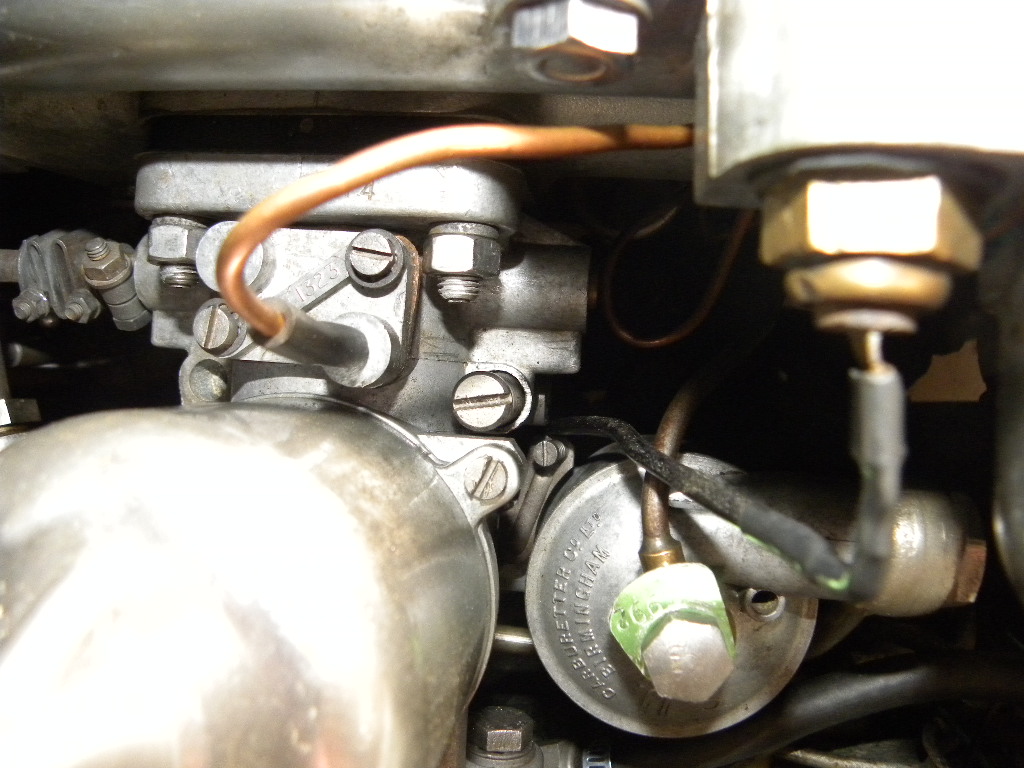
Yeah, I ran into that problem 50 years ago. Since then I have always assembled the front carburetor with the adjustment screw towards the front of the engine. The jet housing with its lever and adjustment screw is attached to the bottom of the carb with four screws, and since it is symmetrical it can be assembled in either direction. With the adjustment screw towards the front it is easily accessible without removing the air horn. This is what my front carb looks like from the top…
My adjustment on the front carb is like yours. The rear carb screw is the one I can not reach. I’m thinking of tack welding a flexible extension on to the screw for easy adjustment with the engine running.
I will examine the base structure and it looks like I would have to remove the carb to change the orientation around to get better access to the A/F screw.
There are four slotted screw that pass through the float bowl extension and then through the jet housing to hold it on, so the switch could possibly be done in situ if you have access to the bottom of your carbs.
This looks like a good idea. Alternatively do you think it possible to install a new much longer bolt replacing the short one and be able to turn the adjustment without a screwdriver and just do it by twisting it by hand.
Jagman, here are some thoughts I’ve had about your situation:
First, be sure and check that you’ve opened the spark plug gaps if you are using the Pertronix. I believe that you should open the gap to about .34 instead of the std. gap.
Since you will want to take off the air plenum to balance the carbs with say a synchronizer tool from say Moss, then just go ahead and take the plenum off now and change out the bolts that are too long. with the plenum off you have easy access to the A/F adjusting screw.
Acquire a Gunson Colortune if you don’t already have one and adjust the A/F with it. once you’ve got it all dialed in, then you can simply put the air plenum back on. The A/F mixture will be set and not need further fiddling with.
Spark plug gaps are correct for the Petronix, I have used Color tune tool. Everything looked good using the tool. I also used the synchronizer tool which showed a perfect balance. All six plugs are filthy black. Thing happens about every 100 miles of driving. My choke is manually with cigar lighter operated and I turn it off as soon as possible so I’m not running the car choked. When plugs are clean it pull like a freight train. Things get progressively worse and currently it is stumbling and backfiring through the carbs, like a lean out condition.
I will pull then plenum and see how difficult it is to rotate the bottom of the back carb as Mike noted. I also will see if a much longer screw can be fitted for adjustments on the fly.
Be aware that if you remove the plenum and disconnect the carb intakes from the air cleaner you will not be able to tune the carburetors correctly, and the engine will always run rich when you re-connect the air cleaner. See my explanation below
The thread on the mixture adjustment screw is a 4BA which would only be available from specialty suppliers such as British Fasteners.
I would not expect anything less (thread pitch 4BA) from Jaguar!! I do understand that that it would run lean during the test and then rich with the air cleaner restricting the flow.
I called upon the beautiful Angela to use her small paws to assist with these A/F screws. Here are some facts:
The front carb was 2 & 1/4 screw turns to seat/stop position.
The rear carb was 1 & 1/2 screw turns to seat/stop position.
Backing up several steps, all of the spark plugs were black sooty. The back three (1 to 3) were minutely worse.
So we turned both screws out 2 & 1/4 and then turned OUT 1/2 turn to lean them.
What do you guys usually find these screws turned out/in at?
Having done the synchronizing balance and a color tune, would you not expect that the screws would normally be very close? These were way different and the plugs were causing engine stumbling and backfiring.
It is too cold and windy to start the engine and do the lift pin test.
I have a Kevlar sleeve as I can imagine it is going to be scalding hot lifting the pins. I will try the rubber tube idea as the screws are not held tightly in their bracket.
I will check back this weekend when the weather is warmer.
Just a second. The idle air screw (the bigger one) can seat. The small mixture screw can‘t really seat, that’s the one where you have to set the jet flush with the bridge and then turn clockwise.
If the idle screws are at different positions that is normal and bot unhealthy within reason. That probably means one throttle is ever so slightly more open.
I am referring to the small screws. We turned them down to where they would NOT turn down any further. I know also that there is a large idle screw for both carbs. I used the idle screws on each carb for synchronizing them.
These carbs have a rubber diaphragm. This is now stretched snd the jet is bottoming out in the bottom of the carburetor. You should probably get the intake out of the way, get everything adjusted (base setting), let the engine warm up, adjust it so it passes the lift pin test, refit the filter, adjust the last bit (the rubber tube on the screw sounds alright) and then see how it runs.
I had a problem with poor carb tune and one carb would not respond to the jet adjustment. The jet was seized and this cannot be detected with the adjustment movements. I removed both carbs and lubricated the jets with some oil. So I learnt that you have to check that the jets slide easily every time you have access.
After watching videos on this topic, i realize I am way above my skill level and fear I would make the car completely inoperable. Just removing the carbs sounds like working the mechanism that controls the throttle butterflies.
If I take the Plenum off, and manually lift the piston, would that not indicate that the jets were centered when they give a solid clunk when they drop? Could I spray lithium grease up the pistons from the bottom to coat the jets to make sure they are not seized.
The last person to work on the carbs was an expert so I’m thinking they are already centered.
I just wish they were as simple as a Holley or Edelbrock to adjust!
an accurate way to measure that the Jets are moving and set the same depth is to remove piston & bell, insert depth tip of vernier onto jet top with the carb bridge as the base, the depth should be 1.5 to 1.75mm
Once they are set I equalise airflow with a meter, but only when the car is fully warmed
After that is done I will set the ASC lean enough to just start and idle the engine when dead cold
all as per Des Hammill
I also remove all the screws, clean them out and add anti-sieze
You can use a Gunson or some other device (or just test drive) to see if you are too rich or lean