I am pasting a link to the original thread I started with the alternator for my 3.8 E-type a while ago. This new thread brings it all together for those who may want to install an alternator into a 3.8 E-type. I found it interesting that the 3.8 is so different from the 4.2s electrically and even mechanically - the block bolt holes are positioned differently. Here is the initial thread: Alternator: best choice for a Series 1 - #77 by ScotThompson
Now for this thread:
Series 1 Alternator: The Final Solution
I thought it best to consolidate the discussion on the choice of an alternator for my 1963 Series 1 E-type FHC as well as its installation. There were lots of lessons learned during this exercise and lots of advice and information provided by J-L, EtypeUK and others - thank you all for the help. What is written here is just my solution; there are lots of ways to have a different conclusion. For my car I do not have A/C but there is a possibility that I may add it at a later date and I wanted to allow for that. That raises the question of alternator output. The S-1 E-type initially had a generator with about 30-35 (max, hot) amps output as well as a positive ground system. I decided to convert to a negative ground. With modern radios and air conditioning, idling on a hot and humid day, an air conditioning car may require something more like 55 amps. That is “hot” and slow rpm in traffic. So that is my minimum baseline requirement.
To cut to the chase for those who don’t need the details, here is the final solution and the rationale follows:
Alternator Delco CS130 (#7861-11) (stands for Charge System, 130mm dia. Stator)
Output: 12 VDC nominal, negative ground, 85 ampere rating
Rotation: Clockwise
Regulator: Internal
Mount: Spool
Adjust Arm Location: 2 O’clock
Pin Connector: 10 O’clock
Pins*: 4 pins: P not used, L = dash light, F or I not used, S = sense
Post: 2 O’clock threaded bolt for output
Pulleys: Discarded the crankshaft and water pump duplex pulleys in favor of a single vee type.
Single vee pulleys were used on Jaguar’s 3.4 engines and they bolt right on.
Drive Belts: Gates 9435HD FleetRunner V Belt, 0.51” top width (13mm), 43.5 length (1105mm)
Only two pins need be used for this installation and because the length of run to the main terminal on the solenoid is only 2 ft, just one pin (L) and the post are all that is necessary. P is a phase or pulse (a 90 deg square wave) output suitable for a tachometer, L is the alternator indicator lamp circuit, F is an external Field monitor and this pin can also be I and in that case is for the Ignition feed, S is the Sense (for voltage at a point where you want the alternator to “sense” the voltage). The S pin controls the output of the Alternator but the Alternator will use the Post voltage if no voltage is provided to the S pin.
My thoughts are normally driven by being thrifty (okay, some say cheap!) and so it is important to me to strive for affordability. It is not my normal MO to buy a ready-made solution when, with a little work and understanding, I can save a lot of money while perhaps creating a better solution.
Let’s talk alternators. Alternators are rated at full design rpm – something more like 12,000 rpm, not what you are idling at. And they have “hot” ratings and “cold” ratings. This is alternator shaft speed and a typical ratio between the drive pulley and the alternator pulley is about 2.5:1 – the alternator spins 2.5 times for each crank revolution. Some alternators easily produce power (power = voltage X current) at a low rpm and others do not. This is a function of their design. For a number of reasons, I zeroed in on the Delco CS130 alternator: cost, availability, reliability, reparability, and a variety of mounting choices. If I were I in the UK, I would likely have focused on Lucas, but here in the US Delco is still king, although Denso is another common alternator. Here is a tip. Most Delco alternator are made in China today. There are five levels of quality of Chinese-made alternators; the best is Grade 5. I never did figure out how to ascertain which is what other than if you buy the cheapest, you’ll probably get the cheapest. I do know that a US-made Delco is a good product and that is what I sought out. I found a NOS government surplus Delco alternator on eBay for $80; delivered for $20. Here is the label on the CS130 box my purchase came in.  It is correct except my alternator was for a non-A/C car and therefore produces 85 amps. That 7861-11 number is a universal ordering number and it stipulates that the alternator has a spool mount (single fat mounting foot at 6 O’clock), the pin connector at 10 O’clock and the adjusting bracket ear at 2 O’clock. These two positions are designated by looking at the rear of the alternator. And yet, the direction of rotation is referenced by looking at the alternator front: CW in my case. That is exactly what I was seeking except for a serpentine belt type of pulley. I intended to swap that out for a single V pulley with standard offset ($14).
The CS130 Delco alternator was introduced in 1986 as an improvement over the 10Si and 12Si choices. Delco made many improvements with the CS130: smaller, lighter, quieter electrically and mechanically, better voltage regulation, a variety of output power levels and many mounting configurations. The CS130 produces power at a much lower rpm than the typical 10Si or 12Si; i.e., it will charge at idle speeds. These are common on 1988 to mid-1990 GM vehicles. The standard CS130 is 105 amps but a CS130 made for a non-A/C vehicle is 85 amps (they also make 100 amp and all the way up to 200+ amps). I couldn’t find an output  curve for the 85 amp variety, but here is the standard 100 and 105 amp outputs. Note how quickly it produces sufficient power to run an A/C system: if the engine is turning at 1000 rpm, the alternator is tuning 2500 rpm. When the car is running, the alternator should be producing between 13.5 and 14.2 volts DC. The lower value is driven by the rpm and the upper value is controlled by the regulator. If the output exceeds, 14.8 Volts, something is amiss and battery damage can occur.
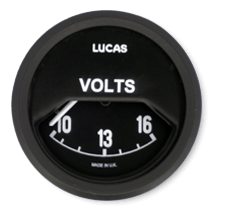
When upgrading the alternator, it is advised to consider the vehicle’s wiring. The E-type was designed with a 45-amp wiring system and with an ammeter on the instrument panel, a “hot” ignition switch and a “hot” light switch. Because an ammeter requires all the current to flow through it so as to display the amount of current flow, the headlight switch is also designed to pass all the current through it to the lights, and the ignition switch is also passing high current, I planned to add relays to carry those high currents. In my opinion unfused, high current load wires are not desirable inside the passenger compartment from a safety and reliability viewpoint not to mention the voltage losses due to long wire runs. To accommodate my philosophy, I will replace the ammeter with a voltmeter. Voltmeters just need to know the voltage and much smaller wires can be used to provide that information. I planned to make electrical system changes using existing wires as appropriate and eliminating wires that will no longer be necessary by abandoning them in the circuit, but leaving them intact for some future owner. I.e., I’ll use the light switch and ignition switch as planned and that way I can verify I’ve connected the wires according to the schematic. However, I have changed the ground to negative ground and of course, I’ve installed a high-power alternator that eliminates the original external regulator and I’ve re-purposed some of the wiring as well as adding a 2nd 10-gauge wire between the alternator output post and starting solenoid. This post then connects to the battery. Here is a picture of the alternator as installed with its single V pulleys and some of the wiring connected. 
An interesting discovery that may be specific to the Series 1 3.8 cars is that the ammeter wiring per the factory schematic starts with a 10-ga brown-white (NW) wire at the factory regulator that runs direct to the ammeter. The connecting wire from the ammeter, 10-ga brown (N) then routes to the top post on the solenoid. These two wires can be entirely abandoned as they serve only the ammeter. The solenoid is unique to the 3.8 cars I re-purposed it as the primary terminal for the battery connection. The original generator output wire of the 3.8 cars is a 10-ga brown-yellow (NY) that fed the original regulator. Via that regulator’s cutout relay, the NY wire connected to the NW wires emanating from the regulator. One of those NW wires was for the ammeter and the other two NW wires connected to the ignition switch and the headlight switch respectively. With the regulator eliminated and the ammeter eliminated (and hence its two now-abandoned wires), the original 10-ga NY output wire at the new alternator can provide power directly to the NW wires feeding those two switches by jumping the NY to the NW at the old regulator location. With the addition of a 2nd 10-ga wire running directly from the alternator output post to the solenoid top post, the battery’s appetite for ampacity will be provided as will the two switches and the #3 fuse. Here is the schematic:

Note the dashed wires to the ammeter are no longer used, the NY + NW at the old regulator are now spliced, a 2nd 10-ga wire runs from the alternator to the solenoid and, additionally, the L output of the alternator utilizes the 16-ga NG (the old Field wire) to connect to the 16-ga NY at the location of the old regulator so as to provide for the Ignition Warning Light (which now will have a resistor in parallel to allow for bulb failure.
Connections: My alternator connector is labeled PLF/IS and so the 3rd pin is either F or I. I could use the S pin to connect to the solenoid post adjacent to the battery – Series 1, 3.8 cars have a solenoid there that functions as a terminal post, starter relay and main battery connector. This S pin requires 12 volts in order for the alternator to produce power; it is typically not switched. There is an L pin that is used for a warning lamp and it is switched so that the lamp comes on with the ignition switch and goes off when the alternator produces more voltage than the battery. The P pin is a square wave output used for tachometers or hour meters and will not be used in this installation. The F (or I) pin can have two functions: either a Field monitor or an Ignition voltage. This installation will not use the F/I pin. The last connection is labeled BAT and it is the ¼” post that provides the main current output. The BAT post must have 12 volts provided to it or the alternator will not produce power. This makes the S pin somewhat redundant if it is connected to the same connector as the Bat wire. However, the S pin can be used to sense a precise voltage at different locations to assure the voltage is at its peak at that point. E.g., the power feed at a relay for the headlamps to assure maximum brightness. If no voltage is provided to the S pin, the alternator will use the voltage at the BAT post. For this project, I will not connect the S pin to the top post on the solenoid as it is only 2 feet away.
Here is the budget for this project – I won’t count wires I had around nor the Pontiac bracket from a previous project.
Delco CS130 Alternator $80 + Shipping of $20 = $100
Alternator Pulley $14
Single V Pulley at Crankshaft C14589 $97
Single V Pulley at Water Pump C14588 $89
Alternator Heat Shield C31757 $29
Gates Fleetrunner Single V belt $27
Alternator Bracket at Engine C25158/38 $74
PLFS Wire Connector $5
Adjusting Bracket from ’72 Pontiac $0
TOTAL $ 435
I think it came out quite well considering I did not plan to change the crank and water pump pulleys in the initial plans. Once into the project, I felt it wise to do away with the duplex fan belt. I now have a safe, highly reliable alternator with a built-in regulator that can be repaired most places and a fan belt that one can buy at any auto parts store. I’ve adjusted the wiring harness to be safe for this installation and I can add a stereo or air conditioning without concern the alternator won’t be able to handle the power requirement. Now it’s onto the relays I plan to add to the car for the headlamp relay and for the ignition switch; I do believe they are an excellent idea and will improve the reliability of the wiring, so I get to it soon.
One final thank you. @Michael_Frank helped me considerably offline with this project when I lost my way electrically. Thanks Mike!
Pics below.