Surely the rest must be all down hill now - right?
The next job is to install the new lower ball joint kits but the new cups seem to be too big to fit.
The original cups seem to be made out of bronze and they sit inside a steel ring that seems to act as a locating dowel when bolting the cup back onto the upright…
I’m guessing this all that means that the circular ring must come out and that the new cup then sits in its place and provides the function of the bearing material and dowel ring together.
Before I get busy with the hammer, please can anyone confirm that I have this right?
As always your help and advice is greatly appreciated.
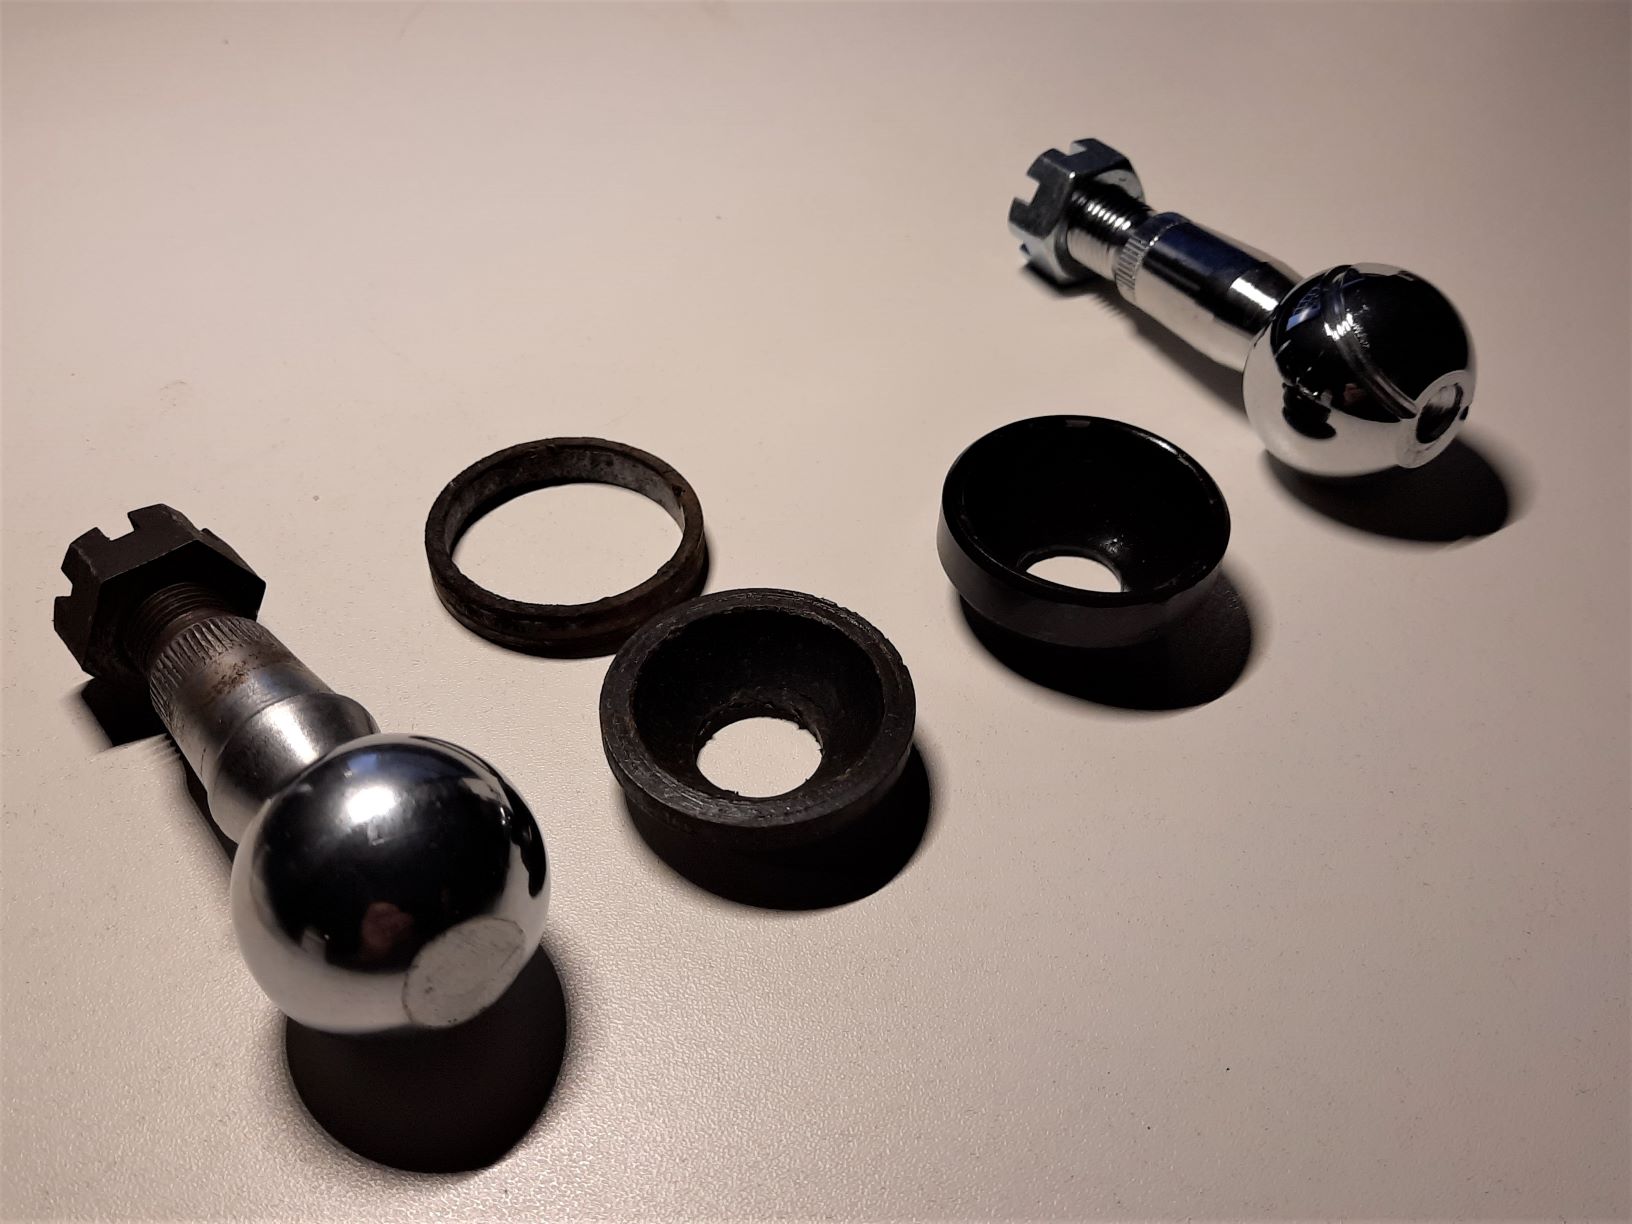
The answer is yes! See the pic below with at the left the old combination of a lower cup and separate spigot/ring, whereas on the right you’ll see the new higher cup.
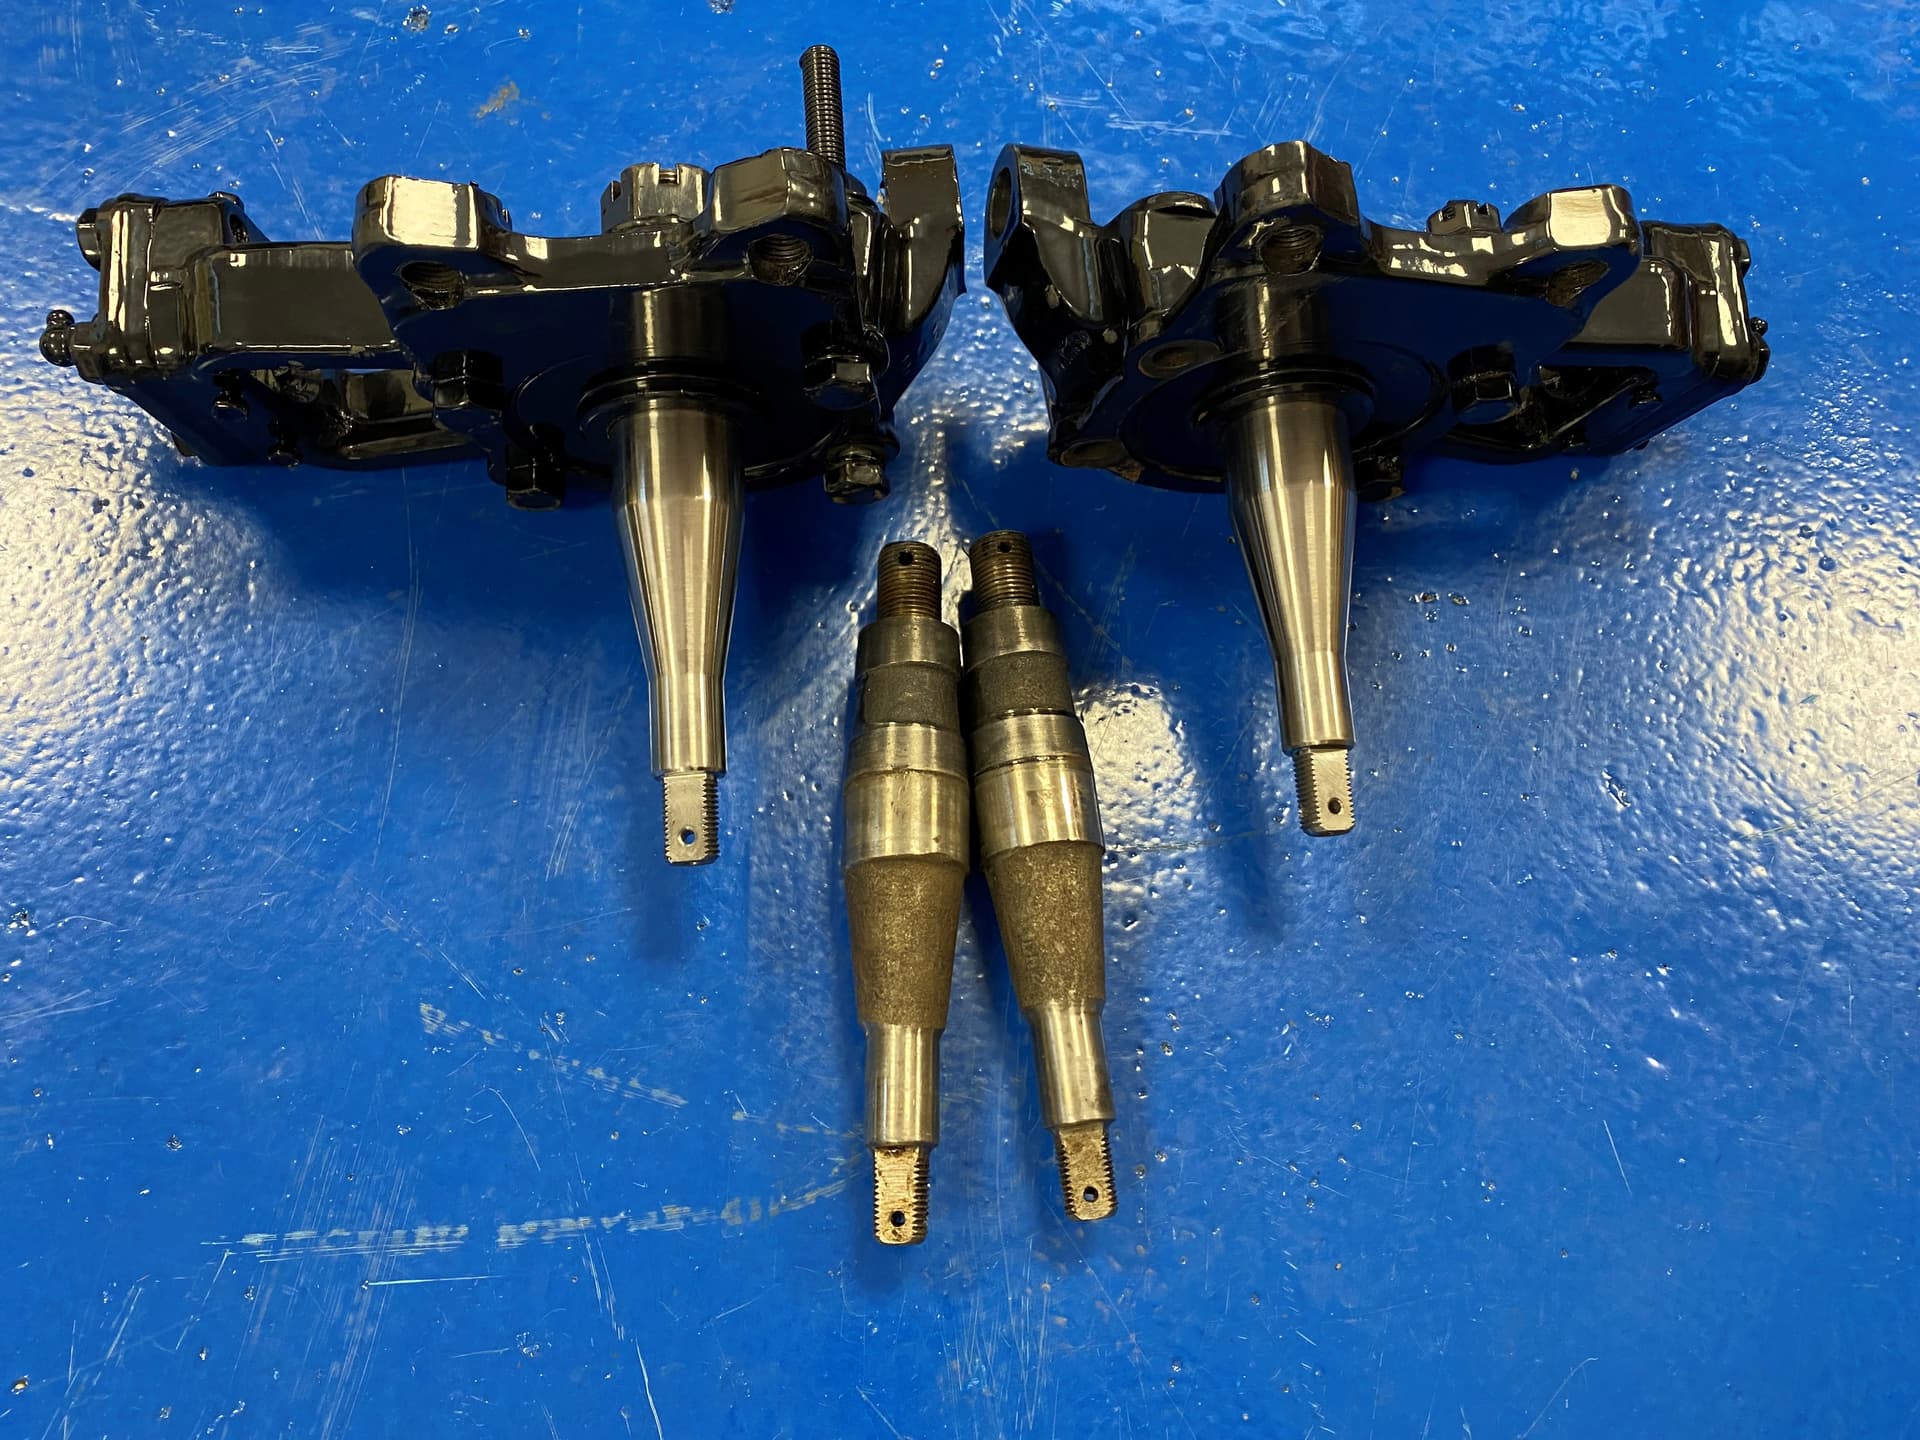
Have you done a trial fit of the inner bearing? When I purchased new stub axles for my ‘S’ the bearings just slid right down and off the bare shaft, the size is below the required fit. I had to loctite the bearings in place.
Of course the ‘usuals’ reply was that they were correct.
BTW not just one set but two!
I took a video of it dropping straight down which I can’t find at present. I’m currently traveling back home so I am away from the offending items.
However I remembered that I had sent an email, here is part of the text;
The inner bearing has an internal diametre of 1.250”
The axles both measure 1.2475” and are free to spin on the shaft, this is not how they are supposed to be.
I thought this might be how it comes apart but you can never be 100% sure.
After reading your reply I took a very small chisel to the joint between the steel ring and the bronze and after a few light taps on each side the steel rings just popped out. Also, the least worn bronze cup just popped out straight but the cup in the picture is like its glued in and wont budge. I’m avoiding being too heavy handed for fear of doing damage…
Yes I did a trial fit. The outer bearings went on and are a tight fit but the inners are too tight to get the bearing on the shaft. It looks like I will have to give the stub axle shaft a light sanding with some wet and dry so as to take them down a little to get the bearing on.
The holding rings are off and the bronze cups are out. It seems as if one of the cups has been spinning in socket instead of the ball spinning in the cup.
Unfortunately the new plastic cups don’t seem to fit in either socket. They drop straight in and are so loose that you can rattle them from side to side with your hand. I was expecting a tight interference fit and having to press in the plastic cup with some degree of force.
Hi Andy…posed the same question here a while ago…the new cups are loose in the socket…if i turn the socket upside down the new plastec cup falls out…a suggestion was to bond it in…iv moved on to other jobs so not got back to this yet…awkward to bond some unknown plastic/nylon to steel…i might score the cup underneath for a bond that might stop the cup turning…Steve
Have you tried the new cups with the “balls” placed in them? It could be that the Ball Joints are just slightly bigger in diameter than the cups and thus secure a proper seating of the cups. I also had new Ball Joints and the fit was fine.
In fact “the proof of the pudding” is only when you have assembled the complete system and pressed in some grease (assuming you have the version with the grease nipples). I even had to place a few shims between the housings on one of them, as otherwise the friction would have been too high.
FWIW you might want to read this old thread I started about my XK140 lower ball joint replacement. https://forums.jag-lovers.com/t/xk140-lower-ball-joints-again/386305/24I found that the cups from different suppliers differed in how well they fit - some were much looser than others, and the looser ones didn’t engage well with the cutout in the upright that is supposed to locate them. I fitted the “better” ones (from SNGB as I recall). So far, I can’t complain.
Yes I think you are right. I have decided to stick with the kit that I have got as I’m sure that it will spread a little under load. The main thing now is to bond the cups in place so that they can’t turn in the sockets.
Iv had good results with JB weld epoxy on metal. .never used it on plastic/nylon…but with mechanical scores on the back of the cups i cant see that it wont do the job…Steve