Still waiting for the body sections to come back from the media blaster - only 12 weeks now. Happy to give recommendations to anyone doing this in the East of England as to where NOT to send your bodyshell.
Anyway, I’m having second thoughts about using the ali-skinned now doors I bought a little while back for various reasons, so having rebuilt the LH door I have now started on the RH one. The golden rule with car resto is always to do one side at a time, and do the worst side first, so you have the best available pattern to work to. Hopefully this will be the last timber of any substance I have to do, as I’m not comfortable with it. Luckily the bootlid was generally OK - I had to make a new bottom-edge timber for it, and remake some of the steel strips that hold the skin on, but I think that’ll be OK.
The RH door will need a full frame again, but as with the LH I plan to reuse the complex top rail that tucks behind the top of the doorskin. There are bits of this missing, but it’s held fairly rigid by the doorskin, and I will make up the damaged areas with Dryfix two-part epoxy. This is a builder’s fix for repairing conservation sash windows etc. and if you get the 16-hr (i.e. the slowest) drying time version you can shape freehand bodies of material up to 52mm (2") thick without the epoxy slumping significantly. It’s quite simply brilliant stuff if you have wood repairs to do. It can be drilled, tapped, worked any way.
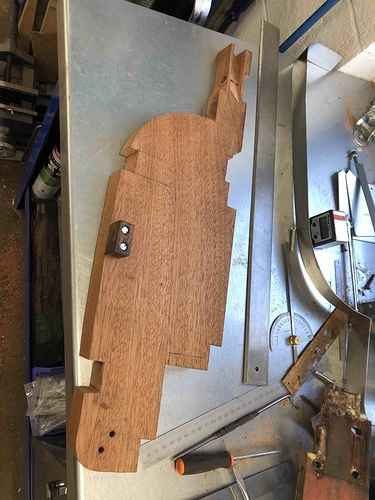
Here’s the nastiest bit of wood on the entire car, the door-to-B-post shut face, which takes the latch mechanism etc. Seems to have gone OK - made it out of Utile, which is what the old original is. No Ash anywhere on this car that I can find.
You can see that I am preserving and re-using significant parts of the original timber. Well, the little block that holds the steel bracing bar, anyway…
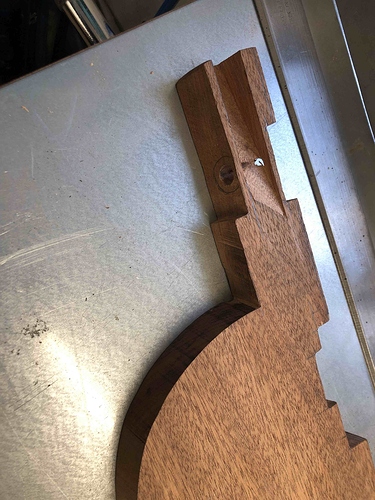
The close up shows the size of the hole actually needed for the door latch rectangular bar to pass through. Jaguar cut this entire hole the same size as that needed on the outside edge to allow the door handle casting to fit. It doesn’t need to be that big, which seriously weakens the timber in this delicate area - for most of its length it only needs to be big enough to allow the rectangular bar to connect the door handle to the inner release latch, so I’ve left substantially more timber in this area.
Just got to finish this frame off now, then cut and weld in the new doorskin repair section and we should be back to high quality hardwood frames with steel skins, as original. That’ll give a nice ‘thunk’ when they shut.
Roger

